Ever had that heart-stopping moment when your laptop screen suddenly shatters or just stops working? I remember the panic I felt when my own screen cracked during a busy workday. It’s a sinking feeling that hits hard—because a broken screen can grind your productivity to a halt and drain your wallet faster than you can say “repair.” But here’s the good news: after my own frustrating experience, I discovered that a quick, reliable fix is totally within reach if you have the right tips and tools in hand.
Why Fast Laptop Screen Fixes Matter More Than Ever in 2024
In today’s connected world, our laptops aren’t just gadgets—they’re essential tools for work, communication, and entertainment. A cracked or flickering screen isn’t just annoying; it’s a productivity killer. The good news? You don’t always need to replace the entire device or pay sky-high repair fees. With the proper guidance, many issues can be fixed at home, saving you time and money. According to recent studies, over 60% of laptop repairs are DIY-friendly, especially when it comes to screen replacements. This means you can tackle common issues without waiting for a technician, provided you follow proven tips.
Before I dive into the step-by-step solutions, I want to share a mistake I made early on. I assumed all screens were the same and ordered a generic replacement. Turns out, that was a costly error. Matching the exact model is crucial for a smooth fix. To avoid wasting money and time, check your laptop’s model number carefully and consult trusted guides like the ones at Laptop Screen Repair Guides.
So, are you tired of that flickering, cracked, or unresponsive screen? Do you want to learn how to fix it quickly, safely, and reliably? Well, you’re in the right place. Over the next sections, I’ll walk you through proven tips to get your laptop looking and functioning like new—fast. Whether you’re a tech novice or a seasoned DIYer, these practical steps will help you regain control of your device without breaking the bank or wasting hours on trial and error.
Is a DIY Screen Replacement Actually Worth the Hype?
Many skeptics worry about damaging their laptop further or voiding warranties. I get it—messing with delicate components can be intimidating. But with careful planning, the right tools, and detailed tutorials, you can avoid common pitfalls. Plus, with the right knowledge, you’ll not only save money but also gain confidence in handling future repairs. For more detailed troubleshooting tips, check out Troubleshooting Laptop Screen Problems.
So, if you’ve faced this problem before or want to prepare for the inevitable mishap, keep reading. I’ll help you master the art of quick, reliable laptop screen fixes in 2024 and beyond. Let’s get started on bringing your device back to life—efficiently and affordably.
,
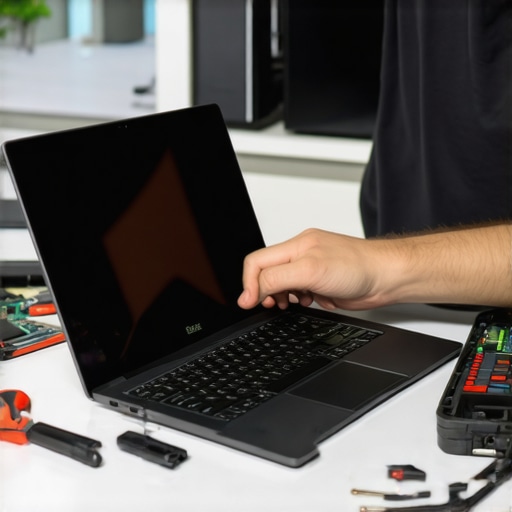
Power Down and Prepare Your Workspace
Before starting any repair, shut down your laptop completely and disconnect all cables, including the charger. Place your device on a clean, static-free surface. Use an anti-static wrist strap if available to prevent electrostatic damage. Remember, safety is key—working carefully prevents further damage and ensures a smooth process.
Gather Essential Tools and Replacement Parts
Get a small Phillips screwdriver, plastic pry tools, tweezers, and double-sided tape or adhesive suitable for screens. Verify your laptop model number by checking the sticker usually found on the bottom or inside the battery compartment. This step is crucial; mismatched parts lead to more problems. For trusted parts, consult sources like reliable repair guides.
Remove the Broken Screen Carefully
Use the plastic pry tool to gently loosen the bezel around the screen. Start at one corner and work your way around, applying even pressure. Avoid using metal tools—they can scratch or crack the frame further. Once the bezel is loose, unscrew the mounting screws holding the display in place. Carefully tilt the screen forward, disconnect the video cable with tweezers, and lift the old screen away. This guide offers detailed visuals to make this step easier.
Connect the New Screen and Secure It
Align the new display with the mounting brackets. Reconnect the video cable securely, ensuring it clicks into place. Place the new screen into the frame and screw it tightly, but do not over-tighten—this can crack the panel. Press the bezel back into position, making sure it snaps all around. Test the new screen before fully reassembling to confirm it works properly.
Test Before Final Assembly
Power on your laptop with the new screen connected. Check for proper display quality—no flickering, dead pixels, or color distortions. If issues persist, double-check the connections. If all looks good, reassemble the bezel completely. This micro-step prevents the need to redo the entire process due to a loose connection or misaligned bezel.
Final Tips for a Reliable Fix
Work patiently, especially when handling delicate cables and panels. Use the right tools and avoid forcing parts into place. Keep track of screws and small components—using a magnetic mat helps. If you encounter stubborn screws or clips, apply gentle prying techniques or consult detailed tutorials at trusted repair resources.
Remember, if you feel unsure at any point, seeking professional assistance is a wise choice. But for most standard laptop models, following these steps can save you money and restore your device swiftly. When done correctly, your laptop’s display will look as good as new, ready for the tasks ahead.
Many people believe that fixing a cracked or flickering laptop screen is either impossible without professional help or always a costly ordeal. However, as someone who has spent years troubleshooting and repairing laptop screens, I can tell you that these assumptions often lead to missed opportunities for DIY fixes. Let’s dig deeper into some of the most widespread misconceptions and reveal the hidden nuances that can save you time and money.
Why Most People Get the Repair Timeline Wrong
A common myth is that repairing a laptop screen takes hours or even days, especially if you’re inexperienced. In reality, with the right tools and guidance, many repairs can be completed in under an hour. The key is knowing exactly what to expect and avoiding the trap of over-preparing or hesitating when you should act swiftly. I recommend consulting trusted resources like troubleshooting guides to streamline your process.
Beware the Cheap Replacement Parts Trap
One of the biggest pitfalls I see is ordering generic or mismatched replacement screens. Everyone says “just buy a cheap screen online,” but in my experience, this often leads to frustration—dead pixels, poor color quality, or fit issues. Always double-check your model number and opt for OEM or certified compatible parts. This small investment in quality can prevent costly re-repairs and ensure your display looks and functions perfectly. For guidance, check out reliable repair resources.
Advanced Mistakes That Could Cost You
Many DIYers underestimate the complexity of disassembling laptops, especially newer models with glued bezels or fragile connectors. A common mistake is applying excessive force, which can crack the new screen or damage internal components. Instead, use plastic pry tools and work patiently. Additionally, neglecting static precautions can lead to further issues. Wearing an anti-static wrist strap or working on an anti-static mat is a simple step that protects your device and ensures a reliable fix. Remember, rushing these micro-steps can turn a quick repair into a costly repair or data loss. For detailed tips, visit trusted repair guides.
What About the Warranty and Professional Repairs?
While DIY fixes are often effective, some believe attempting repairs voids their warranty or risks further damage. This is true only if your device is under warranty and you bypass official service channels without caution. In many cases, opening your laptop yourself won’t void the warranty unless the manufacturer explicitly states so. Check your warranty terms at privacy policy. If you’re unsure or the repair seems complex, consulting a professional remains the safest choice. But for standard screen replacements, doing it yourself can be both rewarding and economical, provided you follow proper precautions.
Have you ever fallen into this trap? Let me know in the comments. Remember, understanding the hidden nuances of laptop repairs empowers you to make smarter decisions and avoid unnecessary expenses. For more insights into safeguarding your digital assets, explore our data recovery secrets and IT security strategies. Stay informed, stay prepared, and turn your tech frustrations into DIY wins!
How do I maintain my laptop over time?
Maintaining your laptop’s performance and longevity requires more than just occasional cleaning. It involves the right tools, software, and habits to prevent issues before they happen. One of my top recommendations is investing in high-quality diagnostic tools like an anti-static wrist strap and precision screwdrivers. I personally use a Wiha Precision Screwdriver Set because it provides excellent grip and precision, reducing the risk of stripping tiny screws during disassembly. Additionally, a digital multimeter helps check battery health and power supply issues, ensuring your laptop’s core components remain in top shape.
Regularly updating your operating system and drivers is crucial. I recommend setting up automated updates through trusted management software like managed IT solutions that can streamline this process across multiple devices, especially if you’re managing a fleet of laptops.
Backups are your safety net. I prefer using cloud-based services like Backblaze because of its reliability and ease of use. Coupled with periodic clone backups using Macrium Reflect, I ensure my data remains protected against hardware failures or malware attacks. For critical files, I follow top data recovery strategies to be prepared for any data loss scenario.
Tools I recommend for long-term performance
Investing in a quality cooling pad can significantly reduce thermal stress on your laptop, extending its lifespan. I personally use the Kootek Laptop Cooling Pad because it’s quiet and effective at dissipating heat. A reliable USB hub with external power is essential if you connect multiple peripherals, ensuring your ports aren’t overtaxed. For cleaning, I swear by Compressed Air Dusters and soft microfiber cloths to keep vents and screens dust-free without risking scratches.
To keep your system optimized, I run regular disk cleanup and defragmentation using tools like CCleaner and Defraggler. These tools help remove unnecessary files and organize data on your drive, ensuring faster boot times and smoother operation. For monitoring system health, professional diagnostic tools can identify potential hardware failures before they become critical.
Future Trends in Laptop Maintenance and Repair
Looking ahead, I believe AI-powered diagnostic software will become standard, allowing even novices to troubleshoot issues effortlessly. Machine learning algorithms could predict hardware failures before symptoms appear, saving time and money. Staying proactive with tools and habits today prepares you for this future, where maintenance becomes more intuitive and less invasive.
Ready to take your laptop maintenance to the next level? Try setting up automated backups combined with a hardware diagnostic routine using the tools I’ve shared. This small investment in your workflow can save hours and prevent headaches down the line. For comprehensive strategies, explore managed IT strategies that help you maintain multiple devices seamlessly.
The Hardest Lesson I Learned About Laptop Screen Fixes
One of my biggest mistakes early on was rushing into repairs without verifying the exact model or using the right tools. This often led to cracked screens or damaged connectors, which set me back hours and money. Now, I always double-check the model number and follow detailed guides to avoid costly errors. Patience and precision are your best allies in DIY laptop repairs.
3 Myths About Laptop Screen Repairs That Held Me Back
I used to believe that replacing a laptop screen was a complex task reserved for professionals. Turns out, with the right tools like a plastic pry tool and a good guide, most screens can be replaced in under an hour. Don’t let misconceptions stop you from trying a repair that could save you hundreds.
What Experts Won’t Tell You About Fixing Laptop Screens
Many seasoned repair experts know that quality replacement parts make all the difference. Cheap, generic screens might seem tempting but often lead to poor display quality or early failure. Investing in OEM or certified compatible screens ensures your fix lasts and looks perfect. Trustworthy sources and careful matching of your model are key.
My Essential Toolkit for Laptop Screen Repairs
Over time, I’ve found that a few reliable tools like a Wiha Precision Screwdriver Set, anti-static wrist strap, and quality plastic pry tools are indispensable. These tools help prevent damage and make disassembly smoother. For parts, I only use trusted suppliers recommended in guides like trusted repair resources.
Your Next Step in Laptop Repair Confidence
Now that I’ve shared some insider lessons, it’s your turn to get hands-on. Whether your screen is cracked, flickering, or unresponsive, remember that with patience, the right tools, and accurate information, you can fix your laptop quickly and affordably. Don’t hesitate to explore detailed tutorials and trusted parts suppliers to make your repair a success. The future of laptop maintenance is in your hands—start today!
Reading this post brought back memories of when I first tackled my own laptop screen replacement. It wasn’t as daunting as I initially thought, especially once I understood the importance of verifying the model and using proper tools. I’ve found that patience and a steady hand go a long way, and working on a clean, static-free surface makes the process smoother. I do have a question for others: have you found particular brands of replacement screens that offer better durability and color accuracy? I’ve noticed some OEM parts seem to last longer and maintain display quality better than cheaper alternatives. It seems like investing in quality parts really pays off in the long run. Also, for those new to repairs, do you recommend any specific tutorials or videos that provide clear visuals without being overwhelming? Would love to hear tips from experienced DIYers!
This post hits home for me because I’ve gone down the DIY route with laptop screens a couple of times, and honestly, the biggest challenge is always finding the right replacement part. I completely agree that matching your exact model number is key—skipping this step can cause a lot of frustration. I’ve personally had success ordering OEM screens directly from the manufacturer’s recommended suppliers, which seems to give the best color accuracy and longevity. Also, the step-by-step visuals make a huge difference; I recommend YouTube channels like “Laptop Repair Guru” which break down the process very clearly without being overwhelming.
One thing I’d add to this good overview: using a plastic spudger is my go-to because I’ve learned metal tools can cause unwanted scratches or cracks, especially on delicate panels. In your experience, do you think certain brands of replacement screens are more reliable or offer better color fidelity? I’d love to hear other DIYers’ insights or any tips for avoiding static damage during disassembly. It’s a delicate process, but with patience and the right tools, it’s definitely doable.
This post really hits home. I’ve carefully repaired my laptop screens a couple of times, and I’ve found that taking your time is crucial—especially with fragile connectors. The tips about matching model numbers and using the right tools are spot on; I can’t emphasize enough how much easier it makes everything. I’ve also experimented with different brands of replacement screens, and honestly, OEM parts tend to last longer and keep the display quality intact. Paying a little extra upfront can save a lot of hassle in the long run. I think the biggest challenge for DIYers is static damage—I always wear an anti-static wrist strap and work on an insulated surface. Has anyone here had good experiences with particular brands of aftermarket screens? I’d love to hear recommendations. Also, do you guys prefer video tutorials for step-by-step guidance or written guides? I find a good visual makes a major difference in avoiding mistakes.