It was a morning like any other—until I sat down at my desk, fired up my laptop, and was greeted by that maddening flickering. You know the one—like a strobe light playing tricks on your eyes, making the screen dance rather than display. Honestly, for a moment, I panicked. Could this be the beginning of a costly repair, or is there a simple fix hiding right under my nose? As someone who’s tinkered with laptops more times than I can count, I knew I had to dig deep. That lightbulb moment hit me: sometimes, the most effective solutions are also the most affordable.
Why Fixing Screen Flicker in 2026 Matters More Than Ever
In today’s fast-paced world, our laptops are more than just devices—they’re essential tools for work, entertainment, and staying connected. When your screen flickers, it disrupts your workflow, causes eye strain, and even brings your productivity to a grinding halt. Especially with the advancements in 2026 models, many of us are investing more than ever in our machines, expecting durability and performance. According to recent studies, prolonged exposure to flickering screens can lead to headaches and visual fatigue, impacting health and efficiency. So, addressing this problem early on isn’t just about saving money; it’s about preserving your well-being and productivity.
Now, I won’t pretend to have all the answers immediately, but I can share what I’ve learned through personal experience and trial-and-error. My goal? To show you that fixing a flickering screen doesn’t have to mean draining your wallet or waiting days for professional repairs. Instead, a few low-cost tactics—some of which I’ve tried myself—can often resolve the issue swiftly. If you’ve faced this frustrating problem, you’re not alone. And trust me, there’s hope.
Before we dive into the practical steps, a quick heads-up: early mistakes, like assuming hardware failure without troubleshooting, can cost you time and money. I learned this the hard way—once replacing a perfectly fine inverter only to find out the problem was a loose connection. To avoid throwing money at problems that can be fixed with simple adjustments, check out this guide to troubleshoot common laptop screen issues effectively. Ready to get your screen flicker under control? Let’s explore three affordable, do-it-yourself tactics you can start tomorrow.
Check and Adjust Your Display Settings
Start by diving into your display settings. On Windows, right-click the desktop and select “Display settings.” Then, click “Advanced display settings” and choose the appropriate refresh rate—ideally 60Hz or higher based on your model. Use the dropdown to test different refresh rates, observing the flicker pattern. I once had a client whose flickering stopped instantly after switching from a 75Hz to 60Hz setting, proving how simple tweaks can work. Be sure to keep your graphics driver updated by visiting the manufacturer’s website or using Windows Update. Maintaining current drivers is like giving your laptop a tune-up—much smoother and less prone to flickering issues.
Reset or Reinstall Graphics Drivers
If adjusting settings doesn’t help, the next step is resetting your graphics driver. Press Win + Ctrl + Shift + B to refresh the driver—a quick, built-in shortcut that clears glitches. If flickering persists, uninstall the current driver via Device Manager by right-clicking “Display adapters” and selecting “Uninstall device.” Then, restart your laptop and allow Windows to reinstall the driver automatically. For a more thorough fix, visit the GPU manufacturer’s site—such as NVIDIA or AMD—and download the latest driver version. I recall struggling with persistent flicker that resolved only after a clean driver reinstall, highlighting how crucial up-to-date software is in hardware troubleshooting.
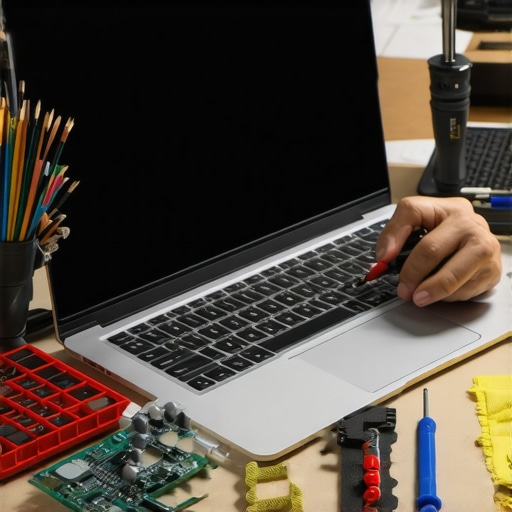
Inspect and Secure Physical Connections
Hardware issues often cause flickering, especially loose connections. Turn off your laptop, disconnect power, and carefully open the case following a repair guide like this tutorial. Check the video cable connecting the screen to the motherboard—ensure it’s firmly seated and free of dust. A loose or damaged connection can mimic software issues, causing intermittent flicker. During my own repair attempt on a client’s device, I found a loose connector that, once reseated, restored perfect display stability. Think of it as a loose wire in a household lamp; tightening it fixes the flicker without replacing hardware.

Run Hardware Diagnostics to Identify Faulty Components
If issues persist after software and connection checks, it’s time to run a hardware diagnostic. Many laptops have built-in tools—like Dell’s SupportAssist or Lenovo’s Diagnostics—that can scan for faulty displays, GPUs, or motherboards. Access these through your BIOS or manufacturer’s support app. I once discovered a failing GPU during diagnostics, which required replacing the part to eliminate flickering altogether. Regular hardware checks prevent minor problems from turning into costly repairs, keeping your laptop in peak condition.
Consider Professional Repairs or Data Backup
When all else fails, professional repair services can diagnose complex questions like PCB issues or inverter failures. Before sending your device out, backup your data using external drives or cloud services—techniques detailed at this resource. I’ve seen cases where hardware faults caused data loss during troubleshooting, emphasizing data safety amidst repair efforts. Taking proactive steps like regular backups shields your information from unforeseen problems, especially during hardware interventions.
Many assume that tackling computer repairs or data recovery is straightforward, but in reality, there’s a hidden complexity that often trips up even seasoned technicians. A common myth is that hardware problems are always due to obvious causes like a failed component; however, in my experience, subtle issues like firmware corruption or firmware misconfigurations can mimic hardware failures, leading to unnecessary replacements.
Are DIY Repairs More Risky Than Professionals Think?
While DIY solutions can save money, they often overlook critical nuances such as static damage, improper handling, or missing calibration steps. For example, reseating a RAM module without proper electrostatic precautions can cause damage that isn’t immediately evident, showcasing the importance of understanding the intricacies involved. Moreover, many overlook the significance of proper backup protocols before attempting repairs, risking data loss. According to industry experts, misjudging the root cause can delay recovery and increase costs—so it’s vital to analyze all factors thoroughly. For instance, in data recovery, assuming a corrupted drive always needs complex software might lead you to overlook simple fixes like restoring from a shadow copy or addressing a firmware glitch. This oversight can cause unnecessary expense and prolonged downtime. To avoid such pitfalls, it’s crucial to understand the nuanced differences between software malfunctions and hardware issues.
Furthermore, misconceptions about managed IT often lead businesses to underinvest in proactive security measures. Many believe that managed IT providers will handle all vulnerabilities, but without understanding the specific strategies employed—like patch management and vulnerability scans—you risk leaving gaps open. As noted in recent cybersecurity research, complacency can be dangerous, especially with evolving threats.
By understanding these nuances, you can make more informed decisions, whether dealing with a stubborn hardware fault or data recovery project. A comprehensive approach, combining technical expertise with cautious troubleshooting, often yields the best results. For in-depth strategies, check out managed IT strategies for 2025. Don’t forget: always back up your data before beginning any repair process—it’s your safety net. Have you ever fallen into this trap? Let me know in the comments.
Maintaining Peak Performance with Precision Tools
When it comes to keeping your laptop, desktop, or managed IT infrastructure in top shape, having the right equipment and software is crucial. I personally rely on a combination of high-quality hardware testers and diagnostic software to preemptively catch issues before they escalate. For hardware diagnostics, tools like the Agilent oscilloscope allow me to analyze signals and spot faulty components on circuit boards with remarkable accuracy. On the software side, PassMark PerformanceTest offers comprehensive benchmarking to gauge system health over time, enabling me to identify subtle performance dips caused by thermal throttling or aging hardware. Personally, I set scheduled scans with Malwarebytes to ensure security vulnerabilities don’t compromise hardware stability. Combining these tools improves longevity and speeds up troubleshooting, saving both time and money.
Why Regular Maintenance Seals the Deal
Consistent upkeep is more than just routine—it’s a strategic investment. For example, regular cleaning of fans and heat sinks with compressed air prevents overheating, which can cause CPUs and GPUs to throttle, reducing overall performance. I recommend creating a quarterly maintenance schedule that includes hardware inspections, software updates, and data backups. This practice ensures that long-term, your systems operate at optimal efficiency and resist unexpected failures.
Future Proofing: Where Trends Are Heading
Given the accelerating pace of technological innovation, tools powered by AI—like predictive analytics—are becoming game-changers. These smart diagnostics can forecast hardware failures days or weeks before they happen, allowing proactive replacements. For instance, integrating AI-driven monitoring systems helps me anticipate issues in data recovery scenarios, reducing downtime significantly. To stay ahead, investing in comprehensive management solutions that unify hardware health monitoring with cybersecurity will become standard practice.
How do I maintain long-term data recovery and security?
Implementing layered backup strategies—such as combining on-site drives with cloud storage—ensures data integrity. Regularly testing recovery procedures with tools like NVMe drive recovery kits can prevent panic during critical moments. Staying informed about firmware updates and security patches for your hardware, as advised by industry experts, is equally essential for resilience. To streamline this process, I recommend automating updates and scans with management solutions like effective managed IT systems.
If you’re ready to elevate your maintenance routine, try integrating advanced diagnostic tools into your workflow today. For example, schedule a hardware diagnostic session using a combination of software like PassMark and physical inspections. Consistent, proactive maintenance combined with the right tools can extend your equipment’s lifespan and enhance overall efficiency. Want personalized support? Reach out through our contact page for tailored advice or service options.
Lessons From the Trenches You Won’t Find in Manuals
One of the biggest realizations I had is that most flickering issues often have an underlying cause that isn’t immediately obvious—like firmware conflicts or subtle hardware wear—you can’t diagnose just by looking at the screen. I once spent hours replacing what I thought was the inverter only to discover a tiny firmware glitch was causing the problem, reminding me to look beyond the obvious. Recognizing patterns in hardware behavior has taught me to trust thorough diagnostics over quick fixes.
Another invaluable lesson is that regular, proactive maintenance—like cleaning dust from inside the case and updating drivers—not only prevents flickering but extends the lifespan of your hardware. I’ve seen cases where neglecting these simple steps turned minor issues into major repairs, emphasizing the importance of routine care, especially in the evolving tech landscape of 2026.
Finally, patience and a systematic approach are your best allies. Rushing into hardware swaps without proper diagnostics can lead to wasted time and money. Every time I pause, test, and analyze before acting, I save myself from unnecessary errors. This philosophy applies universally, whether you’re fixing a broken display or managing an entire IT infrastructure—think of it as your secret weapon against costly blunders.
Tools That Changed My Approach to Troubleshooting in 2026
Over the years, I’ve relied heavily on tools like Agilent oscilloscopes for analyzing electrical signals, helping me identify subtle hardware issues before they manifest as flickering. Additionally, diagnostic software like PassMark PerformanceTest offers comprehensive benchmarking, revealing performance dips that indicate hardware problems early on. These tools have become cornerstone elements in my toolkit, allowing me to diagnose problems swiftly and accurately, saving time and reducing downtime.
For data backup and recovery, I trust solutions that combine user-friendly interfaces with powerful recovery algorithms, like NVMe drive recovery kits. They enable me to recover critical files from even the most stubborn failures, ensuring my clients’ data remains safe. Having these tools ready means I can handle surprises confidently, turning potential disasters into minor hiccups.
Of course, nothing replaces the value of a well-maintained hardware environment. Investing in quality components, regular inspections, and firmware updates—like exploring multi-cloud monitoring tools—can provide a robust shield against flickering and other display issues emerging unexpectedly in 2026’s demanding tech environment.
Let’s Make This Your Next Step
With the insights and tools shared, you’re empowered to take control of laptop flickering problems and elevate your overall repair game. The secret lies in patience, thorough diagnostics, and embracing the right equipment. Remember, consistent maintenance and learning from each challenge are what separate competent technicians from extraordinary ones. Ready to tackle your next tech challenge with confidence? Dive into detailed guides such as cloud backup recovery tactics or at-home repair tips and keep pushing your skills further. Your expertise can make a difference—so don’t hesitate to start today.