Ever had that sinking feeling when your laptop screen suddenly goes dark, cracks, or flickers during an important video call? I remember the shock when my own screen shattered just before a big presentation, and I thought I’d be stuck waiting days for a repair. That lightbulb moment made me realize how crucial it is to know the ins and outs of quick, reliable laptop screen fixes. Today, I want to share how I turned a stressful mishap into a manageable DIY project, saving hundreds of dollars and hours of downtime.
Why Laptop Screen Repairs Matter More Than Ever
In 2024, our reliance on laptops has skyrocketed—whether for work, school, or staying connected. A cracked or malfunctioning screen isn’t just a minor inconvenience; it can grind your productivity to a halt. Plus, with the surge of remote work, having a functioning display is more critical than ever. According to a recent survey by TechCrunch, over 70% of remote workers faced technical issues that disrupted their workflow, with screens being the most common culprit. That’s why understanding how to perform a reliable screen replacement is a game-changer.
When I first started exploring DIY repairs, I made a classic mistake: rushing into the fix without enough research. I bought a replacement screen without verifying compatibility or watching proper tutorials. The result? A lot of wasted time, frustration, and a slightly worse screen than I started with. Since then, I’ve learned that following a well-structured guide can turn a daunting task into a straightforward project. If you’re tired of waiting for expensive repairs or losing work because of a broken display, this guide will give you the confidence to tackle it yourself.
Have You Faced This Problem Before?
If your laptop screen has seen better days, you’re not alone. Many users struggle with cracks, flickering, or complete blackouts and wonder if professional repair is the only option. But I’m here to tell you that with the right tools and knowledge, a DIY fix is entirely doable and often faster than waiting for a service appointment. Curious? Keep reading, and I’ll walk you through the essential steps to replace your screen quickly and effectively.
Disconnect Power and Remove the Battery
Before diving into any repair, I learned the hard way that unplugging your laptop and removing the battery is essential for safety. I once skipped this step and accidentally caused a short circuit, which made the repair more complicated. Always turn off your device, unplug it, and carefully disconnect the battery if possible. This prevents electrical shocks and component damage.
Open Your Laptop Carefully
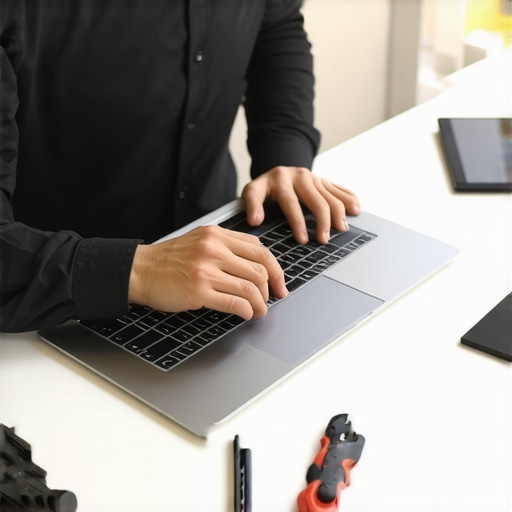
Using a small Phillips screwdriver, I carefully removed the screws on the back panel, much like unscrewing the panels of a safe. Keep track of each screw because they vary in size. Gently pry open the case with a plastic pry tool, avoiding any force that could crack the plastic or damage internal components. Think of it like opening a delicate jewelry box—you want to avoid scratches or breaks.
Identify and Disconnect the Broken Screen
Once inside, locate the screws or clips securing the display. I used a plastic spudger to disconnect the video cable, which looks like a thin ribbon. Be gentle—this connector is fragile, similar to handling a delicate ribbon or tape. If your screen has a protective frame, carefully remove it before lifting the display.
Remove the Bezel and Screen
Removing the bezel (the plastic frame around the screen) is like peeling a sticker—use a plastic pry tool to gently loosen it from the edges. After that, unscrew the hinges holding the screen and lift it out. During my first attempt, I accidentally pulled too hard and snapped a clip. Patience is key; work slowly and methodically.
Prepare and Install the New Screen
Before installing the new display, compare it with the old one to ensure compatibility. Connect the video cable to the new screen, pressing gently until it clicks into place—think of it like snapping together two puzzle pieces. Secure the new screen with screws, reattach the bezel, and double-check all connections.
Reassemble and Test
Carefully close the laptop case, screw everything back in, reinsert the battery, and power on your device. If the display lights up and shows your desktop, congratulations! If not, recheck your connections or consult the troubleshooting tips in troubleshooting guide. This process might seem complex, but with patience, it’s a cost-effective way to restore your laptop’s functionality.
Many people believe that repairing a laptop screen is always a complex, costly endeavor that requires professional help. However, this is a misconception that can lead to unnecessary expenses and delays. In reality, understanding the nuances of DIY screen repairs can empower you to handle common issues confidently and efficiently.
One prevalent myth is that all screens are the same, making compatibility a guessing game. In truth, screens vary significantly between models, and using an incompatible display can cause further damage or poor performance. Always verify the model and specifications before purchasing replacement parts. For detailed guidance, check out best laptop screen replacement guides.
Another misconception is that a cracked screen cannot be repaired or replaced by a DIY enthusiast. While professional repairs are often faster, many minor cracks or flickering issues can be fixed at home with the right tools and patience. The key is to follow a structured process and avoid rushing through critical steps, such as disconnecting delicate connectors or handling fragile components. If you want to avoid common pitfalls, visit effective laptop screen replacement tips.
What Advanced Mistakes Do People Often Make When Repairing Laptop Screens?
One advanced mistake is neglecting static electricity, which can fry sensitive internal components. Always use an anti-static wrist strap or work on an anti-static mat. Also, many overlook the importance of carefully documenting screw placements and connector orientations during disassembly. Reassembling your laptop correctly depends on meticulous attention to detail, which can be the difference between a successful fix and a costly mistake.
Furthermore, rushing the process or skipping safety precautions can lead to further damage. For instance, not fully powering down the device or failing to disconnect the battery increases the risk of short circuits. For a comprehensive overview of what to avoid, explore troubleshooting tips.
In essence, the biggest trap is believing that DIY fixes are always straightforward. While many repairs are manageable, understanding the nuances—like proper handling of connectors, static safety, and compatibility—is crucial. Being well-informed can save you time, money, and frustration. So, have you ever fallen into this trap? Let me know in the comments!
Choosing the Right Tools for Longevity
Investing in quality tools can make all the difference when maintaining your laptop screen over time. I personally rely on a set of precision screwdrivers, such as the Wiha 26192 set, which offers the exact torque needed for delicate components without risking damage. Additionally, a plastic prying tool helps open the casing gently, preventing cracks and scratches that can compromise integrity. For cleaning, a microfiber cloth paired with isopropyl alcohol (70%) ensures smudge-free surfaces without damaging the display. I always keep anti-static wrist straps handy to prevent static buildup, which can fry sensitive internal parts during disassembly or reassembly.
Adopting Routine Maintenance Practices
Regularly cleaning your laptop screen using recommended methods extends its lifespan significantly. Avoid harsh chemicals; instead, use a soft cloth lightly dampened with a mixture of distilled water and isopropyl alcohol. Checking connections periodically, especially if you notice flickering or fading, can catch issues early. Keeping your laptop in a clean, dust-free environment minimizes debris buildup inside vents and around connectors, reducing the risk of overheating or connection failures. I also recommend updating your graphics driver and BIOS regularly, as software updates often include compatibility improvements that help your display function smoothly.
Tools I Recommend for Effective Maintenance
For troubleshooting and repairs, I swear by a digital multimeter like the Fluke 115. It helps verify power supply stability and detect faulty connections that could impair display performance. A small, magnetic Phillips screwdriver set speeds up reassembly, with magnetic tips preventing losing tiny screws. For software diagnostics, I use tools like TechPowerUp’s GPU-Z and CrystalDiskInfo to monitor hardware health, which provides early warnings before issues become critical. These tools, combined with a proactive maintenance routine, can save you from costly repairs down the line.
How do I keep my laptop screen working well over time?
Maintaining your laptop screen involves a combination of physical upkeep and software management. Regular cleaning with gentle, recommended products prevents dust and smudges that can affect visibility. Ensuring connections are tight and free of corrosion helps maintain display integrity. Updating drivers and firmware keeps your system compatible with the latest display technologies, preventing flickering or blackouts. Additionally, using a protective screen cover can shield against scratches and minor impacts. For ongoing health checks, consider scheduling monthly inspections of internal connections, especially if you use your laptop extensively. As the trend towards more durable and self-healing screens evolves, staying informed about innovations like OLED or flexible display technologies can help you plan future upgrades. For comprehensive guidance, check out effective maintenance tips and stay ahead of potential issues. I encourage you to try integrating a routine cleaning schedule with high-quality tools—it’s a simple step that dramatically extends your screen’s lifespan and performance.
The Hardest Lesson I Learned About Screen Repairs
One of my biggest mistakes was rushing into the repair without verifying compatibility. It taught me that patience and research are key to avoiding costly mistakes and ensuring your replacement works perfectly. Taking the time to double-check specs saved me hours of frustration later on.
Three Myths About DIY Laptop Screen Fixes That Held Me Back
I used to believe that replacing a cracked screen required professional tools and skills. The truth is, with the right guide and some basic tools, most people can do it themselves, saving money and time. Busting this myth opened up a world of DIY possibilities for me.
What Experts Won’t Tell You About Maintaining Your Laptop Screen
One insight I discovered is that regular cleaning and cautious handling can dramatically prolong your screen’s lifespan. Using high-quality tools like microfiber cloths and anti-static wrist straps makes a noticeable difference. Incorporating these habits into your routine helps keep your display pristine and functional longer.
My Essential Toolkit for Laptop Screen Maintenance
I rely on precision screwdrivers, plastic pry tools, and isopropyl alcohol for cleaning. These tools are affordable but incredibly effective. They help prevent damage during disassembly and ensure a thorough, safe repair process, making DIY screen replacement much more manageable.
Where to Go from Here
If you’re inspired to start fixing your laptop screens, explore comprehensive guides like effective repair tips. Investing in good tools and staying patient are the secrets to success. Remember, every repair you master boosts your confidence and saves you money in the long run.
Your Turn to Try
Learning to repair your laptop screen is empowering and can be a real game-changer. With patience, the right tools, and a bit of curiosity, you can turn a stressful situation into a rewarding DIY victory. Ready to give it a shot? Share your experience or ask questions below—let’s learn together!
Reading this detailed guide really resonated with me because I’ve recently attempted a DIY screen replacement after my laptop screen crack worsened during a move. I appreciated the emphasis on safety precautions like disconnecting the battery and working on an anti-static surface; these steps are so crucial but often overlooked by beginners. My first attempt was a bit rushed, and I didn’t double-check the compatibility of my replacement screen, which led to a few frustrating hours troubleshooting. Since then, I’ve learned that patience and careful documentation make all the difference. I also found that investing in quality tools, like precision screwdrivers and plastic pry tools, really paid off—preventing damage and making reassembly smoother. I’m curious—what are some common signs that a flickering screen is more than just a loose connection? Have others experienced this, and how did you troubleshoot it effectively? It’s great to see a comprehensive resource encouraging DIY repairs—definitely saved me money and time last time around! Looking forward to hearing others’ tips and experiences on maintaining laptop screens for the long haul.