I vividly remember that sinking feeling when my laptop screen suddenly went black during an important presentation. My heart sank—here I was, ready to impress and instead facing a costly repair bill I hadn’t budgeted for. That lightbulb moment struck: I didn’t have to spend a fortune or wait days for a technician. I realized there are simple, cost-effective ways to fix a cracked or malfunctioning laptop screen myself. Today, I want to share with you the secrets I’ve learned about quick and affordable laptop screen replacements so you won’t be left stranded.
Why Your Laptop Screen Might Be the Most Critical Fix You Face
Few things are as frustrating as a broken display. It’s not just about aesthetics; your screen’s health directly impacts productivity and even your mental well-being. If you’ve ever tried to work with a flickering or shattered display, you’ll appreciate how disruptive it can be. The good news is, many common issues can be fixed at home with minimal tools, saving you hundreds and cutting repair time drastically. With some guidance, you can replace that cracked panel or fix dead pixels efficiently. And as experts in computer repair often highlight, timely DIY fixes can prevent further damage and extend your device’s lifespan.
Is Replacing Your Screen Actually Worth the Hassle?
Many skeptics think, ‘Is this even feasible without messing up my laptop further?’ Trust me, I made the mistake early on of assuming all repairs required professional help, leading to more damage and expense. If you’re considering a DIY approach, it’s essential to weigh your comfort level and follow trusted tutorials, like the step-by-step guides available [here](https://computerrepairmasters.com/laptop-screen-repair-how-to-fix-common-issues-at-home). Doing your own screen replacement can be rewarding and budget-friendly, especially if you’re cautious. The key is understanding which issues are genuinely repairable at home and which might require professional intervention. Overcoming that initial fear is part of the journey—once you’ve done it, you’ll see how manageable it truly is.
Are you tired of throwing away your old laptop because of a cracked display? Or maybe you’ve hesitated, afraid of causing more damage? You’re not alone. Many users face this dilemma every year. But with proper knowledge and tools, fixing your laptop screen can become an achievable DIY project. Prepare to dive into the practical steps that will turn you from hesitant to confident — because I promise, this isn’t as complicated as it seems.
Prepare Your Workspace and Gather Tools
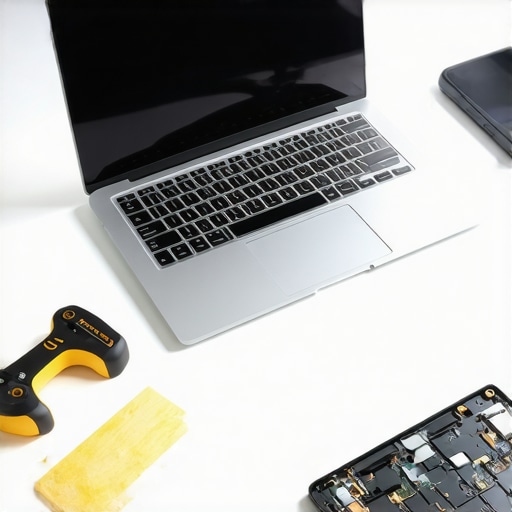
Begin by clearing a flat, well-lit surface. Gather essential tools: a small Phillips screwdriver, plastic pry tools, tweezers, and an anti-static wrist strap to prevent static damage. Remember, a clutter-free area minimizes the risk of losing tiny screws or damaging sensitive components. I once worked on a cluttered desk, which led to a misplaced screw that caused delays—organizing your workspace is key. To find the right tools easily, check out this comprehensive DIY repair kit guide.Many believe that managed IT services are merely about technical support and troubleshooting, but the reality runs much deeper. A prevalent myth is that external IT providers only step in during crises, overlooking their proactive role in cybersecurity and strategic planning. In my experience, companies that understand this nuance tend to leverage the full spectrum of services, especially in data protection and cloud integration, which are critical for scalable growth. Overestimating in-house capabilities can be a costly mistake, as detailed in studies highlighting the importance of expert-managed solutions for long-term security and efficiency. A trap to avoid is assuming all IT providers employ the same protocols; vetting their approach to data recovery and breach mitigation ensures you’re not left vulnerable. When it comes to laptop screens, many think replacing a cracked display is always complex; but with proper techniques, DIY fixes can be surprisingly straightforward. However, neglecting to recognize the specific nuances—such as compatibility issues or adhesive types—can lead to further damage. Want to dive into these details? Check out this guide for expert tips. Regarding data recovery, a common misconception is that all data loss is irrecoverable, which isn’t true if you’re aware of the subtle signs and correct recovery methods. Using advanced tools and avoiding common mistakes like overwriting lost data can make all the difference. According to industry analysis, proactive recovery strategies significantly improve odds of successful restoration, especially for critical files. Remember, rushing into repairs or trusting unverified sources can backfire—any DIY project or professional service deserves careful assessment. Have you ever fallen into this trap? Let me know in the comments. For more insights, explore our dedicated data recovery strategies and ensure your data’s safety.Maintaining your computer’s performance over time requires more than just casual attention; it demands the right tools and disciplined routines. I personally swear by a few specialized items that have saved me countless hours of troubleshooting and prevented major failures. One indispensable tool is a high-quality ESD (Electrostatic Discharge) wrist strap, which I always wear during internal repairs to prevent static damage—something many overlook until it’s too late. Pair that with precision screwdrivers, particularly those with magnetic tips, allowing me to handle tiny screws without frustration or loss, especially when working on laptops or delicate motherboards.
For cleaning, I recommend a soft, anti-static brush and compressed air cans. The brush helps remove dust from fans and heatsinks, which can cause overheating, while compressed air blasts away debris from vents and filters. These steps are crucial for long-term cooling efficiency and overall system health. Remember, dust buildup isn’t just a matter of aesthetic; it directly impacts your device’s lifespan.
When it comes to diagnostics, software is just as vital as hardware. I rely heavily on tools like CrystalDiskInfo for monitoring drive health—this open-source utility provides real-time SMART data that can preemptively warn you of impending drive failure. For system cleanup and performance boosting, CCleaner remains my go-to, but I always advise cautious use because over-optimizing can sometimes cause stability issues.
In addition, an external USB drive is invaluable for creating regular backups using software like Macrium Reflect. Automated backup solutions save me hours of stress when data recovery becomes necessary, especially after ransomware attacks or hardware failures.
Predicting where technology is headed, I anticipate more integrated diagnostic tools powered by AI emerging, enabling even non-professionals to diagnose problems remotely with high accuracy. This trend will make proactive maintenance more accessible and less dependent on physical tools.
**How do I maintain my tools and routines to ensure ongoing health?** Regularly inspecting and calibrating hardware, keeping software updated, and practicing disciplined cleanup routines are key. For instance, I set reminders every three months to update all diagnostic and cleaning tools, ensuring they’re effective against new challenges.
If you’re ready to elevate your maintenance game, consider investing in a comprehensive toolkit that includes a quality ESD strap, precision screwdrivers, diagnostic software, and cleaning supplies. For detailed guidance, check out our tutorial on top computer repair tips. Don’t forget, the right tools combined with consistent routines will significantly extend your device’s lifespan and reliability. Want to dive deeper? Explore expert strategies in managed IT solutions for scalable success—your devices will thank you.
What I Wish I Knew Before Opening Up a Laptop
One of the most valuable lessons I learned was to never underestimate the importance of documenting every step. Taking photos of internal components before removal saved me countless headaches and prevented reassembly errors. Also, understanding the model-specific nuances, like adhesive types and connector placements, made my repairs smoother and less stressful.
Tools and Techniques That Truly Make a Difference
Having the right tools, such as a quality anti-static wrist strap and precision screwdrivers, isn’t optional—it’s essential. I discovered that using plastic pry tools instead of metal ones greatly reduced the risk of damaging delicate display panels or housing. Investing in these tools early on turned a daunting task into an achievable project.
Why Your Confidence Matters More Than the Cost
I initially hesitated, fearing I would cause more damage or end up spending more. But the truth is, gaining confidence through careful research and patience enabled me to succeed without professional help. This DIY experience not only saved money but also boosted my trust in my technical abilities—proof that a little courage and the right guidance go a long way.
Where I Turned for Reliable Guidance
Trusted resources like this comprehensive guide became my go-to for step-by-step instructions. Additionally, forums such as tech communities provided practical tips from experienced DIYers, which prevented common pitfalls. Knowing I wasn’t alone made the process less intimidating and more rewarding.
How This Journey Reshaped My Approach to Tech Repairs
This experience taught me that many repairs, once considered professionally exclusive, are entirely within reach with proper planning and patience. It encouraged me to stay curious and proactive about maintaining my devices. If you’re hesitant, remember: with the right tools, resources, and a cautious mindset, you can turn a potential crisis into a confidence-building achievement.
Trading Fear for Action — Your Next Step is Closer Than You Think
Embarking on a DIY laptop screen replacement isn’t just a repair—it’s a chance to learn, save money, and gain independence. The next time your device shows signs of trouble, consider applying what you’ve learned here. Your laptop’s health and your skills will thank you for it.
What’s Your Next Fix? Share Your Experience Below
Have you ever tried repairing your laptop screen or encountered unforeseen challenges? Drop your story or questions in the comments—let’s learn from each other’s journeys!
Reading this post really resonated with me. I remember my first DIY laptop repair attempt; I was nervous but excited to try. Gathering the right tools, especially the anti-static wrist strap and plastic pry tools, made a huge difference in how smoothly the process went. The key, I found, is patience and careful documentation—taking photos before disassembly saved me from reassembly missteps. I also appreciate the emphasis on research and following trusted guides because, honestly, jumping in without proper knowledge can do more harm than good.
Have any of you tried replacing screens on older laptops? I’ve found that compatibility issues can be tricky sometimes, especially with models that use different adhesive types or connectors. Does anyone have tips for verifying parts beforehand to avoid buying the wrong replacement screen? It’d be great to hear practical suggestions from others who’ve navigated these challenges. Overall, this encourages me to stay confident and proactive about maintaining my devices—it’s surprisingly empowering to DIY your own tech repairs.