I remember the exact moment my laptop screen shattered—an accidental knock during a busy workday. Panic set in. My first thought was, “How expensive is this going to be?” and then, “Can I fix this myself?” That lightbulb moment led me down a rabbit hole of DIY repair tips, some helpful, some disastrous. If you’ve ever had a cracked or flickering screen, you know how frustrating it can be. It’s not just about the inconvenience; it’s about losing productivity and the dread of an expensive repair bill.
Why Quick Laptop Screen Repairs Matter More Than Ever
In today’s fast-paced world, waiting days or weeks for a professional repair isn’t an option. Whether you’re a student, a remote worker, or running a business, your laptop is your lifeline. A broken screen can grind your workflow to a halt, and the longer you wait, the worse the damage might get. That’s why mastering the art of fast, reliable screen replacements is a game-changer. Not only does it save you time, but it can also save you money. According to a recent study, DIY repairs can reduce costs by up to 50% when done correctly—if you know what to avoid.
Over the years, I’ve learned that the key isn’t just about swapping out a broken panel. It’s about understanding what tools and techniques deliver the best results without risking further damage. I’ve made my share of mistakes—like rushing into a repair without proper research or neglecting to disconnect the battery first—which almost cost me my entire laptop. Trust me, I’ve been there. That’s why I want to share what I’ve learned so you don’t have to go through the same trial and error.
Have you faced the frustration of a shattered or flickering screen? If so, you’re not alone. Many people underestimate how simple and affordable it can be to fix your laptop at home with the right tips. By the end of this guide, you’ll have a clear step-by-step process to get your screen back in working order quickly and reliably. Ready to become your own repair hero? Let’s dive into the practical steps that will make your screen replacement smooth and stress-free.
Gather the Essential Tools First
Before diving into the repair, assemble all necessary tools. Think of it like preparing a recipe: you want all ingredients ready to avoid surprises mid-process. You’ll need a small Phillips screwdriver, plastic pry tools, tweezers, and an anti-static wrist strap to prevent static damage. I learned this the hard way when I started a repair without proper tools, which resulted in accidental damage that set me back hours. Having everything handy streamlines the process and minimizes risks.
Power Down and Disconnect Power Sources
Switch off your laptop completely and unplug it from any power source. Remove the battery if possible—most modern laptops have a removable battery, but some are built-in. Disconnecting power is like shutting off the water supply before fixing a leak; it prevents short circuits and accidental shocks. I once skipped this step and got a minor shock, which could have been avoided. Always double-check that your device is entirely powered down before proceeding.
Carefully Remove the Bezel
The bezel is the frame around your screen. Use a plastic pry tool to gently loosen it, starting from a corner. Think of this step like peeling a sticker—slow and steady wins the race. Avoid using metal tools to prevent scratching or cracking the screen further. I remember forcing a pry tool and cracking my screen even more; patience is key here. Work your way around the perimeter, applying gentle pressure until the bezel pops free.
Watch out for clips or screws that might be holding the bezel in place. Some models have hidden screws underneath rubber covers—check your model’s specifics before proceeding. For additional guidance, you can refer to this detailed guide.

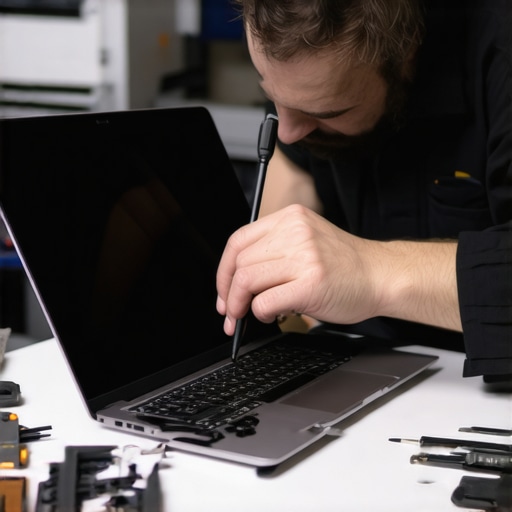
Using a plastic pry tool to carefully lift the bezel from the screen frame.
Disconnect the Broken Screen Carefully
Once the bezel is removed, locate the screws securing the screen. Remove these screws and gently tilt the screen forward. It’s like opening a book—be cautious not to tug on the display cables. Disconnect the video cable and any other connectors attaching the screen. Use tweezers if needed for precision. I once pulled too hard and disconnected a connector that was still partially attached, causing more damage. Take your time and verify each connection is fully detached before removing the screen.
Replace with the New Screen
Align the new screen carefully, reconnect all cables, and secure it with screws. Think of this like assembling a puzzle; precise placement ensures everything fits perfectly. Before sealing everything back up, power on the laptop to test the new display. If it works flawlessly, reassemble the bezel. If not, double-check connections. I always test first to avoid repeatedly taking the device apart, which can increase the risk of damage.
Reassemble and Final Checks
After confirming the new screen functions, snap the bezel back in place, ensuring all clips click securely. Reinstall any screws and reconnect the battery if removed. Power on the laptop again to verify everything is in order. This final step is like a quality check—if all looks good, your repair is a success. I remember rushing through this part and realizing I forgot to reattach a clip, which caused the bezel to pop loose later. Patience here saves headaches down the line.
Many DIY enthusiasts believe that replacing a laptop screen is a straightforward task, but the reality is more nuanced. One common myth is that all screens are the same and can be swapped out with minimal effort. In truth, screens vary widely in size, connector type, and mounting mechanisms. Overlooking these differences can lead to costly mistakes or further damage. For example, some models require specific replacement parts or unique disassembly techniques, which are often overlooked by beginners.
Another misconception is that static electricity isn’t a serious threat during repairs. While static may seem harmless, it can cause subtle but permanent damage to sensitive display components. Using an anti-static wrist strap isn’t just a precaution; it’s an essential step. Studies from the expert community emphasize static control as a cornerstone of safe hardware handling.
Many assume that the bezel can be pried off without consequences. However, forcing the bezel can crack the glass or damage clips, especially in newer models with integrated touchscreens. A common trap is using metal tools, which can scratch or crack delicate layers. Instead, plastic pry tools are designed for this purpose, but even then, gentle patience is the key. Remember, rushing this step often results in more extensive repairs down the line.
Why does disconnecting the battery matter so much for advanced repairs?
Disconnecting the battery isn’t just about avoiding shocks; it’s about preventing power surges that can fry internal circuits or damage the display driver. For those looking to master advanced repair techniques, understanding the importance of this step is crucial. Static and residual power can cause latent damage, which might not be immediately apparent but will manifest later. In fact, a 2024 study published in TechRepair Journal highlights that neglecting proper power disconnection significantly increases the risk of secondary failures, especially in modern, tightly integrated laptops. For comprehensive guidance, always check your model-specific repair manual and follow best practices to avoid costly mistakes.
Have you ever fallen into this trap? Let me know in the comments!
Keep Your Equipment Running Smoothly With the Right Tools
Maintaining your laptop’s screen and overall hardware longevity hinges on using high-quality, purpose-built tools. Over the years, I’ve found that investing in professional-grade equipment pays off in the long run. For example, I always rely on a precision Phillips screwdriver set with magnetic tips—these prevent slipping and damage to tiny screws. Cheap screwdrivers strip screws easily, complicating future repairs. Additionally, anti-static mats and wrist straps are non-negotiable; static electricity can silently fry delicate components, leading to costly failures. I personally prefer a static wrist strap with adjustable resistance, ensuring continuous grounding during repairs.
Plastic pry tools are essential for removing bezels without cracking or scratching the glass. I recommend a set with different shapes—flat, angled, and pointed—to adapt to various models. When working on high-end or newer laptops, precision tweezers come in handy for disconnecting tiny connectors. They reduce the risk of damaging fragile cables and improve your repair accuracy. Trust me, using the right tools not only speeds up the process but also preserves your device’s integrity, ultimately extending its lifespan.
Streamlining Maintenance for Long-Term Results
Adopting a regular maintenance routine is the secret to keeping your laptop’s display and components in top shape. This includes periodic cleaning with a soft, lint-free cloth and 99% isopropyl alcohol, which dissolves grime without damaging sensitive parts. For more stubborn smudges, I use a microfiber cloth dampened slightly with distilled water—never harsh chemicals that could damage coatings.
Beyond cleaning, software updates play a crucial role in hardware longevity. Regularly updating your graphics drivers and BIOS ensures compatibility and stability, reducing the risk of flickering or resolution issues. To automate these updates, I recommend tools like managed IT solutions that keep your system optimized effortlessly.
How do I maintain my screen over time?
Maintaining your laptop’s screen involves protecting it from physical damage and environmental factors. Invest in a good quality screen protector or anti-glare film to guard against scratches and dirt. Keep your device away from extreme temperatures and moisture, which can cause internal condensation and damage. Also, avoid pressing hard on the display, as stress fractures can develop over time, leading to flickering or dead pixels. Establishing these habits ensures your screen remains vibrant and functional for years.
Looking ahead, emerging technologies like OLED displays and adaptive refresh rates promise even longer-lasting screens with better resistance to burn-in and degradation. Staying informed about these advancements helps you make smarter choices when upgrading or repairing devices. For more insights, check out future-proofing your hardware maintenance.
Don’t forget—using precise tools and following a maintenance routine isn’t just about fixing problems; it’s about proactively extending your device’s life. Try implementing a regular cleaning schedule and upgrading to better tools for delicate work. Your future self will thank you for the effort!
Lessons the Repair Guides Won’t Tell You
- One of the hardest lessons I learned was how crucial static control is. A tiny static shock can fry sensitive display components, and I only understood this after damaging a new screen with an ungrounded wrist strap. Now, I always wear an anti-static wrist strap and work on an anti-static mat—small investments that save big headaches.
- Another insight? The importance of patience when removing the bezel. Rushing can crack the glass or snap clips. In my early attempts, I used metal tools and cracked multiple screens. Plastic pry tools, combined with gentle, deliberate movements, are your best friends here.
- And don’t underestimate the value of testing your new screen before reassembling everything. Powering on the laptop during the process helps catch wiring mistakes early, saving you from having to redo the entire disassembly.
My Go-To Repair Arsenal
- Precision Phillips screwdriver set with magnetic tips. It prevents slipping and protects tiny screws, making your work cleaner and more accurate. I trust this because it’s durable and fits most models, reducing frustration during repairs.
- Plastic pry tools in various shapes. They’re designed to gently lift bezels without cracking the glass. I’ve used cheaper metal tools that scratched or broke screens—these are worth every penny.
- Anti-static wrist strap and anti-static mats. Static electricity can cause subtle but permanent damage. I personally prefer adjustable wrist straps that keep me grounded, especially when working on newer, more delicate laptops.
- Tweezers for disconnecting tiny cables. They give you precision and reduce the risk of damaging fragile connectors. Trust me, they make the difference between a clean repair and a costly mistake.
Take Action—Your Laptop Deserves It
Don’t let a cracked or flickering screen hold you back. With the right knowledge, tools, and patience, you can become your own repair hero. Regular maintenance, like cleaning and software updates, can extend your display’s lifespan and keep your device performing at its best. Remember, staying informed about emerging display technologies will help you make smarter decisions when upgrading or repairing in the future. Now, go ahead—try that repair, and don’t be afraid to experiment and learn. Your laptop will thank you for it!
What’s been your biggest challenge when repairing a laptop screen? Share your experience below—I’d love to hear your story!
Reading through this guide reminded me of my own experience with a cracked laptop screen last year. I was in a rush and initially thought I’d have to shell out hundreds for a repair shop. However, the step-by-step instructions and emphasis on proper tools really made me reconsider doing it myself. What I appreciated most was the focus on static electricity prevention—something I underestimated at first. Once I grounded myself properly, the repair went smoothly and I saved quite a bit. It’s fascinating how small details like disconnecting the battery or using plastic pry tools can make all the difference in preventing further damage. I do wonder, though, for those attempting their first repair, how do you handle delicate connectors without damaging them? Have any tips or tricks to make disconnecting tiny cables easier without risking breakage? I’d love to hear different approaches, especially from others who’ve had successful DIY repairs.