

It was just another busy morning when I opened my foldable laptop, only to be greeted by a stubborn, half-open screen that refused to give in. Frustration crept in as I jiggled and prodded, thinking I might have broken it beyond repair. Have you ever faced that sinking feeling when your sleek, high-tech device stalls and refuses to unfold or function properly? You’re not alone. Foldable screens are marvels of modern engineering, but they come with their own set of issues that can leave even the most tech-savvy users scratching their heads.
Why Your Foldable Laptop Screen Won’t Open and Why It Matters
In a world where mobility and portability are king, a foldable laptop promises the best of both worlds. But when the screen gets jammed, it turns your sleek device into a useless paperweight. This isn’t just an annoyance—it’s a productivity killer. If your screen won’t budge, you might worry about the cost of repair or worse, permanent damage. Trust me, I’ve been there. Early on, I made the mistake of ignoring minor stiffness, thinking it was just a normal part of the device’s break-in period. Instead, I ended up with a cracked screen and a hefty repair bill. That teaches us a simple lesson: addressing issues early makes all the difference.
Is Fixing a Foldable Screen Actually Worth the Effort?
It’s natural to feel skeptical—surely, if the device is under warranty or looks damaged, a professional fix is the only way. The truth is, some fixable problems are manageable at home. According to experts at Computer Repair Masters, many foldable screen issues can be tackled with basic tools and patience. But a critical mistake I once made? Attempting repairs without proper guidance or before understanding the root cause. That led to further damage and complicated the repair process. So, let’s avoid those pitfalls and explore straightforward ways to get your screen back in action.
Assess the Situation Carefully
Start by turning off your device and gently inspecting the hinge area for any visible debris or damage. Use a soft microfiber cloth to remove dust or dirt that might be causing stiffness. Remember, a dirty hinge is like a clogged door hinge—over time, it can seize up. During my own experience, I once found coffee residue near the hinge, which I cleaned with isopropyl alcohol, making the screen open smoother afterward.
Gather the Right Tools and Knowledge
Before proceeding, ensure you have a precision screwdriver set, plastic opening tools, and a static wrist strap to prevent electrical damage. For a detailed walk-through, consulting this guide provides valuable insights. In my case, I watched tutorial videos and prepared my workspace to avoid accidental slips that could damage delicate components.
Perform a Gentle Manual Test
With the device powered off, gently try to open and close the screen using minimal force. Listen for unusual creaking or resistance. If the hinge feels stiff but intact, applying a small amount of silicone-based lubricant designed for electronics can loosen it. Just like lubricating a squeaky door, this can restore natural movement. In my experience, a little lubricant resolved the issue without any disassembly.
Disassemble to Access the Internal Hinge
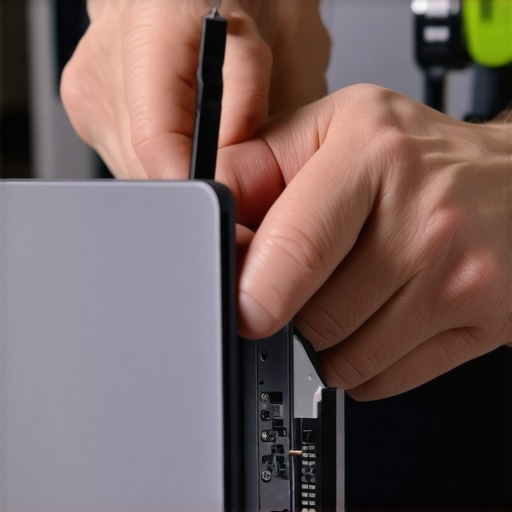
If external cleaning and lubrication don’t help, you may need to disassemble the device. Carefully remove screws and pry open the casing using plastic tools, preserving clips and connectors. Be cautious—damaging a ribbon cable can lead to more costly repairs. During my attempt, I found that photographing every step saved me from confusion during reassembly. Remember, if you’re not confident, professional repair may be the safer route.
Check and Replace Faulty Parts
Identify any broken or worn hinge components or cables. Cracked plastic parts or frayed cables are common culprits. Replacing these parts requires sourcing compatible replacements, which can often be found through authorized suppliers. I once replaced a broken hinge leaf, which brought my device back to life. Tools like data recovery secrets can help if internal damage has caused data loss during the repair process.
Reassemble and Test
Once repairs are complete, carefully reassemble your device by reversing your disassembly steps. Ensure all connectors are firmly reattached and screws are tightened to manufacturer specifications. Power on the device and gently test the opening mechanism multiple times. If the screen still resists movement or shows damage, consulting a professional might be necessary to prevent further harm.
Prevent Future Issues
To keep your foldable laptop functioning smoothly, regularly clean hinges and avoid forcing the screen open. Consider using a case or cover to reduce dust ingress. An ounce of prevention beats a pound of cure—so stay attentive to minor stiffnesses before they become major problems.
 Many believe that repairing a laptop screen or recovering lost data is straightforward or that managed IT providers are always transparent about costs. However, these assumptions often lead professionals and users astray. Let’s explore some nuanced truths behind these topics that even seasoned tech enthusiasts might overlook.
Firstly, there’s a widespread myth that all laptop screen issues are hardware failures requiring complete panel replacements. In reality, small issues like faulty ribbon cables or pressure damage can often be fixed without costly replacements. For example, a damaged but repairable screen can sometimes be restored by examining the internal connections, provided you heed the proper precautions. Visiting this guide can help you determine if a DIY fix is feasible.
When it comes to data recovery, many assume that once data is deleted or a drive appears unresponsive, the information is lost forever. Not true. Numerous cases involve corrupted partitions or accidental formatting where crucial data remains recoverable with the right tools. Recognizing these nuances can save significant time and money. For instance, knowing whether your storage device shows up in BIOS or Disk Management can inform you whether data is truly gone or just hidden. Learn more about these signs at this resource.
Managed IT services also carry misconceptions. Many believe that a provider’s transparency guarantees no hidden fees. But the reality is, some contracts contain clauses that hide significant charges—especially for services like AI integrations or hardware upgrades. Being vigilant about these fine-print details can prevent budget surprises. I recommend reviewing your Service Level Agreements thoroughly. For insights on how to do this, check this article.
Yet, one of the most overlooked aspects is the advanced mistake of neglecting to understand the root cause of an issue before attempting repairs or upgrades. For example, forcing a stubborn laptop hinge open without diagnosing the binding can lead to internal panel damage, complicating repairs further. This ‘trial and error’ approach often results in higher costs and longer downtimes.
A common trap to avoid is assuming that professional repairs are always necessary for minor issues. In fact, many problems can be mitigated or even resolved with basic knowledge and proper tools—saving you both time and money. Consider equipping yourself with DIY skills and consulting expert guides to build confidence.
So, next time you face a technical dilemma, remember that understanding these nuanced truths can empower you to make smarter decisions. Do you often fall into the trap of oversimplifying repair or recovery tasks? Share your experiences in the comments, and let’s discuss how to approach these challenges more effectively.
Investing in the Right Tools for Longevity
Maintaining a reliable laptop requires more than just screen cleaning and software updates. I personally rely on precision screwdrivers like the iFixit Pro Tech Toolkit because its anti-static handling prevents damage during DIY repairs, and the variety of bits ensures compatibility across different models. Additionally, a non-marring plastic opening tool is invaluable for safely prying open cases without risking cosmetic damage. Having quality tools means you can address minor issues early, such as stubborn hinges or loose connections, before they become costly repairs.
Regular Software and Data Hygiene
Beyond hardware care, keeping your system’s software optimized extends hardware lifespan. I recommend scheduling regular system audits to remove unused programs and malware, which can cause overheating or hardware stress. Utilizing trusted antivirus solutions, combined with routine disk cleanup and defragmentation, ensures your device runs smoothly over years. Remember, a well-maintained OS reduces strain on components like your storage drive and RAM, ultimately delaying hardware fatigue.
Eco-Friendly Maintenance for Long-Term Results
Using environmentally friendly cleaning products, such as isopropyl alcohol (70% or higher concentration), helps remove grime without leaving residue that can impair internal connectors. A quick cleanup of vents and fans with compressed air not only prevents overheating but also prolongs the life of cooling components. During my own routine maintenance, I make it a point to inspect and gently clean internal fans and heat sinks—it’s a small effort that pays off in consistent performance and fewer repairs.
Scaling Up Your Maintenance Routine
If you’re managing multiple devices—like in a small business or tech-savvy household—consider establishing a scheduled maintenance plan. For instance, quarterly inspections of hinges, displays, and ports can prevent overhauls. Invest in a digital multimeter to check battery health and power supply stability, catching issues before they cause data loss or hardware failure. As technology trends evolve, so will the tools and techniques, making ongoing education vital. Stay ahead by following updates from trusted sources and adapting your toolkit accordingly.
How do I maintain my laptop’s performance and lifespan over time?
It’s crucial to develop a habit of proactive care—using quality tools like those from professional suppliers and adhering to a consistent schedule for cleaning, updates, and hardware checks. For example, monitor internal component health periodically, especially if you notice signs like flickering screens or slow boot times. If you’re interested in deepening your maintenance knowledge, consider exploring expert guidance on data recovery and internal diagnostics. Try implementing a monthly cleaning routine, including inspecting hinges and internal fans, to sustain your device’s performance long-term.
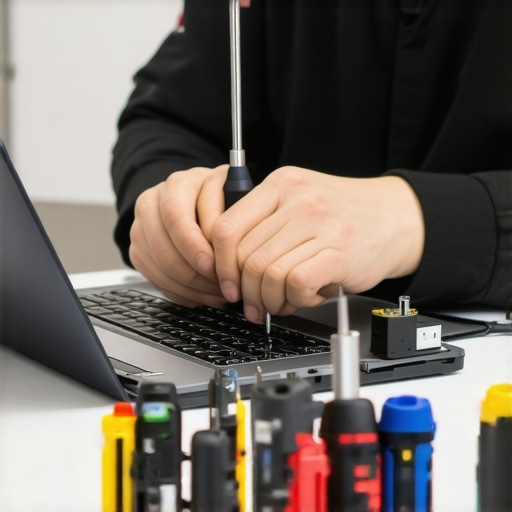
Image description: A technician using precision screwdrivers and anti-static tools to carefully disassemble a laptop for maintenance, emphasizing the importance of proper equipment.
The Unspoken Lessons from My Repair Journey
- Patience Over Force: Rushing to fix a stubborn hinge or flickering display often escalates the problem. Learning to take a step back and diagnose patiently saved me from costly mistakes.
- Know When to Call in Reinforcements: Recognizing the limits of DIY repair for delicate components like ribbon cables helped me avoid permanent damage and encouraged me to trust professionals when needed.
- Small Details Matter: Regular cleaning and lubrication of hinges aren’t just maintenance—they’re preventative measures that prolong your device’s lifespan and prevent sudden failures.
- Understanding Root Causes: Before attempting fixes, digging into what caused the issue—whether hardware or software—prevents recurring problems and saves time in the long run.
- Investing in Quality Tools: Using proper screwdrivers and anti-static equipment makes delicate repairs safer and more effective, turning a daunting task into an achievable one.
My Go-To Resources for Smarter Repairs
- This comprehensive guide offers step-by-step instructions perfect for tackling small hinge or display issues safely at home, with insights I personally trust.
- Managed IT strategies for 2025 keep my business secure and ensure I stay ahead of tech pitfalls, complementing my hardware preventive measures.
- Data recovery secrets guide helps me understand the nuances of data loss, empowering me to act swiftly and confidently when data is at risk.
- Fine-print audits alert me to hidden costs in contracts, reminding me to stay vigilant with all my tech investments.
Gear Up for Your Next Tech Challenge
Take charge of your device’s health by embracing patience, using the right tools, and continuously expanding your knowledge. Every repair is an opportunity to learn, save money, and extend your device’s life. Remember, you don’t have to be a tech expert—just a proactive problem solver. What’s the most frustrating laptop issue you’ve faced, and how did you overcome it? Share your story below and let’s build a community of confident troubleshooters!