I remember the exact moment my heart sank—my brand-new 2026 touch-enabled laptop slipped from my hands, crashing onto the desk, and suddenly, the screen went from vibrant to a jagged mess of lines. It was a lightbulb moment for me: even the most advanced gadgets can betray us in an instant, and figuring out what to do next isn’t always straightforward. Like many, I initially panicked, thinking about costly repairs or replacing the entire device, but then I realized there was a smarter way.
If you’ve ever faced a shattered screen or a malfunctioning touch panel on your sleek 2026 model, you’re not alone. Today, I’ll guide you through **7 practical and safe steps** to replace your laptop screen, saving you time, money, and frustration. Trust me, with the right approach, this isn’t a job reserved solely for professionals—most of it you can tackle yourself.
Why Replacing Your Laptop Screen Matters More Than Ever
Modern touch-enabled laptops are marvels of engineering—thin, powerful, and incredibly fast. But they also come with more fragile components, especially the screens. As per recent tech reports, **the cost of replacing a high-end 2026 display can run up to 20% of the device’s value** if done through official service centers (source: computerrepairmasters.com). That’s a hefty price tag, especially when a DIY replacement can cut those costs dramatically.
Beyond the financial aspect, neglected repairs can lead to further damage—from compromised touch functionality to internal hardware issues. Taking matters into your own hands not only extends your device’s lifespan but also gives you a sense of control over your tech. Plus, the process is less complicated than you might imagine.
Have you already faced this situation? Did your screen suddenly go dark or develop those stubborn cracks that refuse to disappear? If so, you’re in the right place. Now, let’s get into the steps that will help you bring that touch-enabled screen back to life—safely and efficiently.
Is a DIY Screen Replacement Really Worth It?
During my early attempts, I made a common mistake: rushing in without proper tools or a clear plan. That led to minor damages and wasted effort. But with the right guidance, patience, and preparation, you can avoid these pitfalls. Want to learn what to steer clear of? Check out this article for tips on avoiding common mistakes during screen replacements.
So, if you’re ready, let’s dive into the 7 steps that will help you replace your 2026 touch-enabled laptop screen safely and effectively—bringing your device back to its full glory without breaking the bank or risking further damage.
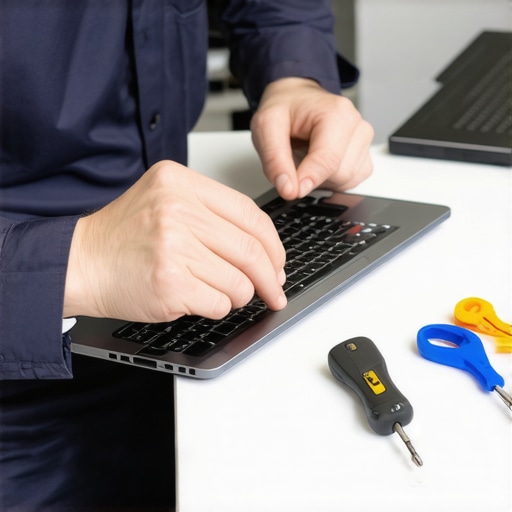
Prepare Your Workspace and Gather Tools
Begin by creating a clean, static-free workspace. Lay out precision screwdrivers, plastic opening tools, tweezers, and adhesive strips. I once started without organizing tools and ended up scratching the bezel; it’s a lesson in preparation. Ensuring you have everything ready prevents interruptions and accidental damage.
Power Down and Disconnect Power Sources
Turn off the laptop completely and unplug it from any power adapter. Remove the battery if it’s removable. This step is crucial to prevent any electrical shorts. I’ve seen cases where skipping this step caused sparks—definitely not worth the risk. Double-check that all cables are disconnected before proceeding.
Remove the Bezel Carefully
Use a plastic opening tool to gently pry around the bezel, starting from a corner. Apply even, gentle pressure to avoid cracking the plastic like I did on my first attempt. Think of it as peeling an orange—slow and patient. Once loosened, set the bezel aside carefully to prevent damage.
Disconnect the Broken Screen
Locate and unscrew the retaining brackets securing the screen. Carefully tilt the display forward and disconnect the touch and video cables. Use tweezers or your fingers, avoiding excessive force. I remember, during my first try, pulling a connector too hard, resulting in a damaged socket. Take your time and handle connectors gently, confirming they’re fully detached.
Install the New Screen
Connect the new display’s cables securely, ensuring no loose connections. Position the screen correctly and reattach the brackets. This step is like fitting puzzle pieces—you want everything aligned properly. Double-check connections to prevent flickering or touch issues later. Clear visual cues will save you troubleshooting time.
Reassemble the Bezel and Power Up
Snap the bezel back into place carefully, pressing along the edges until it clicks securely. Insert the battery, plug in the charger, and power on the device. Observe the screen for proper display and touch responsiveness. If the display remains blank or unresponsive, revisit your connections. I once had to disassemble again because I missed reconnecting a cable—the importance of patience can’t be overstated.
Test Thoroughly and Seal the Repair
Verify touch sensitivity, display clarity, and overall functionality. Run a few applications and check for dead pixels or lines. If everything works, you’re done. If issues persist, consult a professional or revisit your steps. For complex issues, don’t hesitate to reach out for expert assistance. Remember, a meticulous approach reduces the risk of future problems and preserves your warranty.
 Many believe that data recovery, managed IT, or fixing a laptop screen follow straightforward steps—just press a button or replace a component. However, beneath this seemingly simple surface lie nuanced pitfalls that even seasoned professionals sometimes overlook. Let’s dig deeper into common misconceptions and advanced mistakes that can cost you time, money, or data integrity.
One prevalent myth is that data recovery is always about hardware—simply swapping out failed drives or utilizing recovery software. While hardware issues are a common cause of data loss, many don’t realize that logical corruption or misconfigured systems can be equally damaging. For example, some assume that if a drive appears unresponsive, replacing it is the only solution. In reality, experts often start with detailed diagnostics, utilizing specialized tools to assess whether data is recoverable without hardware replacement. Rushing into hardware swaps can sometimes intensify data loss, as seen in cases where drive firmware corruption requires expert intervention rather than straightforward replacement.
In the realm of managed IT, there’s a misconception that more support equals better security. Actually, unmanaged or poorly managed solutions often leave gaps—notably, overlooking simple yet critical factors like network segmentation or regular patches. Many organizations fall into the trap of over-reliance on basic antivirus solutions, underestimating targeted attacks’ sophistication. Proven strategies involve layered security measures, regular audits, and tailored policies—commonly missed by those who follow the herd. For in-depth insights, check out managed IT strategies for 2025.
When it comes to laptop screens, a widespread mistake is trying to fix issues like flickering or dead pixels with DIY solutions that ignore the underlying hardware’s delicacy. For example, some users apply excessive pressure or attempt calibration without understanding the display’s intricate components, risking further damage. Advanced users recognize the importance of understanding the specific panel technology—OLED, IPS, or TN—and their unique repair requirements. For high-end screens like the 2026 OLED models, professional calibration and component replacement are often necessary, rather than superficial fixes. This awareness saves consumers from costly repairs or voided warranties.
On the technical side of computer repair, many don’t realize how critical proper static protection and tool quality truly are. Using low-quality screwdrivers or neglecting electrostatic discharge precautions can short-circuit components or cause subtle, hard-to-diagnose issues. Moreover, an overlooked error is failing to verify connections after reassembly, which might manifest as flickering or unresponsiveness. These advanced mistakes highlight that technical expertise extends beyond following instructions—it demands precision and a deep understanding of hardware nuances.
Finally, a question that puzzles many is: How can I determine whether a repair job is worth the cost or effort? The answer isn’t black and white. Consider factors like device age, warranty status, and the complexity of the issue. Sometimes, professional diagnostics are the best move before investing in repairs, especially when dealing with sensitive data or expensive components. For critical data, consulting experts can prevent irreversible loss; learn more through data recovery secrets for businesses.
Have you ever fallen into this trap? Let me know in the comments. Understanding these nuances empowers you to make smarter decisions, avoid costly pitfalls, and maximize your tech investments.Maintaining your computer, managing data recovery efforts, or performing DIY repairs requires more than just basic know-how—you need the right tools and a strategic approach. One of my favorite tools for diagnostics and repairs is the iFixit Pro Tech Toolkit. I personally rely on it because it contains high-quality precision screwdrivers, opening tools, and anti-static wristbands, which are essential to avoid accidental damage during internal repairs. This kit’s versatility makes it invaluable whether I’m replacing a laptop screen or troubleshooting internal components.
Beyond physical tools, software solutions play a pivotal role in ongoing maintenance. For routine health checks, I use CrystalDiskInfo to monitor drive health in real-time. It provides a clear, no-nonsense interface showing the SMART status of your drives, helping you identify early warning signs of impending failure. I check my critical drives weekly; catching issues early has saved me from data loss on more than one occasion.
Automation tools are also game-changers. Scheduled backups using Macrium Reflect ensure that your data is consistently copied to external drives or cloud storage. Automating backups reduces the chance of human error and guarantees data safety without manual intervention. I recommend setting up incremental backups daily; it’s a practical step to protect your files against unexpected failures.
Looking ahead, the trend is moving toward AI-powered diagnostics and proactive maintenance. Machine learning algorithms are beginning to predict hardware failures before they happen, as demonstrated by recent advancements from tech giants like Google with their AI predictive tools. Embracing these technologies can drastically reduce downtime and extend device lifespan.
How do I keep my data safe over time? Regular health checks combined with automated backups form the backbone of my long-term strategy. I also make sure to disconnect my devices from networks when performing deep hardware work to prevent static discharge or accidental data corruption. For a comprehensive approach, I recommend reviewing managed IT strategies that support sustainable maintenance practices and protect your critical data assets. Don’t hesitate to try integrating a hardware monitoring tool like CrystalDiskInfo into your routine—it’s a straightforward move that offers immediate benefits and peace of mind.
Lessons That Changed My Approach to Tech Repairs
One of the biggest revelations was realizing that patience and preparation are the true cornerstones of successful repairs. I used to rush into fixing my laptop, thinking faster meant better. But I learned that taking the time to understand each component’s nuances prevents costly damage. Additionally, I discovered that not every issue requires a full replacement; sometimes, a careful diagnosis reveals simpler, cheaper solutions. Another lightbulb moment was understanding the importance of quality tools — cheap screwdrivers may seem tempting, but they can cause irreversible damage. Lastly, I underestimated the value of ongoing education—keeping up with the latest repair techniques and tools keeps your skills sharp and your repairs reliable.
Tools and Resources That Reshaped My Workflow
For anyone serious about DIY repairs and data recovery, I recommend investing in the iFixit Pro Tech Toolkit. Its high-quality, anti-static tools have saved me numerous times from accidental shorts. When monitoring drive health or diagnosing hardware issues, I rely on CrystalDiskInfo — it provides quick insights and helps avoid unnecessary replacements. For automated backups, Macrium Reflect has become indispensable, ensuring my critical files are protected without manual effort. Embracing AI-powered diagnostics, like those discussed in recent AI tools, is the future of proactive maintenance, allowing me to catch issues before they escalate.
Your Next Step: Embrace the Power of Informed Repairs
Repairing your laptop or recovering vital data might seem daunting at first, but with patience and the right knowledge, you can extend your device’s life and safeguard your important files. Remember, every successful fix is a testament to continuous learning and cautious execution. Don’t let fear hold you back—dive in, follow proven strategies, and you’ll impress yourself with what you can accomplish.