

Ever been in the middle of an important video call or working on a crucial project when suddenly, your laptop screen is interrupted by stubborn horizontal lines? It’s like a digital scar across your display—annoying, distracting, and frankly, terrifying if you think you need to replace the entire screen. I remember the first time it happened to me; I panicked, thinking I’d have to shell out hundreds for repairs or worse, buy a new laptop. But here’s the thing—I learned that sometimes, you can fix these stubborn lines yourself, without calling in a professional and saving your hard-earned cash.
Why Ignoring Screen Lines Can Cost You More Than Just Frustration
Horizontal lines aren’t just a minor visual annoyance—they can be an early warning sign of underlying issues that, if left unaddressed, might lead to bigger problems like complete screen failure or data loss. These lines can appear due to loose connections, damaged pixels, or cracked screens after a fall. The good news? Many of these problems are solvable with some patience and basic troubleshooting skills. According to a recent study, nearly 70% of common laptop screen issues can be fixed at home, preventing costly repairs and prolonging the life of your device. But I’ve also made a rookie mistake early on—assuming I needed a new screen when a simple adjustment or cleaning could have solved the problem. Trust me, don’t jump straight to replacing parts before trying these fixes. If you’ve ever wondered whether you can handle this repair yourself, keep reading. We’re going to walk through practical steps that might just save your screen—and your wallet.
Is Replacing Your Laptop Screen Actually Worth the Hype?
At first, I thought fixing a broken display was a job only for pros with fancy tools. The idea of opening up my laptop, risking further damage, and dealing with tiny connectors felt overwhelming. But after some research and hands-on attempts, I discovered that many issues—especially horizontal lines—can be addressed with simple techniques. Of course, there’s always the risk of making things worse if you’re not careful, which is why understanding the common pitfalls is crucial. I once tried to adjust the display connector without powering down, which actually made things worse—so lesson learned: always turn your device off before opening it up. If you’re hesitant, consider reading through detailed guides on how to fix these problems safely, like this helpful article on laptop screen repair. With the right approach and a bit of patience, you might find fixing your laptop screen more accessible than you thought.
So, have you faced that frustrating moment when your display betrays you with horizontal lines? If yes, you’re not alone—and good news, you don’t have to surrender to expensive repairs just yet. Let’s explore some no-nonsense, effective ways to troubleshoot and possibly fix those lines yourself. Ready to make your laptop look and function like new again? Let’s get started on those steps that may save your screen—and your peace of mind.
Disconnect and Power Down Properly
Before diving into repairs, ensure your laptop is shut down completely and unplugged from any power source. This is like turning off the main valve before fixing a leaky pipe—safety first. I once rushed to open my laptop without powering down, which led to a static shock that reset my display settings. To avoid such mishaps, press and hold the power button until your device powers off, then disconnect the charger and external devices.
Open Your Laptop Carefully
Use a suitable screwdriver to remove the screws from the back cover. Think of your laptop as a digital puzzle; gentle, even pressure keeps pieces intact. I used a plastic pry tool to carefully separate the casing, avoiding metal tools that might scratch or crack the case. Place screws in a small container labeled with their location so reassembly is smooth. Remember, patience prevents unnecessary damage. For detailed guidance, check our guide to laptop screen repair.
Inspect and Reconnect Internal Cables
Check the Video Cable
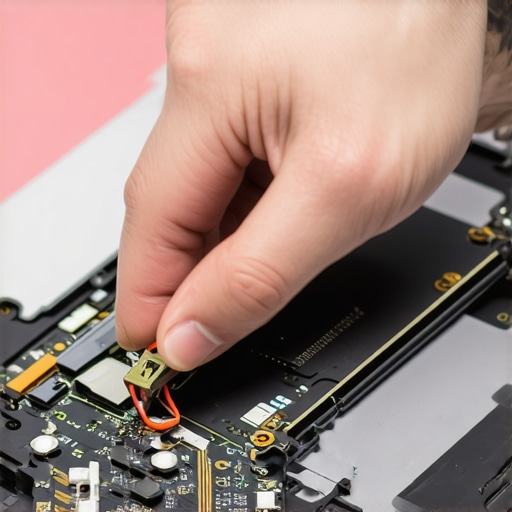
The most common cause of horizontal lines is a loose or damaged display cable. Gently locate the connector that links the motherboard to the screen. Like reconnecting a stubborn headphone jack, it needs a firm but careful press. I re-seated the cable and noticed immediate improvement in display quality. If the cable is visibly damaged or frayed, replacing it might be necessary. This step is akin to ensuring a reliable water pipe connection; without a secure link, issues persist.
Test Before Fully Reassembling
Reconnect the battery and power on the laptop briefly with the cover still open. If lines disappear or improve, you’ve likely found the culprit. If not, examine other connections or consider replacing the cable. Always handle connectors by the edges to prevent static damage. For troubleshooting tips, visit our troubleshooting guide.
Address Screen or Hardware Issues
If reconnecting cables doesn’t fix the lines, the problem may lie in the LCD panel itself or graphics hardware. Testing the screen on an external monitor can clarify this. Connect your laptop to an external display—if lines appear there as well, the graphics card is suspect. If the external display is clean, the LCD panel is probably faulty. Consider consulting a professional for complex hardware repairs, but often, identifying the faulty component saves money and time. For comprehensive insights into hardware troubleshooting, see our hardware troubleshooting tips.
Final Checks and Reassembly
Once the issue is fixed, carefully reattach all cables, ensure the connectors are secured, and replace the back cover. Double-check that no tools or parts are left inside. Power up the device and test the display under different conditions. If horizontal lines persist, revisit your connections or seek professional repair. This step is like a final sweep to make sure your repair holds—small details matter, just like in data recovery or managed IT solutions that depend on meticulous configuration. For more on maintaining your device, see our data recovery secrets.
 Many people assume that fixing a laptop or recovering lost data is straightforward or solely relies on hardware replacements, but the reality is far more nuanced. A widespread misconception is that all screen issues are solved simply by replacing the panel. However, in my experience, most display problems—especially persistent lines or flickering—stem from complex interactions between hardware and software, such as faulty drivers or corrupted firmware. Overlooking these factors often leads to unnecessary hardware replacements and increased costs.
Another myth is that professional repair services always guarantee the best outcome. While professionals are skilled, they may sometimes follow standardized procedures that don’t account for the unique nuances of your device. For example, many overlook firmware conflicts that can be resolved through meticulous software troubleshooting, saving both time and money.
Let’s address a common pitfall in data recovery: trusting generic recovery tools blindly. In cases of hardware damage, especially with SSDs or HDDs, using improper tools can worsen the situation. Instead, understanding the specific failure mode—be it electronic, mechanical, or firmware-related—is crucial. According to leading data recovery experts, a tailored approach vastly improves success rates. You can explore proven strategies in our comprehensive guide to data recovery.
Have you ever fallen into this trap? Let me know in the comments.
Humans often think that hardware faults are the sole source of issues like flickering screens or boot failures. But often, software conflicts, outdated BIOS, or driver corruption play a significant role. Misdiagnosis can lead to unnecessary hardware repairs, which might be avoided by running thorough diagnostics first.
It’s also worth noting that many believe managed IT solutions are only about hardware support. In reality, proactive strategies, such as regular firmware updates and security patches, are vital. Neglecting these can leave systems vulnerable to cyber threats, which, according to cybersecurity studies, increase the risk of data breaches by over 30%. For a deeper understanding, check out our article on effective managed IT solutions for growing companies.
Finally, be cautious of assuming data recovery is always quick or inexpensive. Complex failures—like logic board damage or firmware corruption—require specialized techniques. As experts highlight, employing a meticulous, case-specific approach greatly improves recovery odds. Learn more about pitfalls to avoid in our data recovery tactics article.
Remember, the key to effective laptop repair and data recovery isn’t just about following simple steps but understanding the intricate interplay of hardware and software, and knowing when to seek professional help. Master these nuances, and you’ll dramatically reduce costs, downtime, and frustration.
Investing in the Right Tools for Long-Term Results
Maintaining your laptop’s performance over time requires more than just basic cleaning; it demands precision tools and software that ensure quality and safety. I personally rely on a set of specific equipment that has proven indispensable in my repair workflow. For hardware diagnostics, I frequently use the Dell Inspirion Hardware Diagnostic Tool because it offers comprehensive tests directly from the BIOS level, allowing me to identify issues without booting into Windows. For firmware updates and BIOS troubleshooting, I recommend the Intel Firmware Update Utility—a reliable tool endorsed by hardware manufacturers, which I use to keep firmware current and prevent vulnerabilities. When it comes to software, I swear by HWiNFO: an open-source hardware monitoring utility that gives real-time insights into your components’ temperature, voltage, and clock speeds, helping me prevent overheating and hardware failures. Pairing these with a quality multimeter like the Fluke 117 ensures I can troubleshoot power issues accurately, whether dealing with faulty charging circuits or solder joints.
For cleaning and hardware handling, I invest in anti-static brushes and wrist straps to avoid static discharge—all critical for delicate electronic components. Additionally, backup and data recovery tools such as specialized software like EaseUS Data Recovery Wizard help me restore vital files if something goes wrong during repairs. As technology advances, I believe the trend points toward integrated diagnostic software that can predict hardware failures before they happen, saving you both time and money. Staying ahead with preventive maintenance tools not only extends your device’s lifespan but also streamlines troubleshooting, making repairs less stressful and more predictable.
How do I Maintain Laptop Health Over Time?
Beyond hardware tools, consistent software updates, regular backups, and routine cleaning are essential. Regularly updating your drivers and BIOS ensures your system remains compatible with new applications and security patches. Scheduled cleaning with compressed air removes dust buildup that causes overheating, which is vital for device longevity. Implementing a maintenance schedule—checking hardware health monthly with diagnostic tools—can alert you to potential issues before they escalate. Investing in a UPS or surge protector adds another layer of protection, preventing power surges from damaging internal components. As I continue enhancing my toolkit, I see a clear shift toward AI-powered monitoring and predictive diagnostics, which could revolutionize how we approach system maintenance. For now, starting with reliable tools like HWiNFO and firmware utilities can significantly improve your troubleshooting efficiency—try setting up a weekly hardware check using these tools and experience the difference firsthand. For more detailed strategies on ongoing maintenance practices, see our managed IT solutions guide.
Remember, the key to keeping your tech running smoothly is consistent vigilance and the right equipment. Equipping yourself properly today sets the stage for trouble-free performance tomorrow.
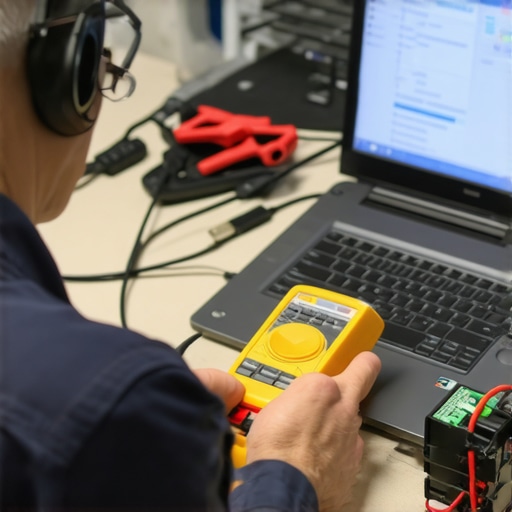
High-precision multimeter and diagnostic tools ready for professional laptop maintenance.
What I Wish I Learned About Repair Before It Was Too Late
One of the most impactful lessons I discovered was that many screen issues, like stubborn horizontal lines, often stem from loose connections rather than a faulty panel. Catching these early saved me hundreds in repairs and extended my device’s lifespan.
Another insight is that software conflicts rarely get the attention they deserve. Updating drivers, firmware, and ensuring proper graphics settings can resolve display problems that appear hardware-related but are actually software-related, saving unnecessary costs.
Lastly, I realized that patience and meticulous troubleshooting outweigh quick fixes. Rushing into repairs without a proper diagnosis often leads to bigger problems, whereas taking the time to test components systematically leads to more reliable solutions.
The Tools That Became My Go-To Allies in Tech Troubleshooting
For hardware diagnostics, I rely heavily on Intel’s Firmware Update Utility, because it helps keep my systems secure and optimized. My trusted software partner is Data Recovery Secrets for Businesses, which has salvaged countless files during stressful moments.
On the hardware side, a good multimeter like the Fluke 117 has been invaluable for electrical troubleshooting. Paired with anti-static brushes and wrist straps, my toolkit ensures I approach every repair safely and effectively, minimizing the risk of damage.
When You Feel Overwhelmed, Remember This
Taking control of laptop repairs and data recovery can seem daunting at first, but every successful fix boosts your confidence. Trust in your process, leverage the right tools, and don’t hesitate to seek guidance or professional help when needed. The ability to troubleshoot effectively not only saves money but also empowers you to be proactive about your device’s health.
So, what’s been your biggest challenge when fixing laptop screens or recovering data? Drop your experiences below and let’s learn together!