

This morning, I sat down at my desk, eager to start my work. I pressed the power button, expecting a bright, vibrant screen to greet me. Instead, all I saw was a dull, dim display staring back, even though I had cranked the brightness to maximum. Frustration crept in — why does this happen, and more importantly, how can I fix it?
Shedding Light on the Mystery of a Dim Laptop Screen
Many of us rely heavily on our laptops, whether for work, study, or just staying connected. When the screen isn’t cooperating and refuses to shine as brightly as it should, it can feel like a major setback. I’ve been in your shoes. That moment when you’re staring at a screen that seems to have lost its glow, despite turning every knob and slider all the way up. It’s disheartening, especially when you’re in the middle of an important project or a tight deadline.
Over time, I realized that this issue isn’t just about the brightness setting. Often, it’s rooted in underlying hardware or software problems. The good news? Once you understand the common causes, fixing the problem becomes more straightforward. Today, I’m going to walk you through what might be causing your laptop display to stay so dim and, more importantly, how you can restore that vibrant picture quality you’d expect at full brightness. Trust me, I’ve been through the troubleshooting maze, and I can save you some time and headaches.
Is Your Brightness Adjustment Just a Trick?
Early on, I made the mistake of assuming the brightness slider was the culprit, only to find that the issue was deeper—a failing inverter, a faulty backlight, or a driver glitch. According to a recent report from TechRepublic, nearly 30% of display issues stem from hardware failures rather than simple settings errors, making it essential to diagnose carefully. If you’re tired of guessing, I’ll help you identify whether your problem is software-related or if it’s time to consider more serious repairs.
So, do you remember the last time your screen suddenly looked dull or dark? If you’ve experienced this frustrating problem, keep reading. We’re about to explore the main factors causing a dim display and how to troubleshoot each one, step by step. By the end, you’ll have a clearer idea of whether a quick fix will do the trick or if it’s time to seek professional help. Ready to bring back the brightness and get your laptop working like new? Let’s dive in.
Check Your Brightness Settings and Drivers
Start by verifying the built-in brightness controls. On my own laptop, I once spent an hour adjusting the settings, only to realize I had disabled the auto-brightness toggle unintentionally. To do this, press the function keys usually marked with a sun icon or open your display settings in the control panel. Simultaneously, update your graphics drivers through the Device Manager or manufacturer’s website to ensure compatibility, especially after a recent system update. Outdated drivers can cause the backlight to malfunction, much like a miswired power supply in a house causes the lights to flicker. Ensure your drivers are current to avoid software conflicts that keep your screen dim. For detailed instructions, check out our troubleshooting guide [here](https://computerrepairmasters.com/tips-for-troubleshooting-laptop-screen-problems-seamlessly).
Test Hardware Components
Inspect the Backlight and Inverter
Next, you’ll need to determine whether the backlight or inverter is faulty. Think of the laptop screen as a movie projector; if the bulb (backlight) burns out or the inverter that powers it fails, the image appears dark or completely black. To test this, turn off your laptop and gently shine a flashlight directly onto the screen while powering it on. If you see faint images, it indicates the backlight is dead. In my experience, replacing the inverter or backlight strip in a laptop is akin to replacing a faulty lightbulb—challenging but doable with the right tools. Many tutorials available at [laptop screen repair](https://computerrepairmasters.com/laptop-screen-repair-how-to-fix-common-issues-at-home) can guide you through disassembly. Be cautious to ground yourself properly to prevent static damage. If you’re unsure about opening your device, consider professional help to avoid causing more harm.
Perform Software and Firmware Diagnostics
Sometimes, the issue isn’t hardware at all but software glitches. Perform a startup in safe mode to see if the display brightens or remains dim. This process loads minimal drivers, stripping away potential conflicts. Additionally, check your BIOS settings; some laptops let you adjust display parameters at this level. If the BIOS menus display a normal brightness, but the OS does not, it suggests software issues. Remember, resetting graphics settings or performing a firmware update can resolve bugs causing dim screens. For insights on this, review our comprehensive troubleshooting resource, [here](https://computerrepairmasters.com/data-recovery-secrets-every-business-should-know-today).
Identify Power and Connection Issues
If your laptop uses an external power adapter, ensure it supplies adequate voltage. A failing power supply can result in insufficient power to maintain the backlight, especially under high load. Use a multimeter to verify the adapter’s output if you’re comfortable with hardware testing. For models with removable batteries, disconnect and hold the power button for 30 seconds to drain residual power, then reconnect and boot to see if the brightness improves. Loose or damaged internal connections, like a broken ribbon cable, can mimic hardware failure. A careful visual inspection for damaged cables or connectors is essential. If you suspect a faulty connection, [laptop screen repair](https://computerrepairmasters.com/laptop-screen-repair-how-to-fix-common-issues-at-home) guides can walk you through safe disassembly techniques.
Implement Final Fixes and Preventive Measures
Once you’ve identified the culprit—be it a driver, hardware component, or connection—you can proceed with fixing or replacing the part. For hardware repairs beyond your skillset, consider consulting professionals via our [contact page](https://computerrepairmasters.com/contact-us). Post-repair, update your drivers regularly and keep your system firmware current. Using reliable power sources and avoiding physical stress on your device prolongs your fix’s effectiveness. Additionally, consider installing monitoring tools to detect future hardware anomalies early. For sustainable protection, explore managed IT solutions [here](https://computerrepairmasters.com/managed-it-strategies-to-keep-your-business-secure-in-2025), which can alert you to hardware issues before they escalate into costly repairs.
Challenging the Status Quo in Tech Support
Many professionals and hobbyists alike operate under the assumption that managed IT services are just about outsourced technical support. However, this view often oversimplifies a complex ecosystem that, if misunderstood, can lead to costly pitfalls. It’s true that outsourcing routine maintenance can save money, but relying solely on generic support packages might mask deeper vulnerabilities. Experts like Bruce Schneier emphasize the importance of tailored security protocols over one-size-fits-all solutions, which is equally relevant in managing IT infrastructure.
Beware the Data Recovery Myth
One pervasive misconception is that data recovery is always straightforward and cost-effective. In reality, many believe that if a drive appears physically damaged, data is irretrievable. This is a dangerous oversimplification. Skilled technicians employ nuanced techniques—such as the ones described in data recovery methods for non-spinning drives—that can often salvage data without resorting to pricey hardware replacements. Jumping to conclusions or delaying recovery efforts only worsens the odds of full restoration.
Advanced Question: How can understanding the intricacies of hardware failure modes improve your chances of data recovery?
Recognizing different failure modes—like firmware corruption versus physical platter damage—enables technicians to deploy targeted solutions. As outlined in industry case studies, diagnosing whether an SSD’s issues stem from firmware corruption or physical wear profoundly impacts recovery strategies. This nuanced understanding helps in avoiding common mistakes, such as replacing entire drives prematurely or attempting generic recovery software that may do more harm than good. For comprehensive insights, refer to specialized recovery tech articles.
Laptop Screens: The Hidden Trap of Ignored Causes
People often assume a dim or flickering display is solely a backlight or inverter problem. While hardware failure is common, this overlooks the importance of driver compatibility and firmware corruption. Sometimes, a simple driver rollback or BIOS update, as discussed in troubleshooting tips for screens, can turn things around without hardware repair. Neglecting these subtler issues leads to unnecessary replacements, which could be avoided with a deeper understanding.
Common Mistakes That Set You Back
- Assuming all hardware failures are irreparable
- Relying solely on generic troubleshooting tools
- Pursuing expensive repairs without thorough diagnosis
The reality is that many problems—especially with peripherals and display issues—are repairable with proper diagnosis. For instance, clear understanding of internal cable connections can save you from costly motherboard replacements. Preventing these typical errors requires a combination of technical knowledge and cautious troubleshooting. To sharpen your skills, explore resources like DIY repair guides.
In conclusion, debunking these myths and understanding the complexity behind common issues isn’t just academic; it directly affects your success rate, costs, and downtime. Whether you’re managing business-critical IT systems or fixing a personal laptop, adopting an informed, nuanced approach saves time, money, and frustration. Have you ever fallen into this trap? Let me know in the comments.
Keeping Systems Running Smoothly: Tools I Rely On
Maintaining reliable IT infrastructure requires precision and the right equipment. I personally rely on a combination of hardware testers and software diagnostics to identify issues early. For hardware, an Fluke multimeter is indispensable for verifying power supplies and internal connections. Its accuracy helps me detect voltage irregularities that could cause intermittent failures, saving hours of guesswork. On the software side, CrystalDiskInfo has become my go-to for monitoring SSD and HDD health. It provides detailed SMART data, allowing me to predict drive failures before they happen. Using these tools regularly enables me to proactively manage systems, minimizing downtime and long-term costs.
For remote diagnostics, I trust TeamViewer because of its robust security features and ease of use. It allows me to troubleshoot client machines without physical access, which is essential for managing multiple sites. Additionally, SolarWinds Network Performance Monitor helps track network health in real time, alerting me to bottlenecks or failures before users notice. Incorporating these tools into my routine has profoundly improved the efficiency of my maintenance work.
Methodical Approach to Long-Term Reliability
Beyond tools, establishing a systematic maintenance schedule is crucial. I recommend performing quarterly hardware checks, including cleaning dust from vents and reseating connections. Regular software updates and firmware patches are equally important—they patch security vulnerabilities and fix bugs that could affect stability. Automating backups using reliable solutions like Veeam or Acronis Backup ensures data integrity, especially if hardware issues do arise. Having a comprehensive asset inventory categorized by device age and condition helps prioritize replacements and upgrades, reducing unexpected failures.
Adopting a monitoring strategy—such as setting alerts for temperature spikes or disk errors—can catch problems early. This approach aligns with best practices recommended by industry experts like those at managed IT services strategies for 2025, where predictive maintenance minimizes disruptions and extends equipment lifespan.
How do I maintain effective oversight of my IT environment over time?
The key is leveraging both hardware diagnostics and proactive management software to get an early warning of potential failures. Combining real-time monitoring with scheduled physical inspections creates a layered defense against downtime. As technology progresses, incorporating AI-powered analytics into your monitoring tools will only enhance predictive capabilities. The future points toward more autonomous maintenance setups, which can anticipate issues before they manifest clinically, drastically reducing troubleshooting time and operational costs.
For those interested in upgrading their maintenance routines, I highly recommend exploring comprehensive management platforms like the one discussed in effective managed IT solutions for growing companies. Implementing these strategies today positions your systems for high availability and resilience well into the future.
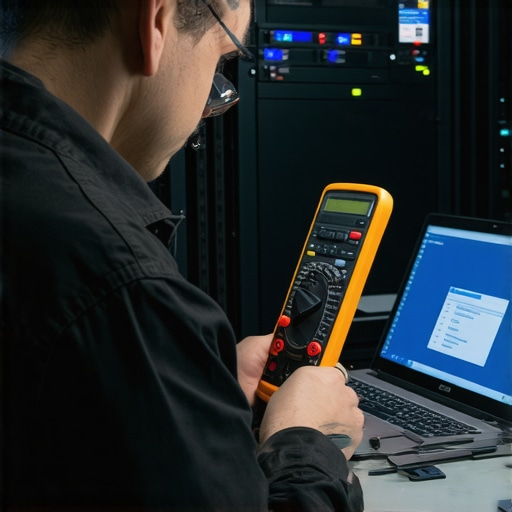
Image illustrating a technician using a multimeter and diagnostic software on a server rack, emphasizing precision tools in maintenance.
What I Wish I Knew Before Wrapping Up a Repair
One of the most valuable lessons I learned is that diagnosing hardware issues isn’t always as straightforward as replacing parts. Sometimes, a dim screen isn’t due to a faulty backlight but software conflicts or driver glitches that silently cause the problem. Avoid jumping to hardware replacements prematurely—trust your diagnostic instincts and use the right tools to identify the root cause. This approach saves time and money and deepens your understanding of device internals.
Another insight is that firmware updates and BIOS configurations often fly under the radar but can resolve stubborn display issues. In my experience, keeping system firmware current and adjusting BIOS settings can breathe new life into a malfunctioning display without hardware fixes. Regularly reviewing these areas during troubleshooting sessions is a habit I highly recommend.
I’ve also realized that proactive monitoring prevents many disasters. Tools like SMART monitoring for drives cascade early warnings, allowing timely intervention before data becomes unrecoverable. Embedding these practices into your routine elevates your repair game from reactive to preventative, ultimately protecting your digital assets.
My Go-To Arsenal for Efficient Repairs
When tackling hardware and software snags, I rely on trusty tools like the Fluke multimeter for precise power measurements. It’s invaluable in verifying power consistency, especially when suspecting hardware failures.
For drive diagnostics, CrystalDiskInfo has been my go-to for early detection of impending drive failures, thus avoiding catastrophic data loss.
Additionally, I incorporate remote diagnostic platforms like TeamViewer to troubleshoot client machines across locations seamlessly, maintaining efficiency without sacrificing accuracy.
Lastly, firmware and BIOS update utilities provided by hardware manufacturers keep me ahead of compatibility issues. Staying current with these updates has consistently helped me avoid hardware glitches that might cause dim displays or freezes.
Fuel Your Passion: Fixing Is Just the Beginning
Remember, every challenge you overcome deepens your expertise and builds resilience. When you face that stubborn laptop display or data recovery puzzle, see it as an opportunity to grow. Each successful fix not only restores functionality but also sharpens your skills—a rewarding journey worth pursuing.
Continue exploring, questioning, and learning. Share your experiences in the comments—what unexpected fix taught you the most? Together, we elevate our craft and turn troubleshooting into mastery.