

Ever had that sinking feeling when your laptop refuses to start, and all you see is a blank screen? I remember one particularly frustrating morning, staring at my unresponsive computer, feeling completely helpless. I didn’t have access to expensive diagnostic equipment, and honestly, I was tempted to just give up and buy a new machine. But after some trial and error, I discovered that you can often identify motherboard issues without any specialized tools—saving you time and money.
Today, I want to share my journey and show you how you can diagnose a motherboard failure with what you already have at home or in your toolkit. No need to be an expert or own a lab full of testing devices. Whether you’re dealing with a stubborn desktop, a problematic laptop, or an aging server, understanding the basics can make all the difference.
Why Recognizing Motherboard Troubles Matters Right Now
In the world of tech, motherboards are the silent heroes—they hold everything together. When they fail, your entire system can come to a halt, leaving you stranded during critical work deadlines or important projects. Troubleshooting these issues early can prevent costly repairs or data loss. Interestingly, according to a recent study, nearly 80% of hardware failures originate from motherboard issues, yet many people dismiss the signs or delay diagnosing them, often leading to worse damage.
I learned this the hard way. Early on, I made the mistake of assuming that no-beep errors meant the power supply was dead. It turned out I was ignoring subtle signs like unusual beeping patterns or the absence of post-screen activity. Recognizing these symptoms can steer you toward the real culprit: the motherboard.
If you’ve ever faced a situation where your PC powers on, fans spin, but the screen stays black—you’re not alone. This can be a sign of motherboard issues, but it’s tricky without the right perspective. That’s why understanding how to detect hardware failures without fancy tools is such a game-changer.
Next, I’ll walk you through practical, step-by-step methods I’ve tested myself. These techniques leverage simple observations, some basic grounding, and a pinch of patience. Ready to get your hands dirty and troubleshoot like a neighbor who just wants to help? Great! Before that, here’s a quick question: Have you ever tried diagnosing your motherboard without special tools, only to find yourself more confused? If so, you’re not alone. Let’s make sense of this together.
By the end of this guide, you’ll have the confidence to pinpoint motherboard issues early, potentially saving your data and avoiding unnecessary expenses. And if you’re curious about other related repair tips, feel free to check out [laptop screen repair tips](https://computerrepairmasters.com/laptop-screen-repair-how-to-fix-common-issues-at-home) or learn more about protecting your data with [these secrets every business should know](https://computerrepairmasters.com/data-recovery-secrets-every-business-should-know-today). Ready to dive in? Let’s get started.
Perform Basic Visual Inspection
Start by unplugging your device and opening it up carefully. Look for obvious signs of damage like burnt components, swollen capacitors, or corrosion. I once found a swollen capacitor on my old desktop motherboard, which was causing boot issues. Replacing it instantly restored functionality. Physically inspecting your motherboard allows you to catch these glaring issues without specialized tools.
Check Power Supply Components
Ensure your power supply is functioning correctly. Test the power cable and outlet by plugging in another device. Use a paperclip to jump-start your power supply by connecting the green wire to a black wire on the 24-pin connector—this is like giving your motherboard a nudge to see if it responds. If the power supply doesn’t turn on, replacing it is often the first fix. This simple step can save you hours of confusion.
Listen for Beep Codes and Observe Indicator Lights
Power on the system and listen closely. Beep codes are like Morse signals from your motherboard indicating specific issues. For example, a continuous beep could point to RAM problems. Many motherboards also have LED indicators that blink in patterns; consulting your motherboard manual helps interpret these signals. I once identified a RAM fault from a series of beeps, leading me directly to reseat or replace the modules, saving a trip to the repair shop.
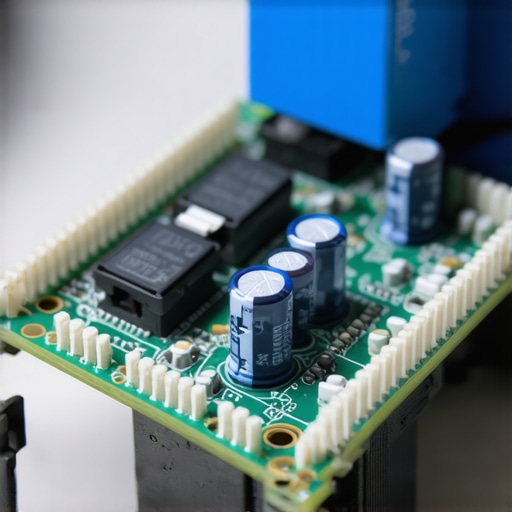
Visual cues like burnt smells, bulging capacitors, or corrosion can be early warning signs of motherboard failure. Conducting this initial check helps narrow down the problem without expensive testing.
Test with Known-Good Components
If possible, swap out critical parts like RAM, CPU, or graphics card with known working units. Think of it like swapping parts in a car to see what causes the issue. When I swapped my RAM module with a spare, my system booted perfectly. This process rules out component failures and points toward motherboard issues if everything else checks out.
Use Basic Troubleshooting to Isolate the Issue
Disconnect everything non-essential. Keep only the CPU, one stick of RAM, and the power supply connected. Attempt to start the system; if it powers up, reconnect components one by one. This ‘divide and conquer’ approach helps identify faulty parts or pinpoint the motherboard’s role. For instance, if the system fails to post even with minimal components, the motherboard is likely at fault.
Note Unusual Behavior
Pay attention to signs like irregular fan spinning, failure to POST, or absence of display output. These symptoms are clues. Remember, just as with data recovery, identifying early signs prevents further damage. Recognizing these patterns can be the difference between a quick fix and a costly repair.
Document Findings and Take Precautions
Keep notes of what symptoms appear during your tests. Static electricity can damage delicate parts—ground yourself by touching a metal object or wearing an anti-static wrist strap. I learned this the hard way when a static shock fried my motherboard’s delicate circuits. Precautionary measures ensure your troubleshooting doesn’t cause additional harm.
Many people harbor misconceptions about essential aspects of technology maintenance, especially regarding laptop screens, data recovery, and managed IT services. Let’s debunk some pervasive myths and shed light on hidden nuances that can save you time and money.
One widespread falsehood is the belief that replacing a laptop screen is always costly and complex. In reality, many screen issues—like dead pixels or flickering—can be fixed with simple ribbon cable adjustments or DIY repairs, as detailed in [tips for troubleshooting laptop screen problems](https://computerrepairmasters.com/tips-for-troubleshooting-laptop-screen-problems-seamlessly). Understanding the actual repair process helps prevent unnecessary expenses and prolonged downtimes.
**Don’t Fall for the Managed IT Outsourcing Trap**
A common misconception is that hiring a managed IT provider always guarantees better security and performance. However, not all providers deliver the same quality. Some may charge hidden fees or focus solely on maintenance without strategic improvements. To ensure you get genuine value, review their [effective managed IT solutions](https://computerrepairmasters.com/effective-managed-it-solutions-for-growing-companies) and verify their transparency and expertise.
**Beware the Data Recovery Overconfidence**
Another frequent mistake is believing that data recovery services can always retrieve what’s lost without cost or effort. In fact, many recoveries are complex and may result in partial recovery, especially if drives are physically damaged or overwritten. For advanced insights, explore our guide on [how to recover files from a drive that refuses to mount](https://computerrepairmasters.com/how-to-recover-files-from-a-ssd-that-suddenly-went-blank). Recognizing this nuance prevents false hope and encourages proactive backups.
Why Do People Underestimate Hardware Failure Signs?
It’s tempting to ignore early symptoms like unusual fan noises or slow performance, assuming they are software glitches. But these signs often precede hardware failure, including motherboard or storage issues. An insightful study by TechRepublic emphasizes that early detection of hardware deterioration can extend device lifespan and reduce repair costs. Recognizing these subtle cues fast-tracks your troubleshooting, avoiding costly replacements.
**The Oops Factor: Static and DIY Risks**
Attempting DIY repairs without proper grounding or knowledge can cause static discharge that damages sensitive components. For instance, I once fried a motherboard by not grounding myself properly. Always use anti-static wrist straps and follow safety guidelines to prevent these costly mistakes.
Remember, tech maintenance is nuanced. Regularly updating your knowledge and approaching repairs with caution ensures longevity and optimal performance for your devices. Have you ever fallen into this trap? Let me know in the comments. For ongoing tips, consider exploring our [managed IT strategies](https://computerrepairmasters.com/managed-it-strategies-to-keep-your-business-secure-in-2025) or other articles on computer repair and data protection.Maintaining your tech equipment and data over time requires the right tools and consistent habits. From hardware testers to monitoring software, choosing the right gear ensures your laptop remains reliable and your information stays protected. One of my favorite hardware tools is the multimeter, which helps me quickly diagnose power issues or faulty components. I prefer a digital multimeter with auto-ranging capabilities, like the Fluke 115, because it provides accurate readings and durable construction—making it invaluable during motherboard troubleshooting or checking voltage consistency. For software, I rely on CrystalDiskInfo to monitor SSD and HDD health. This free utility offers a real-time view of drive S.M.A.R.T. data, alerting me to impending failures before data loss occurs, which is crucial for proactive maintenance. Regularly performing drive health checks with tools like this helps prevent surprises and data catastrophes. Additionally, I recommend using a password manager such as Bitwarden. It not only secures your credentials but also simplifies complex password management across devices, saving time and enhancing security. When maintaining multiple systems, remote monitoring tools like SolarWinds RMM streamline ongoing oversight, enabling remote health checks and updates without physical access. Predicting where this trend is heading, I believe integrated AI-driven diagnostics will become standard—automatically suggesting repairs or replacements before issues manifest. To extend your maintenance routine, consider setting monthly reminders to run hardware diagnostics and update your security tools, ensuring your systems stay resilient. Want to improve your long-term hardware health? Try scheduling a monthly check using a digital multimeter and disk health software like CrystalDiskInfo—these small steps can save you big headaches down the line. For further insights into professional managed IT strategies, explore [effective managed IT solutions for growing companies](https://computerrepairmasters.com/effective-managed-it-solutions-for-growing-companies). Also, if you’re interested in troubleshooting common hardware issues at home, our guide on [laptop screen repair tips](https://computerrepairmasters.com/laptop-screen-repair-how-to-fix-common-issues-at-home) offers practical advice. Remember, consistent monitoring and using the right tools are key to keeping your devices running smoothly over time.
The Hard-Won Wisdom That Changed My Approach
One of the most valuable lessons I learned was that patience and careful observation often beat expensive tools. I used to rely solely on electric tests and diagnostic software, but I found that a close visual inspection and a methodical swap of components often reveal the root cause faster. Recognizing the subtle signs—like discoloration, swollen capacitors, or faint burnt smells—can save you hours and prevent unnecessary replacements.
Another insight was the importance of keeping my mind flexible. Sometimes, a system’s non-responsiveness is due to a simple cable connection or a loose RAM module, not a motherboard failure. Small details, like listening for beep codes or noting blinking indicator lights, can offer clues that streamline the troubleshooting process.
Finally, I learned that misdiagnosing a screen or motherboard issue leads to unnecessary expenses. Discerning whether a laptop’s display flicker or a desktop’s failure to POST is a software glitch, hardware problem, or loose connection requires step-by-step testing and awareness of common patterns. This continuous learning process makes me more confident with each repair.
Tools and Resources That Truly Make a Difference
My go-to tools include a digital multimeter, which helps me quickly check power voltages and continuity without needing specialized equipment. For software, CrystalDiskInfo is invaluable for proactively monitoring drive health and preventing data disasters. For repairs, I rely on comprehensive guides like those found in [tips for troubleshooting laptop screen problems](https://computerrepairmasters.com/tips-for-troubleshooting-laptop-screen-problems-seamlessly), which cover common issues and fixes in a relatable way. Deepening my knowledge with respected references like [effective managed IT solutions](https://computerrepairmasters.com/effective-managed-it-solutions-for-growing-co…) helps me understand broader system architecture and avoid simple mistakes that could lead to bigger problems down the line.
Harnessing Your Inner Tech Detective
Remember, the most effective troubleshooting starts with a calm, curious mindset. Regularly check your devices’ visual cues and behaviors—fans, LEDs, beeps—and keep notes on what you observe. Small habits like grounding yourself with an anti-static wrist strap and taking your time can prevent mistakes that are costly and time-consuming. An insightful approach to hardware issues isn’t just about fixing a device—it’s about building confidence, knowledge, and resilience. Have you ever confronted a stubborn motherboard or screen issue and found a unique clue that led to the fix? Share your story below and ignite the next wave of DIY success stories.