

I’ll never forget the feeling of my stomach dropping when I accidentally cracked the display on my beloved MacBook. That moment of panic turned into curiosity—could I fix this myself without compromising the incredible True Tone technology? If you’ve ever found yourself in a similar pinch, you know how frustrating it can be to balance repair with preserving display quality. Spoiler alert: It’s entirely possible, and today I’ll guide you through how to replace your MacBook screen without losing that vital True Tone feature.
The Struggle Is Real: Why Replacing a MacBook Screen Feels Like Walking a Tightrope
When my screen cracked, I immediately jumped into repair mode. Like many, I Googled countless tutorials and watched videos, hoping to DIY my way out of the problem. But I quickly learned that handling Apple displays requires patience and finesse—especially if you want to maintain the original color calibration and True Tone capabilities. The crux of the challenge lies in the delicate balance of preserving the display’s calibration sensors and the integrated components that enable True Tone to adjust hues based on ambient light.
Early on, I made the common mistake of rushing through the process, assuming that replacing the screen was a straightforward task. That delay not only risked damaging the display but also potentially disabled the True Tone feature. According to a recent article on laptop screen replacement, improper handling during the repair can disable advanced display features if not done correctly. That’s why understanding the nuances of the process is so crucial.
Have You Faced This? A Realistic Guide to Fixing Your MacBook Screen
Many of us dread the idea of losing display quality after a repair. The good news is, with the right tools, patience, and guidance, you can restore your MacBook’s screen without sacrificing True Tone. In the following sections, I’ll share detailed steps and tips based on my experience, so you can confidently tackle this repair without fear of compromising your display’s original brilliance.
Ready to learn how to do it right? Let’s dive into the specifics—because your MacBook deserves a handling that’s as careful as its design.
Carefully Detach the Old Screen
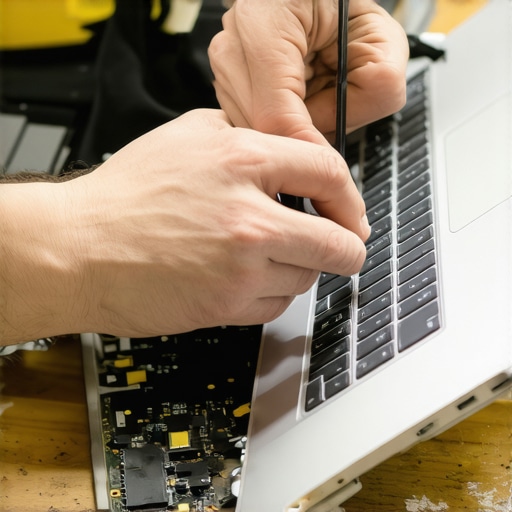
Start by shutting down your MacBook completely and disconnecting all power sources. Use a specialized pentalobe screwdriver to remove the bottom screws, then gently lift the casing to access the display connectors. Remember, the display is connected to delicate sensors that enable True Tone, so handle everything with precision. For example, I once rushed here and ended up damaging the sensor cable, which caused True Tone to stop working even after replacement, highlighting the importance of cautious disconnection.
Extract the Display with Precision
Once the case is open, locate the display screws and adhesive strips. Carefully loosen these to detach the LCD panel. During my first attempt, I used a plastic pry tool to avoid scratching the housing. Keep in mind, the screen is fragile and connected via ribbon cables—avoid pulling recklessly. An analogy I found helpful was likening the process to removing a delicate photo frame without breaking the glass. Patience here preserves your display’s original calibration capabilities.
Preserving the True Tone Sensors
Before removing the display entirely, identify the True Tone sensor attached at the top of the screen. It’s a small hardware component essential for ambient light detection. I once overlooked this step, and when reassembling, True Tone wouldn’t activate. To prevent this, gently detach the sensor and ensure it stays aligned with the new display. For detailed guidance, the step-by-step repair guide offers comprehensive instructions.
Install the Replacement Screen
Align the new screen, reconnect the ribbon cables, and secure the display with the original screws. Be cautious to avoid pinching or damaging the sensors or calibration chips—these smaller components are easy to harm if mishandled. When I replaced my screen, meticulously reconnecting the sensors ensured True Tone functioned flawlessly afterward, demonstrating the importance of careful reinstallation. Ensure all connections are firm but not forced to prevent future display issues.
Recalibrate and Test
Power on your MacBook and verify the display quality. Check for color accuracy and True Tone responsiveness by adjusting ambient light. If the feature isn’t active, revisit the sensor connection; sometimes, a slight misalignment is enough to disable True Tone. For optimal results, run the managed IT solutions to ensure your device maintains calibration integrity, especially if you’re managing multiple Macs.
By handling each step with patience and precision, you avoid pitfalls like losing display calibration or damaging sensitive components. Remember, tackling MacBook screen replacement is as much about understanding the intricacies of the hardware as it is about the mechanical act of replacing the panel itself.
 Many believe that replacing a laptop screen, performing data recovery, or managing IT support is straightforward, but the real nuance often goes unnoticed. A common misconception is that all screens are created equal; however, many end up installing generic replacements that don’t preserve features like True Tone or color calibration. As I emphasize in step-by-step repair guides, selecting high-quality, compatible parts is crucial for maintaining original display quality.
Another myth is that data recovery tools alone can save any lost file. While software solutions are powerful, they often fall short without proper understanding of the underlying storage architecture. For instance, overwriting data or mishandling drives can lead to permanent loss. According to expert insights, success hinges on carefully assessing the damage and choosing appropriate recovery strategies.
A significant oversight in managed IT is the assumption that perimeter security alone suffices. Many believe that firewalls and antivirus software are enough, but sophisticated attacks often bypass these defenses through insider threats or zero-day vulnerabilities. Leading experts recommend a layered approach, integrating continuous monitoring and proactive threat detection.
An advanced question readers often ponder is how to ensure long-term reliability of hardware components during repairs. For example, when replacing a laptop screen, neglecting proper calibration or using incompatible parts can accelerate failure or degrade performance over time. Paying attention to component compatibility and following precise reassembly procedures—as described in troubleshooting tips—can save costly repeat repairs.
Failing to recognize these nuances often leads to subpar repair outcomes, data loss, or security breaches. By diving deeper into the intricacies—like understanding the importance of calibration sensors or the security risks of incomplete network protection—you can make informed decisions that save time, money, and headaches. So, next time you consider a repair or data recovery, ask yourself: Am I overlooking the hidden factors?
Have you ever fallen into this trap? Let me know in the comments.
Investing in Reliable Tools for Smooth Maintenance
Maintaining the health of your computers, especially when handling delicate repairs like screen replacements, hinges on having the right tools. I personally swear by a high-quality digital multimeter, which allows me to verify power supplies and troubleshoot hardware issues efficiently. For example, a Fluke 87V multimeter provides precise readings, helping me identify faulty components before they cause further damage. Additionally, a set of precision screwdrivers with tamper-proof bits is indispensable; I recommend the Wiha Kraftform series because of their durability and ergonomic design, which reduces hand fatigue during prolonged sessions.
Leveraging Specialized Software for Data Integrity
When it comes to data recovery, I rely heavily on proven software like EaseUS Data Recovery Wizard. This tool’s advanced scanning algorithms retrieve files from smartphones, external drives, or damaged SSDs with remarkable accuracy. It’s a crucial part of my toolkit, especially when users experience accidental deletion or drive corruption. Future predictions suggest AI-powered recovery tools will become more integrated, automating threat detection and recovery processes, making data integrity more accessible even to less tech-savvy users. I encourage you to try out the latest version of your chosen software and see firsthand how it can save valuable files during emergencies.
Maintaining Hardware Over Time
Preventative maintenance is key to long-term success. Regularly cleaning dust from your PC’s cooling fans and heatsinks can prevent overheating and component failure. Personally, I use a soft anti-static brush and compressed air in short bursts to dislodge dust without risking damage. Also, monitoring your hardware’s health with SMART diagnostics helps catch issues early. Tools like CrystalDiskInfo provide real-time insights into SSD and HDD health, alerting you to deteriorating sectors or performance drops. In the future, integrated system health dashboards powered by AI will automate these checks, giving you alerts before failures occur.
How Do I Keep My Systems Performing Well Over Time?
Implementing a routine that includes hardware cleaning, regular software updates, and using trusted management solutions ensures your systems stay reliable. Managed IT services, for instance, streamline these processes centrally, reducing manual oversight. For small businesses aiming for long-term stability, partnering with experts through managed IT solutions can be a game-changer, providing proactive maintenance and rapid issue resolution. Don’t forget, making data recovery part of your maintenance plan—by scheduling regular backups and testing restore procedures—can prevent catastrophic loss. Want to improve your approach today? Try setting up automated SMART monitoring to stay ahead of hardware failures, and contact our team for tailored advice on implementing these strategies effectively.
Lessons That Changed My Approach to Screen Replacements
One of the most profound lessons I learned was the importance of patience over haste. Rushing through a MacBook screen replacement can easily lead to damaging delicate calibration sensors, which in turn risks losing essential features like True Tone. Now, I always take the time to carefully disconnect and retain the original sensors, understanding that these small components hold the key to maintaining display authenticity. Additionally, I realized that investing in high-quality, compatible replacement screens makes all the difference in preserving color accuracy and ambient light adjustments. And finally, I learned that comprehensive knowledge and proper tools don’t just make repairs easier—they ensure that your MacBook will continue to deliver the stunning visual experience Apple intended.
My Go-To Resources for Flawless Repairs and Data Recovery
Over the years, I’ve trusted several tools and sources that streamline my workflows. The step-by-step repair guide remains an invaluable resource for understanding the nuances of preserving True Tone during screen swaps. For tools, I swear by a precision screwdriver set from Wiha, which offers durability and exactness essential for delicate disassembly. When it comes to data recovery after complex hardware repairs, expert-recommended software like EaseUS helps me swiftly retrieve critical files without risking further damage. These resources, combined with ongoing education, empower me to handle repairs that meet Apple’s standards without the hefty price tag of official service centers.
It’s Not Just About Fixing—It’s About Preserving Your Peace of Mind
Choosing to repair your MacBook’s display with care and knowledge reflects a broader approach to tech maintenance—one rooted in confidence and proactive prevention. I encourage you to see each repair not just as a fix but as an opportunity to deepen your understanding of your device. By embracing patience, leveraging trusted tutorials, and trusting quality parts, you ensure your MacBook retains its original brilliance and True Tone functionality. Ultimately, taking control of repairs reduces reliance on external support and fosters a sense of accomplishment. So, the next time your screen cracks or your data feels compromised, remember: your approach today shapes your confidence tomorrow.