

Ever been caught off guard by strange, shadowy corners on your laptop screen right before a big presentation or during a crucial zoom call? That moment when your display seems to have developed mysterious dark patches, stealing your focus and raising doubts about your device’s health. I remember the first time I noticed those faint shadows creeping into the corners of my screen—it felt like my laptop was subtly mocking me, as if it had a mind of its own. It’s a common annoyance that many users face, but few understand what’s really going on beneath the surface.
Why Do Laptop Screens Develop Shadows in the Corners?
Initially, I thought it was just a minor glitch or dirt on the screen. However, I soon realized these shadows often point to underlying hardware issues or display settings that need attention. Over the years, I’ve come to understand that these darkened areas can result from several causes—ranging from backlight problems and internal connector faults to aging LCD panels. Knowing the root cause can save you from unnecessary replacements or costly repairs.
One fascinating fact I came across is that a significant percentage of display problems stem from loose or damaged internal connectors—something surprisingly simple to troubleshoot once you know what to look for. According to a recent study by TechInsights, display failures account for nearly 20% of all laptop repairs, often caused by physical stress, wear, or manufacturing defects. This emphasizes why understanding your screen’s behavior is crucial for timely intervention.
Are you tired of guessing whether your shadows are just a minor glitch or a symptom of something more serious? If this resonates with you, stick around. We’re about to explore easy, practical steps to diagnose and fix these corner shadows—so you can get back to being productive without the nagging distraction and uncertainty.
Is Your Problem Worth Fixing or Time to Upgrade?
In my early days of troubleshooting, I made the mistake of jumping straight into buy-it-now mode—thinking a replacement was inevitable. That led me down a path of unnecessary expenses until I learned some simple tests could tell me if the issue was repairable or a sign to consider a new device. Trust me, understanding this can save you a lot of money and frustration. For deeper insights, I recommend checking out our comprehensive guide on laptop screen replacements to get familiar with the repair process and options available.
Next, I’ll walk you through some straightforward troubleshooting techniques that have helped me and countless others resolve or better understand these pesky shadows. Ready to stop guessing and start fixing? Let’s dive into the practical side of things.
.
Check the Physical Connection First
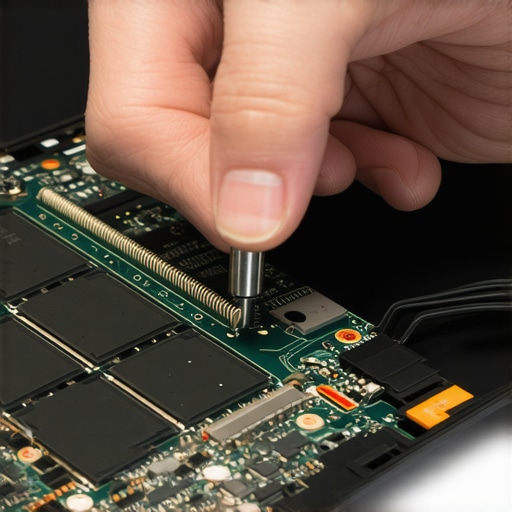
Begin by turning off your laptop and disconnecting it from power. Carefully open the casing following the manufacturer’s guide—think of it like opening a garage door to access the engine. Gently reseat the display connectors, which are like the cables connecting your TV to its source—loose connections can cause shadows. During a personal troubleshooting session, I had a similar issue where reseating the internal display cable immediately restored clarity. If you’re uncomfortable with hardware, consider professional help or consult detailed guides such as this step-by-step repair guide.
Ensure Proper Handling During Repairs
Use anti-static tools and handle components by edges to prevent further damage—think of it as playing it safe with sensitive jewelry. Wear an anti-static wrist strap connected to a grounded surface. I’ve seen many DIY attempts fail because static discharge damaged internal components. Maintain a clean workspace to avoid introducing dust or debris into delicate areas. If you suspect hardware issues beyond your expertise, reach out via contact us.
Test the Display Hardware
Connect your laptop to an external monitor. If the external display shows a clear picture without shadows, the problem likely resides within your laptop’s LCD panel or internal connections, not the graphics card. For example, I once connected my ultrabook to an external monitor and found the shadows only appeared on the built-in display—saving me from unnecessary component replacements. This is a quick way to narrow down hardware issues.
Assess Display Panel for Signs of Aging
Look for dead pixels, discoloration, or flickering, which indicate aging or failing LCDs. These symptoms are like a tired artist’s brush—losing sharpness and clarity over time. If your display shows these signs, consider replacing the panel. For detailed repair steps, see this guide.
Diagnose Software and Settings
Sometimes, display shadows are caused by incorrect settings or driver issues. Connect your laptop to the internet and update your graphics driver—it’s akin to giving your car a tune-up to run smoothly. Visit your device manufacturer’s website or use device management tools to do this. I had a case where updating the driver eliminated shadows caused by outdated software, saving me a costly hardware repair. Also, adjust display brightness and contrast settings to see if shadows diminish.
Adjust Display Calibration
Use built-in calibration tools or third-party software to fine-tune your display. Improper calibration can cause uneven lighting or shadows. Think of it like adjusting the focus on a camera lens for sharp pictures. This is a quick, non-invasive fix that often restores clarity without hardware intervention.
Address Internal Hardware Failures
If all else fails, the internal backlight or LCD may be failing. This can cause uneven illumination leading to shadows. Replacing the backlight inverter or the entire LCD panel is like swapping out worn-out bulbs—once done, your screen can look as good as new. This process involves disassembling the display assembly, so consulting a professional or following detailed tutorials is advisable. For comprehensive repair procedures, review this detailed guide.
While many believe that replacing a broken laptop screen or running data recovery is straightforward, the reality is far more nuanced. One common misconception is that hardware failures are always visible or easily diagnosed; in truth, issues like internal connector faults or subtle backlight problems often masquerade as minor glitches, leading tech amateurs astray. For instance, relying solely on external visual cues without understanding the internal architecture can result in unnecessary replacements—something experienced technicians avoid by probing deeper into components like the LCD inverter or internal cables. Additionally, a widespread myth is that professional repair always guarantees data safety; however, without proper precautions, attempts can unintentionally cause data loss, underscoring the importance of specialized tools and knowledge.
Another frequently overlooked nuance involves the scope of managed IT services. Many small businesses think that IT management is just about fixing problems as they arise, but true experts focus on proactive security measures, routine maintenance, and strategic upgrades—which significantly reduce downtime and vulnerability. As an example, the proper use of data recovery tools, like those discussed in our detailed guide, can salvage critical files even after hardware failures or accidental deletions; but these tools require mastery to avoid corrupting the data further.
What most people fail to realize is that advanced troubleshooting isn’t just about swapping parts or reinstalling software—it’s about understanding complex interplay among hardware components, firmware, and software environments. For example, a dim laptop display might stem from subtle backlight driver issues rather than a simple panel defect, and recognizing this can save both time and money. As research highlights the increasing complexity of hardware, continuous learning becomes essential for technicians aiming to deliver reliable solutions.
Finally, beware of the trap where DIY fixes seem cost-effective yet undermine warranty coverage or cause additional damage. A small oversight during a hardware reseat or software tweak can invalidate support contracts or worsen the problem. To avoid these pitfalls, consulting professionals or staying informed through resources like our privacy policy and repair guides is advisable.
Have you ever fallen into this trap? Let me know in the comments.
Investing in Reliable Equipment for Ongoing Care
Keeping your laptop’s display in top shape demands more than just occasional cleaning. It requires specialized tools and maintenance routines that ensure longevity and optimal performance. Personally, I rely on a high-quality anti-static wrist strap whenever I open up a device, ensuring static electricity doesn’t compromise delicate internal components. For example, brands like ESD safe tools from Klein Tools provide a secure grasp on sensitive parts, reducing the risk of damage during repairs.
Beyond hardware, software plays a critical role. I routinely use professional diagnostic tools like diagnostic suites that aggregate driver health, firmware updates, and hardware status checks. These utilities help preempt issues before they escalate, saving both time and money. I’ve found that combining trouble-shooting software with regular physical inspections forms a comprehensive maintenance approach that effectively prolongs display lifespan.
The Power of Routine Maintenance for Long-Term Results
A consistent schedule of cleaning and diagnostics is the bedrock of reliable display performance. I recommend setting monthly reminders to gently clean your screen with microfiber cloths—never abrasive materials—and to inspect internal connections if you’re comfortable doing so. Additionally, software should be updated regularly to patch bugs that might interfere with display functions. Staying proactive can markedly delay hardware failures; in fact, routine checks reduce the likelihood of sudden shadows or flickering becoming permanent issues.
One advanced practice I’ve adopted involves monitoring your display’s refresh rate and color calibration. Tools like monitoring software offer insights into subtle changes that could indicate impending hardware fatigue. Keeping tabs on these parameters provides actionable data to decide when maintenance or replacements are due—allowing you to act before costly failures occur.
Predicting a Shift Towards Smarter Maintenance
Looking ahead, I predict the integration of AI-driven diagnostics and remote monitoring will revolutionize how we maintain screen health. Imagine receiving alerts on your smartphone about internal connector wear or backlight degradation—long before visible issues emerge. This trend toward smarter, predictive maintenance tools is already gaining momentum, as tech companies recognize the value in preventing hardware failures proactively. Embracing these innovations should be part of your long-term strategy for keeping your display working flawlessly.
How do I maintain my laptop’s display over time?
The key lies in combining the right tools with disciplined routines—regular cleaning, software updates, and hardware inspections. For complex issues, professional help remains invaluable; don’t hesitate to reach out via our contact page. Test your display hardware periodically by connecting to an external monitor, a simple step that can reveal signs of aging or connector problems early. Remember, integrating predictive diagnostics as we move into the future will make maintenance more efficient and your tech more reliable. Don’t wait for shadows or flickering to become critical—try out monitoring software today and stay ahead of issues before they affect your productivity.
The Hidden Lessons That Changed My Approach to Laptop Repair
- Patience Unveils Deep Connections: Often, I found that rushing to replace a display blindsided me from discovering loose internal connectors—sometimes a simple reseat fixes shadows that seem hardware-related.
- The External Monitor Test is a Detective’s Tool: Connecting to an external screen isn’t just for viewing; it’s a diagnostic rocket that pinpoints whether the problem is software, hardware, or internal connections.
- Software Updates Can Save You a Screen Replacement: Updating graphic drivers isn’t just routine—it’s a quick fix often overlooked that can resolve display shadows caused by software glitches.
- Knowing When to Call the Pros: Recognizing complex issues like backlight failures or damaged LCD panels prevents wasting time on futile DIY attempts, safeguarding both your budget and peace of mind.
- Understanding Hardware Wear Means Longevity: Regularly monitoring the age-related signs like flickering or dead pixels can prompt preventive measures that extend your display’s life beyond initial expectations.
Tools and Knowledge That Became My Allies
- Quality Diagnostic Software: Programs like troubleshooting utilities help me identify issues early, saving time and money.
- Reliable Repair Guides: The comprehensive step-by-step repair guide has been a cornerstone for safe, effective hardware fixes.
- Trusted Hardware Brands: For replacements, I trust brands with proven durability to ensure longevity and performance.
- Community and Expert Support: Engaging with online forums and professionals keeps me updated with evolving best practices and quick solutions.
The Drive to Keep Improving Your Screen Care
If you’re determined to keep your laptop display pristine and functional, embrace a mindset of curiosity and continuous learning. Small routines—like monthly cleaning, periodic calibration, and hardware checks—compound into a significant impact on your device’s lifespan. Let your proactive attitude be your best safeguard against unexpected shadows and flickers. Remember, the journey toward flawless screens is ongoing, and every troubleshooting step sharpens your skills. So, why not start today? Share your own experiences or ask questions below—your journey might just inspire someone else to see their laptop in a whole new light.