

Ever experienced that sinking feeling when your laptop refuses to turn on, and suddenly those high-priority files seem out of reach? I remember the first time I faced this nightmare—my heart pounding as I realized the crucial presentation, irreplaceable family photos, and vital documents were trapped inside a lifeless machine. It was a lightbulb moment for me—if only I knew how to pull those files without powering up the device.
Why Suffering a Dead Laptop Doesn’t Mean Losing Everything
Many folks assume that once a laptop won’t boot, the data is forever lost. That simply isn’t true. Modern data recovery techniques allow you to access your files even when your computer stubbornly refuses to turn on. This realization transformed my approach and saved me countless times since. According to a report from Statista, over 60% of data loss is accidental or hardware-related, emphasizing the importance of knowing how to recover files from non-booting devices.
Is Overcomplicating Data Retrieval Actually Worth the Hype?
Initially, I made the mistake of rushing to replace hardware or professional services without trying simpler recovery steps myself. It often led to unnecessary costs and delays. Starting with basic troubleshooting not only saves money but also gives you insight into your device’s health. If you’ve faced a similar dilemma, you’re not alone—many discover that bulk of data can be retrieved without expert intervention, provided they follow the right steps. For more detailed tips, you can check out this comprehensive guide.
Now, let’s dive into the practical methods that can help you rescue your essential files from a dead or unresponsive laptop. No miracle required—just some patience and the right knowledge.
میرید شروع کنیم!
Disconnect the Laptop and Prepare Your Workspace
Start by turning off the laptop and disconnecting all power sources. Place the device on an anti-static mat or a clean, static-free surface. Gather essential tools such as screwdrivers, an external drive enclosure, or a USB-to-SATA adapter. Remember, handling internal components can be delicate—think of it like working on a vintage car engine, where precision matters.
Remove the Storage Drive Carefully
Identify and Access the Drive
Open the laptop case following manufacturer instructions or online repair guides. Locate the storage drive—usually a 2.5-inch SATA SSD or HDD. It’s akin to finding the trunk of your car; once located, disconnect it gently using appropriate screwdrivers. If uncertain, consult troubleshooting tips for specific models.
Detach the Drive with Caution
Once accessible, remove the drive carefully, avoiding contact with circuit components. Think of it like unplugging an old stereo; gentle handling prevents damage. Keep the drive in an anti-static bag if you aren’t immediately connecting it to your recovery setup.
Connect the Drive to a Working Computer
Use a USB-to-SATA adapter or an external enclosure to connect your drive to a healthy computer. This is like plugging a spare oxygen mask into a life support system—restoring access to vital data. Once connected, the drive should appear as an external disk in your operating system.
Launch Data Recovery Software
Utilize reputable recovery tools such as Recuva, EaseUS, or Stellar Data Recovery. These are like skilled rescue teams, sweeping through the drive to find recoverable files. Install and run the software, then scan the connected drive. Be patient—the process may take time depending on drive size and condition.
Recover and Safely Store Files
After scan completion, preview recoverable files to identify what’s salvageable. Save these to a different external drive or cloud storage. Remember, never save recovered files back onto the same drive to prevent overwriting existing data—consider it like cloning a rare photograph before restoration.
Consider Professional Help for Tough Cases
If the drive isn’t recognized or data seems corrupted, it’s best to consult professional data recovery services. They have specialized tools akin to advanced laboratories, capable of salvaging data from physically damaged drives or encrypted devices.
Throughout this process, avoid rushing or using the laptop while internal components are exposed. For further insights into diagnosing hardware issues, check out this troubleshooting guide for comprehensive tips. Remember, patience and careful handling are your best allies when rescuing your precious files.
Many assume that data recovery is straightforward or that paying for professional help is always the best option, but the reality is far more nuanced. A frequent myth is that if a drive shows physical damage, recovery is impossible without expensive lab services. However, advanced techniques and a thorough understanding of hardware behaviors often allow for successful retrieval without costly procedures—yet many overlook these affordable options. Additionally, there’s a dangerous trap in rushing to replace components like laptop screens or drives at the first sign of trouble, instead of diagnosing the underlying issue. This impulsive approach can lead to unnecessary expenses or even further damage. For example, trying to fix a flickering screen by replacing the entire display without checking internal connectors or inverter problems can be futile. Experts emphasize that a detailed analysis of hardware nuances often reveals simple fixes, saving time and money.
Have you ever fallen into this trap? Let me know in the comments.
Why do so many overlook the importance of understanding the subtleties of hardware behavior? Because it’s easy to assume that all failures are equal or that symptoms directly point to a single cause. In truth, many issues—like a slow SSD or flickering display—stem from complex interactions within the device’s components. Recognizing these advanced nuances requires experience; otherwise, you risk applying superficial solutions that don’t address the root cause. For example, a hard drive making clicking sounds might seem like complete failure, but sometimes it’s just a matter of misaligned read/write heads or firmware glitches that can be fixed without full replacement. According to industry experts, mastering these subtleties significantly improves success rates and reduces costs, especially for small business owners who rely on managed IT solutions for efficient support.
When approaching data recovery or repairs, avoid common pitfalls such as neglecting to back up regularly or rushing into replacements. Instead, develop an understanding of hardware behaviors—like temperature fluctuations affecting SSD performance or connector corrosion causing flickering. This knowledge helps you make informed decisions and prevents unnecessary expenses. For example, inspecting internal connectors or testing power supplies may reveal simple issues that mimic more serious faults. To do this effectively, it’s crucial to stay updated with the latest diagnostic techniques. You can explore specialized resources like [this comprehensive guide](https://computerrepairmasters.com/ultimate-guide-to-data-recovery-after-accidental-deletion) for advanced insights.
Keep in mind, sometimes the most straightforward explanation isn’t the right one. Educating yourself about the complex interactions within your devices can set you apart from typical troubleshooting assumptions. Remember: superficial fixes often delay true resolution and can exacerbate problems. Take the time to analyze symptoms thoroughly—this approach aligns with expert practices and can save you considerable time and money. To deepen your understanding of how hardware intricacies influence repair outcomes, check out [this resource](https://computerrepairmasters.com/data-recovery-secrets-every-business-should-know-today). Being informed empowers you to navigate repairs effectively and avoid costly mistakes, whether you’re dealing with data recovery, screen issues, or hardware upgrades.
Ensure Longevity with the Right Maintenance Gear
Keeping your computer running smoothly over time demands more than just reactive fixes; it requires proactive maintenance using reliable tools and techniques. My personal approach emphasizes industry-grade diagnostics combined with smart software choices that prevent breakdowns before they occur.
Invest in a Quality Multimeter for Hardware Checks
From my experience, a Fluke 117 True RMS Multimeter is invaluable. It enables precise voltage readings and continuity checks, helping you identify power issues early — often a culprit behind screen flickering or unexpected shutdowns. This tool is compact, highly accurate, and durable, making it perfect for frequent troubleshooting sessions.
Select Software That Guides Your Maintenance
For ongoing system health, I personally rely on CrystalDiskInfo. It provides real-time SMART data of your drives, alerting me to potential failures long before data loss happens. Regularly scheduled scans uncover thermal issues or wear levels, which are especially critical for laptops subjected to built-in batteries and limited cooling.
Keep a Canon Pixma MG3620 for Document and Print Maintenance
While it might seem unrelated, maintaining printers with clean ink cartridges and periodic nozzle checks prevents workflow disruptions, ensuring your entire tech ecosystem stays functional. I found that keeping peripherals in top shape saves countless troubleshooting hours during crunch time.
Future Trends in Computer Maintenance Tools
The industry is shifting towards AI-powered diagnostic software that can autonomously detect and suggest fixes for hardware and software issues. Imagine devices that self-report their health status or even initiate repairs without user intervention. This trend promises to shift our maintenance strategies from reactive to proactive, reducing downtime significantly.
How do I maintain my computer’s health over time?
Establish a routine that combines consistent software scans with hardware checks. Schedule quarterly SMART tests, keep your drivers updated, and invest in quality tools like multimeters or diagnostic software to catch problems early. Remember, preventing issues is always cheaper and less time-consuming than fixing a broken system after failure. For comprehensive guidance on hardware diagnostics, check out this troubleshooting guide.
Don’t wait for your system to crash. Try integrating advanced tools like CrystalDiskInfo into your maintenance routine today, and experience the peace of mind that comes with proactive care.
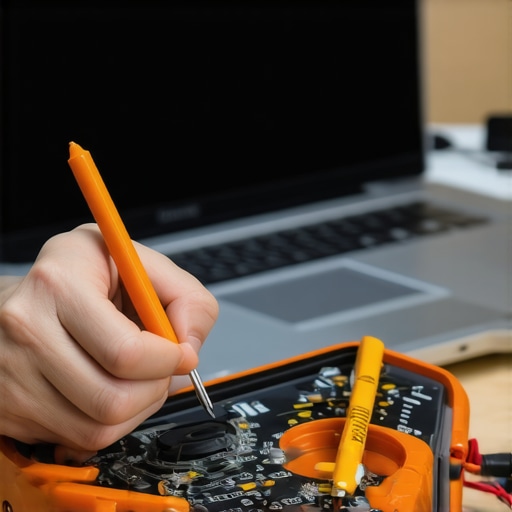
Lessons from the Frontline No One Tells You
- One of the biggest surprises I encountered was realizing that not all drives with physical damage are beyond saving. A careful analysis of symptoms and understanding hardware behaviors often reveals simple fixes, like reconnecting loose cables or replacing power adapters, which can save a lot of money and stress.
- Patience is your greatest ally. Rushing into drastic repairs or professional services without trying basic troubleshooting can lead to unnecessary expenses. Sometimes, just a firmware reset or software update restores access that seemed lost forever.
- Overconfidence in DIY solutions can backfire. I’ve learned to approach each case with humility and a readiness to seek professional help when symptoms point to complex hardware failures, especially with critical data on no-boot devices.
- Investing in learning how hardware components interact has significantly improved my success rate. A deeper knowledge of SSD behaviors and motherboard subtleties empowers me to diagnose issues more accurately, reducing unnecessary replacements.
- My biggest takeaway is that every failure teaches a new lesson—embrace each challenge as an opportunity to deepen your expertise. The more you understand about hardware nuances, the better you’ll become at salvaging files and avoiding costly mistakes.
Tools and Insights That Changed My Approach
- The Power of Data Recovery Tools is unmatched in my arsenal. Software like Stellar Data Recovery and EaseUS Data Recovery Wizard provide robust scanned previews and safe recovery processes, building confidence in salvaging complex cases. Additionally, knowledgeable blogs like this guide have kept me updated on the latest techniques.
- Hardware diagnostic tools such as Fluke multimeters and internal inspection cameras have transformed my troubleshooting routine, allowing me to detect subtle issues invisible to the naked eye. These tools help me preempt failure, saving both time and data.
- Continuous education through trusted sources like Data Recovery Secrets keeps me ahead in a field where technology evolves rapidly. Checking for firmware updates and understanding SSD wear leveling have become second nature.
- Finally, I rely on community forums and expert networks for support. Sharing insights with peers helps me verify assumptions, especially when facing unusual symptoms or encrypted drives.
Keep Moving Forward, One Recovery at a Time
Every time I successfully recover data from a seemingly dead device, it’s a reminder that perseverance and knowledge are key. The world of data recovery and computer repair is complex but rewarding—every challenge enhances your skills and habits. If you’re eager to improve, start with understanding your hardware deeply, adopt the right tools, and don’t hesitate to seek expert advice when needed. Your expertise not only protects your files but also empowers you to tackle future tech hurdles with confidence. And remember, staying curious and proactive is the best strategy to ensure your devices—and your data—stay safe and accessible. What’s the most unexpected lesson you’ve learned from a data recovery project? Share your story below.