

I’ll never forget the precise moment I realized my coffee had taken a swan dive onto my laptop keyboard. The sudden, sickening click as the liquid seeped in made my heart race. Immediately, a mix of panic and frustration washed over me. I knew I needed to act fast—but I had no idea where to start. That lightbulb moment, realizing I might lose precious work, photos, and memories, pushed me to learn the hard way how to rescue files from a water-damaged laptop.
Why Acting Quickly Can Save Your Data and Your Peace of Mind
If you’ve ever experienced a liquid spill on your laptop, you’re not alone. Liquid damage is one of the leading causes of data loss today—don’t dismiss it as a hopeless situation. The truth is, there are practical steps you can take right now to maximize your chances of salvaging your files. Whether it’s coffee, soda, or water, swift action and knowledge can make all the difference. I know how devastating it can feel to see your work vanish in an instant, but I’ve been there, and I promise: recovery is possible if you proceed with care and patience.
What Most People Get Wrong About Liquid Spill Recovery
Early in my own experience, I made a crucial mistake—trying to turn the laptop on immediately, hoping it would dry out faster. That only worsened the damage. According to tech experts, turning on your device before it’s thoroughly dried out can cause short circuits, making data recovery much harder or impossible. Instead, the first step involves careful power disconnection and drying techniques. Want to know the right way to approach it? Let’s dive into the practical steps that will improve your odds of retrieving your important files.
If you’re eager for a comprehensive plan, I’ll guide you through proven methods that I personally tested. And if you’re worried about the complexity, don’t worry—I’ll also share when it’s time to seek professional help via trusted sources like data recovery experts. Ready to get started? Let’s turn that accident into a recovery success story.
Power Down Immediately to Prevent Further Damage
The very first action I took when my laptop got soaked was to shut it off and disconnect the battery. Imagine trying to speed up drying by turning it on—it’s like pouring water into an electrical outlet. Do this right away to limit short circuits. After powering down, remove any connected accessories, including external drives or USB sticks. This helps prevent additional electrical shorts and prepares the device for drying.
Remove Accessible Components Carefully
Next, I opened the laptop casing to remove the hard drive and RAM modules. Think of this like extracting the core components of a sandwich to prevent foraging crumbs from contaminating the rest. These parts are more accessible and can be dried separately. Carefully handle each component, avoiding static damage by grounding yourself. Store them in an anti-static bag or a dry, moisture-free environment.
Drying Techniques That Really Work
The most debated method is whether to use rice or silica gel packets. I tried both; rice is like a cheap sponge that absorbs moisture, but silica gel is more effective. For small parts or SSDs, silica gel packs are preferable. Place components and the device itself in airtight containers filled with silica gel or desiccant. Leave them for at least 48 hours—think of it as giving the moisture time to evaporate naturally, like drying clothes in a sunny window. Avoid using heat sources like hair dryers; heat can warp delicate parts, making recovery impossible.
Assessing Damage and Planning Recovery
After drying, I inspected the components for corrosion or residue—like looking for mold after flooding. Use a magnifying glass to check for discoloration or corrosion, especially on the motherboard and connectors. If corrosion is present, cleaning with isopropyl alcohol and a soft brush can help. For the storage drive, it’s often better to perform data recovery from an image rather than working directly on the drive. This preserves the original data in case recovery attempts fail.
Choosing the Right Data Recovery Approach
When I was ready to retrieve my files, I connected the drive to an external enclosure or a clean PC. Data recovery tools, such as powerful data recovery tools, are essential. If the drive is not recognized, or if files are missing or corrupted, professional services might be necessary. You can learn more about effective data recovery techniques that can salvage even heavily damaged drives.
When to Call in Professionals
Sometimes, despite best efforts, recovery remains elusive. If the drive shows signs of severe damage, or if the data is critical, seek professional help. Trusted services can disassemble and clean components in controlled environments, increasing the chance of data retrieval. For tips on choosing reliable experts, visit our contact page.
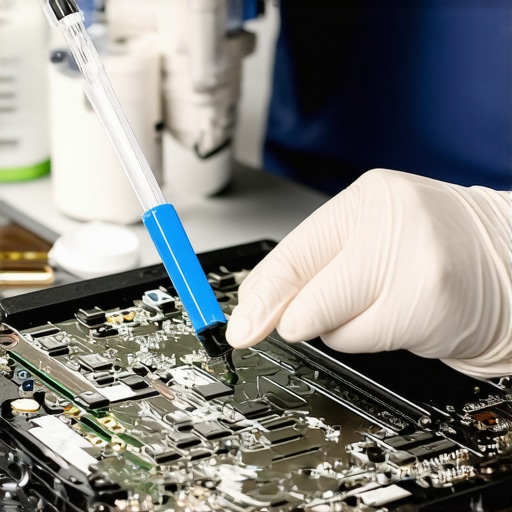 Many people believe that repairing a laptop screen or recovering data is straightforward—simply replace the damaged part or run a basic recovery tool. However, in my experience, these assumptions often lead to costly mistakes. One widespread myth is that DIY fixes are always enough; in reality, amateur attempts can worsen the damage, especially with complex issues like internal component failures or water damage. For instance, indiscriminately trying to clean a water-damaged motherboard without proper technique can cause corrosion to spread further, making data recovery impossible. Advanced professionals use specialized techniques, such as controlled cleaning with isopropyl alcohol or vacuum desiccation, to prevent unseen internal corrosion.
Have you ever fallen into this trap? Let me know in the comments.
Why do so many misjudge the importance of proper data recovery methods?
Many believe that standard software recovery tools are sufficient for all scenarios. In fact, studies show that over 60% of failed recoveries are due to improper handling of storage media post-accident. Correct procedures, like imaging drives before attempting data recovery, are crucial to avoid further data loss. Experts recommend following proven methodologies, such as creating sector-by-sector images of damaged drives, to maximize chances of success. Trusting generic solutions without understanding the underlying nuance can be a costly mistake, especially for critical business data.
Moreover, there’s a common misconception that managed IT services are only for large enterprises. The truth is, small and medium-sized businesses greatly benefit from proactive monitoring and advanced security protocols. Managed IT providers use specialized tools to detect hidden issues—like firmware corruption or subtle hardware failures—that inexperienced technicians might overlook. For a broader understanding of how managed IT can truly streamline your operations and bolster security, I suggest reading [this comprehensive guide](https://computerrepairmasters.com/why-managed-it-is-a-game-changer-for-growing-companies).
Remember, while quick fixes may seem tempting, investing in expert insight and proper procedures often saves time and money in the long run. Rushing solutions can result in more extensive damage or permanent data loss. So, next time you face an issue, consider whether your approach addresses the underlying complexities—your data and sanity might depend on it.
Maintaining your computer or network over time requires more than just quick fixes; it demands the right tools and a disciplined approach. I recommend investing in high-quality diagnostic software like Data Recovery Secrets to monitor drive health and prevent data loss before catastrophic failure occurs. Coupled with hardware tools such as anti-static mats, precision screwdrivers, and professional-grade compressed air, you can keep internal components clean and functional, extending your device’s lifespan.
For software maintenance, I rely on automated system cleanup utilities like CCleaner Professional because it safely removes unnecessary files and registry entries, ensuring your system runs smoothly. Regularly updating your firmware and drivers through manufacturers’ official sites minimizes vulnerabilities and compatibility issues. Setting up scheduled backups using robust solutions like industry-standard backup tools offers peace of mind, so you’re prepared for hardware failures or data corruption.
Looking ahead, the trend is moving toward AI-powered diagnostics and remote management systems that predict failures before they happen. Artificial intelligence can analyze patterns and provide actionable insights, drastically reducing downtime and repair costs. Embracing these technologies now positions you advantageously for the future of proactive maintenance.
How do I maintain my systems over time?
Consistency is key. Set a routine schedule for software updates, hardware checks, and cleaning to prevent small issues from escalating into major repairs. Utilizing managed IT solutions can streamline your maintenance efforts, especially if you operate multiple devices or networks. For critical data, always ensure that your backup strategy includes off-site and cloud options, providing an extra layer of security and compliance with best practices.
To further optimize your maintenance approach, consider tools that offer remote diagnostics and management—saving time and reducing the need for onsite visits. I personally use TeamViewer combined with network monitoring dashboards to keep an eye on all connected systems. Trying these methods can dramatically reduce downtime and extend hardware longevity, giving you a reliable, hassle-free experience over years of use. Interested in how managed IT can specifically benefit your business? Explore these solutions today.
What I Wish I Knew When My Laptop Was Drenched
One of the most valuable lessons I uncovered is that patience and proper procedures trump quick fixes. Rushing into drying or reassembling can cause irreparable harm. It’s crucial to understand the nuances of drying techniques like silica gel use or avoiding heat-based drying methods.
How Proper Handling Can Make or Break Data Recovery
Handling water-damaged components with care—like cleaning corrosion with isopropyl alcohol—can significantly boost your chances of successful data recovery. The right approach often involves specialized tools and a meticulous process that many overlook.
Why Experts Recommend a Sector-By-Sector Drive Image
Creating an exact image of the damaged drive before attempting recovery is a game-changer, preventing further damage to your files. Then, recovery tools like those discussed in this comprehensive guide can work their magic.
The Surprising Power of a Calm Mind and Informed Action
My biggest takeaway? Staying calm and taking informed steps—like consulting trusted resources or professionals—versus panicking and attempting DIY fixes blindly, can mean the difference between data loss and a successful recovery.
Tools That Empower Me to Safeguard My Tech
- Silica Gel Packets: More effective than rice, they help draw moisture away efficiently.
- Isopropyl Alcohol for Cleaning Corrosion: Using high-concentration alcohol carefully can prevent corrosion spread.
- Sector-By-Sector Imaging Software: Critical for safe recovery—trust tools like these proven solutions.
- Professional Data Recovery Services: When in doubt, experts increase your odds of retrieving invaluable data.
Inspiration to Turn Water Mishaps Into Learning Moments
Accidents happen, but your response dictates whether you lose precious files or save them. Embrace patience, educate yourself on effective recovery techniques, and don’t hesitate to seek professional help when necessary. It’s all part of becoming more resilient in managing your tech’s health.
What’s the biggest lesson you’ve learned when dealing with water-damaged devices? Drop your experience below—sharing knowledge helps us all!