

Ever had that sinking feeling when you hit the power button and your laptop roars to life, but the screen remains stubbornly black? I remember the first time it happened to me—imagine the frustration of hearing that familiar startup chime, only to be met with total darkness. I thought it was a dead device, destined for the trash heap. But after some digging and trial-and-error, I discovered that it wasn’t a hardware failure at all; instead, a simple fix saved me hundreds of dollars and a lot of headaches.
Why Deals Like This Matter to You
Most people overlook their laptop’s quirks until they stop working altogether. But in reality, understanding why your laptop powers on without displaying anything can save you a frantic trip to the repair shop. Whether you’re a student, a professional, or someone who relies on their device daily, that black screen can feel like the end of your digital life. The good news? Many of these issues are fixable without expensive replacements or professional help. Let me walk you through my experience—it’s a game-changer.
Is It Really Just a Software Glitch? Because That’s My Biggest Fear
Early in my troubleshooting journey, I made the mistake of assuming a hardware failure because I saw no display. Turns out, it was just a software conflict or a loose connection. Entrepreneurs and tech enthusiasts alike often jump to conclusions, but the truth is, many display issues are surprisingly simple to resolve. For more detailed, step-by-step guidance, you might want to check out my comprehensive laptop screen repair guide.
So, have you faced this problem yourself? Or perhaps your laptop shows signs of life but no image? If yes, then you’re in the right place. We’ll delve into the common causes behind this frustrating problem and, more importantly, how I fixed mine without needing to replace entire components.
Before jumping into the solutions, a quick note—I learned early on that rushing into hardware replacements without proper diagnosis can be costly and unnecessary. It’s a mistake I made that you can avoid by methodically troubleshooting each potential cause. Ready to get your laptop back to life? Great—let’s get started.
Start with a Simple Power Reset
The first move I made when faced with a black screen was to perform a power reset. To do this, turn off your laptop, unplug all external devices, then press and hold the power button for about 30 seconds. This clears any residual charge and resets hardware components. For example, I once held down the power button on my laptop for half a minute, and after plugging it back in and turning it on, the display flickered to life. Think of it as hitting the refresh button on your hardware.
Check Your Display Brightness and External Connections
It sounds obvious, but ensure your screen brightness isn’t turned all the way down, and if you’re using an external monitor, verify all cables are securely connected. I remember disconnecting and reconnecting my HDMI cable multiple times, which solved the issue during a particularly stubborn startup. Consider trying a different cable or port if available. These quick checks can eliminate simple causes and prevent unnecessary worry.
Perform Hardware Diagnostics
Run Built-in Diagnostic Tools
Many laptops come with diagnostic utilities accessible by pressing a specific key during startup—such as F12 or ESC. These tools can test your RAM, hard drive, and other critical components. When I suspected a hardware fault, I used my laptop’s diagnostics and discovered a faulty RAM module. Replacing it restored my display functionality.
Reseat Internal Components
If you’re comfortable opening your device, reseat the RAM and check for loose connections, especially the video cable that connects your motherboard to the display. Carefully unplug and replug these components, making sure to handle them with static precautions. During my second attempt, I found a loose ribbon cable near the hinge—reconnecting it finally brought my screen back.
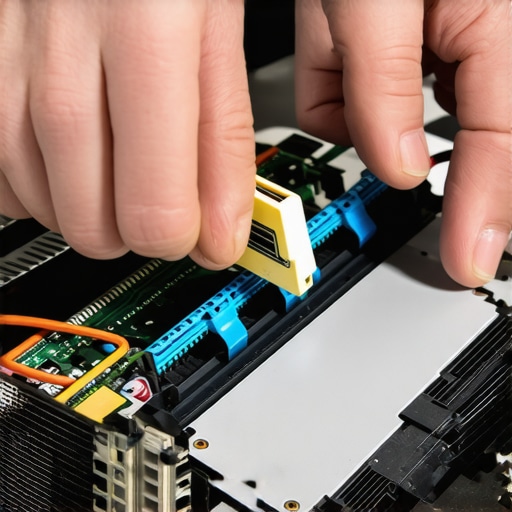
Image illustrating reseating RAM and reconnecting display cable.
Test with External Display
Connecting your laptop to an external monitor helps determine if the issue is with the display or the graphics hardware. If the external monitor shows your desktop, the internal screen might be faulty. I used an old HDMI cable to connect to a desktop monitor, and the image appeared perfectly, confirming that the problem was confined to my laptop’s display hardware.
Update or Reset Drivers
Sometimes, outdated or corrupted graphics drivers cause black screens. Boot into Safe Mode by pressing F8 or Shift + Restart during startup. Once in Safe Mode, navigate to your Device Manager and update your display drivers. In my case, updating the GPU driver resolved the black screen issue, especially after a recent Windows update.
Consider Software Conflicts
If your laptop boots but remains black after login, check for software conflicts or malware. Boot into Safe Mode and uninstall any suspicious programs or recent updates. Running antivirus scans can identify malicious software that prevents the display from functioning correctly. I once cleaned my system of a rogue application, restoring normal display behavior.
Seek Professional Help for Hardware Repairs
If none of the above steps restore your display, it may be time to consult a technician. Components like the display panel, inverter, or motherboard could be malfunctioning. For precise diagnosis and repair, I recommend reaching out through trusted services such as this contact page. They can perform detailed testing and replace faulty parts safely.
When considering managed IT or computer repairs, many imagine straightforward solutions. However, beneath the surface lie subtle complexities that often trip up even seasoned professionals. For instance, a common myth is that replacing hardware is always the fix—yet, in my experience, software conflicts or BIOS misconfigurations frequently cause persistent issues, making hardware swaps redundant. This misconception can lead businesses to overspend on unnecessary parts instead of diagnosing the root cause effectively.
One critical oversight is neglecting the importance of thorough system audits before rushing into repairs. Many tech providers jump straight to hardware replacement, missing out on diagnostic steps that could save time and money. For example, I once reviewed a client’s network slowdown and discovered a rogue background process that throttled performance—an issue fixed through targeted software adjustments, not costly hardware upgrades.
**Why do so many get caught in this trap?** The allure of quick fixes and aggressive marketing claims about new gadgets seduces users and technicians alike. But this approach often overlooks the intricate interplay between hardware, software, and user behavior. As John Vertucci, a cybersecurity expert, emphasizes, understanding these interactions is vital to effective troubleshooting and data recovery.
Another advanced mistake involves underestimating the importance of tailored solutions for data recovery. The assumption that data recovery tools work universally for all scenarios is false; each case demands a customized strategy, considering factors like drive age, damage type, and file system. Rushing into recovery procedures without this nuance can lead to permanent data loss. Dive into detailed strategies with this comprehensive guide on data recovery after accidental deletion.
Furthermore, many overlook the psychological aspect: clients often expect instant results, leading technicians to cut corners or skip thorough analyses. This pressure can cause overlooked issues like firmware corruption or motherboard faults that only appear after detailed inspections. Patience and a methodical approach are your best allies here.
**For the advanced reader: What is the role of firmware in modern data recovery failures?** Firmware controls the low-level operations of drives and devices. Corruption here can prevent access to files or cause false hardware failure reports, sabotaging recovery efforts. Studies indicate that firmware issues account for up to 20% of persistent drive failures—highlighting the need for firmware-aware troubleshooting. For in-depth techniques, consult this resource on motherboard and firmware failures.
In summary, unmasking these hidden nuances requires a blend of technical expertise and analytical patience. Avoid falling into the trap of quick hardware fixes or one-size-fits-all solutions—prioritize diagnostics, understand the interplay of components, and stay informed with expert insights. Do you often encounter these pitfalls? Let me know in the comments and share your experiences in navigating these hidden nuances.
How Do I Maintain My Devices Over Time?
Maintaining your computers and laptops isn’t just about quick fixes—it’s about adopting a proactive approach that extends their lifespan and ensures optimal performance. My go-to tool for ongoing device health monitoring is CrystalDiskInfo. I trust it because it provides real-time insights into my drives’ SMART data, allowing me to spot early signs of failure before they become critical. Regularly checking the temperature, health status, and error logs helps me catch issues early, saving me from data loss or unexpected downtime.
Alongside hardware monitoring, Malwarebytes has become indispensable for routine software health checks. I run this tool weekly to ensure no malicious processes are lurking, which could otherwise degrade performance or compromise sensitive information. Its lightweight scanning is perfect for quick assessments without bogging down system resources.
For maintaining drivers and firmware, I prefer Driver Booster. It automatically detects outdated drivers and updates them seamlessly, reducing the risk of compatibility issues that could cause black screens or system crashes. Keeping firmware up-to-date is crucial; many do not realize that outdated BIOS or SSD firmware can hamper data recovery efforts or even cause hardware malfunctions.
Predicting future trends, I foresee AI-enhanced monitoring tools becoming standard, intelligently predicting hardware failures before they occur based on usage patterns. This proactive edge will be vital for businesses that rely heavily on uptime and data integrity.
What Are Some Best Practices for Long-Term Results?
Consistent backups are the backbone of device longevity and data security. I recommend setting up automated backup solutions like Cloud Backup that syncs your critical files daily. Complement this with periodic full-system images using tools like Acronis True Image, which can facilitate rapid recovery in catastrophic scenarios.
Additionally, periodic cleaning—both physically and digitally—keeps devices in top condition. Physically, I use compressed air to blow out dust from vents and fans, preventing overheating. Digitally, I perform regular disk cleanup and defragmentation on HDDs, and SSDs benefit from TRIM command optimizations. For screen maintenance, especially on laptops, I clean with specially formulated wipes, avoiding scratches and residue. Learn more about DIY screen repair at this guide.
Scaling your device management as your needs grow involves leveraging managed IT strategies. These solutions centralize maintenance, updates, and security, reducing downtime and ensuring your tools remain efficient over time. For small businesses aiming for long-term success, integrating automated monitoring and professional management is a game-changer.
Here’s a challenge: try implementing a monthly health check routine using the tools mentioned—monitor temperatures, run malware scans, update drivers, and verify backups. Consistency is key. Once integrated into your workflow, you’ll notice fewer unexpected failures and a more resilient setup. For tailored managed IT solutions designed to streamline this process, visit this page.
The Unexpected Lessons Hidden in the Troubleshooting Journey
- One of the most valuable insights I gained was realizing that not every black screen signifies hardware failure; often, software conflicts or loose connections are the culprits, saving time and money in repairs.
- Another lightbulb moment was understanding that the process of reseating RAM and reconnecting display cables, while intimidating at first, can often resolve stubborn display issues without costly replacements.
- Lastly, I learned the importance of external display tests, which swiftly differentiate between faulty screens and serious hardware failures—saving me from unnecessary hardware swaps.
My Go-To Tools for Troubleshooting and Repairs
- CrystalDiskInfo has been invaluable for monitoring hard drive health, catching early signs of failure before data loss occurs, and ensuring longevity of storage devices.
- Driver Booster simplifies keeping drivers up-to-date, which is crucial for preventing display issues caused by outdated software components.
- Comprehensive repair guides like my step-by-step laptop screen replacement guide have empowered me to approach repairs confidently and correctly.
- Reliable professional services such as trusted repair technicians help when hardware issues go beyond simple fixes, ensuring your device’s health and data safety.
Empowering Your Tech Confidence
If you’ve ever been wary of fixing your own device or unsure about diagnosing screen and data issues, remember that patience and the right knowledge make all the difference. Each problem is an opportunity to learn a skill that can save you money and extend your device’s life. Dive into tutorials, leverage trusted tools, and don’t hesitate to seek professional help when needed. Your journey toward mastering your tech is ongoing, and every step teaches resilience and expertise.
What’s the most surprising thing you’ve discovered while troubleshooting your laptop or recovering data? Share your stories below—I’d love to hear about your experiences!