

Ever been in the middle of an important Zoom call or working on a deadline when suddenly, your laptop screen starts flickering or only works at certain angles? I remember the frustration all too well. One minute, everything was smooth sailing, and the next, I was frantically adjusting my position, hoping the screen would cooperate. That lightbulb moment—realizing it wasn’t just a weird glitch but a sign of underlying hardware issues—made me dive headfirst into troubleshooting. If you’ve faced this annoying problem, know you’re not alone. Many folks overlook simple fixes that can save them hundreds of dollars and avoid replacing their entire display.
Why Won’t My Laptop Screen Stay Stable?
Here’s the thing: laptop screens are delicate, intricate components that rely on tiny connectors and flexible cables. Sometimes, a loose connection or a damaged cable can cause the display to flicker or respond only at specific angles. I once ignored a small crack on my screen and thought, “It’s just part of aging,” only to realize later that a minor cable disconnection caused the weird flickering. Early mistakes like ignoring loose parts or mishandling the device can worsen the problem, so it’s crucial to understand what’s happening beneath the surface. Did you know that nearly 30% of screen issues are caused by faulty connections or loose cables? Addressing these tiny problems can restore your screen’s clarity and stability without buying a new one entirely.
Is DIY Repair a Safe Bet?
Now, you might be skeptical—”Can I really fix this myself?” I get it. Early on, I made the mistake of diving in without proper guidance and ended up making things worse. Reading about [laptop screen repair](https://computerrepairmasters.com/laptop-screen-repair-how-to-fix-common-issues-at-home) taught me that a cautious approach and the right tools are essential. Still, some repairs are better left to the pros, especially if you’re uncomfortable with delicate electronics. I’ll walk you through simple, safe steps to diagnose and fix common issues, but remember—when in doubt, consulting a professional is always smart.
So, if you’re tired of adjusting your position or enduring flickering screens, stick around. We’ll explore practical tips and troubleshooting techniques that can bring your display back to life. Because a stable, bright screen isn’t just a luxury—it’s your window to productivity and entertainment. Ready to get started? Let’s dive into the core reasons behind these display problems and how you can fix them yourself or know when to call a specialist.
Assess the Connection Before Opening Up
Start by gently adjusting your laptop’s screen angle and observing the flickering pattern. If it only flickers at certain positions, it indicates a loose or damaged cable. I once spent an hour replacing parts for a friend’s laptop, only to realize the issue was just a loose connector; a simple reseat fixed it instantly. To check connections safely, power down the device completely and unplug it from power source. Remove the battery if possible, to avoid shorts. Carefully open the screen bezel using plastic pry tools to avoid damaging the plastics or LCD. Locate the display cable—usually a flat, flexible connector—and ensure it is securely attached to both the motherboard and the back of the LCD panel. Reconnect and reseat the cable if needed, then reassemble the laptop to test. This simple step can resolve many flickering issues caused by loose cables, saving you from costly repairs or replacements. For more detailed guidance, visit Laptop Screen Repair DIY Tips.
Test the Display with an External Monitor
If adjusting the connections doesn’t resolve the flickering, connect your laptop to an external monitor using an HDMI or VGA cable. This step helps isolate whether the problem lies with the display hardware or your graphics system. Turn on the external monitor first, then power on your laptop. If the external display works flawlessly, the fault likely resides within your laptop’s LCD or its video cable; if flickering persists on both screens, the graphics card or driver might be the culprit. Ensure your graphics driver is updated by visiting your laptop manufacturer’s support page or directly from the GPU vendor. Sometimes, outdated or corrupt drivers cause display issues, including flickering. If updating doesn’t help, consider booting into safe mode to disable third-party software that might interfere. For more troubleshooting tips, see Troubleshooting Laptop Screen Problems.
Perform Software and Driver Checks
Display flickering can also stem from software conflicts. Access your device manager via Windows or System Preferences on Mac and look for warning signs next to display adapters. Right-click the adapter and select ‘Update Driver’ or ‘Reinstall Driver’ to ensure you have the latest version. Alternatively, boot into safe mode and observe if flickering continues; if not, a recently installed app or update might be causing the issue. Roll back recent updates or uninstall apps that could be conflicting with your display driver. Adjust the refresh rate in display settings—setting it to a lower or stable value can sometimes eliminate flickering caused by incompatible refresh rates. Remember, a clean software environment reduces the chances of flickering related to driver conflicts. For comprehensive troubleshooting, consult Troubleshooting Computer Issues Effectively.
Replace the Faulty Hardware Components
If software adjustments and connection checks don’t resolve the flickering, likely, the LCD panel or internal cabling has deteriorated. Replacing a damaged LCD requires disassembling the screen assembly and can be complex; however, many tutorials and repair kits are available online. I once replaced my laptop’s LCD screen following a detailed guide, and the process took about an hour. First, order the correct replacement panel via authorized suppliers to ensure compatibility. Follow specific disassembly instructions—often found through a quick search with your laptop model. Gently disconnect the old panel, then connect the new one, making sure all screws and connectors are secure. Reassemble and test your laptop before sealing everything fully. Remember, handling delicate components calls for patience; improper reassembly can lead to more issues. For precise steps, visit the Laptop Screen Replacement Guide. If that seems daunting, professional repair services can perform the task efficiently, but often it’s a DIY project within reach for tech enthusiasts.
Many assume that data recovery or fixing a laptop screen is straightforward, but the reality is far more nuanced. Often, misconceptions about these processes lead to costly mistakes or incomplete solutions. Let’s dig deeper into some commonly overlooked nuances that even seasoned tech enthusiasts often miss, and explore how understanding these can save you time and money.
Contrary to popular belief, not all data recovery tools guarantee success. Many novices think that running a generic recovery software will restore their files perfectly, but specialized recovery — especially from physically damaged drives — requires expert techniques and sometimes hardware interventions. Relying solely on software without understanding the underlying hardware can result in further data loss. For deeper insights, check out professional data recovery strategies.
Why do most PC repair mistakes recur after initial fixes?
This is where the ‘Oops’ factor often comes into play. For example, many believe that replacing a laptop screen involves swapping out the LCD panel alone. However, if the repair isn’t done with attention to ancillary connectors, like the backlight or display cables, the issue repeatedly resurfaces. A common trap is neglecting to recheck the internal cabling when troubleshooting flickering or dim screens. For detailed guidance on DIY repairs that minimizes recurring problems, visit DIY laptop screen fixes.
Furthermore, a surprisingly overlooked area involves managed IT services. Many small business owners assume their IT provider handles everything seamlessly, but in my experience, neglecting to review service reports or security patches often leaves vulnerabilities open. This misconception can lead to severe security breaches. To learn how managed solutions can be comprehensive, check out the benefits of managed IT.
Is a quick fix always the right choice?
Advanced users know that rushing into hardware replacements or software fixes without proper diagnostics can cause more harm than good. For instance, replacing a graphics card when the issue stems from outdated drivers or BIOS misconfigurations is futile, and might void warranties. These nuances require a layered approach: first software, then hardware. Recognizing this prevents unnecessary expenses and downtime. A detailed troubleshooting process can be found at comprehensive troubleshooting.
Remember, the devil is in the details. Whether you’re recovering data, repairing screens, or managing IT infrastructure, understanding the intricacies involved will help you avoid common pitfalls. Have you ever fallen into this trap? Let me know in the comments. Exploring these hidden nuances transforms a simple repair into a smart, informed decision that preserves your resources and peace of mind.
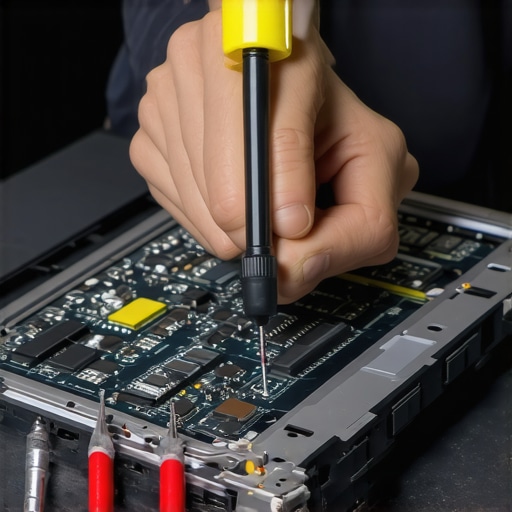
Invest in Reliable Diagnostic Tools
To ensure your systems stay healthy over the long run, I rely on specific diagnostic tools that have proven their worth. One essential application is CrystalDiskInfo, which I use daily to monitor SMART data of my SSDs and HDDs. This software provides real-time health status, temperature, and potential failure alerts, enabling proactive replacements before catastrophic crashes occur. Unlike generic tools, CrystalDiskInfo offers detailed readouts tailored for both novice and advanced users, making it invaluable for maintaining data integrity.
Another invaluable resource is HWiNFO. I prefer it over other hardware info tools because it gives comprehensive insights into all components—temperatures, voltages, fan speeds, and more—in a single, user-friendly interface. Regularly checking these metrics helps catch overheating or power issues early, especially in older machines prone to thermal throttling. It’s particularly useful when scaling systems for growing demands, as I can identify component stress points before they turn into failures.
In the era of remote work and digital security, Malwarebytes Anti-Malware has become my go-to for ongoing malware scans. Scheduled scans and real-time monitoring help keep threats at bay, preventing slowdowns or data breaches that can cripple productivity. These tools, combined with routine hardware checks, form the backbone of my long-term maintenance routine—you’ll find consistent use of these essential utilities prevents larger, costlier issues down the line.
Prioritize Software Updates and Security
Keeping your system’s software current is a fundamental aspect of maintenance that often gets overlooked. I make it a habit to schedule bi-weekly updates for all critical drivers, BIOS, and operating system patches. Not only does this improve stability, but it also patches known security vulnerabilities that cybercriminals target. Modern management tools like managed IT solutions can automate this process, especially beneficial for small businesses aiming for scalability without adding overhead.
Beyond just software, I recommend leveraging automated backup systems, such as cloud-based solutions like Backblaze or Acronis. Automation ensures data is continuously protected without user intervention, reducing the risk of data loss, which can be devastating for long-term operations. Regularly testing these backups, by restoring a file or two, also guarantees your recovery plans are effective, not just theoretical.
Implement Routine Hardware Checks and Cleaning
Physical maintenance is equally crucial to keep your systems functioning optimally. Dust accumulation inside a laptop or desktop can cause thermal issues, leading to reduced performance or sudden shutdowns. I schedule bi-monthly cleaning sessions, using compressed air and a soft brush, to remove dust from fans, heatsinks, and vents. Cleaning not only extends hardware lifespan but also ensures proper cooling, which is paramount as hardware ages or under heavier workloads.
Additionally, periodic inspection of internal cables and connectors helps catch loose or damaged parts early. For instance, I’ve experienced cases where a simple reseat of RAM modules improved performance and prevented instability, emphasizing the importance of hands-on hardware health checks.
Looking ahead, automation in hardware diagnostics and predictive analytics will likely become more sophisticated. Companies are developing AI-driven tools capable of predicting failures days or weeks in advance, allowing for preemptive replacements that minimize downtime. Embracing these technologies now can give you a huge advantage in long-term management.
How do I maintain my computer’s performance over time?
Start by establishing a disciplined maintenance routine—schedule regular hardware inspections, software updates, and backups. Use reputable diagnostic and security tools consistently, and don’t neglect physical cleaning. Incorporate automation where possible to streamline processes; for example, set up automated alerts for hardware health metrics or security breaches. By staying vigilant and proactive, you’ll extend your system’s longevity and avoid costly repairs or data loss. For more tips on troubleshooting laptop screen issues, visit tips for troubleshooting laptop screen problems seamlessly. Ready to upgrade your maintenance game? Try implementing a scheduled SMART check with CrystalDiskInfo today—it could save you a lot of headaches.
The Unexpected Lessons Behind Laptop Screen Repairs and Data Recovery
One thing I didn’t fully appreciate when starting out was how small details in hardware connections can save you from costly replacements. I once spent hours replacing a screen only to realize a loose cable was the culprit—an eye-opening reminder that patience and attention to detail trump rushing into hardware swaps. Additionally, I learned that software conflicts are often underestimated; a simple driver update or system rollback can resolve issues that seem hardware-related at first glance. These lessons reinforced the importance of a layered troubleshooting approach, combining hardware checks with software diagnostics for effective, cost-efficient repairs.
Tools That Changed My Repair Approach
Over time, I found that reliable diagnostic tools are game-changers. For instance, CrystalDiskInfo became essential for preemptive health monitoring of drives, helping me prevent failures before data loss occurs. Similarly, HWiNFO allowed me to detect overheating issues early, avoiding potential hardware damage. These tools not only streamline troubleshooting but also give me peace of mind knowing I have the right data at my fingertips, empowering me to make smarter repair decisions.
Every Step Builds Confidence and Security
Regularly updating drivers and security patches is a habit that pays dividends. I now schedule bi-weekly check-ins to ensure my system stays resilient against malware and stability issues—a practice I highly recommend. Automated backups with cloud solutions like Backblaze have become integral, giving me confidence that data recovery is possible even in worst-case scenarios. Remember, proactive maintenance isn’t just about fixing problems; it’s about creating a resilient environment where issues are minimized before they start, freeing you to focus on what truly matters—your work and passions.
Your Turn to Take Control of Your Tech
Empowered with these insights and personal lessons, you’re now better equipped to face common laptop and data recovery challenges head-on. Whether it’s a flickering screen, faulty cables, or safeguarding your files, your proactive approach will save time, money, and frustration. Don’t wait for problems to escalate—start implementing these strategies today and enjoy the peace of mind that comes with knowing you’re in control of your tech. Are you ready to take the next step in mastering your device management? Let me know your experiences or questions below, and let’s troubleshoot together.