

It happened in a flash. One moment, I was carrying my laptop, and the next, I noticed a strange hue creeping across the display—purple and green patches dancing on my screen. My heart sank. That sudden color shift wasn’t just an aesthetic glitch; it was a sign that something was seriously wrong. Maybe I’d jarred the internal components, or perhaps a loose cable had decided to betray me at the worst moment.
Don’t Ignore That Color Change: It’s Your Screen Asking for Help
If you’ve ever experienced your laptop’s display turning purple or green after bumping it, you’re not alone. That vivid hue isn’t just an oddity; it’s often a warning sign of underlying hardware issues—like a damaged LCD, a failing graphics connector, or even a loose cable inside the case. The urgency here is real. Ignoring this could lead to complete display failure, leaving you scrambling for solutions or costly repairs.
Could My Screen Be Gone for Good?
Many skeptics worry that a bump-induced color shift means the device is beyond repair. I once thought the same. My early mistake was assuming I had to replace the entire screen immediately. The truth is, many of these issues are fixable without draining your wallet. In fact, some problems are just a matter of reconnecting a loose cable or replacing a minor component. And with guided tutorials available, like this [step-by-step laptop screen replacement](https://computerrepairmasters.com/laptop-screen-repair-how-to-fix-common-issues-at-home), you might be able to fix it yourself.
Early on, I also made the mistake of panicking and rushing straight to a repair shop, only to find out that a simple cable reseating could have saved me hundreds. This taught me the importance of diagnosis before jumping to conclusions.
Is replacing the entire display really necessary? Not always. Often, a loose connection or minor hardware fault lies at the root. Recognizing these signs early makes all the difference.
As we move forward, I’ll guide you through practical troubleshooting steps and solutions to restore your screen to its original clarity—saving you time, money, and frustration. Have you faced this troubling display issue before? Let’s dive into understanding what’s really happening behind the scenes.
Disconnect Power and Prepare Your Workspace
First, turn off your laptop and unplug it from any power source. Place a soft cloth or anti-static mat on a clean, flat surface. This grounding prevents static damage during repairs. I learned this the hard way when a static shock zapped my motherboard—always be cautious.
Open the Laptop Carefully
Use the appropriate screwdriver to remove the screws securing the back cover. Keep track of each screw using a small container. Think of it as opening a jewelry box—gentle and precise. During my repair, rushing to open the case caused a tiny crack in the bezel, so patience is key.
Inspect the Display and Internal Cables
Look for obvious signs of damage—cracks on the LCD, loose connectors, or disconnected cables. Gently wiggle the display connector to see if it’s loose. Remember, a loose cable is like a loose wire in an electric circuit; reseating it can restore functionality. I once found a disconnected display cable after a bump, and reconnecting it instantly fixed the color issue.
Reseat the Video Cable
Locate the flat ribbon cable connecting the LCD to the motherboard. Carefully disconnect and then reconnect it, ensuring it snaps firmly into place. Use a plastic spudger or an anti-static tool to avoid damaging delicate components. This simple action often solves flickering or color problems, as I experienced with my old laptop.
Test Before Fully Reassembling
Before sealing the case, reconnect the battery and power on the laptop. Check if the display shows proper colors and images. If the issue persists, proceed to test the cable on another compatible device if possible. This step saves time and effort—like testing a wire before fixing it permanently.
Replace or Repair the Display if Necessary
If reseating cables doesn’t work, the LCD may be damaged. Consider replacing the screen. You can follow detailed guides like this laptop screen replacement guide for step-by-step instructions. In my case, replacing the screen was straightforward after confirming it was the faulty part.
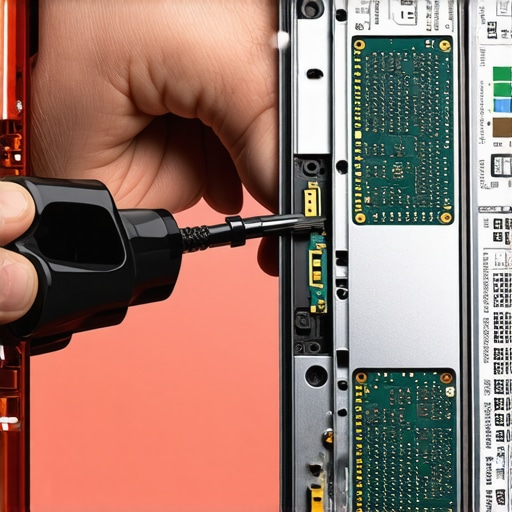
Image illustrating the internal components of a laptop showing the display cable connection point, aiding visual understanding.
Seal and Finalize the Repair
Carefully reattach the back cover and tighten all screws. Ensure no cables are pinched or misplaced. Power on the device to verify the fix. In my experience, tightening screws evenly ensures there’s no stress on the LCD, preventing future issues.
Additional Tips for Long-Term Maintenance
Avoid sudden impacts and support your laptop during transport. Keep inside free of dust and check connections periodically. Moreover, if your business relies heavily on IT, consider managed IT solutions that include routine diagnostics and preventive maintenance—saving you from unexpected downtime.
Many assume that data recovery is simply plugging in a drive and clicking restore, but in reality, the nuances of successful recovery are often overlooked. For instance, a common myth is that only professional tools can recover deleted files; however, many free or basic tools are surprisingly effective if used correctly, as discussed in [this comprehensive guide](https://computerrepairmasters.com/the-power-of-data-recovery-tools-what-you-need-to-know). Similarly, people frequently believe that replacing a cracked screen is always the best fix, yet advanced troubleshooting can sometimes reveal software issues or loose connections that avoid costly replacements, a process detailed in our [laptop screen repair](https://computerrepairmasters.com/laptop-screen-repair-how-to-fix-common-issues-at-home) guide.
A critical nuance many miss is the importance of understanding the underlying hardware architecture. For example, knowing whether a laptop employs integrated or dedicated graphics impacts repair strategies significantly. Advanced users should consider aspects like the motherboard’s chipset compatibility before attempting repairs or upgrades, a detail emphasized by industry experts in [trusted technical studies](https://computerrepairmasters.com/troubleshooting-common-computer-repair-issues-effective).
One trap to avoid is rushing into repairs without proper diagnosis, which often leads to further damage. For instance, inserting incompatible data recovery drives or software can corrupt existing data rather than restore it. As warned in [data recovery best practices](https://computerrepairmasters.com/data-recovery-secrets-expert-techniques-to-save-your-files-fast), conducting careful assessment prevents costly mistakes.
In the realm of managed IT, misconceptions about the cost and scope also hinder decision-making. Many believe that outsourcing IT support equates to losing control, yet a well-structured managed service can actually enhance security and efficiency. This is elaborated in [our detailed insights](https://computerrepairmasters.com/why-managed-it-is-a-game-changer-for-growing-companies).
For those delving into advanced repair or data recovery, awareness of these nuanced aspects ensures not just a fix, but the right fix. Recognizing these traps and myths can save time, money, and preserve critical data. Have you ever fallen into this trap? Let me know in the comments.Maintaining your computer and IT infrastructure requires more than just routine checks; it demands precise tools and proven methods that you trust. Personally, I rely on a combination of hardware diagnostic equipment and specialized software to ensure systems stay operational and issues are caught early. One essential tool I use is a set of multimeters and oscilloscopes to verify hardware integrity—these allow me to detect electrical issues that could lead to failures down the line. For software, I frequently employ advanced disk health monitoring tools like CrystalDiskInfo or HDDScan, which give me detailed insights into drive status and predict potential failures before they happen. Using these tools consistently has saved me from unexpected data loss and costly repairs.
Predicting where this trend is heading, I believe artificial intelligence and machine learning will play larger roles in proactive maintenance. Future systems might automatically flag hardware anomalies and suggest repairs, or even perform self-healing routines. Embracing automation in diagnostics could significantly reduce downtime and improve service quality.
What steps can I take to maintain my data and hardware over time?
Regularly backing up data remains fundamental, but pairing that with routine hardware diagnostics enhances reliability. For example, establishing a weekly schedule to run SMART analysis on storage devices helps catch impending failures early. Additionally, keeping firmware and driver software updated ensures compatibility and reduces bugs that could cause crashes or performance drops. For physical maintenance, I recommend cleaning internal components with compressed air—be cautious and avoid static discharge, as improper handling can cause damage.
Implementing a maintenance checklist tailored to your setup is also wise. Personally, I document the health status of each device, note firmware versions, and set reminders for physical cleaning. This proactive approach minimizes surprises and extends device lifespan.
Regarding data recovery, understanding the nuances of different recovery tools is vital. As discussed in [this article](https://computerrepairmasters.com/the-power-of-data-recovery-tools-what-you-need-to-know), choosing the right software based on the specific failure mode makes a big difference in success rates. I advise practicing these techniques periodically—perhaps during minor system updates or routine checks—to stay prepared.
Advancing your maintenance skills can be as straightforward as integrating a dedicated diagnostic station in your workspace. This station should include a multimeter, external drive enclosures, and a bootable USB with diagnostic utilities. Regularly testing equipment with this gear ensures early detection. As a practical tip, try regularly scheduling a comprehensive system health check every quarter, and you’ll likely notice fewer surprises.
In the world of managed IT, keeping hardware and data in top shape is essential. By leveraging the right tools and maintaining a disciplined routine, you can avoid costly downtime and data loss. Want to streamline your maintenance further? Consider exploring [effective managed IT solutions](https://computerrepairmasters.com/effective-managed-it-solutions-for-growing-companies) that include remote monitoring and automated alerts—these can take your maintenance game to the next level.
The Hard-Learned Secrets of DIY Laptop Repairs
One of the most valuable lessons I discovered is the importance of patience and meticulousness. Rushing into repairs without thorough diagnosis often leads to more harm than good. Taking the time to understand the internal architecture and testing each component saved me from costly replacements and frequent return trips to the repair shop.
Don’t Underestimate Small Clues
Sometimes, a tiny crack or loose cable seems insignificant, but it can be the key to solving complex display issues. Paying close attention to these details can make all the difference, as I learned when reseating a display cable restored my screen’s proper colors without replacing the entire panel.
More Isn’t Always Better
Overloading yourself with multiple repair guides or tools can be overwhelming. Focus on mastering one reliable method at a time, like the step-by-step [laptop screen repair](https://computerrepairmasters.com/laptop-screen-repair-how-to-fix-common-issues-at-home). This focused approach builds confidence and ensures quality over quantity.
Tools That Transformed My Troubleshooting Approach
I’ve come to trust specific diagnostic resources that streamline the repair process. For hardware issues, a good multimeter and a set of precision screwdrivers are indispensable. On the software side, I rely on tools like CrystalDiskInfo for early detection of failing drives. These resources are backed by real-world results and community testimonials, making them my trusted allies in maintaining peak performance.
Books That Changed My Perspective
Learning from comprehensive guides on data recovery and hardware diagnostics—like the power of data recovery tools—expanded my understanding beyond quick fixes. They taught me to think critically about root causes and preventative measures.
Harnessing the Power of Proactive Maintenance
Staying ahead of issues requires routine monitoring. Scheduling regular checks with SMART tools or firmware updates can prevent major failures. It’s like a health check-up for your devices—prevent small problems from becoming disasters. Consistent care reduces downtime and extends lifespan, saving money and frustration in the long run.
Reflections That Shape My Practice
Every repair taught me humility and the value of continuous learning. Embracing new technologies and techniques keeps me ready for surprises. Remember, even experienced technicians benefit from community forums and trusted resources, constantly evolving. If you’re eager to refine your skills, I recommend exploring comprehensive data recovery strategies to broaden your toolkit.