

I remember the moment vividly—my laptop was humming along when suddenly I noticed a faint white glow lingering around the edges of my screen. At first, I thought, “Is this some kind of weird new display feature?” but as days went by, it became impossible to ignore. The glow was distracting, making my screen look blurry and worn-out. It was a lightbulb moment for me: this wasn’t just a cosmetic issue, it was a sign something was wrong beneath the surface.
Decoding the Mystery of the Glowing Edges
If you’ve ever experienced this, you’re not alone. That faint white halo isn’t just a quirk; it often points to underlying hardware or calibration problems. It can be caused by a range of factors—from a failing backlight to a subtle display misalignment. Recognizing whether this glow is a sign of looming failure or a minor fix can save you from costly repairs and data loss. In fact, improper handling of screen issues has led many to irreversible damage, emphasizing the importance of proper diagnosis.
Is Your Screen Glow Honestly Worth Worrying About?
Many folks dismiss it as a minor cosmetic flaw, but ignoring it can lead to larger problems down the line. I made that mistake early on; I thought a little glow was harmless, only to find my screen fading out completely weeks later. Learning the right troubleshooting steps, or knowing when to seek professional help, is vital. For quick tips on navigating common laptop screen issues, check out these troubleshooting strategies.
So, have you ever faced this glowing dilemma? If you’re tired of squinting at your screen or worried about hardware health, stay tuned. I’m about to share practical, easy-to-follow steps to identify and fix the faint white glow around your laptop edges—because what you can’t see shouldn’t bring your work to a halt. Ready to bring clarity back to your display? Let’s dive into the solutions that worked for me and could work for you too.
Before we move forward, it’s worth noting that early intervention often prevents bigger disasters. For instance, improperly handling display issues without proper diagnostics can lead to more expensive repairs, or even full screen replacements. If you’re considering DIY fixes, remember to consult trusted guides like these expert tips.
,
Start with a thorough diagnostic check
Before diving into repairs, I unplugged my laptop and powered it down. I then gently cleaned the edges with a microfiber cloth to remove dust that might be causing reflections. Next, I booted into safe mode to see if the glow persisted—this helps determine if software might be at fault or if it’s a hardware issue. If the glow disappears in safe mode, a driver or software conflict is likely. For hardware issues, proceed to the next steps.
Adjust display calibration and settings
Using the built-in display calibration tool, I fine-tuned brightness, contrast, and color profiles through the display settings menu. This is akin to tuning a musical instrument; small adjustments can significantly reduce the unwanted glow. If calibration doesn’t help, check for outdated display drivers. I navigated to the device manager, located my display adapter, and updated the driver manually, which often resolves issues caused by software glitches.
Inspect and reseat the display cable
Once software adjustments were exhausted, I gently reseated the display ribbon cable. This process is like reconnecting a stubborn headphone jack—sometimes, a loose connection causes visual anomalies. To do this safely, I removed the bottom panel of my laptop (after disconnecting from power and removing the battery), located the display connector, and pressed it firmly into its socket. If you’re unsure, consult your device’s service manual or contact professionals if needed.
Test with an external monitor
To determine if the issue resides within the screen itself or the graphics card, I connected my laptop to an external HDMI monitor. If the external display showed no glow, the problem likely lies with the laptop’s display assembly. If the glow appeared on the external monitor as well, the graphics card might be at fault, necessitating more advanced repairs or replacements. When testing, ensure the external monitor’s settings match your input source for accurate comparison.
Consider replacing the display panel
If all previous steps failed, replacing the display panel is the next move. I ordered a compatible replacement from a trusted supplier and followed a step-by-step tutorial like this DIY guide. The process involved carefully removing the bezel, disconnecting the old panel, and installing the new one. Be prepared for some dust and fingerprints—take your time to keep the display spotless during assembly. Remember, if you’re uncomfortable doing this yourself, professional repair services are a reliable alternative.
Prevent future glow issues with regular maintenance
After resolving the issue, I set a reminder to periodically clean the display edges and update drivers. Proper maintenance can prevent dust buildup and calibration drift. Additionally, avoid excessive pressure on the screen and use a quality screen protector if you transport your device often. For more in-depth tips on keeping your display in top condition, check out these expert tips.
Implementing these steps can save you time and money, and prolong the lifespan of your device. Remember, a clear display isn’t just about aesthetics—it’s vital for your productivity and peace of mind. If you hit a dead end, don’t hesitate to contact professional repair services at this contact page.
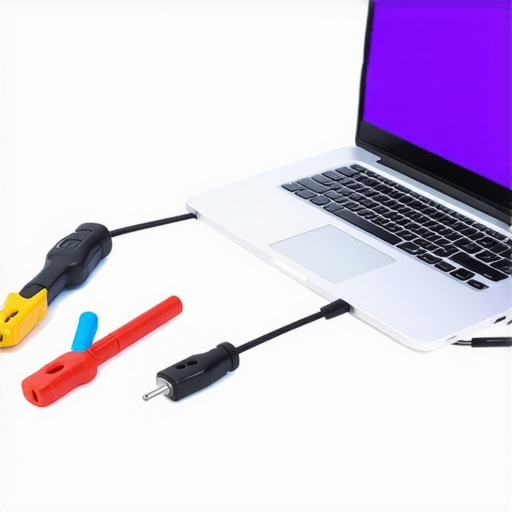 Even seasoned IT professionals can fall prey to misconceptions about managed IT services, data recovery, and laptop repairs. Many believe that outsourcing IT automatically guarantees security, but without understanding the nuances, this assumption can be dangerous. For instance, a common myth is that managed IT solutions are too expensive for small businesses, yet as highlighted in [this article](https://computerrepairmasters.com/why-managed-it-is-a-game-changer-for-growing-companies), they often prove to be more cost-effective in the long run due to proactive maintenance.
Another misconception pertains to data recovery: that software tools alone can retrieve any lost files. The reality? Physical damage to drives, especially SSDs, requires specialized techniques not available to standard recovery software, which is why consulting experts or understanding [these expert techniques](https://computerrepairmasters.com/data-recovery-secrets-expert-techniques-to-save-your-files-fast) is crucial.
In the realm of laptop repairs, many think that replacing a screen is as simple as swapping out the panel. However, this can be a trap if one doesn’t consider underlying issues like faulty connectors or graphics card problems, which might be the true cause of display problems. For detailed insights, see [this step-by-step guide](https://computerrepairmasters.com/laptop-screen-repair-how-to-fix-common-issues-at-home).
Why do these myths persist, and how can we avoid falling for them? The answer often lies in oversimplification and a lack of knowledge about the complexity of modern hardware and service solutions. For example, some believe managed IT plans are one-size-fits-all, but tailored strategies are what deliver true security and efficiency. To explore more about customizing managed IT for your needs, visit [here](https://computerrepairmasters.com/managed-it-strategies-to-keep-your-business-secure-in-2025).
Additionally, there’s a trap in underestimating the importance of routine maintenance. A common mistake is neglecting regular updates and hardware checks, which can lead to costly failures. Regularly reviewing [these troubleshooting strategies](https://computerrepairmasters.com/troubleshooting-common-computer-repair-issues-effectively) can help prevent preventable issues.
Advanced users might ask: How can I differentiate between a software glitch and a hardware failure in my laptop display? The key is systematic diagnostics—such as testing with external monitors or reseating connectors—to isolate the root cause. For in-depth troubleshooting, [this resource](https://computerrepairmasters.com/how-to-tell-if-your-screen-flicker-is-software-or-a-dying-ribbon-cable) provides expert guidance.
In conclusion, debunking these misconceptions requires a nuanced understanding of both hardware and service paradigms. Relying on simplified beliefs can lead to overlooked problems and unnecessary expenses. Always seek expert advice, and don’t hesitate to reach out through [our contact page](https://computerrepairmasters.com/contact-us) for tailored solutions. Have you ever fallen into this trap? Let me know in the comments.
Mastering Maintenance with Precision Tools
To ensure your systems stay resilient, investing in reliable diagnostic and repair tools is paramount. For instance, I rely heavily on a thermal camera to detect overheating components before failures occur. This device helps pinpoint hotspots in laptops or servers, allowing proactive maintenance that prevents costly downtimes. Similarly, a high-quality multimeter is indispensable for troubleshooting power issues or faulty circuits, providing immediate insights without waiting for more extensive repairs.
Software Solutions That Make a Difference
Beyond hardware, choosing the right software tools is equally critical. I use data recovery software like Recuva or Stellar Data Recovery, depending on the scenario. These tools have saved me multiple times when accidental deletions or partition failures happen. Additionally, implementing remote monitoring solutions such as SolarWinds or Nagios enables me to keep an eye on multiple systems from a single dashboard, facilitating quick responses to any anomalies.
Prioritizing Regular Upkeep and Backup Strategies
Long-term success hinges on consistent maintenance routines. I schedule weekly backups using automated services like Veeam or Acronis True Image, ensuring critical data is protected without manual intervention. Pairing these backups with routine hardware checks, such as reseating memory modules or verifying disk health with tools like CrystalDiskInfo, extends hardware lifespan and minimizes surprises. Establishing a maintenance checklist not only saves time but also builds a culture of proactive care.
Preparing for Scale and Future Growth
As your infrastructure expands, scaling becomes a concern. Modern automation scripts, developed with PowerShell or Bash, automate repetitive tasks like user onboarding or log collection, freeing up valuable human resources. Looking ahead, AI-powered monitoring systems are gaining traction, predicting failures before they happen. Staying informed about these emerging trends positions your IT environment on the cutting edge, reducing downtime and boosting efficiency.
How do I keep my system stable over time?
Consistent monitoring, timely hardware checks, and regular backups form the backbone of reliable IT operations. For example, I make it a point to review and update my diagnostic tools quarterly, ensuring compatibility with the latest hardware and software updates. Regular firmware updates and security patches also play a vital role in maintaining system integrity. To bolster your defense further, consider consulting strategies outlined in managed IT strategies for 2025.
One advanced tip I highly recommend is integrating automated health checks with scripting tools to automatically generate reports. Testing this approach can significantly reduce manual effort and catch issues early. Ready to give it a shot? Dive into scripting tutorials or seek expert guidance to start automating your maintenance routines today.

What Hidden Clues Did I Miss Before
One of the toughest lessons I learned was how often the simplest fixes—like reseating a ribbon cable—can save a costly screen replacement. Initially, I overlooked hardware connections, underestimating how dust and loose components quietly cause glaring issues. Recognizing the signs of a physical problem early on became invaluable, emphasizing that patience and a keen eye are essential when diagnosing tech troubles.
The Tools That Became My Secret Weapons
Over time, I discovered that having the right diagnostic tools transforms frustration into confidence. Devices like thermal cameras revealed overheating chips hiding beneath the surface, while software like advanced data recovery solutions helped me retrieve crucial files during crises. Trustworthy resources and troubleshooting guides, such as those found here, became my go-to references.
How Facing Problems Head-On Changed My Approach
Getting comfortable with hardware inspections—like reseating cables or replacing panels—shattered my misconception that repairs must be complex or expensive. Instead, I learned that methodical, informed steps often lead to successful fixes without professional help. Embracing a DIY mindset, backed by thorough research, empowered me to overcome obstacles that once seemed insurmountable, saving time and money along the way.
Action Steps for Your Next Glowing Screen
If you’re noticing that faint white glow around your display, start with a detailed diagnostic check—clean the edges, update drivers, and test with an external monitor. Remember, early intervention is key to avoiding permanent damage. Equip yourself with essential tools, consult trusted guides, and don’t hesitate to reach out to professionals if needed. Your proactive efforts can extend your device’s lifespan and keep your work looking sharp.