

I’ll never forget the morning I thought I was going blind. I’d just finished a big system update, sat down with my mug, and stared at a screen that looked like it was covered in a thick layer of grey ash. My desktop wallpaper—a vibrant sunset I’d shot myself—looked like a faded polaroid from 1974. I panicked. I poked at the monitor, checked the cables, and even considered if I’d developed sudden-onset cataracts. It’s a visceral, sinking feeling when the tool you rely on for everything suddenly looks ‘off.’ You start wondering if you’re looking at a hardware failure masquerading as a software bug. It happens to the best of us, and usually at the worst possible time. [image_placeholder_1]
Stop blaming your eyes for that dull display
The truth is, your hardware didn’t suddenly get old overnight. If things looked crisp yesterday and like a bowl of oatmeal today, the culprit is almost certainly buried in a new line of code or a ‘helpful’ setting that was toggled during your last update. I’ve been there. In my early days, I actually performed a full laptop screen repair because I was convinced the backlight was dying. It was an expensive and embarrassing mistake because the real fix was just a five-minute calibration. Today, I’m going to show you exactly how to get those deep blacks and popping colors back without spending a dime on parts. We’re going to dive into the messy world of color profiles, HDR mismatches, and the blurry laptop screen issues that often follow a major OS patch.
Can a simple update really mess up my expensive hardware?
It sounds like a conspiracy theory, right? But it’s incredibly common. When your OS updates, it often tries to ‘handshake’ with your graphics card using new protocols. If they don’t agree, the system defaults to a safe, generic color space that looks absolutely terrible. According to research from DisplayMate, even the most expensive panels can lose nearly 30% of their perceived color accuracy if the operating system forces an incorrect ICC profile onto the hardware. It’s not that the screen is broken; it’s that the brain of the computer has forgotten how to speak the screen’s language. Have you ever updated your PC only to find your favorite game or movie looks like a foggy morning in London? I’d love to hear your ‘washed out’ horror stories in the comments. Before you start looking into a laptop screen replacement, let’s look at why your graphics driver might be lying to you. Often, troubleshooting laptop screen problems starts with realizing that the ‘Auto-HDR’ or ‘True Tone’ features might be doing more harm than good on your specific panel. We’ll walk through the steps to calibrate it so you can stop squinting and get back to work.
Kill the Auto HDR nightmare before doing anything else
High Dynamic Range (HDR) is a fantastic technology when it works, but on most mid-range laptops, it is a disaster waiting to happen. After an update, Windows might decide your screen is ‘HDR capable’ and force the setting on. This often results in a grey, flat image because the screen’s backlight is not powerful enough to actually hit those peak brightness levels. It is like trying to light up a stadium with a pocket flashlight. Go to your Display Settings and toggle ‘Use HDR’ to off. I remember a frantic call from a local photographer who was convinced her panel was dying. We spent half an hour checking for physical defects before simply toggling this switch. Instantly, her deep blacks returned and the ‘milkiness’ vanished. #IMAGE_PLACE_HOLDER_B#
Why your OS tries to be too smart for its own good
Modern operating systems use ‘Auto-HDR’ to enhance older content, but this software-based guesswork often conflicts with the actual hardware capabilities. If the toggle does not fix it, you might need to calibrate your laptop screen manually to tell the OS where ‘true black’ actually sits on your specific panel. Use the built-in calibration wizard to adjust your gamma levels first, as this is usually where the ‘washed-out’ look originates.
Fix the handshake by rolling back your graphics driver
Sometimes the latest driver is not the greatest. Graphics manufacturers like Intel, AMD, and Nvidia release updates that might be optimized for the newest games but break color profiles for older panels. If the issues started right after an update, your best move is to ‘Roll Back Driver’ in the Device Manager. Think of it as reverting to an older, more stable version of a conversation between two friends. When you fix a blurry laptop screen after a driver update, you are usually just forcing the system to re-recognize the display’s native resolution and color depth rather than relying on a generic approximation.
The difference between a generic driver and the right one
Windows Update often installs a ‘Generic PnP Monitor’ driver. While it works, it is essentially the ‘safe mode’ of color. You want the specific driver from your laptop manufacturer’s website. If you are troubleshooting common computer repair issues effectively, checking the manufacturer’s support page for a dedicated ‘Monitor INF’ file or color profile is a pro move that most people overlook. This file tells your computer exactly what your screen can and cannot do.
Manual calibration is your secret weapon
If the software toggles and drivers do not do the trick, it is time to use the built-in ‘Display Color Calibration’ tool. Search for it in your start menu. This tool walks you through adjusting Gamma, Brightness, and Contrast. Gamma is the big one here—if it is too high, everything looks like it is covered in fog. It is a classic case of hardware failure masquerading as a software bug. By moving that slider, you are re-aligning the digital signal to match the physical limitations of your pixels. You can also look into laptop screen repair DIY tips for clearer displays to see if a simple cleaning or a loose internal cable—rather than a software glitch—is the real culprit behind the lack of contrast.
Stop assuming a dim panel is a dying panel
Many users believe that once a screen loses its ‘pop’ or starts looking milky, it is physically degrading. Everyone says you need to buy a new panel, but in my experience, the problem is frequently a bit-depth or color space mismatch that people miss even after basic calibration. For instance, check your GPU control panel (whether Intel, Nvidia, or AMD) and look for the ‘Output Dynamic Range.’ If it is set to ‘Limited’ instead of ‘Full,’ your blacks will never look truly black. This single setting can cause more frustration than any hardware defect, and it is a common mistake that leads people to spend money on the truth about cheap screen replacement kits from overseas when they did not need to. 
Avoid the one-click driver booster trap
One of the biggest ‘oops’ factors I see is the use of third-party software that promises to ‘auto-fix’ display issues. These programs often prioritize generic performance boosts over color accuracy, frequently overwriting factory-calibrated ICC profiles. This is a classic example of why you should read about computer repair for beginners avoid costly mistakes. These tools can mess with the registry in ways that make your screen look perpetually washed out, regardless of how much you toggle the brightness.
Why does your expensive panel still show color banding?
Advanced users often notice ‘steps’ in smooth gradients, like a blue sky or a dark shadow, even on high-end 4K panels. This usually occurs because the OS is sending an 8-bit signal to a 10-bit panel, or the internal processing bit-depth of the monitor is misaligned with the graphics card output. According to research from the EIZO Library, internal processing capability is just as important as the panel’s physical resolution for maintaining color fidelity. If your gradients look like a staircase, it is likely a software configuration issue rather than a pixel failure. Before looking for a laptop screen replacement step-by-step repair guide, verify that your display bit-depth in Windows Advanced Display settings matches your hardware specifications.
The hidden culprits behind visual glitches
Another nuance that often gets overlooked is ‘Adaptive Brightness’ or ‘Content Adaptive Brightness Control’ (CABC). This is frequently the hidden reason your laptop screen brightness keeps flickering when you switch between dark and light tabs. It is meant to save power, but it ruins the contrast ratio you just worked so hard to calibrate. Understanding the difference between a software glitch and a failing motherboard is key here; if the flickering happens only on certain websites or during video playback, it is a setting, not a hardware death rattle. If you are debating a hardware swap, make sure you know how to choose between an IPS and an OLED laptop screen replacement to ensure you actually get the quality bump you are looking for. Have you ever fallen into the trap of thinking your screen was broken when it was just a setting? Let me know in the comments.
Maintain your panel for years instead of months
Once you have managed to actually fix that washed-out look, the real challenge begins: keeping it that way. I have seen too many people go through the effort of fixing a software glitch only to neglect the physical health of their machine. If you want to avoid a future laptop screen replacement, you need a routine. I personally make it a point to check my display’s bit-depth every month, especially after those ‘silent’ Windows updates that love to reset my settings to ‘Limited Range.’ It is about more than just aesthetics; it is about knowing how to extend the life of your office PCs by three years through proactive monitoring. If you are running a business, this level of attention is why effective managed IT solutions for growing companies are worth their weight in gold—they handle these micro-adjustments so you do not have to.
How can I maintain professional color accuracy over time?
Display panels naturally drift. The phosphors and LEDs in your backlight age at different rates, which means the ‘white’ you see today will not be the same ‘white’ in six months. To combat this, I swear by the Datacolor SpyderX. I do not just recommend it because it is popular; I use it because it bypasses the OS’s guesswork by using a physical lens to read what is actually coming off the glass. This is the only way to ensure your laptop screen repair DIY tips actually result in a professional-grade image. According to the International Color Consortium (ICC) White Paper #16, using a hardware colorimeter is the only method to achieve a Delta E value of less than 2.0, which is the threshold where the human eye can no longer detect color errors. 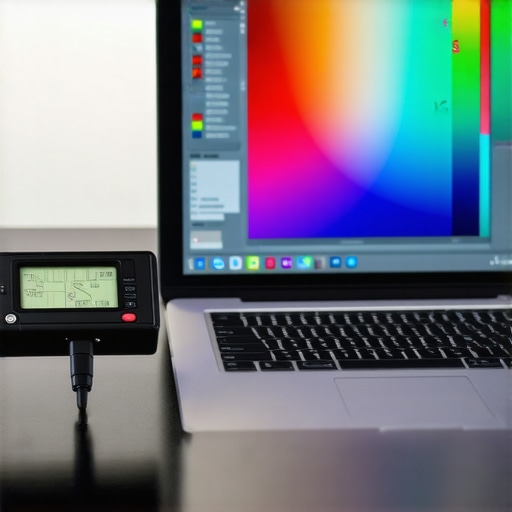
The future of displays is self-healing
We are moving toward a world where AI will handle calibration in real-time based on your ambient lighting and eye fatigue. I predict that within the next three years, we will see ‘Liquid Retina’ and OLED panels that automatically adjust their ICC profiles to compensate for pixel degradation. Until then, you need to be the one in the driver’s seat. This same proactive mindset applies to your data; do not wait for a crash to learn data recovery secrets and expert techniques to save your files. If you can master the handshake between your hardware and software now, you will be miles ahead of the curve when the next big OS update tries to break things again.
Build a fail-safe digital environment
If you are managing more than one machine, stop doing this manually. Using managed IT strategies to keep your business secure in 2025 includes automating these display and driver updates across your entire fleet. It prevents that one ‘washed-out’ laptop from slowing down an entire department. Also, always keep a bootable drive ready; knowing the move that recovers files from a raw drive without software can be a lifesaver if a driver update goes so sideways that it corrupts your boot sector. Before you close this tab, I want you to go into your GPU control panel right now and verify that your Output Dynamic Range is set to ‘Full’—it is the quickest way to see if you have been missing out on 20% of your screen’s potential brightness.
The Brutal Truth About Screen Calibrations I Learned Too Late
Over a decade in the field has taught me that the most expensive repairs are the ones that didn’t need to happen. I have seen countless professionals drop hundreds of dollars on new hardware when the fix was literally a three-minute menu dive. One major lightbulb moment for me was realizing that your graphics card and your monitor are essentially in a constant, fragile negotiation. When that handshake fails, the first thing to go is the contrast. Before you assume the worst, always ask yourself how to tell if your screen flicker is software or a dying ribbon cable, as the symptoms often overlap. Another hard-earned lesson? Never trust the default ‘vibrant’ settings from the factory; they are designed to look good under harsh showroom lights, not in your actual workspace. Finally, remember that your environment changes. A screen calibrated for a dark room will look like a ghost in a sunlit office, so adjust your expectations accordingly.
My Go-To Resources for Perfect Pixels
If you are serious about maintaining a professional-grade display, you need a toolkit that goes beyond the basic brightness buttons. I personally rely on the Datacolor SpyderX for physical calibration because software-only solutions can’t account for the actual aging of your screen’s backlight. For those in a corporate setting, I recommend checking how to audit your managed IT service providers security standards to ensure your fleet-wide display updates aren’t introducing color profile conflicts across the network. I also frequently use Lagom LCD test pages; they are free, browser-based, and perfect for a quick check of your black levels and saturation without installing anything. For business owners, keeping a pulse on data recovery secrets every business should know today is just as vital as display health, because a pretty screen is useless if your drive fails.
Don’t Settle for a Foggy Digital Life
You spend too many hours staring at your monitor to settle for a dull, milky image that causes eye strain and ruins your productivity. Taking ten minutes today to understand why your laptop screen looks washed out and how to calibrate it can save you from years of visual frustration. Whether you are a creative professional or just someone who wants their movies to look right, the power is in your settings, not just your wallet. If you are managing an office, remember that why your business needs a separate VLAN for guest Wi-Fi immediately is the kind of proactive thinking that pairs perfectly with maintaining your hardware’s visual integrity. Take control of your pixels, stop squinting through the ‘grey ash,’ and get back to seeing the world in full color. Have you ever fixed a major display issue just by changing one hidden setting? Let me know in the comments below!