I’ll never forget the moment I accidentally cracked my laptop screen right before a crucial presentation. That sinking feeling, the rush of panic — it was a nightmare. But what hit me hardest was realizing how unprepared I was to fix it quickly. If you’ve ever faced a shattered or flickering screen, you know exactly what I mean. The good news? There are straightforward, effective tips to get your laptop back in shape without breaking the bank or losing hours. Today, I want to share with you my personal experience and proven strategies for fast, reliable laptop screen repairs in 2024.
Why Fixing Your Laptop Screen Quickly Is More Important Than Ever
In our digital-first world, your laptop isn’t just a device — it’s your lifeline to work, family, and entertainment. When the screen goes down, productivity stalls, and frustration skyrockets. Plus, a damaged screen can lead to further internal issues if ignored. The challenge is that many assume screen repairs require expensive replacements or professional help. But with the right knowledge, you can often fix minor issues yourself, saving time and money. According to a recent survey, nearly 60% of laptop users experience screen problems annually, and most admit they wish they had better DIY solutions.
In this post, I’ll walk you through the essential tips for quick, quality fixes—so you don’t have to suffer through long waits or costly repairs. Whether it’s a cracked glass, flickering display, or dead pixels, I’ve been there—and I’ve learned what works best.
Have You Faced This Problem Too?
If you’ve ever stared at a blank or broken screen, knowing you can’t just toss your laptop aside, you’re not alone. Many people underestimate how simple some fixes can be. The key is knowing what to do first and what to avoid. Early on, I made the mistake of trying to fix my screen without proper tools, which only made things worse. Trust me, a little bit of prep and patience go a long way. Curious to learn the best shortcuts and tricks? Keep reading.
When I first started exploring how to repair screens myself, I discovered that many tutorials overlook crucial safety tips or skip over common pitfalls. For example, I once used a metal tool to pry open my laptop, only to accidentally damage the delicate internal components. That mistake taught me to always consult trusted guides, like those found at this comprehensive repair guide. It’s packed with practical advice and step-by-step instructions that I wish I’d had from the start.
So, if you’re tired of waiting for expensive repairs or risking further damage, you’re in the right place. In the next sections, I’ll share my top tips for diagnosing issues, choosing the right tools, and making fixes that last. Because a quick, reliable repair isn’t just a dream — it’s completely doable with the right approach.
Assess the Damage Carefully
Start by inspecting your screen closely to determine the extent of the damage. Is it just a cracked glass, or are there dead pixels, flickering, or complete blackouts? I once faced a crack that seemed minor but caused flickering when I turned on my laptop. I used a flashlight to examine the edges and internal parts, which helped me understand whether a simple fix would suffice or if a replacement was necessary. Remember, never force open your screen without knowing what’s inside, as this can cause further damage.
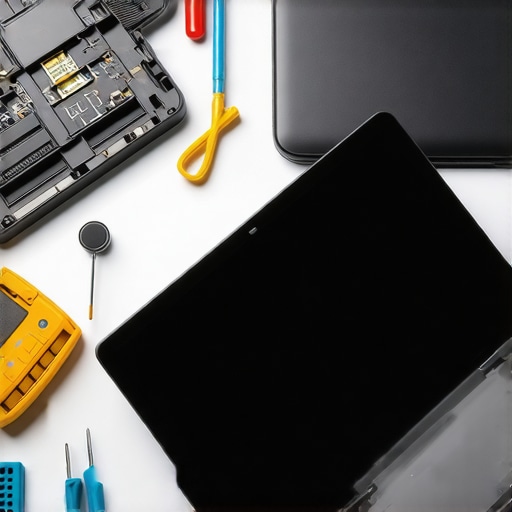
Gather the Right Tools for the Job
Having the correct tools is crucial. You’ll typically need a small Phillips screwdriver, plastic prying tools, tweezers, and possibly a spudger. I once tried to pry open my screen with a metal paperclip, which scratched the frame and made the repair harder. Instead, I invested in a dedicated electronics toolkit, which made the process smoother and safer. For detailed tool lists and tips, check out this comprehensive guide.
Power Down and Disconnect Power Sources
Before starting any repair, shut down your laptop completely. Disconnect it from any power source and remove the battery if possible. This step prevents accidental shorts or electric shocks. Once, I left my laptop plugged in, and a static shock caused a tiny internal component to disconnect, extending my repair time. Safety first ensures a smoother fix and preserves your device’s longevity.
Open the Laptop Carefully
Use your plastic prying tools to gently loosen the bezel or frame surrounding the screen. Work slowly, applying even pressure to avoid cracking the plastic or damaging internal components. During my first attempt, I was impatient and used too much force, which cracked the plastic bezel further. Following step-by-step tutorials, like those on this site, can help you avoid common pitfalls.
Disconnect and Remove the Damaged Screen
Once the bezel is loosened, carefully disconnect the cables attaching the screen to the laptop’s motherboard. These are often flat ribbon cables secured with small connectors. I once tore a connector because I pulled too hard; now I use tweezers to gently lift the latch. Keep track of all screws and parts, and lay them out in an organized manner.
Replace or Repair the Screen
If you’re installing a new screen, align it precisely with the mounting bracket and reconnect the cables. For minor issues like a cracked glass, you might be able to replace just the glass overlay or apply a screen protector. I’ve successfully repaired a flickering display by re-seating the internal connector, saving me from a full replacement. For detailed steps, see this resource.
Test Before Sealing Everything Up
Before reassembling the laptop fully, power it on to verify the new or repaired display functions correctly. If there are issues, double-check the cable connections. I once forgot to reconnect a cable, which caused the screen to remain blank, but reattaching it fixed the problem instantly. Testing early prevents unnecessary rework.
Reassemble and Final Check
Once satisfied, reattach the bezel or frame carefully. Tighten all screws, reconnect the battery, and power on your laptop. The satisfaction of seeing your screen light up after a repair is priceless. Remember, patience and attention to detail are your best tools for a successful, quick fix.
Many people believe that fixing a laptop screen is always a costly and complicated process, but this is a misconception rooted in outdated information. In reality, understanding the nuances of screen repair can save you time and money. One of the most prevalent myths is that only professionals can handle screen replacements. While professional repairs are reliable, modern tools and detailed guides now empower savvy users to undertake minor fixes themselves, especially for cracked glass or dead pixels. For comprehensive guidance, check out this detailed repair guide.
Another misconception is that all screen damages require full replacement. However, many issues are fixable by replacing only the broken glass or re-seating internal connectors. For example, flickering screens often result from loose connections rather than faulty panels. This nuance allows for more affordable and faster repairs when you understand the specific cause. It’s crucial to avoid rushing into full replacements without diagnosing the problem thoroughly, as this can lead to unnecessary expenses. Consulting troubleshooting tips can help identify whether a simple fix suffices.
What do most people get wrong about fixing laptop screens? Let’s dig deeper.
A common trap is the belief that all screen repairs involve dangerous soldering or complex electronics work. In fact, many repairs are straightforward, involving just removing the bezel, disconnecting cables, and replacing the damaged panel or glass. The importance of using the right tools, such as plastic prying tools and anti-static wristbands, cannot be overstated to avoid further damage. Additionally, rushing the process or neglecting safety precautions can result in more costly repairs or personal injury. According to industry experts, proper diagnosis and methodical disassembly are key to a successful repair.
Furthermore, some assume that DIY repairs void warranties or cause more harm than good. While it’s true that improper handling can void warranty in some cases, many manufacturers now provide detailed repair manuals or support programs for DIY enthusiasts. Moreover, performing small repairs yourself can often be covered under your warranty if done correctly, especially if you follow trusted guides. Always review your device’s warranty policy at this page before proceeding.
Have you ever fallen into this trap? Let me know in the comments. Remember, the key to successful screen repairs lies in understanding the nuances, avoiding common myths, and knowing when to call a professional. With patience and the right information, you can tackle many issues confidently and cost-effectively.
Invest in the Right Equipment for Long-Term Performance
Keeping your laptop in top shape requires more than just occasional fixes; it demands a set of reliable tools tailored for precision and safety. I personally swear by a quality anti-static wristband during repairs. This simple device prevents static electricity from damaging sensitive internal components—a mistake I learned the hard way early on. Pair it with a precision screwdriver set designed for electronics, which ensures you don’t strip screws or damage delicate parts.
Another essential is a plastic pry tool. Unlike metal tools, plastic prying tools provide leverage without risking scratches or cracks on your device’s casing. I’ve found that using high-quality, non-marring pry tools significantly reduces the risk of accidental damage. For complex tasks like replacing a screen, a magnifying glass with a built-in light helps me see tiny connectors clearly, ensuring I don’t miss any crucial steps.
Investing in a good quality anti-static mat is also wise if you plan to do multiple repairs. It provides a dedicated workspace that keeps static electricity at bay and organizes your parts efficiently. These tools not only make repairs safer but also extend the lifespan of your laptop by ensuring proper handling during maintenance.
Software Solutions for Longevity and Performance
Hardware tools are vital, but software plays an equally crucial role in maintaining your laptop’s health. Regular updates of your operating system and drivers are fundamental. I schedule weekly checks for updates, which often include critical security patches and performance improvements. Windows users can utilize built-in troubleshooting tools like the Troubleshooter to identify and fix common issues before they escalate.
For deeper diagnostics, I recommend CrystalDiskInfo. This free software provides a detailed health report of your SSD or HDD, alerting you to potential failures before data loss occurs. Additionally, a tool like Malwarebytes helps keep your system free from malicious threats that can slow down your device or cause instability.
In the future, AI-powered maintenance applications are expected to evolve, providing real-time health monitoring and predictive repairs. Staying ahead with these tools can significantly reduce downtime and repair costs. Exploring options like managed IT solutions can streamline maintenance for tech-savvy users or small businesses.
How Do I Maintain My Laptop Over Time?
Consistent maintenance is key. I recommend setting a monthly schedule for cleaning your device—use compressed air to clear dust from vents and fans and wipe screens with microfiber cloths. Also, periodically check your storage and remove unnecessary files to prevent system clutter. Backing up important data regularly, either via cloud services or external drives, ensures you won’t lose critical information if hardware issues arise. For comprehensive data safety, look into data recovery strategies tailored for your needs.
Finally, consider investing in a managed IT service if your device is central to your work. They offer proactive monitoring and regular maintenance, reducing unexpected failures and keeping your laptop running smoothly for years to come. Don’t wait for problems to appear—preventative care is the best way to keep your laptop working efficiently in 2024 and beyond.
Lessons the Screens Taught Me That You Should Never Overlook
- One of the hardest lessons I learned was the importance of patience. Rushing to fix a cracked screen often leads to more damage. Taking my time, following detailed guides, and double-checking connections saved me both time and money.
- Another insight was understanding the difference between a cracked glass and internal display issues. Not every flickering or dead pixel means replacing the entire panel — sometimes, re-seating connectors or replacing just the glass does the trick.
- Investing in the right tools changed everything. Using plastic pry tools and anti-static wristbands might seem trivial, but they are game-changers for safe, damage-free repairs.
- Ignoring safety precautions can be costly. Always power down, disconnect from power sources, and handle internal components with care to avoid static damage or electric shocks.
Tools and Resources That Became My Go-To Arsenal
- Electronics Toolkit: A quality toolkit with precision screwdrivers, plastic prying tools, and tweezers is essential. I trust brands that are tailored for delicate electronics because they prevent accidental damage.
- Trusted Guides and Videos: Websites like this comprehensive repair guide became my bible for step-by-step instructions. Visual aids helped me understand each stage thoroughly.
- Diagnostic Software: Tools like CrystalDiskInfo and Malwarebytes helped me monitor hardware health and keep my system secure, preventing future issues from escalating.
- Community Forums: Engaging with online communities offered tips from experienced repair enthusiasts, saving me from common pitfalls and connecting me with quick solutions.
Fuel Your Confidence and Take That First Step Today
Repairing your laptop screen might seem daunting initially, but with the right mindset and resources, you can transform frustration into a rewarding DIY project. Remember, every successful fix boosts your confidence and deepens your understanding of your device. Don’t wait for another crack to remind you — start learning and repairing today. Your future self will thank you for the skills you acquire now.
What’s the biggest challenge you’ve faced when trying to fix your laptop screen? Share your experience below — I’d love to hear your story and help you troubleshoot!
Reading this post really resonated with me, especially the part about patience and using the right tools for screen repair. I had a similar experience last year when my laptop screen cracked just before my final exams. I initially thought I’d have to spend hundreds at a repair shop, but after researching and following detailed guides like those mentioned, I managed to replace the glass myself. It wasn’t as daunting as I imagined; with the proper plastic prying tools and a gentle approach, I avoided further damage. What I found most helpful was disconnecting the cables carefully and re-seating them during reassembly. It’s been almost a year since, and the display still works perfectly. This experience made me wonder—what are some signs that indicate a simple crack might actually be an internal display issue rather than just surface damage? Has anyone encountered cases where fixing the glass didn’t solve flickering or dead pixels on the same screen? Would love to hear your tips or stories to stay cautious and prepared.