

It happened during a late-night coding session. I reached for my mug, my elbow caught the edge of my laptop, and—CRACK. No, the glass didn’t shatter into a million pieces, but something much worse happened. A tiny, dark smudge appeared near the hinge, and within minutes, it grew into a giant black ink blot that swallowed half my spreadsheet. It looked like a Rorschach test gone horribly wrong. My heart sank. That ‘ink’ is actually liquid crystal leaking from its sandwich of glass, and once it starts spreading, it feels like watching a slow-motion disaster.
That Moment the Screen Bleeds Into Your Soul
If you’re staring at a dark blob right now, you’re probably panicking. I’ve been there. My first instinct was to search for laptop screen repair tips, hoping for a magical software fix. Spoiler alert: there isn’t one. When that internal seal breaks, the liquid crystal inside the display panel is literally leaking out. I made the classic rookie mistake of trying to ‘push’ the ink back to the edge with my thumb. Do not do this. All I did was crack the glass further and double the size of the blot. It’s a hardware failure, pure and simple, often caused by a drop or something as small as a stray pebble on your keyboard when you closed the lid.
Is a DIY fix actually worth the headache?
You might be wondering if you should even bother. Can you really save this thing, or is it destined for the recycling bin? According to a report by Consumer Reports, nearly 25% of laptops experience some form of hardware failure within the first three years, and screens are the most common victims. While some DIY tips for clearer displays work for software glitches, a physical ink blot usually means the panel is toast. But here’s the good news: replacing the screen is often much cheaper than buying a whole new machine, especially if the rest of your hardware is still screaming fast. We’re going to walk through the reality of this repair today. I’ll show you how to tell if you need a full laptop screen replacement or if you can limp along for a few more weeks. Have you ever opened your laptop to find a surprise ‘ink’ painting waiting for you? Let me know—I’d love to hear if yours stayed small or took over the whole screen. Before you go out and buy a new PC, we need to check if the issue is just the panel or if your graphics card is also struggling. Sometimes, troubleshooting screen problems reveals that a loose cable is making things look worse than they actually are. But if that black blob is growing, we need to talk about the replacement process.
The quick trick to see if your motherboard is toast
Before you start unscrewing anything, you need to isolate the problem. Think of your laptop like a movie theater; is the projector broken, or is the screen just torn? To find out, grab an HDMI cable and plug your laptop into a TV or an external monitor. If the picture on the TV looks perfect, then your graphics card is healthy, and the issue is strictly the physical LCD panel. If the ‘ink blot’ or lines show up on the TV too, you aren’t looking at a screen repair; you’re looking at a failing GPU, which is a much bigger headache. I once spent two hours carefully dismantling a friend’s Dell only to realize the ‘bleeding’ was actually a corrupted video driver. A quick visit to troubleshooting common computer repair issues effectively could have saved me a whole afternoon.
Does your screen have a bruise or a breakdown?
Not every mark is a death sentence. If you see a faint, circular discoloration rather than a dark, spreading blot, you might just have a strange pressure mark in the center of your display. This happens when the lid is squeezed too hard against the keyboard. However, if you see that ‘spider-web’ pattern with black liquid leaking out, the internal glass is shattered. 
Don’t buy the first panel you see on eBay
Finding the replacement part is where most people trip up. You can’t just search ’15-inch HP screen’ and hope for the best. Within the same model line, manufacturers often use different connectors. I learned this the hard way when I ordered a replacement for an old ZenBook. I thought I was being a pro, but when the part arrived, the connector was a 40-pin and my laptop only had a 30-pin slot. It was like trying to fit a square peg in a round hole. To avoid this, you must find the specific part number on the back of the actual LCD panel. This requires a bit of computer repair for beginners knowledge—specifically, how to pop the bezel off without snapping the plastic clips.
The hidden dangers of the ‘check cable’ ghost
Sometimes, that terrifying flicker isn’t a broken screen at all. I’ve seen cases where a laptop was dropped, and the internal video cable (the eDP cable) simply wiggled loose. Before you drop $100 on a new panel, try reseating the cable. If you’re lucky, you might just need to learn how to fix a laptop screen that shows a check cable message. It’s a five-minute fix that involves a bit of tape and a steady hand. But if that ink is definitely spreading, it’s time to commit. You’ll want to follow a laptop screen replacement step-by-step repair guide to ensure you don’t accidentally puncture the battery or short out the motherboard while you’re inside the chassis.Let’s talk about the backlight fuse nightmare. This is the ultimate oops factor that turns a simple DIY project into a disaster. I’ve seen hundreds of people follow a laptop screen repair guide perfectly, only to end up with a display that stays pitch black. Why? Because they forgot to disconnect the battery. Modern laptops have always-on power rails. If you touch that eDP connector with a screwdriver or even your fingernail while the battery is plugged in, you will blow a tiny SMD fuse on the motherboard. Suddenly, your hundred dollar repair just turned into a three hundred dollar motherboard service. I made this mistake once on an old MacBook, and that sinking feeling is much worse than the original crack.
The five dollar part that ruins a hundred dollar repair
Everyone tells you that the screen is a passive component you can just swap out like a lightbulb. That is a common myth. It is actually a delicate ecosystem integrated with your logic board. If you do not ground yourself, static electricity can jump from your fingertips to the traces. Most people focus on the glass, but the real expertise lies in the pre-op. You need to understand that computer repair for beginners usually skips the part about ESD safety. According to research published by the EOS/ESD Association, even a discharge you cannot feel, often under 3,000 volts, is enough to fry the sensitive gate oxides in your laptop’s graphics circuitry.
Why did your new screen stay dark?
If you have replaced the panel and still see nothing, or if your laptop screen is too dim to read, you have likely tripped that backlight circuit. Before you panic and assume the new part is dead, take a flashlight and shine it directly at the display at an angle. If you can see a faint image of your desktop icons, the LCD is actually working, but the internal lights are out. This is a nuance most quick fix videos ignore because they want to make the process look easier than it really is.
Stop before you pull that ribbon cable
Another trap is the connector tug. Those 30-pin and 40-pin eDP cables are held by a tiny metal locking bar. If you pull the cable without flipping that bar up first, you will tear the internal gold traces. I have seen people try to fix a vertical yellow line by wiggling the cable, only to snap the connector pins entirely. If you are already troubleshooting common computer repair issues, you have to be surgical. One more pro tip: you can often upgrade your screen quality during a repair. Many mid-range laptops ship with cheap TN panels. If your motherboard supports the necessary eDP lanes, you can swap in a high-quality IPS panel for nearly the same price, though you must check the pin configuration carefully. Have you ever fallen into this trap or accidentally broken something else while trying to fix your tech? Let me know in the comments. 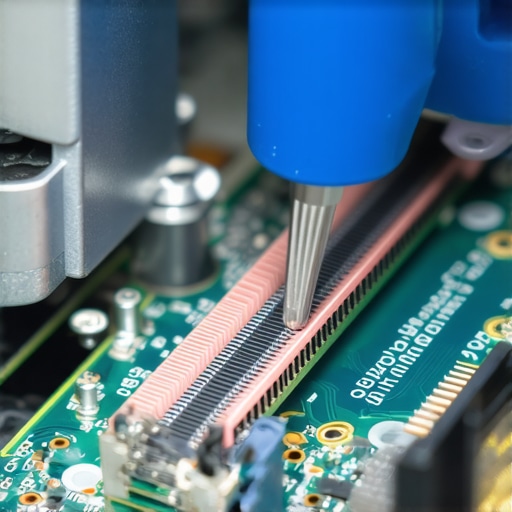 This level of detail is what separates a lucky fix from a professional-grade restoration. Don’t let a simple swap turn into a total loss because of one missed step.If you’re doing this more than once a year, stop using a butter knife or a generic hardware store screwdriver. I swear by the iFixit Mako driver set because the CR-V steel bits don’t round out after three uses. When you’re troubleshooting common computer repair issues effectively, the last thing you want is a stripped screw on a chassis that’s held together by plastic tension clips. For business owners, this is the point where managed IT strategies to keep your business secure in 2025 become a financial necessity rather than a luxury. You shouldn’t be fixing screens in the breakroom; you should have a lifecycle management plan that replaces hardware before the hinges snap and take the display cable with them. I’ve seen too many companies lose thousands in productivity because they lacked effective managed IT solutions for growing companies.
How can I make my laptop screen last for a decade?
It starts with the hinges. If you feel even a slight resistance when opening your lid, stop. That resistance is the plastic mounts inside your display assembly screaming. I recommend a tiny drop of synthetic lubricant on the pivot points once every two years. If you don’t, you’ll end up wondering why your laptop hinges are creaking right before they snap the LCD’s corner. Also, stop using glass cleaner. Ammonia-based cleaners eat through the oleophobic and anti-reflective coatings on modern IPS panels. Stick to 70% isopropyl alcohol on a lint-free cloth—and never spray the screen directly. Moisture can seep into the bottom bezel and short the T-CON board.  As noted in the IPC-A-610 standards for electronic assemblies—the gold standard for the electronics industry—the mechanical integrity of a connection is often compromised long before the component actually fails. This is why professional shops use torque-limited drivers. In the future, I expect to see more modular-first designs as right-to-repair laws gain traction, potentially making these screen swaps as easy as changing a battery. For now, you have to be the guardian of your own hardware. While you’re under the hood, don’t forget the rest of the system. Use the easy way to check your hard drive’s health using smart data to ensure your data is as healthy as your new display. My advanced tip for the day: Download a tool like HWiNFO64 and monitor your GPU Hot Spot temperature; if it’s consistently over 90°C, your screen isn’t the only thing at risk of failing soon. Give it a look today and see what your sensors are really telling you.
Hard Truths from the Repair Bench
After years of fixing these ink-splattered panels, a few lessons stand out that aren’t in the manuals. First, a blot never stays small; it is a ticking clock for your productivity. Second, your eyes will lie to you about screw sizes—always use a magnetic mat to organize them, or you’ll accidentally drive a long screw through a short hole and pierce the motherboard. Third, don’t ignore computer repair for beginners advice about static; it only takes one invisible spark to kill a perfectly good CPU. Finally, if you see a strange pressure mark in the center of your display, treat it as a warning sign to stop stacking books on your laptop bag before it becomes a permanent ink blot.
My Personal Repair Kit Essentials
I don’t start a job without these specific resources. For hardware, the iFixit Jimmy is my favorite tool for popping those stubborn plastic bezels without snapping the clips. For software diagnostics, I rely on HWiNFO64 to verify the eDP lane count before I even buy a replacement panel. When you are looking for parts, search by the LCD model number, not the laptop model, to ensure the connector pins match. And while your chassis is open, it is the perfect time to use the easy way to check your hard drive’s health using smart data so you don’t waste money fixing a screen for a laptop with a dying drive.
Take Back Your Workspace
Repairing a laptop screen isn’t just about saving money; it’s about reclaiming a tool you rely on every day. Whether you decide to tackle this yourself using laptop screen repair tips or hand it off to a professional, you now have the knowledge to avoid the most common pitfalls. Your tech should serve you, not the other way around. Don’t let a hardware failure slow down your goals for the year. Have you ever successfully swapped a screen yourself, or did you run into a nightmare connector? Let me know your biggest repair win or fail in the comments below!