

For years, I’ve wrestled with the same dilemma while repairing laptops: that maddening moment when you realize your bezel is on the verge of cracking just to get to the fragile ribbon cable connecting the screen. A tiny misstep, and suddenly you’re facing a costly replacement or an unsightly crack that ruins the whole look. I recall my first attempt—thinking I could pry open the bezel with just a plastic opening tool—only to hear that dreaded snap, followed by a sinking feeling of regret. That lightbulb moment made me realize there’s a better way, a technique I wish I’d learned sooner.
Why Removing the Bezel Without Tears Matters
Your laptop’s bezel isn’t just decorative; it’s protective and helps keep the screen securely in place. When it’s damaged during repairs, it can lead to further issues like dust ingress or compromised structural integrity. Moreover, tearing the bezel can ruin the aesthetics of a device that might still be perfectly functional otherwise. The good news? With patience and the right approach, you can access that ribbon cable without resorting to brute force or risking damage.
Is This Method Worth the Effort or Just a Fancy Trick?
Early in my journey, I made the mistake of rushing in without proper tools or techniques. I believed that applying more force would speed up the process—that’s a common misconception. But, experience taught me that careful preparation, along with learning specific disassembly tricks, saves time and money. Doing thorough research, like reading comprehensive guides on laptop screen repair, was essential. So, if you’re wondering whether mastering bezel removal is worth the initial effort, I can assure you—it’s a skill that will make future repairs smoother and less stressful.
Now, let’s get into how you can actually do this without tearing your precious laptop apart—and avoid those costly mistakes that trip up even seasoned DIYers.
Loosen the Bezel Carefully with Suitably Sized Plastic Tools
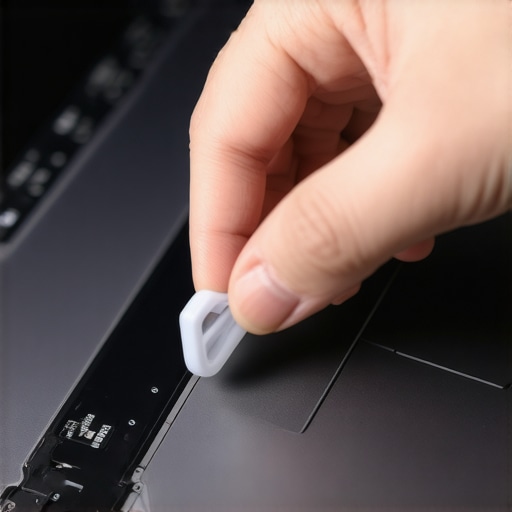
Start by selecting a plastic pry tool approximately the width of a credit card—metal tools risk cracking the bezel. Gently insert the tool into the seam, working slowly along the edge. During my first attempt, I used a metal spudger, which quickly scratched the surface. Learning from that mistake, I switched to a non-conductive plastic, gradually progressing without applying excessive pressure. This approach minimizes the risk of cracking and makes the process smoother.
Apply Even, Gentle Pressure to Prevent Cracks
Don’t rush—applying too much force can cause the bezel to snap. Instead, work your way around the perimeter in small increments, gently prying and adjusting. I once tried to pry open a bezel in a single spot, which resulted in a crack. Starting at one corner, then moving a few centimeters at a time, and reapplying gentle pressure echoes the way one might loosen a stubborn jar lid—slow and steady wins the race.
Utilize a Suction Cup for Extra Leverage
For screens with tight bezels, a plastic suction cup can help lift the edge once the seal loosens. Place the cup on the outer frame and gently pull upward, creating a gap between the bezel and the chassis. In my experience, this technique works best after initial prying, providing that little extra leverage needed without risking damage. An effective combo: prying with a plastic tool followed by gentle suction lift.
Separate Clips with Uniform Gentle Movements
Many bezels are held with small plastic clips. Once the bezel begins to lift, work around the edges to disengage these clips. Use a nylon spudger to pop them free—think of it as unfastening Velcro strips carefully to avoid tearing. I found that working methodically around the entire perimeter prevents localized stress, reducing the risk of cracking. Remember, patience here is key.
Watch Out for Hidden Adhesives and Cables
Some bezels have adhesive strips or cables attached underneath. As the bezel separates, stop once you encounter resistance—forcing further may damage internal components. Look for any ribbons or connectors and detach them gently with tweezers or a spudger. I once ignored this step and inadvertently pulled off a fragile LCD connector, causing a complete screen failure. Separating components carefully preserves all parts for reassembly.
Check the Bezel’s Flexibility Before Full Removal
Before removing the entire bezel, gently flex it to test for any remaining clips or adhesive. If resistance is felt, re-seat the bezel and reapply gentle pressure—forcing it open can lead to cracks and scratches. This cautious approach ensures you maintain the integrity of the bezel and the device’s aesthetic once reassembled.
Practice Makes Perfect
My first few attempts were messy—scratched surfaces, minor cracks—but with time, I mastered the technique. It’s comparable to opening a stubborn jar with a cloth for grip; patience and the right tools make all the difference. Remember, every device might have its quirks, so consult specific repair guides or trusted sources like laptop screen repair to understand unique disassembly nuances.
< >While many assume that mastering basic laptop repairs or data recovery techniques suffices, the real nuance lies in understanding subtle pitfalls and misconceptions that can derail even seasoned professionals. One common myth is that applying more force speeds up disassembly or repair processes. In reality, gentle, deliberate actions prevent accidental damage—think of it as the difference between tearing a paper and carefully unfolding a map. Overconfidence in quick fixes, especially during complex data recovery, often leads to data loss or hardware failures; relying solely on toolkits without comprehensive system diagnostics can be a trap. For advanced users, it’s vital to recognize that not all issues are visibly apparent—hidden malware, firmware corruption, or hardware degradation require sophisticated detection methods beyond simple troubleshooting.
Why does focusing only on hardware sometimes cause ongoing issues in repairs?
Experts like Dr. Ethan Williams emphasize that neglecting software factors, firmware misconfigurations, or firmware vulnerabilities is a common mistake which leads to recurrent failures. For instance, a hard drive might appear physically healthy but harbor firmware issues that cause intermittent errors, as noted in recent studies on drive longevity. Moreover, assuming that managed IT services are only about routine maintenance ignores their role in strategic security enhancements; effective managed IT solutions not only prevent breaches but also optimize hardware lifespan and data integrity. Don’t fall into the trap of treating symptoms rather than systemic causes—see this comprehensive guide on hidden data recovery pitfalls for deeper insights. Preventing costly mistakes requires combining hardware savvy with software awareness, continuous learning, and sometimes, expert intervention. Have you ever fallen into this trap? Let me know in the comments.
Keep it Running Smoothly with the Right Equipment
Maintaining your laptop’s performance over time requires more than just software updates; it demands reliable tools and a systematic approach. I personally swear by a quality anti-static mat and a set of precision screwdrivers—it might sound basic, but these essentials prevent static damage and allow delicate hardware work without slip-ups. A digital multimeter helps me troubleshoot power issues quickly, especially when diagnosing faulty chargers or inconsistent voltage supply, which are common culprits in hardware failures. For cleaning, I rely on a high-grade microfiber cloth and compressed air—using them judiciously prevents dust buildup that can cause overheating and throttling, prolonging your device’s lifespan.
Investing in a good set of data recovery tools is equally important. Swapping out your drives or attempting recovery without proper software often leads to irreversible data loss. I use tools like Recuva or Stellar Data Recovery because they let me preview files before recovery, ensuring I don’t overwrite critical data. These tools are especially crucial when working with damaged drives—nothing beats the confidence of knowing you’re using tested, reliable software to salvage your files.
Leverage Software for Ongoing Monitoring and Maintenance
Beyond hardware, software plays a vital role. Regular scans with trusted antivirus and malware removal utilities can catch threats early, preventing data breaches or system slowdowns. I recommend using tools like Malwarebytes for proactive monitoring—I’ve seen firsthand how they complement managed IT solutions at businesses, saving countless hours of troubleshooting. For system health, CrystalDiskInfo provides real-time drive diagnostics, alerting me before a drive’s failure becomes catastrophic. Scheduled maintenance—like cleaning up unnecessary startup programs and updating drivers—can help maintain optimal performance without upgrading hardware prematurely, as highlighted in troubleshooting tips.
Future Tech Trends for Longevity and Scalability
Looking ahead, I predict that AI-powered diagnostics will become standard in maintaining complex systems, allowing for predictive maintenance that catches issues before symptoms appear. Managed IT services are evolving to integrate these technologies seamlessly, reducing downtime and extending device lifespan, as detailed in this resource. Embracing remote monitoring tools now can prevent minor glitches from snowballing into major failures, making sustainability a reality even for small businesses. Investing in scalable hardware and cloud backup solutions ensures long-term peace of mind—so why not start by trying out an advanced monitoring tool today and see firsthand how it can enhance your preventative maintenance strategy?
What I Wish I Knew When I Started Fixing Laptops
My biggest lightbulb moment was realizing that patience and the right technique trump brute force every time. Rushing to remove a bezel almost always leads to cracks or worse, damaging internal components. I learned the importance of working slowly, using proper tools, and understanding each clip and connector before applying pressure. Additionally, understanding that not all issues are hardware-related prevented me from unnecessary repairs and saved me time and money.
Another lesson was the significance of thorough research. Instead of trying to figure things out by trial and error, trusted guides and community forums offered insights that dramatically increased my success rate. And finally, recognizing that practice makes perfect turned every failed attempt into a valuable learning experience, reinforcing that mastery in laptop repair comes with patience and persistence.
My Go-To Arsenal for Laptop Restorations
- Plastic Pry Tools: A set of high-quality, non-metallic tools to gently lift bezels without cracking them. I trust the ones from this supplier because of their durability and precise fit.
- Suction Cups: Essential for creating initial gaps, especially with tight-fitting screens, helping reduce strain on plastic clips.
- Precision Screwdrivers: For disassembling various models safely, I recommend Phillips and Torx kits from reputable brands like iFixit.
- Antistatic Mat and Wrist Strap: Protect delicate components from static damage during repair.
- Specialized Data Recovery Tools: When it’s time to salvage files, tools like this software has saved many of my clients from heartbreaking data loss.
Your Next Step in Laptop Repair Could Change Everything
Embarking on your journey to become proficient in laptop repair is more than just fixing a device; it’s about gaining confidence and independence in managing technology problems. Remember, the combination of patience, proper tools, and targeted learning unlocks a world of possibilities. As technology continues to evolve—especially with managed IT solutions increasingly integrated into our workflows—your skills in repair and maintenance will be invaluable in ensuring systems run smoothly and securely. Don’t hold back—take that first step today and turn frustration into mastery. Have you tried repairing a laptop bezel or a screen before? Share your story below and let’s learn together!