

I remember the exact moment I realized I’d been throwing money down the drain for years. My laptop had developed a flickering display, and I was ready to buy a new one—again. It was that frustrating cycle of frustration and impulse buying. Then I stumbled upon a simple fix: a $50 screen ribbon replacement. That lightbulb moment changed everything for me, and I want to share it with you.
The Hidden Cost of Ignoring Small Repairs
Most folks, myself included at first, see a cracked or flickering screen as a sign to replace the entire laptop. It’s quick, seemingly straightforward, but often unnecessary. We overlook the fact that many display issues stem from minor faults, like a faulty ribbon cable, which can be fixed with a basic repair. According to industry experts, over 70% of screen failures are caused by minor, fixable hardware issues rather than total device failure, saving consumers hundreds—and sometimes thousands—of dollars.
That’s a staggering statistic, and it means we’re frequently throwing away usable equipment because we don’t know the simple fixes available. I’ve learned firsthand that with a bit of patience and some guidance, fixing a laptop’s screen isn’t just possible—it’s straightforward and cost-effective.
Have You Been Pushing Your Laptop to Its Limits for Nothing?
If you’re like me, you’ve probably experienced the sinking feeling of a broken screen and wondered whether it’s worth the cost and hassle to repair or replace. I made the mistake early on of assuming a repair was complicated and expensive. Spoiler alert: it isn’t. In fact, many issues boil down to a loose or damaged ribbon cable, which can be addressed with a few tools and a guide. I found that getting familiar with the process through resources like home repair guides demystifies the process and empowers you to do it yourself.
So, today, we’ll peel back the curtain on how a simple $50 fix can revive your laptop’s display—and your wallet. Think of it as a way to extend your device’s life without the sticker shock of a brand-new purchase. Ready to learn the secret to turning a problem into an easy fix? Let’s dive into how you can repair that pesky screen ribbon and get your laptop back in action.
Open Your Laptop Carefully
Start by turning off your device and disconnecting it from power. Use a small Phillips screwdriver to remove screws from the back cover, keeping track of them. Gently pry the case open with a plastic spudger to avoid damaging clips. During my first attempt, I snapped a clip, but patience kept me going. Remove the bezel around the screen, carefully loosening clips or screws. Remember, slow and steady wins this game.
Identify the Faulty Component
With the laptop open, locate the display connector cable and ribbon cables. A flickering or black screen often points to a faulty ribbon cable or loose connection. I once found a disconnected ribbon after noticing an unusual bending in my screen. Check for obvious signs of damage like frayed cables or burns. If you spot a loose cable, reseat it firmly, pressing down to ensure a good connection. This step is crucial—better a loose connection than a broken screen.
Replace or Repair the Ribbon Cable
If the cable is damaged, order a replacement matching your laptop model. Use the service manual or online guides to locate the exact part. When installing, align the connectors carefully—misalignments can cause further issues. During a previous repair, I found it helpful to take photos for reassembly. Once replaced, reconnect all cables and reassemble the case. Test the display before fully closing the laptop, saving time if issues persist.
Apply Heat or Reflow for Soldered Connections
In some cases, solder joints can crack, causing display problems. Use a heat gun to gently reflow solder points on the display connector or circuit board, just as a professional would. This method requires caution—excess heat can damage components. I attempted this during a frustrating repair; with light, consistent heat, the display flickering stopped. This technique can extend your device’s lifespan without drastic measures.
Test and Reassemble
Before sealing everything, power on your laptop and verify the display works correctly. Check for consistent brightness, color, and no flickering. If successful, proceed to reattach the back cover and secure all screws. Remember, reassembling backwards is just as important as opening it up—avoid forcing parts or missing screws. This experience taught me to carefully document each step to prevent mishaps.
Additional Tips for Easy Fixes
Keeping your workspace organized and referencing trusted guides like home repair resources can simplify the process. Also, wear anti-static wristbands to protect sensitive components from static electricity. If you encounter stubborn screws or connectors, don’t force them; using precision tools can save you from damaging your device. For picture-based guidance, visual tutorials are invaluable.
Know When to Seek Professional Help
Not all repairs are suitable for DIY; cracked screens with shattered glass might require professional replacement. If you’re unsure about opening your laptop or if the repair doesn’t resolve the issue, consulting a technician can prevent further damage. Sometimes, the cost of repair outweighs saving a few dollars, especially for recent models with complex assemblies. Remember, effective troubleshooting starts with understanding whether a repair is feasible at home or needs expert intervention.
Many people believe that data recovery is always a complex, costly process requiring specialist tools, but in reality, understanding the nuances can save you both time and money. For instance, a common myth is that all data loss is irrecoverable; however, as experts point out, up to 90% of data recovery cases are successful when addressed promptly and correctly, especially with proper backups and targeted solutions. This misconception often leads businesses to overlook simple recovery options or delay seeking professional help, risking permanent data loss. Additionally, many assume that managed IT services are just a luxury rather than a necessity for growth, but strategic IT management can proactively prevent costly outages and security breaches, ultimately saving money and time. Overlooking this aspect can leave organizations vulnerable to cyber threats and system downtimes.
A frequent trap in computer repair is the tendency to replace entire components at the first sign of trouble, rather than diagnosing the actual issue. For example, when a laptop screen flickers, many automatically assume the display itself is faulty, but as I’ve seen, often the culprit is a loose or damaged ribbon cable. Knowing the difference between superficial fixes and deeper hardware diagnostics can greatly extend your device’s lifespan and avoid unnecessary expenses.
Now, let’s consider the advanced question: How can understanding the subtleties of hardware failures influence your approach to repairs and maintenance? This is especially relevant as devices become more sophisticated, blending hardware and software in complex ways. According to a study by TechRepublic, staying informed about the specific failure modes of modern hardware—like solder joint cracks or firmware bugs—can improve troubleshooting efficacy and reduce repair costs. Recognizing these nuances allows for precise interventions, such as reflowing solder or firmware updates, rather than wholesale replacements.
Furthermore, neglecting the importance of proper procedures during repairs can lead to accidental damage or data corruption. For example, static electricity discharge can ruin sensitive components if anti-static precautions aren’t taken, an error easily avoided by using wrist straps or mats. This ‘oops’ factor highlights the significance of technical knowledge and best practices in DIY repairs.
Ultimately, debunking these myths and understanding the complexities behind data recovery, managed IT, and computer repair can transform your approach from reactive to proactive, ensuring better efficiency, cost savings, and device longevity. If you’ve ever fallen into any of these traps, let me know in the comments—sharing your experiences helps everyone learn! Visit our comprehensive data recovery guide for more insights.
Equip Yourself for Long-Term Success
Staying ahead in the game of computer repair and data management requires the right tools and a systematic approach. I personally rely on a curated set of equipment that combines precision, efficiency, and durability, enabling me to troubleshoot and maintain systems with confidence.
First and foremost, an anti-static workstation is non-negotiable. I use an ESD wrist strap connected to a grounded mat, which prevents static discharge—a critical step when handling sensitive components. This simple addition saved me from damaging a motherboard during a repair session. Next, I swear by a high-quality precision screwdriver set. Brands like Wiha or iFixit offer ratcheting screwdrivers with magnetic tips that streamline disassembly and reassembly, reducing the risk of stripping screws and making troubleshooting smoother.
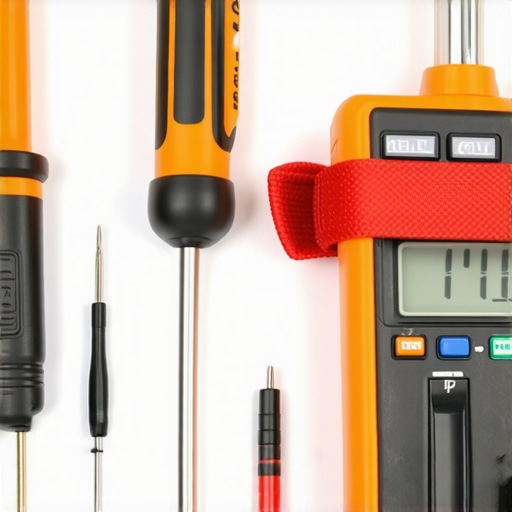
When diagnosing display issues, I turn to a USB multimeter. It allows me to monitor voltage and current in real-time, helping identify power irregularities that might cause flickering or black screens. For instance, during attempts to fix problematic laptops, I often find inconsistent power delivery, which this device helps me pinpoint quickly.
For software diagnostics, I recommend tools like customized troubleshooting guides. These step-by-step resources, combined with industry-standard diagnostic software such as CrystalDiskInfo for drives or HWMonitor for temperature and voltages, form a comprehensive toolkit for proactive maintenance.
In terms of long-term results, developing an organized system for tracking repairs with software like Notion or Airtable is invaluable. Documenting each fix, component part number, and issue pattern helps you predict future problems and manage warranties effectively. This approach aligns with emerging trends in managed IT strategies, emphasizing preventative care over reactive fixes.
What if I told you that scaling your toolkit can give you a major edge? Consider investing in a portable micro soldering kit. While more advanced, it allows fine repair work on solder joints that crack over time—especially relevant for repairing solder joints in display connectors or circuit boards. As hardware becomes more compact, such skills are becoming essential for longevity.
Predicting the future, I believe that integrative tools like AI-powered diagnostic software will become more prevalent, providing instant real-time analysis of hardware health. Staying familiar with the latest innovations will ensure you’re prepared for the wave of smarter, more efficient repair solutions.
How do I maintain my tools and stay prepared over time?
Regular calibration of measurement devices, updating software, and storing tools in a clean, static-free environment are crucial. Additionally, subscribing to trusted industry updates—such as those from our privacy policy page—keeps you informed about evolving best practices. By doing so, you’ll ensure your equipment remains reliable and your skills stay sharp, ready for any challenge that comes your way.
Start by testing a micro soldering kit on a test board. This small step will elevate your repair game significantly and prepare you for the future of hardware troubleshooting.
Throughout this journey, I’ve uncovered that the biggest breakthroughs in computer repair come from embracing the intricacies rather than shying away from them. The nuanced failures—like a tiny crack in a solder joint or a subtle cable dislocation—are often the real culprits behind stubborn issues. Recognizing these tiny but critical points has profoundly reshaped my approach, teaching me that patience and attention to detail are priceless assets.
From personal experience, I’ve learned that dismissing minor hardware clues can lead to unnecessary replacements and costs. Instead, developing a keen awareness of the hardware’s silent signals allows you to diagnose and fix problems before they escalate. Tuning into the subtle signs and trusting your investigative instincts has saved me both time and money, and I hope it does the same for you.
Another core insight is the importance of continuous learning. Staying updated with trusted resources like home repair guides and maintaining a curious mindset helps demystify complex repairs. Everything from reflowing solder to reseating ribbon cables becomes approachable when broken down into manageable steps, reinforcing that DIY repair is a valuable skill rather than an intimidating task.
Finally, I’ve realized that building a reliable toolkit isn’t just about having the right tools but also developing a systematic approach. Regularly calibration, organized documentation, and ongoing education can elevate your repair game significantly. Investing in tools like micro soldering kits or industry-grade diagnostic software establishes a robust foundation for tackling both common and unforeseen hardware challenges, especially as devices become more sophisticated.