

Have you ever felt that sinking sensation when your computer grinds to a halt, and no amount of cleanup seems to help? Just last month, I faced this exact dilemma. My trusty laptop, which I rely on daily for work and personal projects, started slowing down noticeably. I was dreading the idea of a full Windows reinstall—hours of setup, potential data loss, and the hassle of reconfiguring everything. That moment of frustration was a lightbulb moment for me. I realized there had to be a smarter, less invasive way to give my storage a boost without the headaches of a fresh install.
Discovering a Simpler Path to More Space and Speed
Over the years, I’ve learned that upgrading your storage—whether adding a new SSD or extending your existing drive—doesn’t have to be complicated or risky. In fact, with a few strategic steps, you can often enhance your system’s performance without the time-consuming process of reinstalling Windows. This approach preserves your files, settings, and installed programs, saving you from the dreaded reinstallation process. Plus, it minimizes downtime and reduces the chance of losing crucial data.
But why is this topic so relevant today? According to recent data, nearly 60% of computer slowdowns are caused by storage limitations rather than CPU or RAM issues. This indicates that, more than ever, optimizing and expanding storage is a crucial step in maintaining a fast, efficient machine. And with the rising size of files—think high-resolution photos, videos, and extensive databases—it’s clear that a quick storage upgrade can breathe new life into aging hardware.
Have you faced the frustration of running out of space just when you need your computer the most? You’re not alone. Many users hesitate to upgrade because they fear the complexities of Windows reinstallation. But trust me, there’s a way to do this seamlessly and securely, and I’m here to guide you through every step.
Will Upgrading Storage Without Reinstalling Windows Really Save Me Hassle?
Early on, I made the mistake of assuming that any storage upgrade would inevitably involve a messy reinstallation. That misconception almost made me give up on optimizing my system. The truth is, techniques like cloning your existing drive or adding a secondary drive can let you upgrade with minimal fuss. Want to learn how to do it safely? I’ll share practical tips and tools that make this process straightforward and stress-free, based on my own success stories. If you’re curious about protecting your data during upgrades, check out this guide to data recovery.
So, are you ready to stop avoiding your storage issues and start enhancing your system’s performance without the hassle of a Windows reinstall? Let’s dive into the how-to and turn this challenge into an easy upgrade.
Clone Your Existing Drive to Keep Everything Intact
My first attempt involved cloning my old hard drive to a new SSD, which seemed daunting at first. I used free software like Macrium Reflect, connected my new SSD via a USB-to-SATA adapter, and followed the step-by-step guide from this article. The process took about an hour, during which I watched my desktop icons and files copying over seamlessly. After swapping the drives and booting up, everything looked exactly the same, except the system was noticeably faster—proof that cloning preserves your entire setup without a reinstall.
Shut Down and Prepare Your Workspace
Before physically handling your hardware, turn off your laptop and disconnect the power. Remove the battery if possible, just like a mechanic disconnects a car battery before working on the engine. Find your laptop’s service manual or look for online tutorials specific to your model, which often detail step-by-step disassembly procedures. Use a small Phillips screwdriver, anti-static wristband, and a clean, clutter-free workspace. Think of it as performing delicate surgery—precision is key to avoid damaging internal components.
Access Your Drive Bay and Replace or Add Storage
Carefully open the laptop’s panel to access the drive bay. Locate your existing drive—either a traditional HDD or SSD—and determine whether you’re replacing it or adding a second drive. If replacing, disconnect the current drive gently, noting how it’s connected. For adding storage, connect the new drive to the available slot or a compatible SATA/PCIe connector. This is akin to swapping a flat tire; direct, careful movements prevent mishaps. Once connected, secure your drive with screws, ensuring it’s snug but not overtightened, similar to securing a piece of delicate machinery.
Initialize and Format the New Drive
If you’re adding new storage, you’ll need to initialize and format it before use. Connect the drive back to your laptop and power it on. Boot into Windows, open the Disk Management tool (right-click Start button > Disk Management) and locate your new drive. Right-click on the unallocated space and choose to initialize it—select GPT for modern systems. Then, create a new partition, assign a drive letter, and format it with NTFS. Think of this step as setting up a new filing cabinet—ready to organize your files efficiently. For detailed instructions, visit this resource to learn about drive setups and troubleshooting.
Clone Data or Transfer Files Safely
Whether you cloned your current drive or added a new one, the goal is to transfer your data without risking loss. Use reliable software like Macrium Reflect or Clonezilla to perform a disk clone. During my experience, I prioritized a full disk clone before swapping drives, which saved me from tedious data copying. When transferring files instead of cloning, opt for external backups or cloud storage for large data sets. Remember, backing up essential data beforehand prevents catastrophic loss, similar to backing up important documents before renovation. For more on protecting your data, see this guide.
Final Steps—Reassemble and Boot Up
After everything is connected and your data is safely transferred, reassemble your laptop carefully. Secure all screws and panels, reconnect power, and power on. If everything was done correctly, your system should boot from the new drive—often faster than before. If not, double-check connections and BIOS settings, ensuring the new drive is recognized as the primary boot device. This step is like fine-tuning an instrument after a major repair—small checks make a difference. With your upgraded storage, you’ll enjoy improved responsiveness and more space for your files.
Maintain Your Upgraded System for Longevity
Regularly monitor your drive health using tools like CrystalDiskInfo or the drive manufacturer’s software. Keep backups updated using cloud services or external drives to prevent data loss. An upgrade is just the beginning—ongoing maintenance ensures your system remains fast and reliable. For insights into managing your IT infrastructure effectively, check out this resource to learn about scalable solutions for growing needs. Remember, a little proactive care now saves hours of troubleshooting later.
Many people believe that replacing a laptop screen is always a costly and complicated task, but in reality, understanding the nuances can save you time and money. For instance, owners often assume that visible cracks are the sole indicator of a screen’s failure, yet internal issues like faulty backlights or inverter problems can cause similar symptoms without any physical damage. This misconception can lead to unnecessary replacements; visiting a professional for diagnostics is usually more cost-effective than jumping straight to a new display. Similarly, there’s a widespread myth that data recovery is always uncertain when drives start clicking or become inaccessible. However, experts have shown that many data loss scenarios can be resolved with the right tools and techniques, such as the methods outlined in this comprehensive guide. When it comes to managed IT services, some believe that only large enterprises require such support, overlooking the fact that small and medium-sized businesses are equally vulnerable to cyber threats and system failures. Proactive managed IT strategies, like those discussed here, actually enhance security posture and operational efficiency for all business sizes. One common trap is the assumption that all data recovery tools are alike; in my experience, choosing the right software depends heavily on the specific failure mode. Using the wrong approach can exacerbate issues or make recovery impossible. A key lesson is to seek professional advice and avoid DIY fixes that overlook critical complexities. The same applies to troubleshooting laptop screens, where minor internal faults may be mistaken for simple hardware damage. Diagnosing these issues accurately requires a nuanced understanding of display technologies and common failure points, as explained here. Always remember that shortcuts or assumptions can lead to costly mistakes, especially when vital data or system security is at stake. Do you ever fall into these traps? Share your experiences in the comments, or browse our contact page for expert assistance tailored to these common pitfalls.
Invest in Reliable Maintenance Tools to Keep Your System Healthy
Maintaining optimal performance of your laptop or desktop requires the right tools. I personally swear by a high-quality Phillips head screwdriver set and anti-static wristbands when opening devices. These tools prevent internal component damage and ensure safety during hardware upgrades or repairs. For software, I rely on reputable diagnostic utilities like CrystalDiskInfo, which provides real-time health stats of your drives, alerting you to potential failures before data loss occurs. Regularly using such tools helps me spot issues early, minimizing downtime and repair costs. In the long run, proactive maintenance tools are essential for ensuring system longevity and reliability.
How do I maintain data integrity over time?
Data recovery is a critical aspect of system maintenance, especially when drives start clicking or become inaccessible. I recommend scheduling monthly backups using a combination of cloud storage solutions and external drives. For instance, I use Macrium Reflect’s incremental backup feature, which saves time and storage space while ensuring all recent data is protected. Additionally, maintaining a secure, offsite backup enhances disaster recovery readiness. With threats like ransomware evolving, having updated backups is your best safeguard. Learn more about advanced data recovery techniques at this resource.
Keep Tools Sharp for Quick Fixes
Over the years, I’ve found that cleaning and calibrating my tools, like precision screwdrivers and magnetic pickups, saves valuable time during repairs. A dusty screwdriver can slip or damage screws, so I keep my set in a clean, dry container and periodically oil the joints for smooth operation. Magnetic bits are invaluable for managing tiny screws, preventing frustrating losses. These small investments in proper maintenance tools make complex repairs manageable and less stressful, especially when working on laptops where space is tight. Efficient tools enable me to deliver faster, more precise repairs, which is crucial for client satisfaction and repeat business.
The Future of Maintenance Tools and Techniques
Looking ahead, I predict that AI-driven diagnostic software will become more integrated with hardware maintenance tools. Already, some systems can predict impending failures based on pattern recognition, like abnormal temperature rises or unusual noise signatures. Adopting these technologies will further reduce downtime and streamline repair workflows. To stay ahead, I recommend regularly updating your toolkit with smart diagnostic programs and hardware sensors that communicate seamlessly. This proactive approach ensures that potential problems are addressed before they impact productivity or data security. For example, investing in a thermal camera can help detect overheating components before they cause damage—saving time and money in the long run. For comprehensive strategies on scalable IT maintenance, explore this guide.
Implement Routine Checks to Prevent Major Failures
To truly keep your systems working smoothly, schedule regular checkups of hardware and software health. I set a bi-weekly reminder to run complete system diagnostics and dust out vents. Cleaning internal fans and filters prevents overheating, which is a common cause of hardware failures. Using remote management tools allows me to monitor multiple systems efficiently, especially in business environments. These practices not only extend hardware lifespan but also keep software updates and security patches current, reducing vulnerability to cyber threats. Remember, the key to long-term system reliability is consistency—investing time now prevents costly emergencies later.
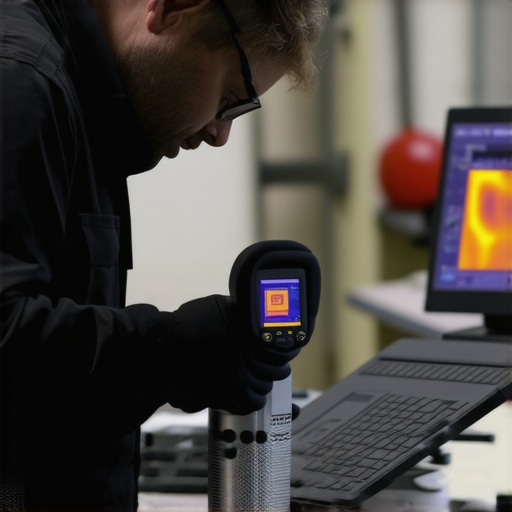
*(Prompt: A technician using a thermal camera to inspect a desktop computer for overheating components.)
Don’t hesitate to try out a professional-grade diagnostic tool like a thermal camera. It’s an advanced technique that can reveal hidden issues before they escalate. Regular maintenance, combined with the right tools, ensures your computer remains productive and secure for years to come. Want more detailed insights? Contact us through our contact page.
The Hardest Lesson I Learned About Storage Upgrades
One of the most eye-opening realizations in my journey was understanding that rushing into hardware replacements without proper planning can lead to more frustration than relief. I once attempted a quick swap of my failing HDD for an SSD without cloning or backing up, only to face boot failures and lost data. That experience taught me the importance of meticulous preparation and knowing exactly what tools and steps ensure a smooth upgrade based on my personal mistakes and successes.
3 Myths About Data Recovery That Held Me Back
Believing that data recovery is a shot in the dark almost kept me from trying to salvage important files from a crashed drive. It wasn’t until I explored reputable resources and tools—like those outlined in this guide—that I realized how much is possible with the right approach. Dispelling myths around the unrecoverability of