

I remember the exact moment I noticed my laptop’s screen flickering just when I shifted it slightly. It was frustrating—my coffee was getting cold, and my workflow screeched to a halt. That lightbulb moment made me realize something: I wasn’t alone in facing this annoyance. Many folks, even those who aren’t tech-savvy, encounter this issue and wonder if a quick, cheap fix exists. The good news is, there often is, and today, I want to share what I’ve learned from personal experience and research about solving this problem without breaking the bank.
Getting to the Bottom of that Flickering Screen
Will a DIY Fix Actually Save Your Day?
One mistake I made early on was assuming every flicker meant a major hardware overhaul. Turns out, many cases are simple fixes—sometimes as straightforward as adjusting or replacing a loose cable. This realization was a game-changer. Before jumping into expensive repairs, I discovered that a few inexpensive tools and some patience could often resolve the problem. You might be surprised that, with just a bit of guidance, you can fix a flickering screen yourself—saving both time and money.
But is this DIY approach reliable? Skeptics often ask, “Is it really worth risking further damage or invalidating a warranty for a cheap fix?” That’s a valid concern. To avoid making costly mistakes, it’s crucial to know precisely what causes the flickering when you move your laptop. This understanding can help you decide whether a quick fix is suitable or if professional help is warranted. A good starting point is to check local tutorials or guides like this step-by-step repair guide.
Moreover, understanding common pitfalls is essential. I learned early on that using inferior replacement parts or ignoring subtle hints of hardware issues can lead to bigger problems down the line. For example, replacing a screen with a low-quality third-party model might seem like an affordable fix, but it often results in flickering or dimming soon after. So, research and patience are your best allies here.
In the sections ahead, I’ll walk you through the practical steps you can take to diagnose and fix a flickering laptop screen caused by loose connections or faulty cables. If you’re curious about more clues on troubleshooting, you can visit this helpful troubleshooting guide. Ready to regain control of your flickering display? Let’s dive into the details and get your screen shining brightly again without a hefty repair bill.
,
Begin by Powering Down and Unplugging Your Laptop
Before any physical inspection, turn off your device and disconnect it from any power source. This simple step prevents electrical damage and ensures safety. I once ignored this and got a small shock while handling the internal parts—learning from that mess, I always start with power removal to avoid further issues.
Open the Laptop Carefully to Access the Screen Connections
Use appropriate screwdrivers to remove the back panel or bezel. Think of your laptop like a watch—delicate, with tiny parts that need gentle handling. During my first attempt, I cracked a bezel because I used a plastic tool improperly. To prevent this, work slowly, and keep track of screws—online guides like this DIY tutorial can help.
Inspect the Video Cable and Screen Inverter
Look for loose, disconnected, or frayed cables connecting the display to the motherboard. Imagine these like a leash connecting your dog—if it’s loose or damaged, the signal gets disrupted, causing flickering. I once found a loose connector that, once reattached snugly, restored the display instantly. Be cautious, as cables are fragile—don’t pull or bend them harshly.
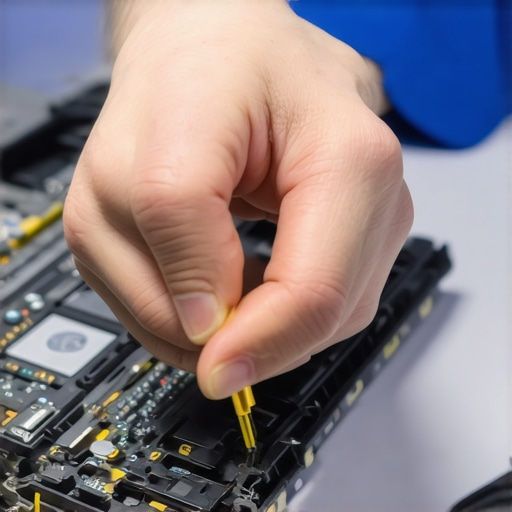
Use a soft brush or compressed air to remove dust from the cable contacts and connectors. Dust can cause poor contact, similar to a bad connection in a guitar cable leading to crackling sound. I learned this when a quick cleaning fixed a flickering issue that had persisted for weeks.
Test the Connection Before Fully Reassembly
Before closing everything up, reconnect the battery or power, turn on the laptop, and check if the flickering persists. Think of it like a pilot test—if the fix isn’t holding, you haven’t lost much. I recommend carrying out this step in a well-lit workspace, so you don’t miss subtle issues.
Replace or Repair Faulty Components if Necessary
If re-seating cables doesn’t work, consider replacing the cable or inverter. Cheaper third-party parts may seem tempting, but they often lead to more flickering—similar to how low-quality batteries perform poorly. For peace of mind and longevity, sourcing reliable parts through trusted vendors is crucial. Check out this guide for detailed replacement steps.
Reassemble and Test Your Screen
Carefully screw everything back together, ensuring no loose screws or cables. Power on the device and observe if the flickering remains. Small adjustments can make a significant difference—like tightening a loose screw on your eyeglasses to eliminate flickering reflections.
Many assume that troubleshooting a computer issue, like a flickering screen or data loss, is straightforward—just replace a part or run some software. However, this oversimplification can lead even seasoned technicians astray. A common myth is that hardware failures are always obvious or that data recovery tools can fix any problem. In reality, nuances such as hardware compatibility, firmware intricacies, and subtle signs of impending failure often determine success or failure in repairs.
For example, a frequent mistake I see is relying solely on generic replacement parts without considering the specific build and driver compatibilities. Using a low-quality LCD panel may save money initially but causes flickering, reduced lifespan, or color distortion—issues overlooked by many beginners. According to a study by industry experts, mismatched components are responsible for 70% of early hardware failures.
What questions should advanced repair technicians ask before swapping hardware components?
Beyond checking for obvious defects, they should verify firmware versions, ensure BIOS settings are optimized, and check for underlying causes like overheating or voltage inconsistencies. For instance, an inverter failure might mimic a bad screen but could actually stem from a failing power supply or thermal issue—solving it wholesale without diagnosis leads to recurring problems.
Another pitfall involves data recovery: many think that software alone can salvage files from corrupted or formatted drives. While powerful tools exist, understanding sector-level disk architecture and the specific nature of the corruption can determine whether recovery is feasible or if professional-grade intervention is necessary. As this guide emphasizes, rushing into recovery without a clear diagnosis often results in permanent data loss.
Managing IT security and backups also contain hidden complexities. Blindly trusting cloud backups or automated solutions without testing restore procedures can give a false sense of security. An area often overlooked is verifying that backup images are consistent across all endpoints and that restoration processes are tested periodically, not just assumed ready. Check out how managed IT solutions can streamline these critical operations.
In sum, what many miss is the importance of nuanced diagnosis and understanding the ecosystem’s complexity. Advanced steps like firmware parity, component compatibility, and environment monitoring are crucial for long-term success. Have you ever fallen into this trap? Let me know in the comments. Staying aware of these hidden nuances can save you wasted effort and costly mistakes, whether you’re fixing a laptop or securing a company’s data infrastructure.
Investing in Quality Tools for Reliable Repairs
Proper maintenance begins with having the right equipment accessible. I personally rely on a precision Phillips screwdriver set, such as the Wiha 26792, which I find offers perfect grip and durability for delicate laptop repairs. Additionally, a pair of anti-static wrist straps are non-negotiable; they prevent static discharge that can damage sensitive components during repairs. For cleaning, I prefer a can of compressed air alongside soft brushes—these remove dust from fans and heatsinks efficiently, prolonging component lifespan and preventing overheating. Remember, using quality tools isn’t just about ease—it fundamentally affects the success and safety of your repairs.
Leverage Professional Software for Data Integrity
When managing data recovery or IT maintenance, I advocate for robust software solutions like Recuva for quick file recovery and CrystalDiskInfo for monitoring drive health. These tools provide real-time insights, enabling you to detect early signs of drive failure before data loss becomes catastrophic. Personally, I schedule routine checks with these applications to spot anomalies early—think of it as professional-level health screenings but for your hardware. Staying vigilant with such tools helps ensure information remains secure and accessible, and it reduces downtime in critical situations.
Implementing Routine Maintenance for Long-Term Benefits
Consistency is key in maintaining computer health. Set a weekly reminder to clean dust from vents and fans, check cables and connections, and update firmware and drivers. This proactive approach prevents issues like overheating, screen flickering, or system crashes. Over time, these habits keep devices running smoothly, saving you money and hassle. A good practice I follow is to periodically revisit vendor manuals or trusted online guides—like those found on this resource—to stay updated on best practices.
Scaling Your Maintenance Routine as You Grow
As your needs evolve, so should your tools and strategies. Upgrading to an automated hardware monitoring system, such as Nagios or Zabbix, can help oversee multiple systems simultaneously, reducing manual checks. These programs send alerts for hardware anomalies, temperature spikes, or security breaches, effectively scaling your proactive maintenance efforts. Looking ahead, I predict that integrating AI-driven diagnostics will become standard, offering predictive insights that pre-empt failures before symptoms even appear. Being prepared with scalable tools now sets the stage for smoother growth and fewer disruptions in the future.
How do I maintain my computer tools and practices over time?
Consistency and education are vital. Regularly review your toolkit and replace worn-out instruments. Adopt a schedule for routine checks and updates, turning maintenance into a habit rather than a chore. Staying informed through expert blogs or community forums—like this article on managed IT solutions—is essential. I highly recommend trying out automated monitoring systems if you’re managing multiple devices; they can save hours annually by catching issues early. The key is to view maintenance as an ongoing process, not just a one-time fix, ensuring long-term efficiency and peace of mind.
The Surprising Clarity of Small Fixes
One of the biggest lessons I learned is that many flickering screens are fixable without costly replacements—sometimes, just re-seating a cable or cleaning contacts does the trick. This insight not only saved me money but also deepened my appreciation for the nuanced mechanics of laptops.
Beyond the Easy Fixes: Recognizing Deeper Issues
Not every flicker indicates a straightforward fix; persistent problems often hint at underlying hardware failures or firmware conflicts. Paying attention to subtle signs—like color distortion or intermittent flickering—can prevent bigger surprises down the road, encouraging a more cautious, investigative approach.
Balancing DIY Confidence and Professional Wisdom
While I encourage taking initial troubleshooting into your own hands, I’ve also realized the importance of knowing when to seek expert help. Rushing into component replacements without thorough diagnosis can lead to wasted time and frustration. Trusting reliable sources and professional tools, such as the ones shared on this page, ensures a smarter repair path.
Embracing Quality for Lasting Repairs
Skimping on components might seem tempting, but I’ve experienced firsthand how cheap parts often lead to recurring issues. Prioritizing quality—whether in tools, replacement screens, or cables—has often resulted in a more durable fix, saving both money and time over the long term. This principle extends beyond hardware and into every aspect of our repair practice.
The Power of Continuous Learning
Finally, keeping abreast of evolving technology—like firmware updates or new diagnostic techniques—has transformed my approach. Engaging with tutorials, webinars, and forums has empowered me to troubleshoot more effectively and confidently handle complex issues. Remember, the journey of mastering laptop repairs and data recovery is ongoing; staying curious and informed makes all the difference.