

I will never forget the night my laptop decided it was tired of being a computer. It was a cold Tuesday, and I had just finished a massive client project. I clicked ‘Update and Restart’ with the naïve confidence of someone who had not yet felt the sting of a corrupted operating system. Fast forward six hours: a flickering logo and a ‘Windows could not complete the installation’ loop greeted me. I lost every single file because I had made the classic rookie error of keeping my life’s work in the same digital basket as the operating system. If you have ever stared at that spinning circle of doom, you know that gut-punch feeling. Today, I am going to show you the one tactical move—creating a dedicated data partition—that ensures even if Windows blows itself up during a patch, your files stay untouched. Have you ever had a Windows update fail and leave you panicking about your precious photos or tax documents?
Put Your Files in a Digital Safe Room
My biggest mistake early on was trusting the default Windows setup. Most people just save everything to the ‘Documents’ or ‘Pictures’ folder on the C: drive. I did too, until a botched security patch wiped my file system table. It was a nightmare, and I eventually needed expert data recovery techniques just to get my family memories back. By separating your data from your operating system, you are essentially building a firewall between the part of the computer that breaks (Windows) and the part you actually care about (your stuff). When you are learning computer repair for beginners, this is the absolute ‘Golden Rule.’
Is splitting your hard drive actually worth the hassle?
You might think it sounds overly technical, but it is actually more about peace of mind than anything else. An industry report by Backblaze suggests that while hardware failure is a risk, software-related data loss is often the silent killer for home users. If Windows fails, you can simply wipe the C: drive and reinstall the OS without ever touching your D: drive where your photos live. It is the ultimate insurance policy. If your machine is currently acting up, you might find the fix for a laptop stuck on the getting windows ready screen useful before you even start the partitioning process. [IMAGE_PLACEHOLDER] Let’s dive into how you can set this up without breaking your budget or your brain.
Open the Blueprint of Your Storage
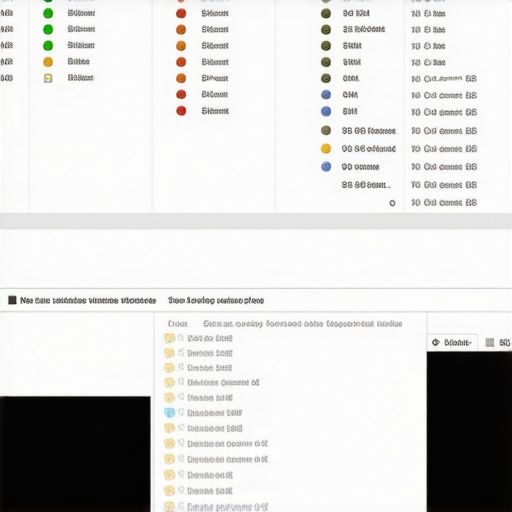
Think of your hard drive as a massive studio apartment. Right now, your bed (the operating system) is right next to your stove (your files). If the stove catches fire, the bed burns too. Partitioning is like building a fireproof wall in the middle. To start, right-click the Start button and select Disk Management. This window shows every byte of storage you own. If you see a sea of ‘Unallocated Space’ or just one massive C: drive, don’t panic. This is where most people realize they are living in that digital studio apartment. While troubleshooting common computer repair issues effectively, this is the first screen I always check. It tells you exactly how your data is distributed across the physical hardware.
Shrink Your Existing Drive Without Losing Data
Now we need to make some room. Right-click on your C: drive and choose ‘Shrink Volume.’ Windows will calculate how much ‘free’ space can be shaved off to create your new partition. I remember doing this for a client who was using one of those cheap consumer laptops for your staff; they only had a 250GB drive, but even carving out 100GB for documents changed their life. When the ‘Shrink’ box pops up, don’t just click okay. Enter the amount in megabytes (MB). If you want 100GB of space for your photos and docs, enter 102400. This process is much safer than it used to be, but it still feels a bit like heart surgery. If you ever find yourself wondering how to recover a partition that vanished after a windows update, it usually starts with a mistake at this very step, so double-check your numbers before hitting that Shrink button.
Assign a New Identity to Your Safe Space
Once you hit shrink, you will see a new block of black ‘Unallocated’ space. It is currently a ghost—Windows knows it is there, but it can’t use it yet. Right-click that black bar and select ‘New Simple Volume.’ This is where you give your new room a name. I always suggest ‘DATA’ or ‘FILES’ and a drive letter like D: or E:. This is much more than just organization; it is a fundamental shift in how you use your PC. It is almost as impactful as the hardware upgrade that actually speeds up your daily workflow because of the mental clarity it provides. I once had a laptop screen go completely white—if you have ever dealt with the first thing to check when your laptop screen goes white, you know the stress—and because my files were on a separate partition, I could just pull the drive out, plug it into another PC, and see my D: drive immediately without digging through restricted ‘User’ folders on the C: drive. Setting this up is the ultimate safety net, ensuring you never need an ultimate guide to data recovery after accidental deletion just because your OS decided to quit.
I see this mistake all the time in my shop: someone creates a partition, feels invincible, and then drops their laptop.
Stop Treating Your New Partition Like a Backup
While splitting your drive protects you from a software meltdown or a botched Windows update, it does absolutely nothing if your hardware physically fails. In fact, data from data recovery specialist Ontrack suggests that nearly 40% of data loss is caused by physical hardware failure. If your drive head crashes or your NAND chips fry, both partitions go down together. To truly be safe, you need to combine this partitioning strategy with actual external redundancy. It’s the difference between having a fireproof safe and a second house. If you are already dealing with weird hardware symptoms, like trying to figure out how to tell if your laptop screen backlight is actually failing, you should be backing up your data to the cloud immediately, not just moving it to another partition.
Don’t Leave Your New Safe Room Empty
This is the biggest ‘oops’ I see beginners make. They create the D: drive but keep hitting ‘Save’ on their desktop, which is still physically located on the C: drive. You have to manually redirect your ‘Documents,’ ‘Pictures,’ and ‘Desktop’ folders to the new partition to get any real protection. To do this, right-click your Documents folder, hit properties, go to the ‘Location’ tab, and move it to your new D: drive. If you don’t take this extra step, your ‘safe room’ is just a fancy, empty closet while your valuables are still sitting on the porch.  Have you ever fallen into this trap of setting up a system but forgetting to actually use it? Let me know in the comments.
Will this strategy still work on a modern SSD?
A lot of ‘old school’ technicians will tell you that partitioning is only for mechanical hard drives (HDDs) and that it actually slows down Solid State Drives (SSDs). That is a total myth. While it’s true that you don’t get the mechanical performance boost we used to get on older spinning disks, the organizational and recovery benefits remain identical. For small business owners, this isn’t just about one laptop; it’s about scalability and security. Relying on local partitions alone is a risk for a team, which is why looking into managed IT strategies to keep your business secure in 2025 is the logical next step. Dealing with the hardware component that causes the most blue screens of death is stressful enough without wondering if your file structure is sound. Using the power of data recovery tools is always a last resort, whereas a well-organized partition is your first line of defense. Even if you aren’t a tech pro, troubleshooting common computer repair issues effectively starts with knowing exactly where your data lives and keeping it far away from the ‘explosion zone’ of your operating system.
Use a tool that predicts the future
I have spent years in the trenches of technical support, and the most common thing I hear is, ‘It worked fine yesterday!’ The truth is, hard drives rarely die without a whisper. I personally swear by a tiny piece of software called CrystalDiskInfo. It reads the S.M.A.R.T. (Self-Monitoring, Analysis, and Reporting Technology) data that your drive is already generating. If I see a yellow ‘Caution’ badge, I don’t wait for a crash; I pull that drive immediately. Learning to use the power of data recovery tools before you actually need them is the difference between a five-minute drive swap and a thousand-dollar recovery bill. While you’re at it, mastering computer repair for beginners means understanding that your hardware has a lifespan. Don’t treat your SSD like a diamond; it’s more like a car tire—it’s designed to wear out eventually.
How do I maintain my data fortress over time?
Maintenance isn’t a one-and-done event; it’s a rhythm. Every six months, I perform what I call a ‘Data Audit.’ I check that my redirection settings (the ones we talked about earlier) are still pointing to the D: drive. Sometimes a Windows major update will reset folder locations back to the C: drive without telling you. It’s frustrating, but catching it early prevents data fragmentation. I also use Macrium Reflect to create a full image of my entire drive once a month. This is essentially a ‘snapshot’ in time. If my OS partition gets corrupted, I can restore that exact snapshot and be back to work in ten minutes. According to the 2024 State of the Cloud Report by Flexera, even with cloud adoption at an all-time high, local redundancy remains the primary defense against localized hardware ‘gray failure’—those weird, intermittent errors that are hard to diagnose.
Why scaling requires a different mindset
If you are managing more than three computers—maybe you’re a small business owner or the ‘IT guy’ for your extended family—partitioning each machine manually becomes a nightmare. This is where you have to look toward managed IT strategies to keep your business secure in 2025. In a professional environment, we don’t just partition; we use centralized servers and ‘Folder Redirection’ via Group Policy. This ensures that no matter which desk an employee sits at, their files are safe on a redundant server. It’s a massive leap in complexity, but it’s how you grow without the constant fear of a single laptop failure bringing your operations to a screeching halt. Often, the hardware upgrade that actually speeds up your daily workflow isn’t a faster CPU, but a more resilient network that takes the ‘save’ burden off your local machine.
The shift from local saves to invisible safety
Looking ahead, I predict we will see ‘AI-driven predictive failure.’ Instead of you checking a tool like CrystalDiskInfo, your OS will likely use machine learning to analyze patterns in your drive’s performance and automatically move your data to a safe partition or the cloud before the hardware actually fails. We aren’t quite there yet for the average user, but the tech is already appearing in high-end data centers. For now, the manual partition is your best friend. Try this: Download a free disk health monitor today and check your ‘Reallocated Sectors Count.’ If it’s anything higher than zero, your drive is already signaling its retirement. Don’t wait—move your files now.
Hard Lessons from the Repair Bench
Over the years, I have seen hundreds of users lose everything because they thought a partition was a physical backup. It is not. One massive lightbulb moment for me was realizing that while partitioning saves you from a Windows crash, it does not save you from a hardware failure or accidental damage. If you are just starting with computer repair for beginners, remember that organization is only half the battle. Another realization? You should never fill your C: drive to the brim; always leave at least 20% empty so the operating system has room for swap files and updates, or you might find yourself needing the ultimate guide to data recovery after accidental deletion much sooner than you think. Finally, always keep a record of your drive letters—if you ever have to move your disk to a new machine, knowing exactly where your critical data lives will save you hours of unnecessary panic.
The Pro Toolkit for Total Data Immunity
I do not just rely on standard Windows tools to keep my system running. I use a specific stack of software to ensure my files stay safe regardless of what happens to the OS. For system imaging, I swear by Macrium Reflect because it allows for rapid restoration of the primary partition without ever touching your separate data drive. For real-time health monitoring, I keep CrystalDiskInfo active to catch hardware warnings before they become catastrophes. Understanding the power of data recovery tools is essential, but preventing the need for them through automation is the gold standard. For those running a small company, manual partitions are just the first step; you should eventually transition to managed IT strategies to keep your business secure in 2025 to ensure these safety protocols are active across every workstation in your office.
#IMAGE_PLACEHOLDER_E#
Take Control Before the Spinning Circle Returns
You now have the blueprint to stop living in a digital studio apartment where one small fire destroys everything you own. By building a fireproof wall between your operating system and your life’s work, you have removed the single greatest source of stress for modern PC users. Computer repair does not have to be a reactive nightmare where you are always one update away from disaster; it can be a proactive strategy that keeps you working while others are searching for recovery solutions. If you find the partitioning process overwhelming or if your drive is already showing signs of physical wear, do not hesitate to reach out for professional help through our contact us page. Your data is far too precious to leave to chance. Have you ever tried to partition a drive only to find that Windows would not let you shrink the volume? Let me know in the comments below!