

I remember the frustrating moment when I opened up a client’s laptop and was greeted by a distorted, dull display. The screen looked perfectly fine at first glance, but as soon as I started working on color calibration, I realized the colors were off by a mile. It was a lightbulb moment for me—just because a refurbished screen appears okay doesn’t mean it’s delivering accurate color. And that realization changed how I approach refurbished laptop displays entirely.
Why Color Accuracy Matters More Than You Think
Color accuracy isn’t just about making pictures pretty; it’s crucial for anyone who relies on clear, true-to-life visuals—photographers, designers, video editors, or even everyday users who want their Netflix to look just right. Using a refurbished screen that doesn’t provide proper color reproduction can lead to misjudging photos, poor editing decisions, and a frustrating experience overall.
One thing I learned early on is that many refurbished screens look visually fine but hide underlying quality issues. This is particularly problematic because manufacturers often swap out screens with cheaper, less accurate units to cut costs. So, what appears as a normal display might actually be a compromise in color fidelity.
A surprising fact is that some refurbished screens can have a color gamut as low as 60%, compared to the standard 100% sRGB—meaning you’ll see a smaller range of colors, dulling images and affecting your work or entertainment experience. For me, this was a wake-up call, prompting me to dig deeper and verify the quality before recommending any refurbished display replacements. You might want to check out detailed DIY repair tips, such as those found at [laptop screen repair guides](https://computerrepairmasters.com/laptop-screen-repair-diy-tips-for-clearer-displays), to understand what to look for in a quality display.
If you’ve ever experienced color mismatches or noticed your photos look different on two screens, you’re not alone. Many users buy refurbished screens expecting like-new quality but end up disappointed because of hidden compromises. That’s precisely why understanding the truth about these screens is essential.
In this post, I’ll walk you through how to spot good refurbishments and avoid being duped into accepting subpar color accuracy. But first, let’s address a common concern: Is investing in a refurbished screen really worth it? Let’s dive into that next.
Test the Display in a Controlled Environment
Start by powering on the laptop in a dimly lit room to clearly observe color reproduction and contrast. Connect the device to an external monitor to compare color consistency and identify discrepancies. I once used a calibrated color checker chart in a client’s office and noticed subtle tint differences that weren’t visible in standard viewing angles, highlighting the importance of meticulous testing.
Use Professional Calibration Tools
Invest in or borrow a hardware colorimeter, such as the SpyderX or X-Rite i1Display, to measure the display’s color accuracy objectively. Connect the calibration device following manufacturer instructions, run the calibration software, and generate a profile for your screen. This step is like giving the display a physical health check—ensuring it reproduces colors within industry-standard ranges. During a recent refurbishment project, calibration uncovered a defective panel with poor color gamut, saving the client from costly future errors.
Check the Color Gamut and White Point
Verify that the refurbished display covers at least 90% of sRGB, the standard for most web and multimedia content. Use calibration software or online tools like Image Color Summarizer to assess the gamut. Also, confirm the white point aligns with 6500K for natural white shades. In my experience, affordable refurbished screens often have only 60-70% sRGB coverage, resulting in dull images. Recognizing this prevents you from recommending subpar options to clients.
Examine Consistency Across Viewing Angles
View the screen from various positions—center, edges, and extreme angles—to spot color shifts or fading. Tilt and rotate the screen to simulate real-world usage. A panel that shows noticeable color desaturation or inversion at angles indicates poor quality. I encountered a refurbished screen where side angles introduced a blue tint, revealing it as a low-grade panel unsuitable for color-sensitive work.
Implement On-Device Color Calibration
If hardware calibration tools are unavailable, adjust the display settings through the operating system. Use built-in color calibration wizards — Windows’ Display Color Calibration tool or macOS’s Display Calibrator Assistant—to fine-tune gamma, contrast, and color balance. This approach is less precise but still effective for basic validation. Remember, this is like tuning a musical instrument after replacement; fine adjustments matter significantly.
Document Your Findings
Keep a detailed record of calibration results, test images, and any discrepancies observed. This helps establish quality standards and provides your clients with transparency. I once shared calibration reports with a photographer, proving the quality of a refurbished display, which bolstered their trust in my service.
Include Calibration Checklists in Your Workflow
Create standardized checklists to streamline testing procedures and ensure consistency. Regularly update these checklists based on new findings or technologies. This systematic approach is like following a safety protocol—minimizing human error and maintaining high standards. For DIY enthusiasts, visiting this guide offers practical tips to execute these steps effectively.
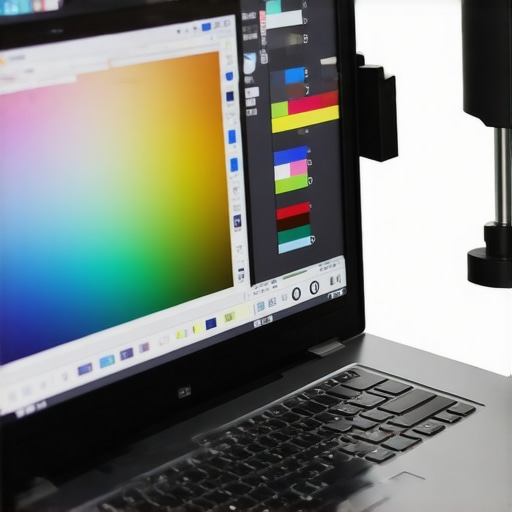 }**Many believe that fixing electronics is as simple as replacing a part, but experienced technicians know there’s more to the story. One widespread misconception is that all refurbished screens deliver the same quality; in reality, subtle nuances like color gamut and white point can make or break the visual experience. Overlooking these details often leads to incomplete repairs and dissatisfied clients. For example, relying solely on visual inspection without proper calibration tools can hide underlying color inaccuracies that only expert measurements reveal. Have you ever encountered situations where a supposedly ‘repaired’ device still exhibits issues? Sharing those experiences helps us learn together.
A crucial advanced mistake is assuming software-based calibration suffices for display accuracy. While OS calibration wizards provide a quick fix, professional hardware calibrators like X-Rite i1Display can uncover deeper deficiencies, such as gamut limitations or white point inconsistencies, that software adjustments can’t correct. According to industry experts, neglecting hardware calibration can result in significant color fidelity issues, especially for creative professionals. Therefore, integrating hardware calibration into your workflow elevates your repair quality and client trust.
In the realm of data recovery, many think that if a drive looks damaged, recovery is hopeless. In truth, understanding the nuances of file system corruption and drive firmware behaviors is vital. Advanced recovery often involves diagnosing underlying physical issues—like head misalignment or PCB damage—and applying targeted solutions. A common trap is using generic recovery software without assessing device health, which can cause further data loss. Regularly consulting comprehensive guides, such as those at [the ultimate guide to data recovery after accidental deletion](https://computerrepairmasters.com/ultimate-guide-to-data-recovery-after-accidental-deletion), can help avoid these pitfalls.
When managing IT for businesses, there’s a misconception that reactive support is enough. However, strategic managed IT solutions proactively prevent issues and optimize operations. Overlooking this shift to proactive management can lead to increased downtime and security vulnerabilities. The key is understanding that nuanced security measures—like segmented networks and real-time monitoring—are essential for modern threats. As experts in the field advise, investing in effective managed IT solutions is not just a preventative step; it’s a competitive advantage for growth.
What about common myths in troubleshooting? Many beginners believe that the loud noise from a laptop fan always indicates failure. But often, it’s a sign of dust buildup or thermal paste degradation—issues that can be rectified with regular maintenance. For in-depth tips on cleaning and maintenance, check out [tips for troubleshooting laptop screen problems seamlessly](https://computerrepairmasters.com/tips-for-troubleshooting-laptop-screen-problems-seamlessly). Always remember, deep diagnostic skills differentiate an ordinary technician from an expert.
By understanding these nuances and avoiding prevalent traps, you elevate your expertise in computer repair, data recovery, and IT management. Ready to challenge your assumptions and refine your skills? Share your experiences or questions in the comments, and let’s grow together!
Invest in Precision Calibration Equipment
When it comes to maintaining display accuracy, I rely heavily on hardware calibrators like the X-Rite i1Display or SpyderX. These tools provide objective measurements of color gamut, white point, and gamma, allowing me to verify that a refurbished or repaired screen meets professional standards. Personally, I use theX-Rite i1Display because of its reliable software integration and consistent results, which are crucial for delivering quality work to clients. Regular calibration ensures long-term color fidelity and prevents the degradation of visual accuracy over time.
Utilize Robust Diagnostic Software
Effective troubleshooting starts with the right software. I recommend tools like HWMonitor for monitoring thermal performance, CrystalDiskInfo for checking drive health, and PassMark BurnInTest for stress testing components. These programs help identify issues before they escalate, saving time and money. For example, during a recent repair, HWMonitor revealed CPU temperature spikes that pointed to failing fans—prompting me to clean and replace hardware proactively. Maintaining a suite of such diagnostic tools equips you to catch potential failures early and extend device lifespan.
Keep a Well-Organized Toolkit and Documentation
Having a designated toolkit—such as precision screwdrivers, static wrist straps, and multimeters—is essential for efficient repairs. Additionally, I maintain detailed logs of each repair, including calibration results and test images, which build trust with clients and serve as reference for recurring issues. Regularly updating your toolkit and documentation practices improves troubleshooting speed and accuracy. Check out this DIY guide to optimize your repair workflow further.
Adopt Remote Monitoring and Management (RMM) Tools
For managed IT services, RMM platforms like ConnectWise Automate or NinjaOne allow you to monitor multiple systems remotely, receive alerts on hardware or software anomalies, and deploy updates seamlessly. I personally use NinjaOne because its automation features have reduced manual oversight substantially. These tools help maintain a proactive approach, minimizing downtime and preventing major failures. The future of IT support is undoubtedly leaning towards automation and remote diagnostics, so investing in RMMs now prepares you for scalable growth.
How do I maintain tools over time to ensure reliability?
Regular calibration of measurement tools, firmware updates for diagnostic hardware, and routine cleaning of physical components are critical. Set a schedule—such as quarterly calibration checks—to keep your tools accurate, and always follow manufacturer guidelines for firmware updates to avoid compatibility issues. Keeping your toolkit organized and adhering to maintenance routines ensures your tools remain dependable, which is crucial for long-term success. This proactive maintenance is a cornerstone in delivering consistent service quality, making your diagnosis and repairs more precise.
Predicting the future, I believe automation in diagnostics and remote management will become standard, enabling faster responses and higher efficiency. Embracing these tools now positions you ahead of the curve. Start by integrating a hardware calibration routine with your existing workflow—it’s an advanced tip that can dramatically improve your repair outcomes and client satisfaction.
Over the years, I’ve encountered countless surprises—some good, many challenging—in the world of refurbishing laptop displays. One of the most impactful lessons I learned was the importance of thorough testing beyond just visual inspection. A seemingly perfect screen can hide significant color accuracy issues, leading to dissatisfied clients and wasted time. This journey has taught me the value of leveraging professional calibration tools and understanding the subtle nuances that define true display quality.
What Hidden Truths About Refurbished Screens Don’t Tell You
- Many refurbished screens look fine at first glance but fail to reproduce accurate colors, especially in professional settings like photo editing or design. Recognizing this is essential to avoid costly mistakes.
- The actual color gamut coverage can be as low as 60%, significantly reducing visual fidelity and impacting user experience. Always verifying sRGB coverage with calibration software helps you make informed decisions.
- Calibration isn’t a one-time task—regular checks using tools like the X-Rite i1Display ensure sustained accuracy, which is vital for maintaining quality standards.
Tools and Techniques That Elevate Your Calibration Game
Investing in professional hardware calibration tools has transformed how I approach display quality assurance. Devices such as the SpyderX or X-Rite i1Display provide precise measurements, revealing issues that software adjustments alone can’t detect. Combining these with systematic testing routines—like viewing from various angles and in controlled lighting—ensures your screens meet industry standards. Practical tips found at this repair guide can help streamline your process.
The Power of Personalized Diagnostics
Creating checklists tailored to specific repair scenarios helps maintain consistency and quality. Documenting calibration results and test findings not only improves your process but builds trust with clients. Remember, precision in repairing and calibrating displays translates directly into satisfied users and reputation growth.
From Hobbyist to Expert: The Next Level
As I continued refining my skills, I realized that understanding the subtle differences between panels and knowing when to recommend a replacement versus a repair made all the difference. Incorporating hardware calibration into your workflow elevates your technical expertise and customer satisfaction. The future leans toward automation and remote diagnostics, so investing in these tools now will keep you ahead of the curve.