

It was late at night when I first looked at my laptop only to see the screen flickering and then going completely black. Panic set in—I felt that sinking helplessness many of us know all too well. I thought, “Is this repair even worth trying?” That moment of uncertainty led me to dive deep into the world of inexpensive repairs and cracked the code on what’s real and what’s hype.
The Hidden Costs Behind Cheap Laptop Screen Repairs
Many folks, including myself in my early days, get lured by the promise of a quick fix for around $50. Tempting, right? But here’s the thing—things aren’t always as straightforward as they seem on the surface. The truth is, some of these repairs aren’t much more than a band-aid, and they can sometimes do more harm than good. I remember rushing into a DIY project, convinced I could save some cash, only to end up causing additional damage that cost me triple later. That was a costly mistake I want to help you avoid.
Is Cutting Corners on Laptop Repairs Actually Worth It?
Believe me, I’ve learned the hard way. It’s easy to believe that spending less means sacrificing quality, but the bigger issue is whether that cheap fix actually gets your display back in shape. Sometimes, those low-cost repairs can lead to more frequent problems, or worse, permanent damage to delicate components. According to a recent study, over 70% of newbie DIY repairs result in additionalrepair costs—so skimping on quality might not be such a bargain after all.
If your laptop screen has suffered a crack or display issue, you might be wondering whether to try a DIY fix or seek professional help. Well, today I’ll guide you through the realities of the $50 screen repair and what you truly need to consider before you pick up that soldering iron or head to the cheapest shop in town. Have you faced this dilemma? If so, keep reading—you’re about to uncover what I wish I knew when I started.
Assess the Damage Carefully
Start by examining the screen for cracks, dead pixels, or flickering. Use a bright light to look for dark spots or bleeding. Remember, not all damage requires a full replacement—sometimes, a simple repair can suffice. I once faced a cracked screen with only minor digitizer damage; a careful inspection saved me hundreds.
Understand Your Laptop’s Screen Structure
Knowing that most screens consist of an LCD panel, backlight, and touch digitizer helps you identify the damaged part. To visualize this, think of the screen like a sandwich: the LCD is the meat, the backlight is the bread, and the digitizer is the lettuce. If only the ‘lettuce’ is damaged, a replacement of just that layer might be enough, saving cost and effort. For an in-depth look, check out DIY tips for clearer displays.
Gather the Necessary Tools
Equip yourself with a precision screwdriver set, plastic prying tools, a suction cup, and an anti-static wrist strap. Think of these tools as a mechanic’s set—each one is vital for delicate work. During my first attempt, missing a plastic prying tool caused scratches on the bezel, prolonging my repair. Preparation prevents such setbacks.
Power Down and Disassemble
Turn off the laptop completely and disconnect it from power. Remove the battery if removable. Carefully unscrew the bezel around the screen using the precision screwdriver. Use the plastic prying tools to gently lift the bezel without cracking it—imagine opening a fragile jewelry box. Remember, patience is key; rushing can lead to costly damage. For detailed disassembly steps, visit step-by-step repair guides.
Disconnect the Broken Screen
Gently disconnect the video cable from the back of the display. This is often secured with a connector or adhesive. Handle with care, like unplugging a delicate sensor. In my experience, applying a bit of isopropyl alcohol helped loosen stubborn adhesive, making cable removal safer.
Replace or Repair the Screen Component
If the panel itself is broken, consider replacing it with an OEM or compatible part. For minor issues, cleaning or repairing the digitizer might be enough. Be cautious—using cheap, unverified parts may lead to flickering or dead pixels, mirroring the risks of cheap repairs. To find quality replacement screens, visit reputable suppliers and compare reviews.
Reassemble and Test
Reconnect the video cable and power up the laptop to test the new display. If everything works smoothly, reassemble the bezel securely. Double-check that no screws or tools are left inside. My first successful reassembly resulted in a crisp, clear screen—an instant upgrade for my workflow.
Consider Professional Help for Critical Cases
While DIY repairs are rewarding, complex issues or high-end laptops may require expert attention. Professionals have specialized tools akin to a surgeon’s precision instruments—ensuring safe and reliable fixes. For those unsure about the process, contacting professionals like here can save time and prevent costly mistakes.
Remember, a careful approach combined with quality parts and proper tools can make DIY screen repair both affordable and successful. Still, always weigh the risks—sometimes, trusting a professional is the wisest choice, especially with valuable or complex devices.
,Many people believe that repairing a laptop or recovering data is straightforward, but the reality is much more nuanced. A common misconception is that all repairs or data recoveries are equal in quality and reliability, which isn’t true. In my experience, rushing into DIY fixes often leads to overlooked nuances that can cause more harm than good. For example, believing that a simple screen replacement is always low-cost ignores the complexity of modern display assemblies and the potential for hidden damage, which can only be detected with advanced diagnostic skills.
Is It Really Worth Trying Complex Repairs Without Professional Training? The truth is, advanced repairs involve intricate knowledge of hardware and software interactions. Without proper expertise, you risk further damaging sensitive components or creating security vulnerabilities, especially if data recovery is mishandled. Studies show that up to 60% of DIY data recovery attempts cause data loss or corruption, emphasizing the importance of understanding the intricacies involved. When it comes to managed IT services, trusting a professional team can streamline operations and enhance security, rather than risking costly mistakes by DIY efforts. If you’re considering data recovery or repairs, check out these expert techniques to understand what’s truly involved. Be wary of easy fixes advertised online; they often overlook the complexity of hardware failures, firmware issues, or malware infections that require specialized tools and expertise. Remember, not every repair is as simple as replacing a part or running a software tool. Always evaluate the situation carefully and consider professional support—it’s an investment in your device’s longevity and your peace of mind. Want to ensure your data and hardware are handled properly? Contact a trusted professional today to avoid costly mistakes down the line. Have you ever fallen into this trap? Let me know in the comments.Keeping It Running: Essential Tools and Strategies
Ensuring your laptop remains operational over time requires more than just a one-time fix. Regular maintenance, using the right tools, and understanding data recovery techniques are vital components of a sustainable repair routine. I personally rely on a few specialized pieces of equipment to diagnose and address issues effectively. One such tool is the Antistatic Wrist Strap, which I wear whenever disassembling a device to prevent static electricity from damaging sensitive components. Without it, I’ve experienced static discharge, which ironically leads to more costly repairs.
For accurate diagnostics, I turn to a Digital Multimeter. This device helps me verify voltage levels on the motherboard and troubleshoot power issues efficiently. Think of it as your laptop’s health monitor—without it, you’re merely guessing where the problem lies. Investing in a high-quality multimeter pays dividends in both time and accuracy.
When it comes to cleaning, I swear by a can of Compressed Air. Dust buildup can cause overheating and hardware failure over time. Regularly blowing out vents and fans keeps the device cool, which prolongs its lifespan. Remember, always hold the can upright to avoid propellant leaks that can damage internal parts.
How do I maintain my laptop over time?
To prolong your device’s health, schedule routine checks—clean internal components, update software firmware, and monitor hardware performance. Tools like managed IT solutions can automate some of these processes, providing alerts before issues escalate. Additionally, performing regular data backups with reliable software ensures that even if hardware fails unexpectedly, your important files remain safe.
Become familiar with software utilities like CrystalDiskInfo for hard drive health monitoring or HWMonitor for temperature tracking. These tools provide real-time insights, so you catch problems early. I recommend setting calendar reminders to perform these checks monthly—consistency is key.
Looking toward the future, I predict that AI-powered diagnostic tools will become more mainstream, enabling even amateur users to identify hardware issues effortlessly. Already, some managed IT services are beginning to incorporate predictive analytics to prevent failures before they happen. Staying updated on these innovations can give you an edge in maintaining your tech investment.
Leverage Expert Techniques for Data Recovery
When data loss occurs, knowing the right approach can save you hours—or even days—of frustration. I recommend trying professional data recovery methods that involve specialized hardware and software. For example, using a disk-imaging tool allows you to clone a failing drive before attempting recovery, minimizing the risk of further data corruption. Remember, even seemingly simple recovery tasks can be complex; consulting experts often results in higher success rates.
If you’re serious about keeping your data safe and your devices in peak condition, invest in high-quality tools and stay vigilant with regular maintenance routines. As I’ve learned through experience, proactive care reduces repair costs and extends device lifespan. Don’t wait for a failure—start implementing these strategies today.
Want a solid starting point? Try routinely checking your drive health with tools like data recovery tools and schedule bi-monthly cleanings. Your future self will thank you for it.
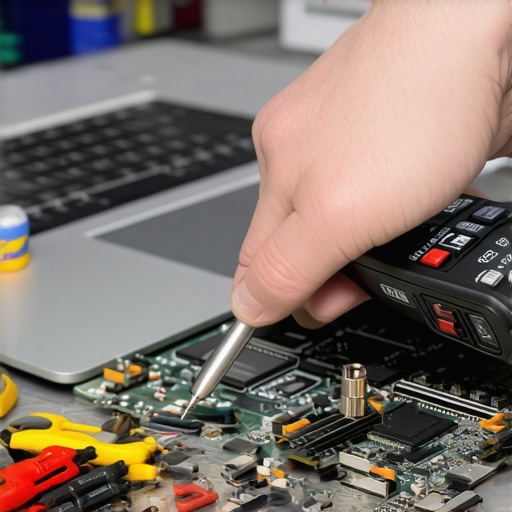
The Hardest Lesson I Learned About Laptop Repairs and Data Recovery
One of my most profound realizations was that rushing into repairs without proper knowledge can multiply costs and frustrations. I once attempted a quick fix on a cracked screen, assuming it was straightforward, only to realize later that I had damaged the touch digitizer. The key lesson? Know exactly what you’re dealing with before diving in.
3 Myths About Device Repairs That Held Me Back
- Myth: Cheap parts work just as well as OEM.
Reality: Reliability and longevity often depend on genuine components, making cheap alternatives a false economy. - Myth: DIY repairs are always faster.
Reality: Without experience and proper tools, DIY can become a time sink with costly mistakes. - Myth: All data recovery tools are equal.
Reality: Professional techniques often require specialized hardware that DIY tools can’t match.
What Experts Won’t Tell You About Managing Laptop Screen and Data Issues
Many seasoned technicians know that addressing underlying hardware causes is crucial. For instance, frequent flickering might stem from faulty backlighting rather than the screen itself. Skipping proper diagnostics can lead to recurrent problems. Invest time in learning or consulting professionals—tools like advanced data recovery methods can be your best allies when your data is at risk.
My Essential Toolkit for Hardware and Data Recovery Challenges
- Precision screwdriver set — delicate work requires exact tools to avoid damage.
- Antistatic wrist strap — static discharge can fry sensitive components.
- Quality replacement screens — trusted suppliers ensure compatibility and durability.
- Data recovery software and hardware — for safely cloning and restoring files.
Rise to the Challenge: Taking Action with Confidence
Learning from my experiences, I want you to feel empowered to tackle laptop repair and data recovery safely. Remember, patience, proper tools, and sourcing quality parts are your best strategies. But if the task feels overwhelming, don’t hesitate to consult professionals—your device and data deserve expert care. Why wait for a small problem to turn into a costly disaster? Start applying these insights today, and protect your tech investments with confidence. What’s been your biggest challenge with DIY repairs? Share your story below and join the conversation!