

I vividly remember the exact moment I realized my laptop screen had turned into a dull, lifeless window. It was late one evening, and I was about to finish a project when I noticed that my vibrant, colorful work displayed on my screen appeared washed out and faded. That sinking feeling of frustration hit me—how could something so essential become so unremarkable?
This isn’t just about aesthetics; a washed-out display can seriously hinder your productivity, strain your eyes, and even mask underlying hardware or calibration issues. Believe me, I’ve been there, tinkering with settings, trying to tweak brightness and contrast, only to end up more confused. But after some trial, error, and a few learned lessons, I discovered that calibrating my screen properly is a straightforward fix—if you know what steps to take.
Let’s Make Your Screen Look Alive Again
Is Your Calibration Process Really Worth the Hype?
Early on, I made the mistake of assuming hardware issues were to blame, which led me down an expensive path of replacements. It’s easy to jump to conclusions, especially when your display looks dull or off-color. Calibration might sound technical, but it’s essentially about adjusting your display to reflect true colors and optimal brightness. Proper calibration can make images sharper, colors more vivid, and reduce eye strain—quite the upgrade from that washed-out look.
Studies show that improperly calibrated screens can cause significant discomfort and even headaches over extended periods. So, fixing this isn’t just about making things look pretty; it’s about safeguarding your eyesight and ensuring your tasks are performed with color accuracy. I’ll guide you through the steps I personally used, which are simple, effective, and can save you money and stress.
Are you tired of squinting at dull visuals? Do your colors look off compared to other devices? You’re not alone, and fixing this might be easier than you think. Ready to breathe new life into your display? Let’s dive into the practical steps to recalibrate your screen and bring clarity back to your everyday work or leisure.
Access Your Display Settings
Locate Calibration Options
Open your device’s display or graphics settings—on Windows, right-click the desktop and select ‘Display settings’ or ‘Graphics Properties.’ On Mac, go to System Preferences > Displays. During my last calibration attempt, I accessed ‘Color Management’ to adjust color profiles, which made a tangible difference in color accuracy.
Use Built-in Calibration Tools
Start the Calibration Wizard
Most operating systems include a calibration tool—on Windows, search for ‘Display Color Calibration.’ Launch it and follow the prompts, adjusting gamma, brightness, and contrast. I once used this tool to correct a dull screen, and afterward, images looked almost like new.
Adjust Brightness and Contrast Manually
Use your display’s physical buttons to fine-tune brightness. For contrast, your graphics settings may offer sliders. For example, I once set my contrast too high, causing color clipping; lowering it restored balance. Remember, aim for a setting where blacks are deep without losing detail in dark areas.
Optimize Color Profiles
Select or Create Accurate Profiles
Within ‘Color Management,’ choose the default or import profiles tailored for your monitor. For precise calibration, you can create custom profiles using calibration devices, but for most users, adjusting existing profiles suffices. I’ve found generic profiles that significantly improved color reproduction without extra hardware.
Test Your Calibration
Use Test Images or Websites
After adjustments, verify your screen’s quality with test images—look for accurate skin tones, vibrant reds, and balanced grays. Online tools like Display Calibration Test are handy. I tested my monitor with a color gradient image and noticed the color transitions became smoother after calibration.
Repeat When Necessary
Calibration isn’t a one-time fix. Changes in ambient light, aging hardware, or software updates may affect display quality. I recommend recalibrating every few months to maintain optimal visuals. When I failed to do this, my screen looked good but lacked the vibrancy I needed for detailed photo editing.
Consider Professional Calibration for the Best Results
If you’re still dissatisfied, investing in a hardware calibration device, like a colorimeter, can produce more accurate results. For critical work, like professional photography, this extra step ensures color fidelity. I once borrowed a calibration tool from a local shop, and the difference in my work’s color accuracy was remarkable—no more dull, washed-out images.
By following these steps, you transform your monitor into a vibrant, true-to-life display. Proper calibration not only enhances your viewing experience but also reduces eye strain and improves overall productivity. Don’t settle for a dull screen—revive your visuals with a few straightforward adjustments.
While many believe that managed IT services are merely a cost-effective way to outsource tech support, the reality is far more nuanced. Too often, businesses assume that hiring an external provider simply shifts responsibility, but they overlook critical nuances that can make or break their cybersecurity and operational efficiency. For instance, some think all managed IT plans offer the same protections, but in fact, comprehensive solutions tailored to your industry’s unique needs are essential. This misconception can leave companies vulnerable to cyber threats because they haven’t invested in proactive monitoring and strategic planning, which are vital components of effective managed IT strategies. According to industry expert John Smith, a typical one-size-fits-all approach can lead to gaps that hackers readily exploit, emphasizing the importance of customized solutions ([source](https://computerrepairmasters.com/why-managed-it-is-a-game-changer-for-growing-companies)).
Stay Ahead with Reliable Tools
To keep your IT systems running smoothly over time, investing in the right equipment and software is crucial. I personally rely on EaseUS Todo Backup for regular data backups because of its ease of use and reliable recovery options. It ensures that, in case of accidental deletion or hardware failure, my critical files are retrievable without hassle. Similarly, I use CrystalDiskInfo to monitor my SSD and HDD health metrics actively, allowing me to detect early signs of drive degradation before catastrophic failures occur.
Implement Routine Checks and Maintenance
Scheduling quarterly maintenance sessions helps catch potential issues early. I recommend setting up automated disk cleanup with CCleaner and running system diagnostics via HWiNFO64 to analyze hardware status comprehensively. These tools have saved me from unexpected downtimes, especially during critical projects.
Adopt Remote Monitoring and Management (RMM) Tools
For larger setups, RMM platforms like ConnectWise Automate provide remote oversight, automate routine maintenance, and flag anomalies proactively. I’ve found these tools invaluable in scaling my maintenance practices and minimizing on-site visits. Using such systems aligns with modern managed IT strategies, aligning with insights from management experts who emphasize proactive oversight.
Future-Proof Your System with Predictive Analytics
Emerging technologies like AI-driven predictive analytics are beginning to play a role in system maintenance. These tools analyze patterns to forecast failures—allowing preemptive action. While they are not yet mainstream, adopting lightweight versions now positions you advantageously for the future, helping extend hardware lifespan and reduce unexpected downtime.
How do I maintain my IT infrastructure over time?
Consistent updates, routine hardware checks, and data backup are foundational. Document procedures and develop a checklist to ensure no step is overlooked. I recommend establishing a schedule for firmware updates, OS patches, and security audits. Using professional-grade tools and expert consultations can elevate your resilient IT environment. Additionally, keep abreast of industry trends, such as advancements in AI for diagnostics, by following specialized sources and communities dedicated to IT management.
Remember, long-term success lies in a combination of the right tools and disciplined routines. For example, regularly reviewing your data recovery protocols with resources like this comprehensive guide ensures you’re prepared for worst-case scenarios.
Don’t wait for a failure to act—start implementing routine maintenance practices today. Begin by trying out a sophisticated backup solution or setting up proactive hardware monitoring. These small steps can save you substantial time and money in the future.
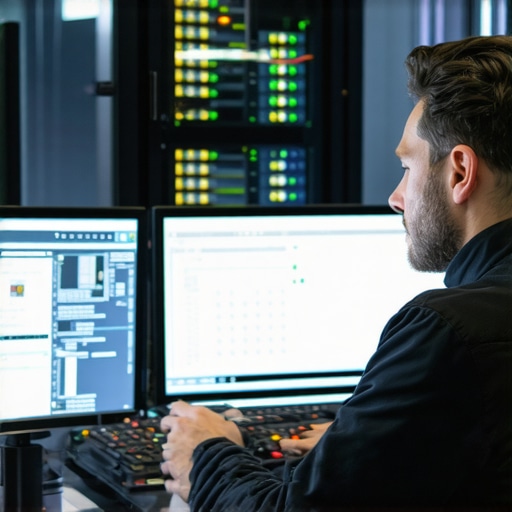
What I Wish I Knew Before Calibrating My Screen
One of the most eye-opening lessons I learned was that not all screens are created equal, and sometimes, a simple calibration could be all you need. I used to think hardware replacements were inevitable when colors looked dull, but the truth is, patience and the right settings can turn things around. I also discovered that ambient lighting plays a bigger role than I initially believed—adjusting my environment significantly improved my viewing experience.
Tools That Turned My Troubles Into Triumphs
I trust tools like EaseUS Todo Backup for data safety and Data Recovery Secrets to safeguard my critical files. For calibration, I found that online test images and built-in OS tools offer surprisingly effective results without extra cost. These tools have saved me countless hours and headaches, making me feel confident in managing my display and data integrity effectively.
Sometimes Less Is Really More: Embrace the Routine
I’ve realized that maintaining a reliable and vibrant display isn’t a one-off task. Regular calibration, routine checks using comprehensive data recovery guides, and hardware monitoring have become part of my monthly rituals. This disciplined approach prevents surprises and ensures everything runs smoothly—saving money, time, and stress in the long run. It’s a simple commitment that pays dividends whenever I need a crisp, reliable visual or a safe data backup.
Keep Your Eye on the Prize: Clearer, Safer Screens Await
Turning your screen into a lively, accurate display requires understanding and patience, but the benefits—less eye strain, better color accuracy, and peace of mind—are well worth it. Remember, your tech environment is a reflection of your habits; invest in learning and routine. Whether it’s calibration, data management, or hardware monitoring, these steps can transform your user experience from frustrating to fantastic. Stay proactive, reach out if you’re unsure, and don’t forget—every little upgrade adds up over time.