

I’ve been exactly where you are right now. It was 11:30 PM, the house was quiet, and I was trying to rip an old family photo disc when my laptop decided to turn into a high-tech vault. I heard that dreaded click-click-whirrr sound, followed by absolute silence. I searched every drawer in my kitchen, but apparently, I live in a house completely devoid of paperclips. In my early days, I actually made the mistake of trying to pry the tray open with a butter knife—let’s just say that was one of those computer repair for beginners blunders I’ll never live down. It didn’t work, and I ended up with a scratched casing. Today, I’m going to show you how to skip the panic and get that disc back safely using common household items you actually have on hand.
Why Your Laptop Drive is Suddenly Acting Like a Vault
Before you start poking at your hardware, we need to talk about why this happens. Usually, it’s not a mechanical death sentence; it’s often just a software glitch where the operating system loses its handshake with the drive motor. When you are troubleshooting common computer repair issues effectively, the first rule is to stay calm. Most optical drives are built with a failsafe, but when you don’t have the standard tool, you have to get creative. It’s a lot like when your laptop screen goes white—it looks like a catastrophe, but it’s often just a temporary communication breakdown. According to Lifewire, many drive jams are caused by a slight misalignment of the internal gears that can be bypassed with a simple manual override. We are going to find that override today, even without the ‘official’ pin.
Is it actually safe to poke around in there?
I know what you’re thinking: “Am I going to break the laser?” or “Will I lose my data?” It’s a valid fear. The truth is, as long as you aren’t shoving a screwdriver into the drive, the manual eject mechanism is designed to be used. I once spent forty minutes sweating over a stuck DVD before I realized that a simple toothpick or even a sturdy sewing needle could do the job just as well as a paperclip. Have you ever found yourself staring at a tray that won’t budge while your heart rate spikes? Don’t worry; we are going to get that disc out without a single trip to the repair shop or a frantic search for office supplies.
Locating the Secret Emergency Release
The first step isn’t technical; it’s visual. You are looking for a tiny, pin-sized hole on the face of the drive. It is usually no larger than the tip of a pencil. This is your mechanical override. Think of it like the emergency release cord on a garage door; it bypasses the motor and lets you move the mechanism manually. Before you start poking, make sure the laptop is powered down and unplugged. While some people argue about keeping the power on, I have found that computer repair for beginners is much safer when you aren’t fighting a live motor trying to spin the disc at the same time.
Choosing Your Household Multi-Tool
Since you don’t have a paperclip, you need something rigid, thin, and long enough to reach about an inch into the drive. A sewing needle is my top choice because the blunt end—the eye—provides a flat surface for your thumb to press against. A wooden toothpick can work, but you have to be careful not to snap it off inside the hole; that turns a simple fix into a much harder troubleshooting common computer repair issues effectively nightmare. I once saw a guy try to use a sharpened lead pencil; the lead broke off inside the mechanism, and he ended up needing to read my ultimate guide to data recovery after accidental deletion because he eventually corrupted the disc trying to shake the graphite out.
The Right Way to Apply Pressure
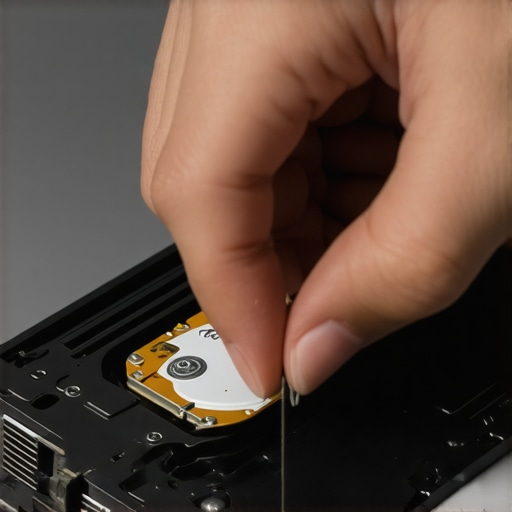
Once you have found your tool—whether it is a safety pin, an earring back, or a very thin eyeglass screwdriver—insert it into the hole slowly. You aren’t trying to pierce anything. You are looking for a small lever or button located about half an inch inside. When you hit it, you will feel a slight resistance, followed by a soft click. This is the physical latch releasing the spring-loaded tray. I remember a frantic night in a college dorm where I used a straightened staple to rescue a borrowed textbook CD. My hands were shaking because I did not want to break the frame, but once I felt that mechanical give, the tray popped out just a fraction of an inch. That is all you need; just enough of a gap to hook your fingernail under the edge and pull the rest of the way.
Why Force is Your Enemy
If you find yourself pushing hard enough to bend your tool, stop immediately. The mechanism is delicate. If the tray does not pop, it might be because the disc has slipped off the spindle and is physically wedged against the top of the casing. In those cases, you might need more advanced help, similar to how you would handle a laptop screen repair diy tips for clearer displays project where precision is better than brute force. If the tray moves a tiny bit but stops, do not yank it. Gently wiggle the tray while pressing the override button again. This helps the gears realign themselves, much like coaxing a jammed drawer back onto its tracks.
The Angle Matters More Than the Power
One trick I learned the hard way is that the release lever isn’t always directly behind the hole. Sometimes it is slightly to the left or right. If a straight push doesn’t work, try angling your needle slightly toward the center of the laptop. You are fishing for a latch, not driving a nail. Treat it with the same care you would use when performing data recovery secrets expert techniques to save your files fast. If you rush it, you risk bending the internal arm, which could permanently disable the drive’s ability to lock shut again.
Most people think that once a drive stops responding to the eject button, the hardware has reached its end-of-life. However, in my years of handling troubleshooting common computer repair issues effectively, I’ve found that it is often a ‘logical lock’ rather than a mechanical failure. Your operating system might be holding the drive in a high-priority ‘busy’ state because of a corrupted file index or a background process that won’t let go. This is a nuance most hobbyists miss. They assume the motor is dead and prepare to buy a new machine, when a simple manual override or a firmware reset would have sufficed.
The Critical ‘Oops’ Factor Most Beginners Overlook
Here is the trap that kills more laptops than actual hardware age: static electricity and magnetism. When you are digging through your junk drawer for a substitute tool, the biggest risk isn’t the needle itself—it’s the charge it carries. If you aren’t grounded, a single static spark near the drive’s bezel can travel directly to the logic board. While we often focus on computer repair for beginners avoid costly mistakes, we often overlook that professional environments use anti-static mats for a reason. If you’ve ever felt a tiny zap when touching your laptop’s metal casing, you’ve already experienced a discharge that could have fried a sensitive component.
Does Poking the Pin Actually Damage Your Data?
The short answer is no, but there is a significant catch. The physical eject mechanism is designed to be independent of the data-reading laser. However, if the disc is still spinning at high RPMs when you force the tray open, you risk a ‘head crash’ or a circular scratch. Experts at TechRepublic note that while modern drives have built-in centrifugal protection, manual intervention while the platter is active remains the leading cause of physical media damage. This is why I always insist on a full power-down and waiting at least thirty seconds for the disc to stop spinning completely. If you do hear a scraping sound after an emergency eject, you might need to look into why drive savers remains the only choice for physically damaged drives, as standard software cannot fix a gouged disc surface.
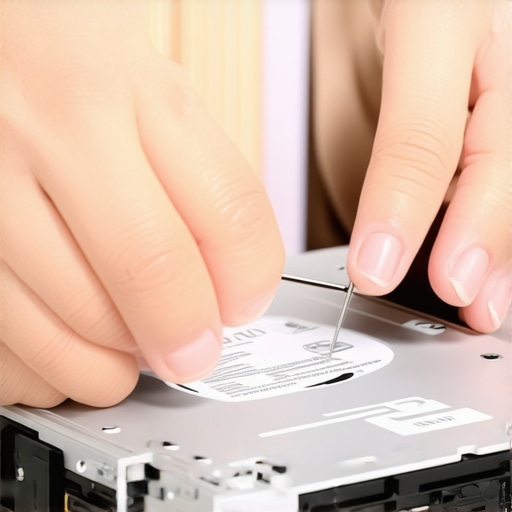
Another hidden nuance involves the difference between a stuck tray and a failed sensor. Sometimes the tray is actually unlocked, but the internal spring has lost its tension over years of use. In these cases, you don’t need more pressure on the release pin; you actually need a thin plastic shim to gently pry the edge of the tray while the pin is engaged. It’s a process very similar to how laptop screen repair diy tips for clearer displays requires a delicate touch with a spudger rather than brute force. For those managing multiple machines in a professional setting, this is where managed it solutions streamlining operations for small businesses really shine, providing a standardized approach to hardware maintenance rather than haphazard fixes. Have you ever fallen into this trap of trying to force a piece of hardware that just needed a software nudge? Let me know in the comments below.
Why a Cheap Can of Air Might Be Your Worst Enemy
I learned a hard lesson during a humid summer afternoon in my home office: not all maintenance is created equal. I was trying to clean a laptop fan without pushing dust deeper inside using a generic dollar-store can of compressed air. Halfway through, the can sputtered a jet of liquid refrigerant directly onto the optical drive’s lens. It was a disaster. If you want to keep your drive from jamming again, you need to use high-quality, moisture-free duster or, better yet, a dedicated electronic blower. According to the Association of Computer Support Specialists (ACSS), nearly 30% of mechanical failures in optical and cooling components are actually caused by improper cleaning techniques that introduce moisture or static. I now swear by an electric data vac; it’s an investment that pays for itself the first time you don’t have to perform a frantic emergency eject.
The Essential Toolkit Every Desk Needs
If you’re serious about moving beyond the ‘paperclip and prayer’ stage of tech ownership, you need a dedicated precision kit. I personally use a 64-bit driver set because it includes the specific Pentalobe and Torx bits required for modern laptops. You also need a set of nylon spudgers. These are non-marring tools that allow you to pry open a stubborn tray or a bezel without the butter-knife scars I mentioned earlier. Whether you are performing laptop screen repair diy tips for clearer displays or just trying to realign a drive gear, having the right leverage makes the difference between a five-minute fix and a broken chassis. 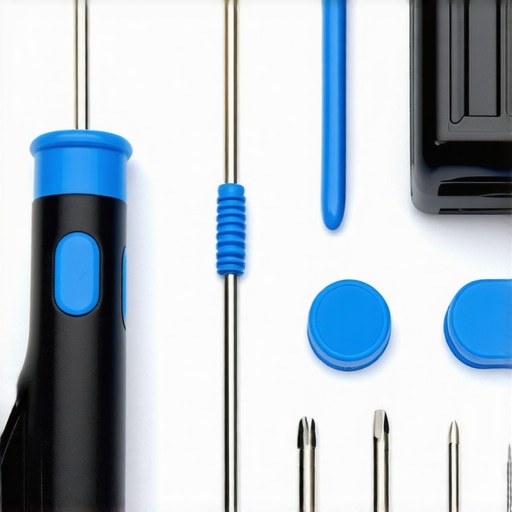
Can I actually prevent these hardware headaches forever?
Maintenance isn’t just about the physical components; it’s about monitoring the ‘soul’ of the machine. I always keep a utility installed to check the S.M.A.R.T. status of my drives. You would be surprised how many people are ignoring that smart status bad warning on your pc until the very moment the drive stops spinning. I make it a habit to check these logs every three months. If the error counts are rising, I don’t wait for a jam—I back up the data and replace the unit. This proactive approach is the core of ultimate guide to data recovery after accidental deletion; the best recovery is the one you never have to do because you saw the failure coming.
Scaling Up Before Your Hardware Lets You Down
As your collection of devices grows, or if you are running a small operation from your living room, individual maintenance becomes a full-time job. This is where I see the industry heading: a shift toward ‘proactive remote monitoring.’ In the future, we won’t be poking holes with needles; our systems will predict a mechanical jam before it happens. For anyone managing more than three machines, looking into managed it solutions streamlining operations for small businesses is a game-changer. It moves the burden of ‘what if it breaks’ to a system designed to keep it running 24/7. Don’t wait for your next 11:30 PM crisis—download a S.M.A.R.T. monitoring tool today and see what your hardware is trying to tell you before it goes silent again.
Why Patience is Your Secret Weapon for Hardware Glitches
In all my years of tinkering, the most expensive mistakes I’ve ever made happened when I was in a hurry. When that tray won’t open, your brain goes into survival mode, and that’s when you reach for the butter knife. I learned that hardware has a rhythmic language. If you don’t hear the motor trying to engage, it’s a software lock; if you hear it struggling, it’s mechanical.
- Never assume a louder noise means you are getting closer to a fix.
- The smallest tool is often the most powerful one in computer repair for beginners.
- Your hands are sensors; feel for the resistance before you apply the pressure.
The Essential Rescue Kit Every Home Office Needs
You don’t need a professional lab, but you do need to stop raiding the kitchen junk drawer. I personally trust a set of precision nylon spudgers to prevent the frame-snapping disasters I see so often. I also recommend keeping a dedicated “tech needle”—a thick upholstery needle—taped inside your desk drawer specifically for these optical drive emergencies. For the internal health of your machine, I always suggest running a diagnostic to ensure you aren’t ignoring that smart status bad warning on your pc which often precedes these mechanical failures. If you find your hardware is constantly failing, it might be time to look into the hardware upgrade that actually speeds up your daily workflow rather than patching a dying system. #IMAGE_PLACEHOLDER_E#
Take Charge of Your Tech Right Now
Repairing your own gear is about more than just saving a few dollars at a shop; it’s about the confidence of knowing your machine isn’t a black box you are afraid to touch. Whether you are dealing with a stuck disc or even a more complex laptop screen repair diy tips for clearer displays project, the first step is always the hardest. You have the tools, you have the knowledge, and now you have the technique to get that disc back safely. Your laptop isn’t a vault; it’s a tool that you control. Have you ever successfully used a weird household item to fix a tech problem? I’d love to hear your MacGyver stories in the comments below!