

I still remember the smell of singed dust and the panicked whine of my first gaming laptop. I thought I was being a pro by grabbing a five-dollar can of compressed air and giving the vents a good, long blast. Instead of a cool, quiet machine, I ended up with a laptop that throttled its speed every five minutes. It turns out, I hadn’t actually cleaned anything; I had just packed the dust into a dense, felt-like brick against the heatsink. If you’ve noticed why your laptop fan is screaming even when you are not using it, you’re probably tempted to do the same. But stop right there. Today, I’m going to help you avoid the ‘dust-shoving’ trap and show you how to actually clear the path for some fresh air without causing a situation where your laptop fan has failed entirely. [IMAGE_PLACEHOLDER]
The Compressed Air Trap You Need to Avoid
My biggest mistake early on was thinking that more pressure meant more clean. I once used a shop compressor—don’t laugh—and nearly sheared the blades right off the hub. The reality is that dust in a laptop isn’t just loose powder; it’s a mixture of skin cells, oils, and fibers that “felts” together over time. When you spray air from the outside in, you are essentially trying to push a carpet through a keyhole. You might clear the intake, but that debris is just settling deeper into the motherboard or wedging between the fan and the heatsink fins. If you are serious about cooling down a gaming laptop or a workstation, you have to create an exit path for that gunk. Have you ever tried to “fix” a loud fan only to have it sound even worse an hour later?
Is opening the case actually worth the stress?
I know what you’re thinking: “I’m not a tech wizard, and I don’t want to break anything.” It’s a valid fear. Many people stick to the “outside-in” method because they are terrified of those tiny screws and ribbon cables. However, as I mention in my guide on computer repair for beginners, the risk of heat damage from a clogged fan is often much higher than the risk of carefully removing a back panel. Did you know that forcing a fan to spin at thousands of RPMs with compressed air can turn the motor into a tiny electrical generator? According to repair specialists at iFixit, this “back-voltage” can actually travel up the wire and damage your motherboard’s fan header. That’s a much more expensive repair than a simple cleaning. Today, we’re going to walk through how to do this safely, keeping your components safe and your airflow high.
Grab Your Tools and Clear the Workspace
Before you even touch a screwdriver, you need to treat your laptop like it is on an operating table. You aren’t just blowing air; you are performing surgery on a system that hates static electricity. I always keep a magnetic mat nearby to hold the tiny screws. I learned this the hard way years ago when a single screw from a MacBook vanished into my shag carpet, leaving me with a wobbly case and a hard lesson in organization. As I noted in my computer repair for beginners guide, the prep work determines your success. You will need a set of precision screwdrivers, a plastic spudger (to avoid scratching the chassis), and a can of compressed air with the straw attached. If you find yourself needing a laptop screen repair later, having these tools ready is already half the battle. 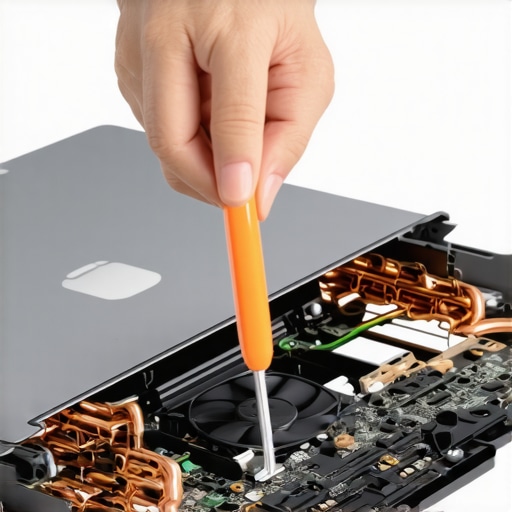
Pop the Hood Without Stripping Your Screws
Most modern laptops have a bottom panel held by six to ten screws. Some are hidden under rubber feet, so do not force the plastic if it feels stuck. I once worked on a gaming rig where the owner had literally snapped the corner of the frame because he didn’t realize there was a hidden screw beneath a warranty sticker. Once the screws are out, use your plastic spudger to gently unclip the edges. Think of this like opening a stubborn Tupperware lid; go slow and listen for the small ‘pops’ as the plastic tabs release. Inside, you will see the motherboard—the nervous system of your machine. This is where things get delicate. If you see dust blankets covering the components, do not just start spraying. You need to identify the fan and the heatsink, which usually looks like a copper pipe leading to a set of metal fins.
Lock Those Blades Before You Spray
This is the most critical step that almost everyone misses. You must use a finger or a non-conductive toothpick to hold the fan blades in place so they cannot spin. Remember that electrical generator warning I mentioned? If you let that fan free-spin while you blast it with air, you risk sending a surge back into the motherboard. This can lead to the hardware component that causes the most blue screens of death failing prematurely. I once saw a DIYer spin a fan so fast with a shop vac that the friction melted the plastic bearing. Hold the blade still, and then give it short, controlled bursts of air.
Clear the Exhaust Port First
The real ‘clog’ isn’t usually on the fan blades themselves but in the ‘wall’ of dust that builds up where the fan meets the copper heatsink fins. Use your compressed air to blow from the *inside out* through the exhaust vent. If the dust is really packed in there, you might need a pair of tweezers to pull out what looks like a small piece of grey felt. This simple act of clearing the path is the secret to cooling down a gaming laptop that has been struggling to stay under 90 degrees Celsius. Just like the move that keeps your server running in a professional environment, maintaining clear airflow is the cheapest and most effective insurance policy you have against hardware failure.Let’s dig deeper into the nuances of hardware longevity that most basic tutorials overlook. A common mistake I see among intermediate enthusiasts is the assumption that software can diagnose every problem. Everyone tells you to run a disk checker or a stress test the moment a computer slows down. However, in my experience, if your hardware is physically failing, running intensive software scans is like asking a person with a broken leg to run a marathon to see exactly where the bone is cracked. This is the ultimate ‘oops’ factor. If you hear a clicking sound or experience sudden, massive system freezes, using free file recovery tools on a failing mechanical drive is the fastest way to kill it. These tools thrash the actuator arm across the platters, potentially gouging the surface and making professional recovery impossible. 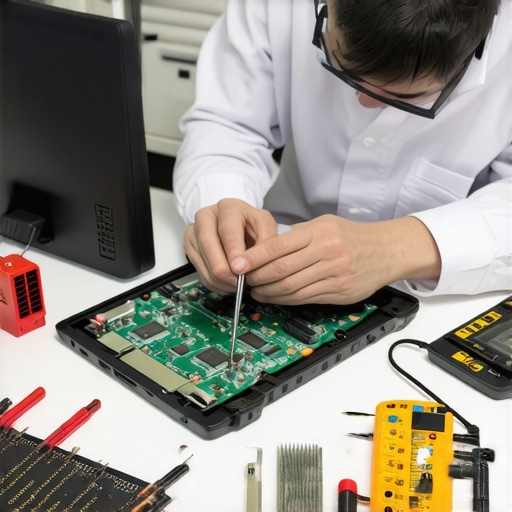
Is your backup strategy failing the reality test?
For the advanced user or the small business owner, the question isn’t whether you have a backup, but when you last performed a ‘fire drill’ restore. According to data recovery specialists at Kroll Ontrack, a massive percentage of business data loss occurs because the user assumed their automated backup was healthy, only to find the files were corrupted or the ‘cloud’ hadn’t synced in months. This is why effective managed IT solutions for growing companies prioritize proactive verification over simple storage.
Stop Putting Your Hard Drive in the Freezer
There is a persistent, dangerous myth that freezing a dead hard drive will shrink the internal metal components enough to let them spin one last time. While this might have occasionally worked on low-density drives from two decades ago, modern drives have such extreme data density that the microscopic moisture from condensation is a death sentence. If you have a physical failure, Drive Savers remains the only choice for physically damaged drives because they utilize ISO-certified cleanrooms. Another trap involves the power source. I have seen the truth about using generic chargers on expensive business laptops firsthand: these cheap replacements often lack the voltage regulation of OEM parts, sending ‘dirty’ power that slowly cooks the capacitors on your motherboard until it simply won’t turn on. Have you ever fallen into this trap? Let me know in the comments.Cleaning the dust out of your machine is a vital first step, but you also need to look at the health of the silicon itself through the lens of telemetry. I never trust a hard drive or an SSD just because it ‘sounds’ okay or feels fast. In my daily workflow, I rely on tools like CrystalDiskInfo or GSmartControl to interpret the raw hex values of a drive’s internal health log. Most people don’t realize that the risk of ignoring that smart status bad warning on your pc is essentially gambling with every precious photo and critical document you own. If you see the ‘Reallocated Sectors Count’ or ‘Wear Leveling’ climbing into the red, that drive is a ticking time bomb. According to the 2023 Backblaze Drive Stats report, drives often show these subtle attribute changes months before a total mechanical failure, and ignoring these signals is the number one cause of high-stress data recovery situations.
Watch the Indicators the Software is Giving You
Beyond the drive, your GPU and CPU are constantly ‘talking’ to you through thermal sensors. If you have noticed strange visual glitches, you must learn how to spot a dying gpu before your screen turns into a wall of static. I use a combination of stress-test tools and real-time monitors like HWMonitor to ensure that even under heavy load, my components aren’t hitting the thermal ceiling that causes long-term degradation. [IMAGE_PLACEHOLDER_D]
Predictive Maintenance is the Future of Business IT
For the professional side of things, the industry is moving away from the ‘break-fix’ model. I have seen how managed IT strategies to keep your business secure in 2025 are shifting toward AI-driven telemetry. Imagine a dashboard that alerts a technician that a server fan’s RPM is fluctuating wildly before the server actually overheats. This proactive stance is exactly why having the checklist for moving your business to the cloud without data loss is so vital—it’s about offloading hardware risks to infrastructure that is monitored 24/7.
How do I maintain my system performance over several years?
It comes down to a ‘verify first’ mindset and a dedicated software toolkit. I always keep a bootable USB drive loaded with a lightweight PE environment. If your Windows installation becomes borked, knowing how to pull data from a drive with a corrupted file system header is the difference between a five-minute recovery and a massive headache. I have seen far too many people lose weeks of work because they didn’t understand the power of data recovery tools what you need to know before the crisis hit. Remember, if the hardware is physically clicking or scraping, stop everything—why drive savers remains the only choice for physically damaged drives is because they possess the cleanroom technology that no software or DIY YouTube guide can replicate. My challenge to you today: download a hardware monitor, run it for an hour of your normal work, and check your ‘Max’ temperatures. If your CPU is crossing 95°C regularly, it’s time to stop reading and start cleaning.
Lessons Bought with Blown Capacitors and Lost Data
Early in my career, I thought a ‘clean’ PC was just about the lack of visible dust on the lid. I once ignored the risk of ignoring that smart status bad warning on your pc because the laptop still felt snappy and responsive. Three days later, the drive clicked its last breath, taking months of work with it. I also learned that computer repair for beginners is less about having the right parts and more about having the right patience. If you rush a fan cleaning, you snap a delicate blade; if you rush a file recovery, you might end up needing to know how to recover a partition that vanished after a windows update. The biggest takeaway from my years at the bench? Hardware rarely lies, but it does give subtle warnings—you just have to be willing to listen before the silence becomes permanent.
Tools That Belong in Every Desk Drawer
You do not need a professional cleanroom to keep your tech running like a dream. I swear by a few specific resources that bridge the gap between amateur and expert. First, always maintain a dedicated bootable environment on a USB drive; understanding the power of data recovery tools what you need to know allows you to see trouble coming before your operating system even fails to load. Second, for business owners, I recommend moving away from the ‘break-fix’ cycle. Exploring effective managed it solutions for growing companies is the only way to ensure your backups are actually verified and your security is proactive rather than reactive. Finally, a simple set of non-conductive nylon spudgers is worth its weight in gold to prevent shorting out components while you work.
Step Into the Role of Your Own Tech Expert
Maintenance is not a boring chore; it is a high-value investment in your daily productivity. Whether you are tackling a laptop screen repair or simply clearing out a stubborn ‘dust felt’ from your exhaust ports, taking that first step builds the confidence to handle bigger tech hurdles down the road. You now have the roadmap to keep your system cool, quiet, and reliable for years to come. Don’t wait for a hardware failure to take action—your laptop will thank you with peak performance. Have you ever found something truly bizarre, like a lost earring or a pet hair ‘blanket’, inside your laptop case during a cleaning? Let me know in the comments below!