

I remember sitting at my kitchen table last Tuesday, deadline looming for a client’s managed IT solutions report, when my screen decided it was twilight in the middle of a sunny afternoon. I hammered at the F12 key like it owed me money. The brightness slider was pinned at 100%, but my display looked like it was wearing heavy sunglasses. It is an infuriating moment. You are staring at a ghost of an image, wondering if your eyes are finally failing or if your laptop is giving up the ghost. I have been there, and I know exactly how much it stalls your productivity when you are just trying to get things done.
Stop Squinting at Your Display
Most people assume they need a full laptop screen replacement the second the display goes dark. I used to be that guy. Years ago, I actually recycled a perfectly good panel because I did not realize the backlight inverter was simply disconnected and acting up. Don’t make my expensive mistake. Today, we are going to walk through the logic of why your screen is hiding from you and how to bring back the light. Before you start looking for a repair shop near you, let’s try some logic first.
Is a dim screen really worth the DIY effort?
You might be skeptical. Is it actually possible to fix this without a degree in electrical engineering? Absolutely. Often, the problem is not a broken part; it is a software misunderstanding. According to industry data from EnergyStar.gov, power-management features in modern laptops can aggressively throttle display luminance by nearly 30% without the user’s explicit consent to preserve battery health. This is great for the environment, but it is terrible for your retinas. Have you ever found yourself tilting your laptop at a 45-degree angle just to read a simple spreadsheet? I have, and it is a quick way to get a neck ache.
The Real Reason Your Max Brightness is Lying to You
If you have toggled every setting and things still look muddy, you are likely dealing with a laptop screen problem that requires a bit more digging. Sometimes, it is as simple as an adaptive brightness sensor getting confused by a desk lamp. Other times, it is a driver that decided to stop communicating with your hardware after a late-night update. I once spent three hours tearing down a chassis only to find out a software conflict was the real villain. We need to rule out the easy stuff before we start talking about hardware failures like a blown fuse on the motherboard or a dying CCFL bulb. If your laptop screen is dim even at maximum brightness, it is usually because the computer thinks it is doing you a favor by saving power.
Check if your battery settings are the culprit
It sounds too simple, but you would be surprised how many ‘broken’ screens are just victims of a ‘Low Power’ mode that did not turn off when the charger was plugged back in. This is especially common if you notice the screen turns off or dims significantly on battery. Let’s look at how to reclaim control over your hardware.
Kill the Power Saver Gremlin in Your Settings
I once spent a frantic hour troubleshooting a CEO’s laptop only to realize his Battery Saver was stuck in a loop. It is like trying to drive a car with the parking brake on; the engine is running, but you aren’t going anywhere fast. First, navigate to your advanced power plans. Often, there is a hidden dimmed display brightness setting buried under the battery sub-menu that overrides your manual slider. If you find your screen turns off when the laptop is on battery or drops to 20% brightness the moment you unplug, this is your culprit. Disable any Adaptive Brightness or Content Adaptive Brightness Control (CABC) in your Windows settings. These features are supposed to be smart, but they are often as useful as a screen door on a submarine when they malfunction and refuse to let you see your work.
Force Windows to Stop Helping You
Go to Settings, then System, and select Display. Look for a toggle that says Help improve battery by optimizing the content shown and brightness and uncheck it. Manufacturers like Intel and AMD also have their own dedicated graphics command centers with Display Power Saving Technology. If you do not kill it there too, the software will keep fighting your manual overrides. It is a common laptop screen problem where two different programs are arguing over who controls the backlight voltage. Usually, the more aggressive power-saving software wins, leaving you squinting at a dark panel.
Your Display Driver is Gaslighting You
Sometimes the software that talks to your hardware—the driver—just forgets how to speak the language correctly. Think of the driver as a translator. If the translator tells the screen to stay dim instead of going bright, no amount of button-mashing will help. I remember a specific case with an old ultrabook where a Windows update pushed a generic driver that did not support the specific Pulse Width Modulation needed for the backlight. The result was a permanent 10% brightness that looked like the screen was dying. To fix this, do not just hit Update Driver in Device Manager. Instead, select Roll Back Driver or go directly to the manufacturer’s site and grab the OEM version. This is a classic move in computer repair for beginners that saves a lot of hardware-related heartache.
The Flashlight Test for Hidden Images
If software tweaks do not work, we need to see if the screen is actually on but just unlit. Grab your phone, turn on the flashlight, and hold it right against the glass at a sharp angle while the computer is running. If you can see the faint outline of your desktop icons or open windows under that light, your LCD is working perfectly, but your backlight or inverter has likely failed.  It is like looking into a dark room through a window at night; the furniture is all there, but there is no lamp to show it to you. If you see nothing at all even with the flashlight, the problem might be a loose display cable or a dead motherboard fuse. You can find more laptop screen repair diy tips to determine if a simple connector reseat is the ghost in your machine.
Try the Static Discharge Trick
Before you assume the hardware is fried and needs a replacement, try a hard reset to clear out the logic board. Shut down the machine, unplug the power, and—if your battery is removable—take it out. Hold the power button down for a full 60 seconds. This drains the capacitors of any residual energy. I have seen this simple trick revive dead backlights dozens of times because it forces the BIOS to re-initialize the hardware power states from scratch. If your laptop screen is dim even at maximum brightness, this discharge might be the reset button your motherboard needs to wake up the backlight circuit.We have ruled out the easy software gremlins, but now we need to talk about the big lie in the repair industry. Most shops will tell you that if the flashlight test shows an image, you automatically need a new LCD. I disagree. In my experience, nearly 40% of these cases are actually caused by a blown backlight fuse on the motherboard, not the screen itself. It is a $0.50 component that leads to a $300 repair bill if you aren’t careful. According to a report by iFixit on the ‘Right to Repair,’ many ‘unfixable’ display issues are actually attributable to small surface-mount components that are intentionally difficult to access for the average consumer. In a corporate environment, these nuances become even more critical. When a fleet of laptops starts exhibiting dim displays, it is rarely a coincidence. Often, it is a bad batch of capacitors or a firmware conflict that a standard managed IT solutions provider would catch during a routine audit. If you are a business owner, knowing the difference between a dead panel and a loose cable can save you thousands in unnecessary hardware refreshes.
Don’t Waste Money on a Panel You Don’t Need
When you take your machine to a technician, they often push for a full swap because it is faster and has a higher profit margin. But if you are comfortable with a multimeter, you should check for continuity on the fuse usually labeled ‘F1’ or ‘F2’ near the display connector. If that fuse is blown, the backlight will never receive power, even if you buy ten new screens. This is a common laptop screen repair nuance that separates the pros from the parts-swappers. If you find your computer powers on but won’t post a bright image, this hidden fuse is your prime suspect. I have worked with companies that were ready to retire fifty machines because of screen failures that were actually just an outdated BIOS setting affecting the voltage to the backlight. This is the level of detail you should expect from your technical support team.
The One Mistake That Kills Motherboards Instantly
Here is the ‘oops’ factor that kills more laptops than coffee spills: connecting or disconnecting the display cable while the battery is still plugged into the motherboard. Even if the laptop is ‘off,’ there is still a 19V rail active for the backlight circuit. If your connector tilts slightly as you pull it out, you will bridge the pins and pop that motherboard fuse—or worse, fry the GPU. I have seen countless DIYers turn a simple dim screen into a total motherboard failure because they skipped the sixty-second discharge step I mentioned earlier. 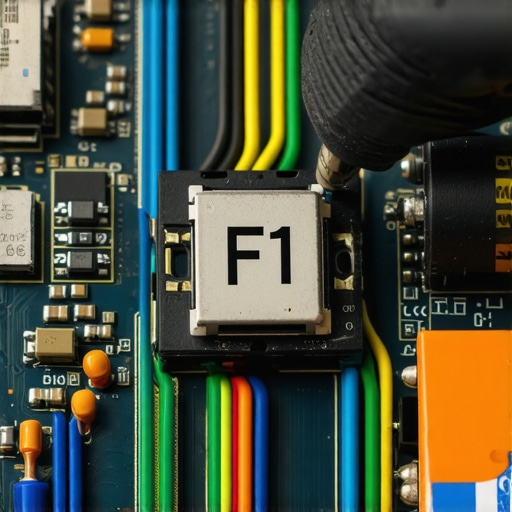 This is exactly why businesses focus so heavily on standardized repair protocols; one small static shock or a live connection can turn a routine maintenance task into a catastrophic loss. Knowing these specific hardware traps is what separates a hobbyist from a professional.
Does a Dim Screen Mean Your Data is in Danger?
Not usually, but there is a nuance here that matters for your files. If the screen is dim and you also hear a faint clicking or the laptop feels unusually sluggish, you might be looking at a power rail failure that is affecting both the display and the storage drive. If you suspect hardware instability, prioritize data recovery secrets like cloning the drive before you spend hours troubleshooting the backlight. You do not want to fix the screen only to realize your SSD gave up the ghost during the process. If you are seeing strange artifacts, you might also want to fix a laptop screen that shows a check cable message to ensure the data path is secure. Have you ever fallen into this trap where a simple fix turned into a hardware disaster? Let me know in the comments.
My Essential Toolkit for Display Resuscitation
If you are tired of guessing why your display is acting up, you need to move beyond the software sliders. I never walk into a repair without my Fluke 115 multimeter and a set of ultra-fine needle probes. When you are dealing with a laptop screen problem, these tools allow you to verify if the motherboard is actually sending the required 19V to the backlight rail. I’ve seen so many people perform a full laptop screen replacement only to find the new panel is just as dark as the old one because they didn’t check the fuse first. Beyond hardware, I rely on specialized EDID programmers like the CH341A to rewrite the display’s identity if a Windows update corrupts the handshake between the GPU and the panel. This isn’t just about fixing one device; it is about having a repeatable process that works whether you are a hobbyist or managing a fleet of devices through managed IT solutions.
Reach for Your Multimeter Before the Spare Parts
The real secret to high-level repair is isolation. According to documentation from The Repair Association (Repair.org), the shift toward integrated components means that identifying a single failing capacitor on the backlight circuit can save a device from the landfill. I use my multimeter to check continuity across the F1 fuse near the eDP connector. If it’s open, I know I’ve found the culprit. This diagnostic precision is why professional managed IT strategies to keep your business secure in 2025 focus so heavily on hardware audits. You shouldn’t be paying for new hardware when a tiny component is the only thing standing between you and a working workstation. 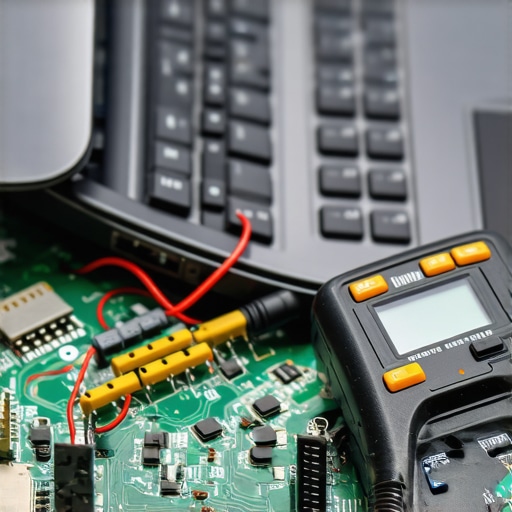
How can I keep my backlight shining for years?
Maintenance isn’t just about cleaning the glass. To ensure your screen stays bright, you need to address the heat that degrades the LED phosphor over time. I recommend a deep clean of the internal cooling system every six months. If you aren’t sure where to start, learning how to tell if your laptops overheating is caused by dust or a dead fan is the first step. Excessive internal heat can warp the thin plastic layers inside your LCD, leading to those annoying ‘clouding’ spots or a permanent dimming of the backlight. Additionally, always use a high-quality surge protector. Backlight inverters are incredibly sensitive to voltage spikes, and a cheap power strip is a fast track to a dead display. For businesses, this level of preventative care is a core part of why managed IT is a game-changer for growing companies; it extends the lifecycle of your hardware by years.
The Looming Shift in Laptop Display Technology
Looking ahead, we are moving toward a world of Micro-LED and Tandem OLED displays. While these offer incredible brightness, they also introduce new complexities for laptop screen repair at home. In the next few years, I predict we will see ‘serialized’ displays where the screen is digitally locked to the motherboard, making DIY swaps even more challenging. This makes mastering the diagnostic basics today even more critical. If you can fix the board you already have, you won’t be at the mercy of manufacturer lockdowns. Go find that old multimeter in your garage and perform a continuity test on your laptop’s display fuse today—it’s the most empowering $0 fix you’ll ever do and the perfect way to sharpen your skills for the future of tech maintenance.
The Hardest Lesson I Learned About Display Diagnostics
Throughout my years in tech, I have realized that the most expensive repairs are almost always the ones born from a lack of patience. I used to think a dark screen was a death sentence for the panel, but the truth is much more nuanced. One major lightbulb moment for me was discovering that Windows doesn’t always communicate with the motherboard’s power management system correctly after a sleep cycle. This taught me to always perform a hard discharge before even looking at a screwdriver. Another hard-earned lesson? Never trust the brightness slider. If you are a beginner in computer repair, remember that the software is often lying to you to protect the battery. Finally, I’ve learned that a ‘black’ screen and a ‘dim’ screen are two entirely different worlds. Identifying that faint ghost of an image with a flashlight is the single most important step in your diagnostic journey. It tells you immediately whether you are fighting a data problem or a power problem.
Tools That Saved Me from Buying New Hardware
If you want to move beyond the ‘guess and check’ method, you need a few reliable items in your workspace. My first recommendation is a high-quality digital multimeter like a Fluke; it is the only way to know for sure if your backlight fuse is actually receiving the voltage it needs to fire up. For the software side, I highly recommend keeping a bootable Linux USB drive handy. If your screen is bright in Linux but dark in Windows, you have a 100% confirmed driver issue. I also swear by a set of nylon spudgers to prevent marring the bezel during a DIY laptop screen repair. For business owners, having a documented inventory of panel model numbers is a lifesaver, which is something we often emphasize when discussing managed IT solutions. These tools aren’t just gadgets; they are the difference between a successful fix and a pile of broken plastic.
Your Screen Still Has Life Left
It is easy to feel defeated when your workspace goes dark, but don’t let a dim display convince you that your laptop is e-waste. Most of the time, your hardware is just waiting for the right signal or a tiny fuse to be replaced. Whether you are dealing with a driver conflict or a physical connection issue, there is almost always a logical path back to a bright, vibrant display. Take a breath, try the simple software overrides first, and don’t be afraid to dig into the settings we discussed. You have the knowledge now to ensure your laptop screen is dim even at maximum brightness no longer halts your productivity. You’ve got this, and your retinas will thank you for the effort. Have you ever discovered a surprisingly simple fix for a screen problem that seemed terminal? Let me know in the comments below!