

I’ll never forget the sinking feeling in my gut when I opened my MacBook after a cramped flight and saw it: a bright, shimmering white halo right where my cursor should be. I thought I’d spilled something, or maybe the pixels were just tired. But no, I had committed the ultimate traveler’s sin by stuffing my laptop into a carry-on that was already bursting at the seams. That little glowing ghost followed me through every document and movie for months. If you’re staring at a similar ‘pressure spot’ right now, take a deep breath. You haven’t necessarily killed your machine, but you do need a plan. Today, I’m going to show you how to identify if those spots are fixable and what you can do to reclaim your workspace without spending a fortune on a whole new unit.
Get Rid of Those Glowing Blobs for Good
White pressure spots are like the bruises of the tech world. They happen when the layers of your LCD or LED panel get squeezed together so tightly that they don’t quite spring back into place. I remember when I first started tinkering with hardware, I made a massive rookie mistake—I thought I could just massage the spot away with my thumb. Spoiler alert: I ended up with a much larger ‘bruise’ and a very expensive lesson in avoiding costly repair mistakes. It’s easy to feel like you’ve ruined everything, especially when your screen has a faint white glow that won’t quit. But before you panic-buy a replacement, we need to talk about what’s actually happening under the glass.
Is my screen actually ruined forever?
I get this question all the time from neighbors and friends who bring me their laptops. The short answer is: maybe not, but it depends on the severity. According to industry data from repair enthusiasts at iFixit, physical pressure is the leading cause of non-cracked screen damage in portable devices, often occurring from as little as a few extra pounds of force. We’re going to look at some DIY tips for clearer displays that might just save your sanity. We’ll cover everything from simple ‘cooldown’ periods to the more involved laptop screen repair methods you can try at your kitchen table. Have you ever opened your laptop only to find a mysterious white spot you swear wasn’t there yesterday? Tell me about your ‘lightbulb moment’ in the comments below, because I bet we’ve shared the same frustration. Let’s get into the nitty-gritty of how these panels work and how we can coax them back to life.
Stop Squishing the Layers
The first thing you have to do is stop the bleeding. If your laptop is currently living in a bag that feels like a stuffed turkey, that’s your first problem. Pressure spots are essentially the result of the diffuser layers being squeezed into the light guide plate. It’s like two pieces of wet glass sticking together; once they touch, surface tension keeps them there.
Empty out that overstuffed laptop bag
Take everything out. Your charger, your mouse, that notebook you never use—get them away from the screen. Often, just letting the laptop sit on a flat, hard surface for 48 hours can allow the layers to naturally separate. This is the simplest form of laptop screen repair how to fix common issues at home. If the spot is still there after two days of ‘social distancing’ from your bag, we move to manual intervention.
Techniques to coax pixels back to life
This is where people get nervous, but if you’re careful, it works. You aren’t trying to force the screen into submission; you’re trying to create a tiny bit of space.
Suction cups aren’t just for windows
My ‘lightbulb moment’ happened when I used a small, high-quality suction cup from a phone repair kit. I applied it directly over the white spot and gave it a very gentle, rhythmic tug. The goal isn’t to pull the screen off, but to lift the front layer just enough to break the seal between it and the backlight. I once did this on an old Dell that had a spot the size of a nickel. On the third tug, I heard a tiny ‘pop’—not the sound of breaking glass, but the sound of layers separating—and the spot vanished instantly. If you see the fix for a laptop screen that has a ghosting effect, you’ll notice that physical alignment is usually the culprit there, too.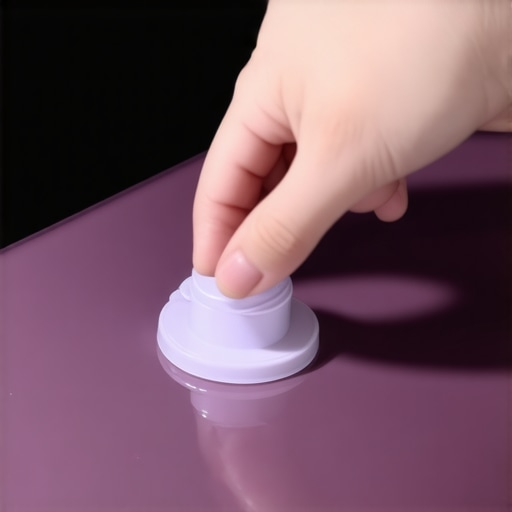
Try the warm compress method
If suction fails, temperature might be your friend. Take a microfiber cloth, dampen it with warm (not hot!) water, and place it in a Ziploc bag. Gently press it against the spot for a few minutes. The subtle heat can make the plastic layers more pliable, allowing them to return to their original shape. While you’re at it, check if troubleshooting laptop screen problems seamlessly involves checking your software settings, just to rule out any weird driver-induced blooms or wondering why your screen looks washed out after a software update.
When you need a full replacement
Sometimes the damage is permanent because the layers are physically scarred. If the spot looks more like a burn or if you see the reason your laptop screen has vertical green lines, the liquid crystal itself might be leaking or the transistors are shot. In these cases, no amount of massaging will help. You’ll need to look at a laptop screen replacement step-by-step repair guide. I’ve swapped out dozens of these, and while it looks intimidating, it’s mostly just tiny screws and delicate ribbon cables.Most people assume that a white spot on their screen is the result of a heavy textbook or a rogue elbow in a crowded subway. While external pressure is a major culprit, my years at the workbench have taught me a more nuanced truth: pressure can come from the inside out. Everyone says to watch your carry-on, but in my experience, the silent killer is internal thermal expansion.
Stop blaming your backpack for every spot
We often talk about the screen as a single unit, but it is actually a sandwich of polarizers, liquid crystals, and diffuser sheets. When your laptop runs hot for extended periods—perhaps because you’re pushing the GPU or your fans are clogged—the internal components expand. A swelling battery or a warping internal frame can press against the back of the LCD assembly just as surely as a heavy bag presses against the front. If you are noticing why your laptop screen has a faint white glow around the edges, it might not be your bag at all; it could be your hardware crying for help. Before you buy a new screen, you should how to verify if your laptop battery is actually failing or just needs a reset, because a bulging battery is a common internal pressure source that many DIYers overlook.
Can internal heat actually warp your display layers?
Yes, and this is where we get into the advanced science of the ‘Mura’ effect. According to the Society for Information Display (SID), Mura refers to non-uniformity in the display brightness, often caused by tiny misalignments in the liquid crystal matrix. While external force causes immediate bruising, chronic heat exposure can cause the adhesives between layers to degrade, leading to permanent ‘blooming’ spots that look exactly like pressure damage. This is a level of tips for troubleshooting laptop screen problems seamlessly that goes beyond just ‘don’t drop it.’ If your workspace is regularly over 85 degrees or your laptop is poorly ventilated, you are essentially slow-cooking your display layers into a permanent state of misalignment. 
The cleaning mistake that turns a small spot into a disaster
Here is the ‘Oops’ factor that I see far too often. Someone notices a small spot and thinks it might be a smudge, so they grab the nearest bottle of high-percentage Isopropyl alcohol. This is a massive ‘trap’ in the world of avoiding costly repair mistakes. If that alcohol seeps past the bezel, it can get pulled into the display layers via capillary action. Once liquid is trapped between the diffuser and the light guide plate, it creates a permanent translucent stain that is nearly impossible to remove without a full panel teardown. I once saw a client turn a $20 fix into a $400 replacement just by being too aggressive with a spray bottle. If you’re attempting any DIY tips for clearer displays, always apply cleaner to the cloth, never the screen.
Is it a pixel or a pressure point?
Sometimes, what looks like a pressure spot is actually a cluster of ‘stuck’ pixels or a backlight failure. You need to distinguish between a physical deformity in the layers and an electronic failure. If the spot changes color when you run a pixel-flipping utility, it’s an electronic issue. If it stays a static, glowing white regardless of what’s on the screen, it’s physical. This is how you how to spot a hardware failure masquerading as a software bug. If the spot has a shimmering quality, you might even be looking at the fix for a laptop screen that has a ghosting effect, which often points back to the display cable rather than the panel itself. Have you ever fallen into this trap of over-cleaning or ignoring a hot battery? Let me know in the comments, because your ‘oops’ moment might just save someone else’s screen.
Equip your workbench with the right gear
When you move from casual tinkering to serious maintenance, your kitchen drawer tools just won’t cut it. I’ve seen too many people try to pry open a bezel with a butter knife, only to crack the very glass they were trying to save. My go-to for years has been a specialized precision toolkit—specifically one with ultra-thin nylon spudgers. These are essential because they won’t scratch the delicate plastic of your laptop casing or short out internal components. If you are serious about DIY tips for clearer displays, you also need a high-quality suction cup. I don’t mean the ones for your shower; I mean a heavy-duty vacuum-seal puller used in professional glass repair. This tool allows you to apply concentrated, even tension to the top layer of a display, which is often the only way to separate layers that have fused due to external pressure. For software, I rely on HWMonitor to track internal temperatures. If I see my CPU hitting 90 degrees Celsius while idle, I know that white spot isn’t a fluke—it’s thermal expansion warping the panel.
How do I maintain my display health over time?
Consistency is the secret sauce to longevity. First, you need to establish a ‘no-stack’ rule: never put anything on top of your laptop, even if it’s closed. The weight of a single heavy textbook can be enough to create permanent Mura defects. Second, invest in a decent laptop stand that facilitates airflow. This prevents the internal heat buildup that leads to safely removing a bulging laptop battery before it presses against the underside of your screen. For business owners, this kind of individual care is hard to enforce at scale. That’s where managed IT solutions streamlining operations for small businesses become invaluable. They can remotely monitor hardware health across fifty laptops at once, catching a failing fan or a cooking processor before the screen even shows the first sign of a white glow. It’s about being proactive rather than reactive, which is the same logic you should apply to extending the life of your office PCs by three years through regular thermal paste refreshes and dust cleanouts.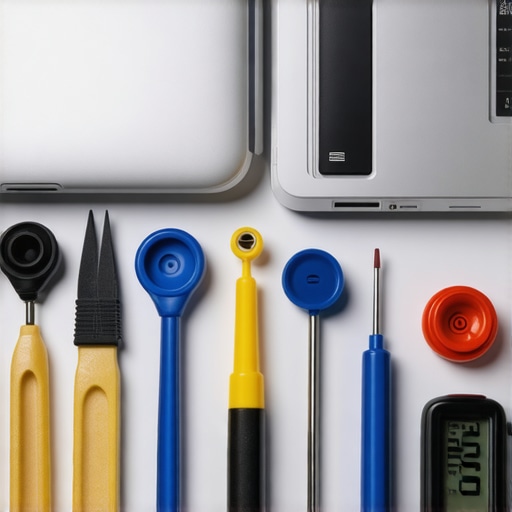
The next generation of resilient screens
Looking ahead, the industry is moving toward flexible OLED substrates. While these are less prone to the ‘shattering’ we see in traditional LCDs, they present new challenges with organic degradation and ‘burn-in’ pressure spots. DisplayMate Technologies, a leader in screen calibration and diagnostic standards, notes that as sub-pixel density increases, the margin for error in layer alignment becomes almost microscopic. We are likely to see more ‘self-healing’ polymers in the next five years—coatings that can actually flow into micro-scratches or redistribute themselves when pressure is applied. Until then, your best bet is a rigid hardshell case and a disciplined cooling strategy. If you’re currently dealing with a stubborn spot, I challenge you to try the suction method today. It’s a low-risk, high-reward move that could save you the $200 cost of a new panel. Just remember to be patient; sometimes it takes a few gentle tugs to break that vacuum seal between the diffuser and the light guide. For those managing a whole fleet of devices, keeping a close eye on managed IT strategies to keep your business secure in 2025 will ensure your hardware stays as resilient as your data.
Hard Truths I Discovered in the Repair Shop Trenches
Over the years, I’ve realized that a white spot is rarely just a cosmetic flaw; it’s a symptom of how you treat your hardware. One of the biggest lightbulb moments I had was discovering that many ‘pressure’ spots were actually caused by batteries that were slowly swelling and pushing against the panel from the inside. If you ignore the heat, you ignore the screen’s health. Another hard lesson? Not every shimmering mark is a pressure spot. Sometimes, it’s actually a ghosting effect caused by a loose display cable, which is a much cheaper fix than a whole new panel. Finally, remember that patience is your best tool—rushing a repair with too much force is how you turn a minor bruise into a shattered display.
My Personal Kit for Display Resuscitation
If you want to move past the ‘wait and see’ phase, you need the right gear. I always keep a few specific items on my workbench to handle these delicate situations. First, I swear by high-quality precision toolkits because nylon spudgers are non-marring and perfect for avoiding costly repair mistakes when prying open bezels. Second, I use thermal monitoring software to ensure that heat isn’t warping my internal components. Lastly, for the suction method, I recommend a specialized 2-inch vacuum puller—it provides the precise, even tension needed to separate display layers without cracking the glass.
Don’t Let a Single Spot Stop Your Workflow
It’s easy to get discouraged when your hardware starts showing its age or its battle scars from travel. But taking the time to learn these laptop screen repair methods isn’t just about saving money; it’s about taking ownership of the tools you use every day. Whether you successfully pop a layer back into place or decide it’s time for a laptop screen replacement, you’re gaining valuable experience that makes you more tech-resilient. Your workspace is your sanctuary, so treat your laptop screen with the care it deserves. Have you ever tried the suction cup trick, or did you go straight for a full replacement? Let me know in the comments below!