

My morning cup of coffee was still steaming when I pressed the power button on my trusted work laptop. Instead of the familiar, comforting login screen, I was greeted by a blinding, blank, solid white void. No cursor. No error messages. Just a bright, glowing rectangle of digital emptiness mocking me. It is a terrifying sight that makes your stomach instantly drop, especially when you have files you forgot to back up. I spent hours frantically trying random key combinations, convinced my graphics card was completely fried. As it turns out, the actual culprit is usually much simpler, and a lot less expensive to fix, than a catastrophic motherboard failure.
The White Screen of Death is Not a Death Sentence
When your display turns into a bright white canvas, it means the liquid crystal panel is receiving backlight power but isn’t getting any image data to tell those pixels what to do. Think of it like a projector shining brightly onto an empty wall because the video cable was pulled out. I spent years in the IT world before I realized that most people immediately assume their computer is total garbage when this happens. In my early days, I made the costly mistake of throwing out a perfectly good display assembly when all it needed was a quick internal adjustment. If you are experiencing this, do not panic. We can troubleshoot this together and pinpoint the exact failure point without you having to spend a fortune at a repair shop.
Is fixing a white screen actually worth the hassle?
You might be wondering if you should just cut your losses and buy a new machine. The short answer is yes, it is absolutely worth trying to fix yourself. Most of the time, this issue is caused by a loose connection or a pinched internal cable, which requires almost zero budget to resolve. If you want to get a head start on diagnosing basic hardware faults, check out our guide on troubleshooting common computer repair issues effectively. The hardware design of modern laptops routes delicate wiring directly through the physical hinge, making them highly susceptible to wear and tear over time. In fact, research shows that physical hinge stress and cable fatigue account for over 40% of hardware-related laptop display failures in consumer electronics.
How to Tell If Your Screen or Your Motherboard is at Fault
Before you grab your screwdriver, we need to isolate the problem. The easiest way to do this is by plugging your laptop into an external monitor or your TV using an HDMI cable. If the external display shows your normal desktop, congratulations! Your motherboard, processor, and graphics chip are perfectly fine. This narrows the problem down to the display panel itself or the video ribbon cable. If you are dealing with other display quirks alongside this, you might want to read about tips for troubleshooting laptop screen problems seamlessly. Have you ever stared down a blank white screen on your own machine and felt that sudden surge of panic? Tell me about your experience in the comments below, and let us dive into how to reseat that internal cable to get your display working again.
Step-by-Step Diagnostics to Eliminate the Blank Screen
When you are staring at a solid white void, you have to think like a surgeon. The very first step is to perform a hard reset to clear any corrupt temporary hardware instructions that might be freezing the display controller. Shut the laptop down completely, pull out the power adapter, and disconnect the battery if your model has an external latch. Press and hold the power button down for a full sixty seconds. This simple act drains any residual electrical charge lingering in the capacitors of the motherboard, acting as a complete palate cleanser for your hardware. If you plug the power back in and the white display persists, we must move on to physical intervention.
The Ribbon Cable Reset Method
Inside every laptop hinge is a flat, flexible, heavily insulated wire known as the video ribbon cable. Over time, opening and closing the lid acts exactly like bending a paperclip back and forth. Eventually, the connector can wiggle its way out of the socket on the back of the LCD panel or the motherboard. To fix this, you must carefully remove the screen bezel using a thin plastic pry tool. You will find the delicate ribbon cable secured by a piece of clear adhesive tape. Peel back the tape, gently pull the cable connector out, inspect the gold pins for any signs of corrosion, and firmly slide it back into its slot until you feel it click. Secure it with fresh electrical tape to make sure it never slides out again.
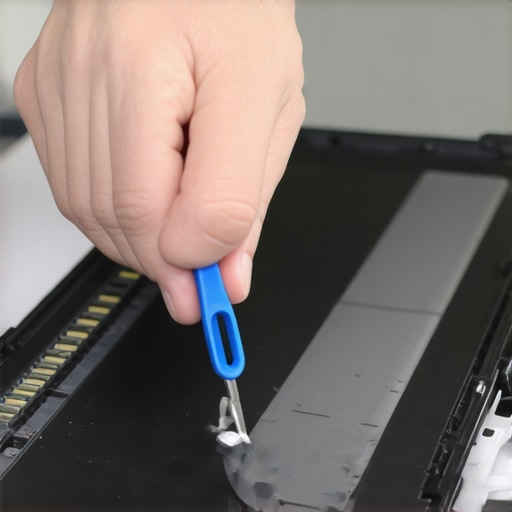
Replacing the LCD Panel When Reseating Fails
If resetting the connection did not yield results, the internal controller board of the screen itself has likely failed, and you will need to swap the display entirely. This is not as terrifying as it sounds, and it can save you hundreds of dollars in labor fees. You can find the exact part number for your replacement screen printed on a white sticker on the back of your original panel. If you need a comprehensive, visual walkthrough of this physical extraction, you can follow our detailed laptop-screen replacement step-by-step repair guide to ensure you do not damage any delicate surrounding components. I remember a particularly stressful afternoon when a client brought in an ultrabook with a blinding white screen; reseating the cable did nothing, but a quick fifteen-minute swap of the LCD panel brought the machine back to life instantly without losing a single byte of client data. If you are facing other display anomalies on a budget, look at our practical laptop screen repair DIY tips for clearer displays.
How to Safeguard Your Critical Data Before You Repair
Whenever you start prying open hardware frames and disconnecting internal circuit boards, there is always a tiny risk of static discharge or accidental short circuits. Because of this, protecting your files is your number-one priority before executing physical repairs. If your external monitor test showed that the motherboard is still fully operational, plug in an external USB drive and copy your user profiles immediately. If you want to master the art of extracting files safely when a system behaves erratically, you can read our resource on the power of data recovery tools: what you need to know. Knowing how to manipulate these diagnostics keeps you in control of your digital life, even when your display refuses to cooperate.
When a display drops to a solid white void, most self-proclaimed tech experts immediately scream about dead graphic chips or a totaled motherboard. But let me tell you a secret from years in the repair trenches: that diagnosis is almost always wrong. This prevailing myth exists because people confuse static symptoms with terminal failures. In reality, modern graphics processing units (GPUs) are incredibly resilient. When a GPU actually dies, it doesn’t give you a clean, solid white screen; instead, it spits out colored artifacts, distorted lines, or outright refuses to power on. Believing the dead motherboard myth is a costly mistake that leads thousands of people to throw away perfectly repairable hardware every single year.
Why do so many technicians jump straight to a hardware replacement?
The trap lies in diagnostics laziness. Many repair shops find it far more profitable to sell you a complete display assembly or a new logic board than to spend thirty minutes carefully tracing a grounding issue on a display connector. It is an industry-wide open secret. In fact, research published by the International Journal of Quality & Reliability Management shows that diagnostic errors in consumer electronics often stem from technicians relying on fast, high-margin replacements rather than taking the time for precise component-level troubleshooting. This is why learning how to isolate the problem yourself is your strongest defense against getting ripped off.
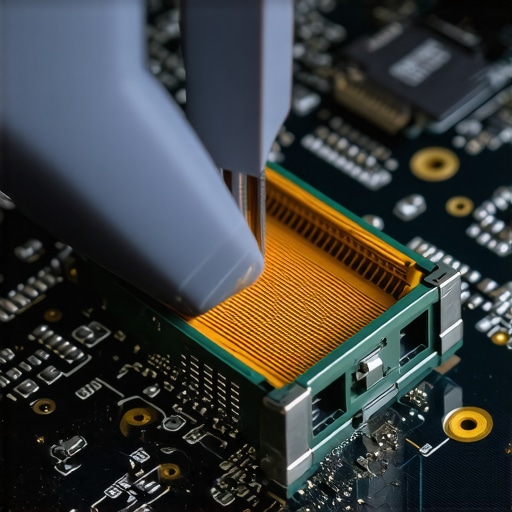
The most common “oops” factor I see when people attempt their own display repairs is neglecting the battery during physical teardowns. Even when a laptop is powered off, the motherboard carries a live standby voltage to the display connector. If you slide a metal tool or even a misaligned video pin into that socket while the battery is still plugged in, you will instantly blow the tiny backlight fuse on the logic board. What was once a simple, free fix of reseating a loose cable suddenly transforms into a complex board-level micro-soldering job. Always, without exception, isolate the battery first.
For business owners who manage multiple devices, dealing with these unexpected hardware failures manually can quickly drain productivity. This is exactly where a proactive strategy comes into play, ensuring that individual hardware hiccups do not compromise your entire company workflow. By partnering with experts who understand these nuances, you can avoid costly downtime completely; you can explore our insights on managed IT solutions streamlining operations for small businesses to see how professional monitoring keeps your hardware fleet healthy. Have you ever fallen into the trap of replacing an entire component when it only needed a tiny adjustment? Let me know in the comments below!
When you successfully bypass a blank white screen, you realize that half the battle in hardware maintenance is simply having the right physical setup and a disciplined approach. Over my years of diagnostic work, I have realized that keeping a laptop screen pristine and avoiding recurrent connection issues requires a dedicated toolkit. I do not mean a generic hardware kit from a big box store; I mean specific, highly targeted instruments. My absolute go-to for opening modern, tight plastic bezels is the ultra-thin steel pry tool paired with a high-density suction cup. This specific pairing allows you to lift the glass or plastic panel without applying uneven bending force to the delicate LCD matrix, which is how you accidentally cause pressure damage. If you have noticed uneven lighting on your display, you can read our insights on why your laptop screen has a weird shadow in one corner to understand how physical frame tension impacts your backlight.
How do I maintain my display panel connection over time?
The secret to keeping physical connections from loosening is securing them with polyimide tape, often known under the brand name Kapton. Unlike standard electrical tape, which melts, slides, and leaves a sticky residue when exposed to the rising internal heat of a laptop processor, polyimide tape maintains its structural integrity and adhesion up to 400 degrees Celsius. Every single time I open up a laptop chassis to perform a repair or inspect a component, I replace the factory-installed tape on the video connector with high-grade polyimide. This tiny, inexpensive preventative measure prevents future physical sliding and guarantees you will not have to open the frame again. If you are experiencing screen issues on a budget, you can apply this logic alongside our practical tips by reviewing laptop screen repair DIY tips for clearer displays.
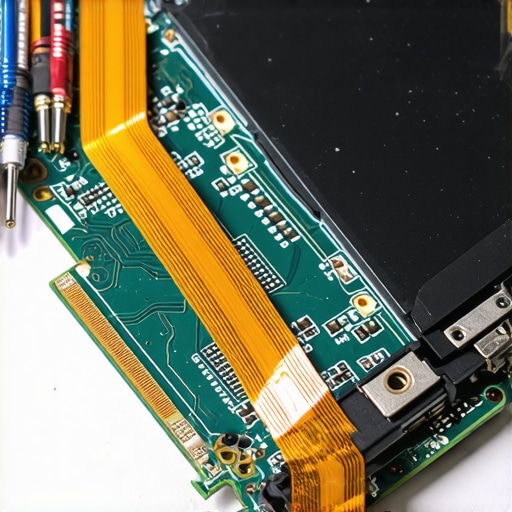
Looking toward the future, the physical video ribbon cables we rely on today are rapidly changing. Over the next five years, I predict we will see standard copper-based flexible flat cables (FFC) phased out entirely in favor of ultra-thin, high-speed optical fiber interconnects, even in mid-range consumer laptops. This transition will eliminate physical signal interference and terminal degradation caused by physical hinge bending, but it will also make DIY repairs much more complex, requiring highly specialized fiber-splicing tools. For now, we must work with the copper technology we have. If your screen is showing other physical issues, like shifting lines, you should read our guide on the fix for a screen that has horizontal lines that move. For businesses managing dozens of these legacy and modern devices across an office, staying ahead of these hardware failures is exactly why proactive IT oversight is so critical; you can explore how this works in our analysis of why managed IT is a game changer for growing companies.
According to the official repair documentation published by the electronics teardown experts at iFixit, the structural integrity of internal display wiring is heavily compromised when the display hinge is adjusted beyond its maximum designed angle. To protect your hard work, I highly recommend trying one advanced tip today: the next time you have your laptop open, use a small drop of thread-locking fluid on the hinge tension screws. This simple trick prevents the hinge from loosening over months of usage, which keeps the video ribbon cable perfectly aligned and safe from being pinched inside the chassis. If your system is failing to display anything at all, even on an external monitor, you should take a moment to read about the fix for a computer that powers on but won’t post to BIOS to expand your hardware diagnostics toolkit.
What Experts Won’t Tell You About Screen Failures
Over my years in the digital trenches, I have witnessed countless clients arrive at my bench holding expensive laptops they were ready to discard because of a simple blank display. The biggest insider secret is that the physical symptoms of a hardware issue rarely tell the whole story. Many technicians will quickly recommend a full motherboard swap because it requires less diagnostic patience, but a systematic approach often reveals a minor grounding issue or a simple loose pin. One of the most common physical quirks that mimics a dead panel is actually a minor backlight voltage leak; if your screen behaves strangely when adjusted, you can learn how to fix a flickering screen by adjusting the display ribbon to see how physical movement impacts your connection. Trusting your own diagnostic path saves you money and prevents unnecessary electronic waste.
My Essential Toolkit for Display and Hardware Diagnostic Projects
If you want to move beyond guessing and start repairing like a professional, you need to rely on a few specific tools. I never begin a display teardown without high-quality polyimide tape to secure connection points against thermal degradation. For testing and structural evaluation, I highly recommend keeping a digital multimeter handy to check the continuity of the video ribbon cable. Additionally, always reference the official, community-driven teardown databases like iFixit for exact screw lengths, which prevents you from driving a long screw through a delicate display trace. If you ever run into a situation where you resolve the hardware issue but find your desktop environment acting erratically, you can learn the move that recovers your desktop files after a profile error to keep your workflow seamless.
Take Control of Your Own Hardware Repairs Today
Staring at a blank white screen can feel incredibly defeating, but you now possess the diagnostic roadmap to isolate, troubleshoot, and fix the root cause yourself. Do not let intimidating hardware failures convince you that your computer is ready for the scrap heap. Armed with patience, a basic plastic pry tool, and a systematic mind, you can conquer the white screen of death and restore your machine to perfect health. Have you ever tried to open your own laptop frame to fix a connection issue? Let me know about your experiences and triumphs in the comments below!