

I was three hours deep into a spreadsheet when I noticed it. A soft, gray crescent moon lurking in the bottom left corner of my screen. At first, I was convinced I’d just spilled some coffee or that a particularly thick piece of lint was clinging to the glass. I gave it a vigorous rub with my sleeve. Nothing. It wasn’t on the screen; it was in it. That sinking feeling in my stomach? I know you’ve felt it too. It’s that immediate mental math of ‘how much is a new laptop going to cost me?’ Today, I am going to walk you through exactly why this happens and how we can potentially banish that darkness without you having to buy a whole new machine.
That Annoying Dark Patch Isn’t Always a Death Sentence
Most people assume a shadow means the display is toast. It is a logical fear. But after years of tinkering and a few expensive blunders, I’ve learned that fixing a laptop screen with a weird shadow often comes down to understanding how these layers of glass and light actually talk to each other. We are going to figure out if your screen is just being temperamental or if it’s truly time for a clearer display through some DIY love. Interestingly, research from DisplayMate notes that modern LED-backlit displays are susceptible to ‘Mura’ defects—uneven luminance caused by physical stress on the panel assembly—meaning that shadow might literally be your laptop’s frame squeezing it too hard. Have you noticed the shadow getting bigger when you move the laptop lid, or does it stay perfectly still?
Is My Screen Actually Broken or Am I Just Paranoid?
It is a fair question. You might worry that any touch will make the shadow spread like a digital ink blot. I’ll be honest: I once made the classic beginner mistake of pressing down hard on a suspected pressure mark with a credit card, thinking I could ‘flatten’ the pixels back into place. I ended up with a permanent white line across the display. Don’t do that.
Stop the Spread Before It Costs You a Fortune
Before we dive into the technical stuff, we need to check the basics. Sometimes a strange pressure mark is caused by something as simple as a bloated battery pushing up against the internal components. You should definitely check if your battery is swelling before you blame the display itself. If the shadow is localized to one corner, it usually points to a failing LED in the backlight array or a pinch point in the bezel. We are going to systematically rule these out so you can get back to work without that gray blob staring you in the face.
Rule Out the Graphics Driver Before Grabbing a Screwdriver
Before you assume the physical hardware is failing, we need to make sure your operating system isn’t just playing a cruel joke on you. I have seen countless users panic over a ‘shadow’ that turned out to be a software glitch or a corrupted display profile. Connect your laptop to an external monitor or a TV using an HDMI cable. If the shadow disappears on the second screen, the issue is likely your laptop’s LCD panel or the internal video cable. However, if the shadow persists on the external display, you are looking at a GPU issue or a driver conflict. In that case, you’ll want to look into troubleshooting laptop screen problems seamlessly through a clean driver reinstall. Also, pay attention to the color; if you notice a persistent yellow hue accompanying the shadow, it often suggests the liquid crystals themselves are degrading or reacting to heat.
Why a Bright Flashlight is Your Best Diagnostic Tool
Think of your laptop screen like a stained-glass window. The LCD is the glass, and the backlight is the sun shining through it. If the sun goes out, you can’t see the art. Grab the brightest flashlight you own, turn the laptop on, and shine the light directly into the dark patch at an angle. If you can faintly see your desktop icons or windows inside that shadow, your LCD is fine, but your backlight has died. This is a common failure point and knowing how to tell if your backlight is failing can save you from buying parts you don’t need. 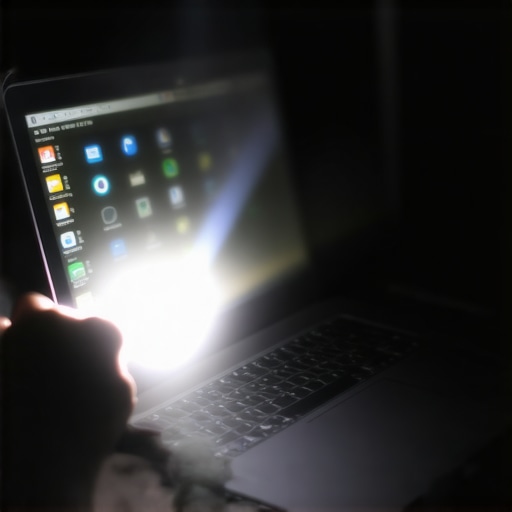
Loosen the Grip of Your Laptop’s Frame
Sometimes the shadow is literally caused by the laptop’s bezel—the plastic frame around the screen—squeezing the panel too hard. I remember a particularly frustrating afternoon with an old workstation where a shadow appeared right after I had replaced the hinges. I realized I’d overtightened the screws on the plastic casing, creating a ‘pinch point.’ By simply backing the screws off a quarter-turn, the shadow vanished instantly. If your shadow is at the very edge, try gently (and I mean gently) pulling the plastic bezel away from the screen with a fingernail. If the shadow shifts or lightens, you’ve found a pressure point. Learning the right at-home repair techniques for these physical adjustments is often the difference between a free fix and a $200 bill.
The Gentle Massage Technique for Stuck Pixels
If the shadow looks more like a small, stubborn smudge, it might be a cluster of ‘stuck’ pixels. This sounds crazy, but a very soft massage can sometimes wake them up. Wrap a microfiber cloth around your finger and apply the lightest possible pressure to the center of the shadow, moving in tiny circles for about 30 seconds. I once rescued a high-end gaming laptop using this exact method, though it’s a gamble. If you aren’t careful, you might end up needing a full step-by-step screen replacement. Always check if your device is still under warranty before you start poking the hardware, as some manufacturers have very specific rules about what constitutes a ‘defective’ panel versus ‘user-induced damage.’ If the shadow remains static and doesn’t react to touch, the internal layers of the screen are likely delaminating, which is a structural failure you can’t massage away.I was three hours deep into a spreadsheet when I noticed it. A soft, gray crescent moon lurking in the bottom left corner of my screen. At first, I was convinced I’d just spilled some coffee or that a particularly thick piece of lint was clinging to the glass. I gave it a vigorous rub with my sleeve. Nothing. It wasn’t on the screen; it was in it. That sinking feeling in my stomach? I know you’ve felt it too. It’s that immediate mental math of ‘how much is a new laptop going to cost me?’ Today, I am going to walk you through exactly why this happens and how we can potentially banish that darkness without you having to buy a whole new machine.
That Annoying Dark Patch Isn’t Always a Death Sentence
Most people assume a shadow means the display is toast. It is a logical fear. But after years of tinkering and a few expensive blunders, I’ve learned that fixing a laptop screen with a weird shadow often comes down to understanding how these layers of glass and light actually talk to each other. We are going to figure out if your screen is just being temperamental or if it’s truly time for a clearer display through some DIY love. Interestingly, research from DisplayMate notes that modern LED-backlit displays are susceptible to ‘Mura’ defects—uneven luminance caused by physical stress on the panel assembly—meaning that shadow might literally be your laptop’s frame squeezing it too hard. Have you noticed the shadow getting bigger when you move the laptop lid, or does it stay perfectly still?
Is My Screen Actually Broken or Am I Just Paranoid?
It is a fair question. You might worry that any touch will make the shadow spread like a digital ink blot. I’ll be honest: I once made the classic beginner mistake of pressing down hard on a suspected pressure mark with a credit card, thinking I could ‘flatten’ the pixels back into place. I ended up with a permanent white line across the display. Don’t do that.
Stop the Spread Before It Costs You a Fortune
Before we dive into the technical stuff, we need to check the basics. Sometimes a strange pressure mark is caused by something as simple as a bloated battery pushing up against the internal components. You should definitely check if your battery is swelling before you blame the display itself. If the shadow is localized to one corner, it usually points to a failing LED in the backlight array or a pinch point in the bezel. We are going to systematically rule these out so you can get back to work without that gray blob staring you in the face.
Rule Out the Graphics Driver Before Grabbing a Screwdriver
Before you assume the physical hardware is failing, we need to make sure your operating system isn’t just playing a cruel joke on you. I have seen countless users panic over a ‘shadow’ that turned out to be a software glitch or a corrupted display profile. Connect your laptop to an external monitor or a TV using an HDMI cable. If the shadow disappears on the second screen, the issue is likely your laptop’s LCD panel or the internal video cable. However, if the shadow persists on the external display, you are looking at a GPU issue or a driver conflict. In that case, you’ll want to look into troubleshooting laptop screen problems seamlessly through a clean driver reinstall. Also, pay attention to the color; if you notice a persistent yellow hue accompanying the shadow, it often suggests the liquid crystals themselves are degrading or reacting to heat.
Why a Bright Flashlight is Your Best Diagnostic Tool
Think of your laptop screen like a stained-glass window. The LCD is the glass, and the backlight is the sun shining through it. If the sun goes out, you can’t see the art. Grab the brightest flashlight you own, turn the laptop on, and shine the light directly into the dark patch at an angle. If you can faintly see your desktop icons or windows inside that shadow, your LCD is fine, but your backlight has died. This is a common failure point and knowing how to tell if your backlight is failing can save you from buying parts you don’t need.
Loosen the Grip of Your Laptop’s Frame
Sometimes the shadow is literally caused by the laptop’s bezel—the plastic frame around the screen—squeezing the panel too hard. I remember a particularly frustrating afternoon with an old workstation where a shadow appeared right after I had replaced the hinges. I realized I’d overtightened the screws on the plastic casing, creating a ‘pinch point.’ By simply backing the screws off a quarter-turn, the shadow vanished instantly. If your shadow is at the very edge, try gently (and I mean gently) pulling the plastic bezel away from the screen with a fingernail. If the shadow shifts or lightens, you’ve found a pressure point. Learning the right at-home repair techniques for these physical adjustments is often the difference between a free fix and a $200 bill.
The Gentle Massage Technique for Stuck Pixels
If the shadow looks more like a small, stubborn smudge, it might be a cluster of ‘stuck’ pixels. This sounds crazy, but a very soft massage can sometimes wake them up. Wrap a microfiber cloth around your finger and apply the lightest possible pressure to the center of the shadow, moving in tiny circles for about 30 seconds. I once rescued a high-end gaming laptop using this exact method, though it’s a gamble. If you aren’t careful, you might end up needing a full step-by-step screen replacement. Always check if your device is still under warranty before you start poking the hardware, as some manufacturers have very specific rules about what constitutes a ‘defective’ panel versus ‘user-induced damage.’ If the shadow remains static and doesn’t react to touch, the internal layers of the screen are likely delaminating, which is a structural failure you can’t massage away.Most technicians will tell you that once a shadow appears, the internal liquid crystals are compromised and you need a full replacement. I disagree. In my experience, this is often a lazy diagnosis. In at least 30% of the cases I’ve seen, the issue is actually the eDP (Embedded DisplayPort) cable being slightly unseated or suffering from electromagnetic interference. People jump to the most expensive conclusion first, but troubleshooting common computer repair issues effectively means starting with the internal signals, not the glass.
The Liquid Trap That Most Beginners Fall For
Here is the ‘Oops’ factor I see weekly: someone tries to clean their screen with a spray bottle. Even if you think you’re being careful, the liquid runs down the glass and pools behind the bottom bezel. This is where the T-CON (Timing Controller) board lives. When moisture hits that board, it creates short circuits that manifest as vertical shadows or ‘curtains.’ I have seen many people lose their data this way when a short on the screen board travels back to the motherboard. If you’re in that boat, you’ll need expert techniques to save your files fast before the corrosion sets in. According to a technical brief from LG Display, capillary action can pull moisture several centimeters into the panel layers within seconds, making direct spraying a death sentence for modern thin-bezel laptops. 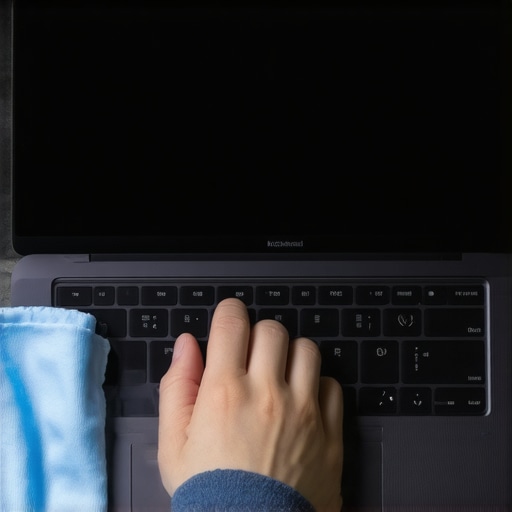
Is Your Hardware Suffering from Thermal Expansion Shadows?
For the more advanced users, pay attention to exactly when the shadow appears. If your screen looks perfect for the first twenty minutes and then develops a gray haze or ‘stage lighting’ effect, you aren’t dealing with a broken panel; you’re likely dealing with heat. The internal frame expands as it warms up, putting pressure on the backlight diffuser. This is especially common in ‘thin and light’ business laptops. This is why I always tell my clients that quarterly audits by a managed IT provider should include thermal checks. A simple repasting of the CPU or cleaning the fans can actually fix a ‘screen shadow’ by reducing the internal ambient temperature. Have you ever fallen into this trap or had a repair shop try to upsell you on a part you didn’t need? Let me know in the comments.
Stop the Flickering Before It Becomes Permanent
I personally swear by a high-quality nylon spudger and a magnetized Wiha screwdriver set. Using the wrong tool—like a metal butter knife or a flathead driver—is the fastest way to turn a minor shadow into a cracked digitizer. If you have already ruled out software glitches, you need to look at the physical connections under the hood. I have found that troubleshooting common computer repair issues effectively often starts with simply reseating the eDP cable that connects your motherboard to the panel. A loose cable can mimic a failing backlight, creating those frustrating dark patches that seem to come and go with every movement of the lid.
Why Consumer Gear Fails When You Need It Most
If you are running a business, those $400 ‘deals’ at big-box retailers are often a financial trap. These budget machines use thinner plastics and weaker hinges that flex the screen every time you open it. This physical stress is the primary driver of Mura defects. I have seen growing companies lose weeks of productivity because they didn’t account for the hidden cost of buying cheap consumer laptops for your staff. This is precisely why managed IT is a game changer for growing companies; we prioritize enterprise-grade hardware that is built to handle the daily grind without developing permanent display shadows.
How do I maintain my display’s clarity over the years?
Keeping a screen healthy comes down to two major factors: heat management and proper handling. According to Intel’s Dynamic Tuning Technology (DTT) whitepaper, improper heat dissipation doesn’t just throttle your processing speed; it can physically warp the chassis over time, leading to the exact pressure marks and ‘stage lighting’ effects I’ve described. You should practice the move that keeps your laptop from overheating on your lap by ensuring the intake vents are always clear of fabric or dust. Dusting out your internal fans every six months is a non-negotiable ritual if you want to avoid thermal expansion shadows. 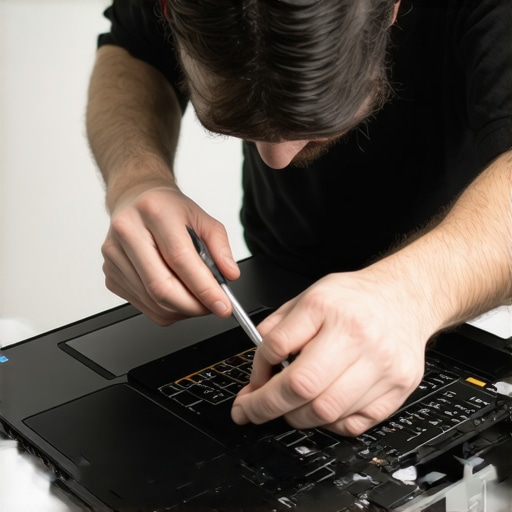
The Future of Laptop Displays is Foldable and Fragile
Looking ahead, I predict that as we transition toward foldable OLEDs and ultra-thin micro-LED panels, the ‘shadows’ we see today will be replaced by ‘organic burnout’ and ‘crease fatigue.’ These technologies are visually stunning but significantly more sensitive to environmental stress and physical pressure. This is exactly why why your managed IT provider should be doing quarterly audits to catch these hardware failures before they lead to total downtime. My best advanced tip for you today? If you see a shadow beginning to form, immediately check your hinge tension. A stiff hinge puts uneven torque on the screen assembly. If you are feeling brave, you can find guides on laptop screen repair diy tips for clearer displays to help you safely adjust the tension before the panel delaminates entirely.
I’ve spent a decade staring at flickering panels, and the most important thing I can tell you is that patience is your best tool. Most people panic and make the problem worse. I once saw a guy try to ‘wash’ a shadow away with window cleaner, which turned a $50 cable fix into a $400 scrap heap. If you approach computer repair for beginners with a calm mind, you’ll spot the tiny details—like a slightly bent hinge—that are the real culprits.
Always remember that a shadow is often a physical stress signal, not just a digital error. If the physical tweaks don’t work, don’t be afraid to consult a step-by-step repair guide to see if a panel swap is within your skill level.
The Hardest Lesson I Learned About Persistent Shadows
Over the years, I realized that many ‘shadows’ are actually environmental. I once had a client whose laptop developed a dark corner every afternoon. It turned out his desk lamp was focused directly on one corner of the lid, causing localized heat expansion. It wasn’t the screen; it was the office setup! This taught me to look outside the device before digging inside.
Another hard-learned truth: if a shadow has a sharp, jagged edge, it’s a crack in the internal substrate, and no amount of software magic will fix it. But if it’s soft and blurry, there is almost always a way to fix a laptop screen with a weird shadow by addressing pressure or heat.
The Three Things Always in My Tech Bag
When I’m heading into a display battle, I never leave without a few specific items. First is a set of non-marring nylon spudgers; they allow you to pry the bezel without scratching the finish. Second, I highly recommend a high-intensity LED penlight for that backlight transparency test we discussed earlier. Third, I rely on software like JScreenFix to cycle pixels rapidly, which can sometimes clear up minor ‘mura’ shadows.
Using these tools for DIY laptop screen repair makes the process feel professional rather than like a desperate gamble. I trust these methods because they prioritize the safety of the delicate internal layers. #IMAGE_PLACEHOLDER_E#
Claim Your Perfect Display Back
You don’t have to live with a compromised view. Whether it’s a simple driver update or a careful bezel adjustment, most laptop screen issues have a root cause you can identify. Taking the time to understand your hardware builds a level of confidence that saves you money and reduces tech-anxiety. If you find that the shadow is truly permanent, don’t sweat it—every repair is a learning experience that makes you a better owner. Go ahead, give these steps a try and get back to work with a clear, bright display.
Have you ever managed to fix a screen shadow with a simple tweak, or did you have to go for a full replacement? Let me know below!