

I spent nearly two thousand dollars on a machine that promised crystal clear visuals, yet I found myself squinting at text that looked like it had been smeared with Vaseline. It was infuriating. I had just finished setting up my workspace, ready to dive into some deep work, when I realized the icons and text were fuzzy around the edges. I actually thought I had a defective unit right out of the box. My first instinct was to panic and search for a laptop screen replacement step-by-step repair guide, convinced the hardware was a dud. But the hardware wasn’t broken; it was just confused by the software settings.
That Moment Your Premium Screen Looks Like Garbage
We buy these high-resolution displays because we want more screen real estate and sharper details. However, there is a weird paradox in modern computing: sometimes more pixels actually lead to less clarity. This usually happens because of display scaling. When you have a 4K resolution on a 13-inch screen, the native icons become microscopic. To make it readable, Windows or macOS stretches the image. If that stretching isn’t handled perfectly, you get that dreaded blur. I made the classic rookie mistake early on of trying to manually set my resolution to 1080p on a 4K panel, thinking it would even things out. It didn’t. It just made everything look like a pixelated mess from 2005. I should have looked for laptop screen repair diy tips for clearer displays before messing with the native resolution.
Is my expensive screen actually a lemon?
It is easy to feel cheated when your Retina or Ultra HD display looks worse than your old budget monitor. You might worry that you’ve wasted your money or that you need computer repair for beginners to figure out what is wrong. I promise you, your screen is likely fine. We are going to fix this today by diving into DPI settings and app-specific overrides. Interestingly, research indicates that high-DPI scaling issues account for a significant portion of user interface frustration in professional environments, often leading users to believe their hardware is failing when it is actually a configuration error. Have you ever felt like your eyes were straining more on a better screen than on your old one? If you are seeing weird artifacts or notice your laptop screen flickers only when the brightness is low, that might be a hardware quirk. But for most of us, the blurriness is just a software tug-of-war. We need to tell your operating system exactly how to handle those millions of extra pixels so you can finally get the crispness you paid for.
Match the monitor to its native resolution
The first thing you must check is your native resolution. Think of your laptop screen like a grid of tiny lightbulbs. If your software tries to display a 1920×1080 image on a 3840×2160 (4K) grid, it has to guess where those extra pixels go. This interpolation is what creates the ‘fuzzy’ look. I once spent three hours trying to fix a ‘blurry’ Photoshop interface for a designer who was convinced her screen was dying. I almost went as far as looking up a laptop screen replacement step-by-step repair guide because the blur was so uniform. It turned out she had lowered her resolution to ‘make the icons bigger.’ Don’t do this. Always keep your resolution at the (Recommended) setting and use scaling to adjust the size of elements instead. If you see physical artifacts like a single vertical line of pixels, that is a hardware issue, but general blur is almost always this resolution mismatch.
Stop the system from stretching your icons
Windows and macOS use scaling to make high-resolution screens usable. If you are on a 14-inch 4K screen at 100% scaling, you would need a magnifying glass to read your emails. Most systems default to 150% or 200%. The problem occurs when the scaling isn’t an even integer. When you use 125% or 175%, the math gets messy, and the edges of windows start to look soft. I recommend sticking to 100%, 150%, or 200% whenever possible. If you find yourself constantly squinting, you might need tips for troubleshooting laptop screen problems seamlessly to find a balance between size and sharpness. 
Overriding the scaling on stubborn legacy apps
The real nightmare begins with older software. Some apps were designed before high-DPI screens existed. They don’t know how to scale, so Windows just stretches them like a rubber band, resulting in text that looks like a smudge. I faced this recently while helping a small firm with managed IT solutions streamlining operations for small businesses. Their ancient accounting software was unreadable on their new laptops.
The Compatibility Tab trick
You can force these apps to render correctly. Right-click the app’s shortcut, go to Properties, then the Compatibility tab. Click ‘Change high DPI settings.’ Check the box that says ‘Override high DPI scaling behavior’ and select ‘System (Enhanced)’ or ‘Application’ from the dropdown. This forces the app to either handle its own scaling or tells Windows to use a sharper stretching algorithm. It is much like computer repair for beginners—it is a simple toggle that solves a complex-looking problem.
Fine-tune your text with the ClearType wizard
Sometimes the windows look sharp, but the text itself feels ‘off.’ This is often because the sub-pixel rendering is misconfigured. In Windows, search for ‘Adjust ClearType text.’ It will take you through a series of boxes where you pick the text that looks best to you. It is a bit like an eye exam for your computer. This is a common step in laptop screen repair diy tips for clearer displays. If you’ve gone through all these steps and the screen still feels dim or discolored, you should check how to tell if your laptop screen backlight is actually failing, as hardware degradation can often be mistaken for software blur. Clear text and proper scaling are the backbone of a professional setup, similar to how managed IT strategies to keep your business secure in 2025 provide the backbone for digital safety.
Let’s dig deeper into a nuance that even some seasoned IT professionals miss. Everyone tells you that 4K is the gold standard for productivity, but in my experience, the more is better philosophy is a trap for 13 or 14-inch laptops. While the marketing suggests you get more screen real estate, the reality of Windows scaling means you often end up with less usable space than a standard 1080p panel once you scale the UI to a readable 200%. If you push it to 150% to gain that space, you introduce the micro-blur that strains your eyes over an eight-hour workday.
Higher pixel counts aren’t always better for your eyes
The contrarian view I hold is that 1440p is the sweet spot for laptop displays, yet it is the hardest resolution to find. High-DPI displays consume significantly more battery and GPU cycles just to render the same spreadsheet. According to a study published by the Society for Information Display (SID), excessive scaling in non-linear ratios, such as 125% or 175%, can increase visual search time by up to 20% compared to native integer-scaled interfaces. This is because the brain has to work harder to process the soft edges caused by sub-pixel interpolation. If you’ve been searching for laptop screen repair diy tips for clearer displays and nothing seems to work, your resolution might actually be too high for the physical size of your screen.
Don’t let your cleaning habits destroy your anti-glare coating
Here is the oops factor that ruins premium hardware: using household glass cleaners. I have seen countless executives bring in machines where the screen looks like it has a permanent smudge that won’t wipe away. They used Windex or a similar ammonia-based cleaner, which eats through the oleophobic and anti-reflective coatings. Once that layer is damaged, there is no software fix and no polish that can bring it back. You are looking at a laptop screen replacement step-by-step repair guide just to fix a cosmetic mistake. Another common physical trap is neglecting the thin gap between your keyboard and screen. Over time, skin oils on the keys transfer to the glass, and pressure from your laptop bag can lead to why your laptop screen has a permanent mark from the keyboard. Always use a microfiber cloth and 70% isopropyl alcohol—sparingly—never spraying the screen directly. 
Why does your screen look washed out when using a USB-C dock?
This is a sophisticated frustration for users with multiple-monitor setups. You might have a perfectly crisp laptop screen but a blurry, color-shifted external monitor. This often isn’t a hardware failure but a bandwidth limitation of your docking station or cable. Many docks use Chroma Subsampling (4:2:0) to save bandwidth, which compresses color data and makes text look like it has a red or green shadow. Before you assume you need computer repair for beginners, check if your dock supports DisplayPort 1.4 or higher. These nuances are why managed IT strategies to keep your business secure in 2025 now include hardware standardization—ensuring that every component in the chain can actually handle the data the screen requires.
The data recovery myth that leads to permanent loss
Finally, we need to address the biggest mistake in modern repair: the DIY data recovery attempt on a failing drive. When a screen goes black and a user suspects hardware failure, they often try to reboot dozens of times. If the issue is actually a failing SSD or HDD, every power cycle is potentially overwriting metadata. Modern data recovery is less about software scans and more about firmware stabilization. If you have critical files, stop using the device immediately and look into data recovery secrets expert techniques to save your files fast. Whether it is a software glitch or you’re trying to figure out how to tell if your laptop screen backlight is actually failing, the key is methodical isolation rather than panicked clicking. Have you ever fallen into this trap? Let me know in the comments.
Stop the keyboard sandwich from ruining your glass
One of the most common physical issues I see in high-end workstations isn’t software-related at all; it’s the physical pressure of the laptop lid in a cramped bag. If you’ve ever opened your machine to find a ghostly rectangular outline on your display, you already know why your laptop screen has a permanent mark from the keyboard. To prevent this, I personally use a wafer-thin microfiber shroud that sits between the keys and the screen when closed. This doesn’t just keep oils off the glass; it acts as a buffer against the micro-flexing of the chassis that eventually leads to permanent pressure marks or even dead pixels. If your frame is already feeling loose, knowing how to tell if your laptop hinges are about to snap the frame can save you from a catastrophic failure that could crack your LCD from the inside out.
How do I maintain my display’s health over the long haul?
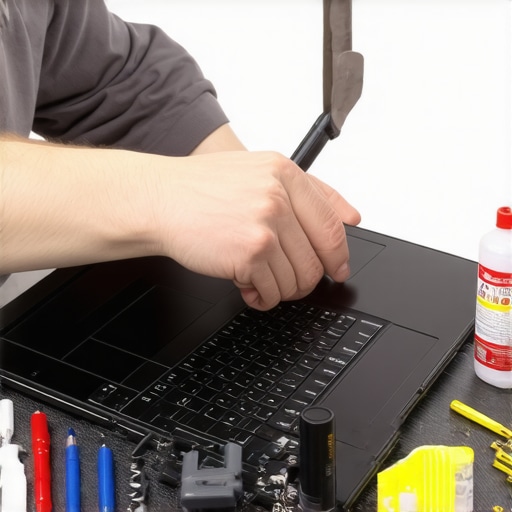
Maintenance is about more than just wiping away fingerprints. For professionals, color accuracy and backlight consistency are the real metrics of success. According to the official VESA DisplayHDR compliance tests, maintaining consistent peak brightness requires more than just software settings; it involves keeping your machine cool so the backlight driver doesn’t throttle power to prevent overheating. I recommend using tools like HWiNFO to monitor your GPU and screen temperatures during heavy workloads. If you notice your screen is fine but your navigation is failing, you might need to learn how to fix a laptop touchpad that has become erratic and jumpy, as heat often affects the capacitive sensors under the palm rest before it kills the screen itself.
The software toolkit for a healthy workstation
I don’t trust the built-in Windows notifications to tell me when my hardware is failing. For my personal setup, I use a combination of CrystalDiskInfo for storage health and specialized calibration tools like the SpyderX. While the power of data recovery tools what you need to know is that they are meant for emergencies, a proactive approach to hardware monitoring is much more effective. For my business clients, we integrate these health checks into a broader strategy, often following the checklist for moving your business to the cloud without data loss to ensure that even if a screen or a motherboard fails, the data is already safe. Remember, the hardware upgrade that actually speeds up your daily workflow isn’t always a faster CPU; sometimes it’s simply moving to an external high-refresh-rate monitor that reduces eye fatigue and input lag.
The high-refresh future of business displays
The trend is clear: we are moving away from standard 60Hz panels toward 120Hz and 144Hz OLED screens even in non-gaming laptops. While this makes motion incredibly fluid, it introduces new maintenance challenges like sub-pixel wear and burn-in. I predict that within three years, ‘pixel-shifting’ software will be a standard feature in all managed IT environments to protect these expensive panels from static UI elements like taskbars. My advanced tip for today: go into your most-used legacy app, right-click the executable, and try the ‘System (Enhanced)’ DPI override I mentioned earlier. It is the single most effective way to reclaim the sharpness of your display without buying new hardware. Don’t wait for your screen to fail; fine-tune your settings now to get the professional clarity you actually paid for.
Hard Lessons From the Front Lines of Display Repair
After years of squinting at high-end panels, I’ve realized that the marketing numbers rarely tell the whole story. Most users assume that a high price tag guarantees a perfect experience, but the reality is more nuanced. Here are the lightbulb moments that changed how I treat my workstation:
- Integer scaling is your best friend: Sticking to 200% instead of 175% can be the difference between a constant headache and a productive afternoon because it prevents the software from having to guess pixel placement.
- Resolution isn’t a proxy for quality: A well-calibrated 1080p screen often beats a poorly scaled 4K panel for text-heavy work.
- Don’t ignore the physical impact: Most ‘software’ blurs I see in the field are actually caused by micro-scratches or oil buildup. If you see ghostly rectangular marks, you should check why your laptop screen has a permanent mark from the keyboard.
My Personal Inventory for Maintaining Hardware Excellence
I don’t rely on luck to keep my screens sharp. I trust specific tools and habits to keep things running. First, HWiNFO is essential for monitoring the thermal health of my display drivers to ensure they aren’t throttling. Second, I always keep a DataColor SpyderX handy for monthly calibrations, which is vital for any professional setup. Third, I follow a strict maintenance schedule similar to troubleshooting common computer repair issues effectively. Finally, if you ever face a sudden hardware failure where the screen won’t turn on, knowing the power of data recovery tools what you need to know can save your career when the backlight finally gives out.
Take Back Your Visual Clarity Today
Your laptop screen is the primary way you interact with your digital life. Don’t settle for ‘good enough’ when you can have pixel-perfect precision. By taking the time to adjust your scaling, fix legacy apps, and maintain the physical glass, you are protecting your most valuable asset: your eyes. If you ever feel overwhelmed by the technical side, remember that even computer repair for beginners starts with these small, methodical steps. Your hardware is capable of greatness—you just have to give it the right instructions. #IMAGE_PLACEHOLDER_E# Have you ever managed to fix a blurry app using the High DPI override we discussed? Let me know in the comments below!