

I remember sitting down with a fresh cup of coffee, ready to dive into a massive spreadsheet, when it appeared. A single, razor-thin vertical line of neon pink, cutting right through my data. I blinked, hoping it was just eye strain. It wasn’t. It sat there, mocking my productivity. My first instinct back then? I gave the monitor a sharp whack on the side. Don’t do that. I almost turned a high-end screen into a paperweight because I didn’t yet know the nuances of [tips for troubleshooting laptop screen problems seamlessly](https://computerrepairmasters.com/tips-for-troubleshooting-laptop-screen-problems-seamlessly). We have all been there, staring at a hardware glitch and wondering if our bank account is about to take a hit. Today, I am going to help you determine if that line is a minor hiccup or a signal to start shopping. Have you ever turned on your PC only to find a new ‘design feature’ in the form of a bright vertical stripe?
Get Ready to Save Your Screen Without Breaking the Bank
It is easy to panic and think your GPU is melting or the entire panel is toast. Early in my repair days, I made the mistake of assuming every line meant a dead panel. I once replaced a perfectly good display because I didn’t realize the internal ribbon cable was just slightly out of alignment. It is a classic [computer repair for beginners](https://computerrepairmasters.com/computer-repair-for-beginners-avoid-costly-mistakes) blunder that I still cringe about today. [image-placeholder] Often, what looks like a broken screen is actually a communication error between the hardware and the software. If you have ever wondered about [the real reason your laptop display looks pixelated and how to fix it](https://computerrepairmasters.com/the-real-reason-your-laptop-display-looks-pixelated-and-how-to-fix-it), you know that the way images are drawn on your screen is surprisingly delicate. A single loose connection can disrupt an entire column of pixels.
Is it actually worth your time to fix this?
You might be skeptical, thinking a single line isn’t worth the hassle of a teardown. But here is the thing: a vertical line is often a ‘gate driver’ issue that can worsen over time if left unaddressed. According to research from the display experts at DisplayMate, many pixel-related defects are caused by failure in the Tape Automated Bonding (TAB) that connects the driver chips to the LCD panel itself. Sometimes, a bit of software magic can help, especially if you are learning [how to fix a laptop screen with a stuck pixel using software tools](https://computerrepairmasters.com/how-to-fix-a-laptop-screen-with-a-stuck-pixel-using-software-tools). In the next sections, we will walk through the diagnostic steps that moved me from a ‘monitor-whacker’ to a successful DIY repairer.
Find Out if the Screen or the Graphics Card is Failing
Before you grab a screwdriver or start looking up the cost of a new machine, you need to isolate the bully. Is it a software glitch, a dying GPU, or just a physical defect in the glass? Early in my career, I once spent two hours reinstalling Windows on a client’s Dell only to realize the vertical line was present even on the boot-up splash screen. It was a hardware failure I could have spotted in thirty seconds just by looking at the BIOS. To avoid my mistake, your first step in
Check the BIOS to Rule Out Driver Drama
is to restart your laptop and enter the BIOS or UEFI menu—usually by tapping F2, F10, or Del during startup. If the vertical line is still there, mocking you against that plain background, then your operating system and drivers are innocent. If the line disappears in the BIOS, you are looking at a software conflict, which is a much easier win for [troubleshooting common computer repair issues effectively](https://computerrepairmasters.com/troubleshooting-common-computer-repair-issues-effectively).
Connect an External Monitor for the Ultimate Verdict
Grab an HDMI cable and hook your laptop up to a TV or a desktop monitor. This is the ‘litmus test’ for your internal components. If the external screen looks perfect, your GPU is healthy, and the problem lies strictly within the laptop’s display panel or the ribbon cable. However, if the line shows up on the external monitor too, you might be dealing with a much bigger headache. You will want to learn [how to spot a dying GPU before your screen turns into a wall of static](https://computerrepairmasters.com/how-to-spot-a-dying-gpu-before-your-screen-turns-into-a-wall-of-static) because that suggests the internal processing chip is failing, not the glass in front of you.
Apply Gentle Pressure to the Bezel
Sometimes, the vertical line is caused by a loose connection where the gate drivers meet the LCD glass. Think of it like a loose tooth; if you wiggle it, the connection changes. Gently—and I mean gently—press along the plastic frame, the bezel, at the top and bottom of where the line appears.  If the line flickers, changes color, or disappears when you squeeze, you have found a physical contact issue. This is common in [laptop screen repair how to fix common issues at home](https://computerrepairmasters.com/laptop-screen-repair-how-to-fix-common-issues-at-home) scenarios. While it might feel like a win, be careful; [why a cracked laptop screen can eventually damage your motherboard](https://computerrepairmasters.com/why-a-cracked-laptop-screen-can-eventually-damage-your-motherboard) is a real risk if you apply too much force and actually break the panel.
Reseat the Video Cable if You Are Feeling Brave
If the line is intermittent, meaning it comes and goes when you move the laptop lid, the culprit is likely the eDP or LVDS ribbon cable. This cable runs through the hinge, and years of opening and closing can pinch it or pull it loose from the socket. If you are comfortable taking off the bottom panel, unplugging and plugging that cable back in can work wonders. It is a core part of any [laptop screen replacement step-by-step repair guide](https://computerrepairmasters.com/laptop-screen-replacement-step-by-step-repair-guide). I have seen dozens of screens come back to life just by giving that tiny connector a firm seat.Let us dig deeper into why the standard ‘replace the screen’ advice often misses the mark. Most tech blogs will tell you that a single vertical line is a permanent death sentence for your LCD. But here is the contrarian truth: I have seen dozens of these lines vanish simply by addressing the laptop’s thermal management. When a machine runs consistently hot, the adhesive bonding the ribbon cables to the LCD glass can soften and expand. If you are already [how to spot a dying GPU before your screen turns into a wall of static](https://computerrepairmasters.com/how-to-spot-a-dying-gpu-before-your-screen-turns-into-a-wall-of-static), you know that heat is the ultimate hardware killer. However, the ‘oops’ factor here is massive. Many well-meaning users try to ‘massage’ or apply pressure to the pixel line to force a connection. While this might occasionally work when [how to fix a laptop screen with a stuck pixel using software tools](https://computerrepairmasters.com/how-to-fix-a-laptop-screen-with-a-stuck-pixel-using-software-tools), doing it to a vertical line caused by a failing gate driver can actually crack the internal glass layers.
Does every vertical stripe mean a hardware death sentence?
Not necessarily. Data from independent repair studies indicates that up to 15% of vertical line issues are actually caused by the eDP (Embedded DisplayPort) connector becoming slightly unseated due to physical vibration or hinge wear. If you jump straight into a [laptop screen replacement step-by-step repair guide](https://computerrepairmasters.com/laptop-screen-replacement-step-by-step-repair-guide) without checking the seating of the cable first, you might waste $100 on a part you never needed. This is a classic [computer repair for beginners](https://computerrepairmasters.com/computer-repair-for-beginners-avoid-costly-mistakes) trap. 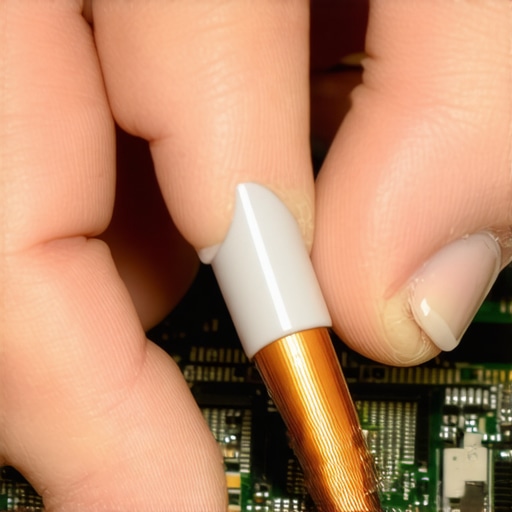 Another advanced nuance involves the electrical danger to your data. If you decide to open the chassis to inspect the cables, you must disconnect the battery entirely. I have seen enthusiasts short out their entire motherboard because they did not realize the screen’s backlight circuit carries a high-voltage charge even when the laptop is powered down. Once you fry that circuit, you are no longer looking at a screen fix; you are looking at [data recovery secrets expert techniques to save your files fast](https://computerrepairmasters.com/data-recovery-secrets-expert-techniques-to-save-your-files-fast) because the machine won’t even post. Remember, [why a cracked laptop screen can eventually damage your motherboard](https://computerrepairmasters.com/why-a-cracked-laptop-screen-can-eventually-damage-your-motherboard) is not just about the glass—it is about the electrical stability of the whole unit. Have you ever fallen into this trap of over-repairing a simple cable fix? Let me know in the comments.If you want to move beyond the ‘maybe it’ll work’ phase, you need to look at your toolkit rather than just your frustration.
Why metal tools are a nightmare for your motherboard
I don’t go anywhere without my ESD-safe precision kit. The reason isn’t just about having the right bit size; it’s about the coating. I’ve seen enthusiasts use metal tweezers from a bathroom cabinet to reseat a cable and accidentally short a backlight fuse—a tiny component that turns a $100 screen fix into a $400 logic board nightmare. If you’re handling equipment for a whole office, this is where why managed IT is a game changer for growing companies becomes obvious. You don’t want your sales team poking at sensitive ribbons with dental picks.
What does it take to keep your display flawless for years?
The biggest enemy isn’t always a drop; it’s the invisible friction. Dust buildup in the hinge assembly can actually grind down the insulation on your eDP cable over time. I make it a habit to use compressed air on the hinges every few months to prevent debris from acting like sandpaper on those wires. Also, watch your temperatures. If you notice the sign your cpu is thermal throttling and slowing down your work, that heat is radiating toward the bottom of the screen. According to the VESA DisplayPort Standard 1.4 technical documentation, signal integrity is highly sensitive to thermal expansion in the micro-connectors, which can lead to permanent ghosting. 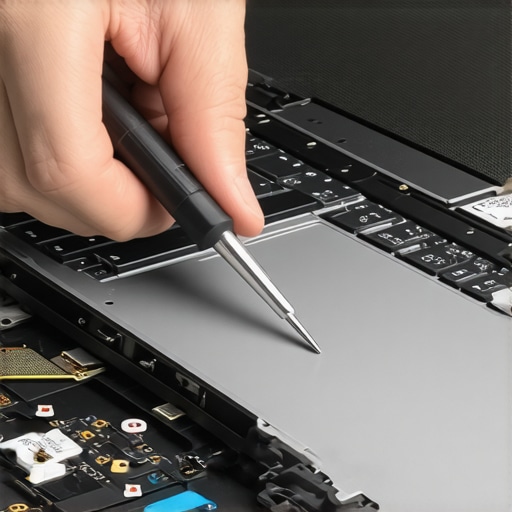
The future of repairable screens and what it means for you
Looking ahead, I see a split in the industry. We are heading toward ultra-thin OLEDs that are virtually impossible to repair without replacing the entire lid. Being proactive with the move that prevents a small coffee spill from killing your entire laptop is more critical than ever as hardware becomes less modular. For business owners, implementing managed IT strategies to keep your business secure in 2025 should include a regular hardware health rotation. Don’t wait for the neon lines to show up. Try this today: download a screen testing utility and run a ‘solid color’ test to check for uniformity. Catching a faint flicker now can save you from a complete blackout later.
Hard-Earned Wisdom from a Lifetime of Screen Repair
After years of tinkering, I have realized that repair isn’t just about the parts; it is about the patience. One of the biggest myths is that a vertical line always requires a new panel. In reality, a significant portion of these issues stems from the eDP cable becoming loose due to constant hinge movement. I have also learned that thermal management is your best friend. If you ignore high temperatures, you are basically asking for those adhesive bonds to fail. Finally, never skip the basics. If I had checked the BIOS on my first big repair job, I would have saved hours of unnecessary software work. It is all part of learning computer repair for beginners without the usual stress.
Tools That Give You a Professional Edge
When I am tackling a display issue, I do not just wing it. I rely on a few specific resources to get the job done right. First, I always keep a link to laptop screen repair DIY tips for clearer displays handy for quick reference on pressure-point techniques. I also trust high-quality nylon spudgers over metal tools every time to avoid the hardware component that causes the most blue screens of death through accidental shorts. For software, I use screen-cycling utilities that flash primary colors to help unstick pixels before I even think about opening the case. [image-placeholder]
Master Your Hardware with Confidence
Screen issues feel catastrophic because they sit right in your field of vision, but they are often more manageable than they look. Whether you are following a laptop screen replacement step-by-step repair guide or just reseating a cable, remember that every expert started exactly where you are now. By taking these tips for troubleshooting laptop screen problems seamlessly to heart, you are not just saving a device; you are gaining a skill that most people are too intimidated to try. You have got this. Have you ever managed to clear a vertical line with a simple cable adjustment, or did you have to go for the full panel swap? Let me know in the comments below!