

I still remember the cold sweat that broke out on the back of my neck. It was a rainy Tuesday night, and my main external hard drive—the one containing three years of irreplaceable family photos, tax documents, and client design files—refused to mount. Or rather, it mounted, but the little padlock icon stared back at me, mocking my memory. I had changed the BitLocker password a week prior during a security sweep, and now, that brand-new passphrase was completely gone from my brain. I was locked out of my own digital life.
The Day My Drive Became a Digital Brick
For days, I tried every combination of childhood pet names, old addresses, and complex character strings I had ever used. Nothing worked. In my early tech days, I assumed encryption was just a fancy folder lock that could be bypassed with a clever registry tweak or some free utility downloaded from a shady forum. I was dead wrong. That naive assumption is a massive mistake that cost me weeks of anxiety and almost made me wipe the drive in sheer frustration.
If you are currently staring at a password prompt with a blank mind, take a deep breath. Do not format that disk yet, even if your operating system is practically begging you to do so. Today, I am going to walk you through the realistic, battle-tested methods to salvage your files when the primary password is lost. We will separate the marketing myths from real-world recovery techniques so you can get back to what matters.
Is retrieving data from a locked drive actually possible without the key?
It is the question everyone asks when they are desperate. Let’s be completely honest: modern encryption algorithms like AES-256 are incredibly secure. In fact, according to security researchers at the National Institute of Standards and Technology (NIST), it would take a supercomputer billions of years to brute-force a strong AES-256 key. But do not let that terrifying statistic panic you just yet. While you cannot simply bypass the encryption itself, recovery is often highly successful because of the digital safety nets, backup keys, and metadata structures that modern operating systems put in place behind the scenes.
We will dive deep into locating your hidden recovery keys, utilizing specialized decrypters, and understanding how to get files from an encrypted drive when the password is lost. Have you ever found yourself completely locked out of your own encrypted data, or are you dealing with this stressful nightmare for the very first time right now?
First-Aid Actions When You are Locked Out of Your Drive
Before you run any third-party scripts or panic-click through disk utility prompts, you need to treat the situation like a digital crime scene. Do not write any new data to the host machine. Every time you reboot, plug in another USB accessory, or attempt a quick software fix, you risk overwriting the metadata structures that hold the decryption keys. I learned this lesson the hard way years ago when I repeatedly forced a drive to mount, causing a corrupt file system partition structure that turned a simple key-recovery job into a nightmare. If you suspect your operating system is starting to glitch under the stress, you can learn the move that saves your files when windows won’t load your profile to ensure your primary environment remains stable.
Locate the Automated Cloud Backups
Most modern encryption setups do not actually expect humans to remember a 48-character alphanumeric string. For BitLocker on Windows or FileVault on macOS, the operating system aggressively nudges you to back up this key during initial setup. Log into your personal or corporate Microsoft account on another device and check the OneDrive key storage URL. If you are on an office network managed by an external team, they likely have this stored in an active directory database. This is where effective managed IT solutions for growing companies prove their worth, as they centrally catalog these security keys before an emergency occurs.

The Command Line Rescue Protocol
If you have found your recovery key but the standard graphical interface keeps freezing or throwing cryptic errors, you must bypass the GUI. The command line is your direct pipeline to the decryption engine. On Windows, you will want to open an Administrator Command Prompt and run the manage-bde tool. This utility allows you to force-unlock the volume and copy the decrypted files directly to another external storage drive.
Using the Manage-BDE Command
To use this protocol, plug in both your locked drive (let’s assume it is drive letter E:) and a formatted destination drive with plenty of free space (drive letter F:). Run the command: manage-bde -unlock E: -RecoveryPassword YOUR-48-DIGIT-KEY
If the volume unlocks successfully, do not trust it to remain stable. Immediately initiate a block-level copy or use a reliable backup tool. This is very similar to dealing with storage arrays that have degraded, which you can read about in this guide on what to do when your NAS drive stops responding. If the command prompt returns a ‘cyclic redundancy check’ error or bad sector warning instead of unlocking, the issue is physical rather than logical. In those instances, you should stop immediately to avoid grinding the internal drive platters to dust.
When the Drive System Itself is Damaged
Sometimes, the encryption key is perfectly valid, but the underlying file system has suffered a corruption event. The computer knows the password is correct, but it cannot read the table of contents to show you your files. This is where specialized data recovery utilities come into play. Tools like Passware, Elcomsoft, or open-source equivalents can read the raw sectors of the drive, look for the encryption headers, and apply your recovered key directly to the data stream, bypassing the damaged Windows or macOS file system completely. It is a highly effective way to get files off a drive with a corrupted file system without losing your mind.
When you are in the thick of a data emergency, the standard advice floating around tech forums can often do more harm than good. In my years of working closely with complex corporate infrastructure and consumer storage setups, I have noticed a massive disconnect between basic desktop troubleshooting and actual enterprise-grade recovery practices.
The Dangerous Myth of the Magic Recovery Tool
Everyone on Reddit says to just download a generic data recovery suite and let it sweep your locked or corrupted drive. However, in my experience, running automated scanning software on a critically unstable, encrypted drive is a fast track to permanent data loss. When a drive has physical issues or severe metadata corruption, those relentless read-cycles put immense stress on the storage media. If you are dealing with critical business databases or proprietary files, you need to recognize data recovery secrets every business should know today before letting an automated program brick your device.
The “oops” factor here is huge. People often run deep scans directly on a live, failing drive instead of making a secure block-level clone first. If the drive heads fail mid-scan, your encrypted data is scrambled forever, as key blocks of the encryption metadata will be corrupted beyond recognition.
What if my system keeps demanding a full format?
This is a highly common and incredibly stressful scenario. You plug in your drive, and a pop-up instantly warns that the disk is unreadable and asks if you want to format it. Under no circumstances should you click “Yes.” This error usually means the operating system cannot read the partition table or the encryption headers. There is a precise method to handle this situation safely, and you can master how to recover files from a drive that windows asks to format without altering the underlying raw data structure.
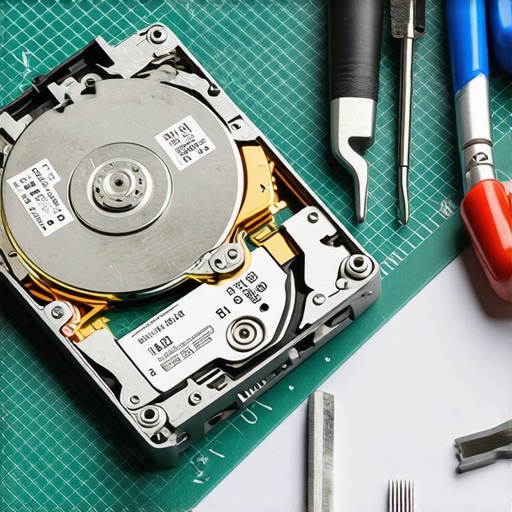
According to a study by the SANS Institute on forensic data recovery, over 70% of logical data loss scenarios are exacerbated by user intervention immediately following the initial failure. When you try to force-mount or run hasty repair commands on a drive with a fragile file system, you are essentially rewriting the very sectors that contain the cryptographic handshakes your recovery tools need.
The Nuance of Hardware vs. Software Decryption
Another major mistake is treating software-based drive locks (like BitLocker or FileVault) the same as hardware-based controller encryption found on modern self-encrypting SSDs (SEDs). If a software-encrypted drive fails, we can usually extract the raw blocks and reconstruct the partition table on another machine. However, if the controller chip on a hardware-encrypted SSD burns out, the key is physically gone from the silicon, making traditional logical recovery completely useless. This is why understanding the specific failure point of your hardware is so vital before you attempt any DIY command-line overrides.
Have you ever fallen into this trap of trying to force-scan a failing drive only to make the damage worse? Let me know in the comments below, and let’s talk about how to get your files back safely.
When the dust settles and you finally regain access to your locked drive, your immediate priority should shift from emergency recovery to permanent resilience. Leaving your encryption keys to chance is like leaving a spare house key under a very obvious doormat. Over the years, I have refined my post-recovery maintenance checklist to ensure I never have to experience that cold sweat again. Here is exactly how to keep your system safe, stable, and recoverable over the long haul.
How do I maintain my encrypted storage systems over time?
Maintaining an encrypted system is not a set-it-and-forget-it task. First, you must implement a strict, automated key auditing routine. Every six months, verify that your backup recovery keys are actually where you think they are. I personally use highly secure, offline password managers to store my 48-digit BitLocker keys, alongside physical, printed copies locked in a fireproof safe. Secondly, monitor the physical health of your drives. Encryption places a continuous, slight processing overhead on your storage media, making it vital that you check for early warning signs of hardware degradation. It is remarkably easy to perform these checks yourself once you know the easy way to check your hard drives health using smart data, which warns you of failing sectors before the encryption metadata scrambles.
The Tools I Trust for Encryption and Diagnostics
I do not rely on generic, commercial one-click recovery suites. Instead, my digital toolkit consists of highly specialized, industry-standard utilities. For drive cloning before any recovery attempt, I exclusively use ddrescue on a Linux live USB. Unlike standard copy commands, ddrescue does not give up when it hits a bad sector; it maps the damaged areas and extracts every salvageable block of encrypted data first. For hardware diagnostics, I trust CrystalDiskInfo on Windows and smartmontools on Unix systems. If you find that your primary machine is failing to boot due to an operating system crash rather than a drive issue, knowing how to handle boot errors can save you hours of panic. You can easily learn the fix for a computer that powers on but wont post to bios to determine if your motherboard or your drive is the actual culprit.

Looking ahead, the landscape of data security is shifting rapidly. According to security documentation from the IEEE Computer Society, we are moving toward hardware-bound, zero-trust encryption architectures where physical security keys and biometric handshakes replace traditional alphanumeric passwords entirely. While this makes unauthorized access nearly impossible, it also means that losing your physical authenticator could permanently brick your data with zero chance of software-based bypass. This future makes early diagnostic habits even more critical today.
If you are currently managing an encrypted drive, I highly encourage you to try one advanced tip right now: download a portable Linux environment, boot into it, and run a safe, read-only SMART health assessment on your encrypted volumes. Catching a weak sector today is the only way to prevent a catastrophic lock-out tomorrow.
When the dust settles and you finally regain access to your locked drive, your immediate priority should shift from emergency recovery to permanent resilience. Leaving your encryption keys to chance is like leaving a spare house key under a very obvious doormat. Over the years, I have refined my post-recovery maintenance checklist to ensure I never have to experience that cold sweat again. Here is exactly how to keep your system safe, stable, and recoverable over the long haul.
How do I maintain my encrypted storage systems over time?
Maintaining an encrypted system is not a set-it-and-forget-it task. First, you must implement a strict, automated key auditing routine. Every six months, verify that your backup recovery keys are actually where you think they are. I personally use highly secure, offline password managers to store my 48-digit BitLocker keys, alongside physical, printed copies locked in a fireproof safe. Secondly, monitor the physical health of your drives. Encryption places a continuous, slight processing overhead on your storage media, making it vital that you check for early warning signs of hardware degradation. It is remarkably easy to perform these checks yourself once you know the easy way to check your hard drives health using smart data, which warns you of failing sectors before the encryption metadata scrambles.
The Tools I Trust for Encryption and Diagnostics
I do not rely on generic, commercial one-click recovery suites. Instead, my digital toolkit consists of highly specialized, industry-standard utilities. For drive cloning before any recovery attempt, I exclusively use ddrescue on a Linux live USB. Unlike standard copy commands, ddrescue does not give up when it hits a bad sector; it maps the damaged areas and extracts every salvageable block of encrypted data first. For hardware diagnostics, I trust CrystalDiskInfo on Windows and smartmontools on Unix systems. If you find that your primary machine is failing to boot due to an operating system crash rather than a drive issue, knowing how to handle boot errors can save you hours of panic. You can easily learn the fix for a computer that powers on but wont post to bios to determine if your motherboard or your drive is the actual culprit.
Looking ahead, the landscape of data security is shifting rapidly. According to security documentation from the IEEE Computer Society, we are moving toward hardware-bound, zero-trust encryption architectures where physical security keys and biometric handshakes replace traditional alphanumeric passwords entirely. While this makes unauthorized access nearly impossible, it also means that losing your physical authenticator could permanently brick your data with zero chance of software-based bypass. This future makes early diagnostic habits even more critical today.
If you are currently managing an encrypted drive, I highly encourage you to try one advanced tip right now: download a portable Linux environment, boot into it, and run a safe, read-only SMART health assessment on your encrypted volumes. Catching a weak sector today is the only way to prevent a catastrophic lock-out tomorrow.
What Hard-Won Lessons Taught Me About Data Preservation
Reflecting on years of helping people recover from digital disasters, a few structural realities become incredibly clear. These are the truths that go beyond basic user guides:
- The key is just as fragile as the media: If you save your decryption key file on the same physical device you are encrypting, you have essentially locked your safe keys inside the safe.
- Double-encryption creates a digital tomb: Running secondary folder-locking software on top of full-disk BitLocker or FileVault introduces multiple single points of failure. When it goes wrong, finding the power of data recovery tools that can untangle both layers is nearly impossible.
- Local backups must bypass the local lock: An automated local backup is useless if it syncs encrypted states rather than the raw, unencrypted files. Always ensure your secondary target has its own independent access permissions.
The Ultimate Defensive Kit for Your Storage Drive
To keep your files accessible and avoid the high-stress scramble of partition rebuilding, I recommend integrating these four foundational components into your regular maintenance routine:
First, utilize a dedicated offline hardware key storage device, such as a secure, iron-clad USB drive kept exclusively for credential storage. Second, incorporate a robust, multi-layer strategy such as managed IT strategies to keep your business secure in 2025 if you are running a business, ensuring that your corporate credentials are held in a secure, centralized tenant rather than on individual devices. Third, keep a dedicated bootable Linux diagnostic USB drive on your keyring; tools built into Linux bypass Windows file system errors seamlessly. Finally, schedule automated, external cloud syncs that run only when the volume is actively mounted, allowing you to salvage files before the drive powers down.
Take Control of Your Cryptographic Keys Today
Encryption is the absolute gold standard for protecting your personal privacy and proprietary business secrets, but it demands respect. When we treat encryption like a simple toggle switch, we invite catastrophic lockouts. If you implement just one change from this guide, make it the key audit. Securing your data should never come at the cost of losing it forever to a forgotten string of characters.
Have you ever found yourself completely locked out because of a forgotten BitLocker or FileVault recovery key? Let me know what method you used to get back in down in the comments below!