

I remember sitting in a crowded airport terminal, trying to finish a report before my flight boarded. The moment I pulled the power cord to head to the gate, my screen started twitching like a neon sign in a dive bar. It was visceral; that instant spike of adrenaline because you assume your expensive hardware is dying. I’ve been there, and I’ve even made the mistake of rushing to buy a replacement panel before realizing the fix was much simpler. Dealing with a flickering display doesn’t always mean a trip to the repair shop. Today, we are going to stop that annoying strobe effect and get your mobile workspace back to normal without spending a dime. [image_placeholder_1]
Stop the Battery-Induced Screen Jitters for Good
It is incredibly frustrating when your laptop works perfectly at your desk but becomes unusable the second you go mobile. This specific problem usually points toward a conflict between your power management settings and your graphics driver. Early in my career, I actually tore down a perfectly good Dell because I thought the ribbon cable was loose, only to find out it was a software ‘feature’ designed to save power. You can often find similar patterns when you troubleshoot low brightness issues as well. The ‘Why’ usually boils down to how your computer handles the transition from AC power to DC power. When the cord comes out, your laptop tries to be ‘helpful’ by aggressive power-saving, which can mess with the refresh rate or voltage. If you have ever noticed the display looks pixelated or weirdly washed out right before the flicker starts, you are likely seeing a power-saving technology called DPST in action. According to technical documentation from Intel, their Display Power Saving Technology can cause noticeable luminance fluctuations when it tries to adjust the backlight based on the content of the screen to save battery life.
Is your hardware actually failing or is it just a bad setting?
It is natural to worry that your GPU is giving up the ghost. Have you ever experienced that moment where you start frantically wiggling the lid to see if the flicker stops? If the flickering only happens when the charger is unplugged and stays steady when it’s plugged in, I have good news: your hardware is likely 100% fine. It’s almost certainly a configuration issue rather than a physical break. We are going to look at the refresh rates and those pesky ‘eco’ settings that manufacturers hide in the graphics control panel. Before you assume you need complex home repairs, let’s dive into the settings that actually control how your screen behaves when it’s thirsty for power.
Kill the Intel Power Saving Feature First
The most common culprit behind that rhythmic twitch is Intel’s Display Power Saving Technology (DPST). Think of it like an over-eager dimming switch that can’t decide how bright the room should be. To kill this ‘feature,’ you need to open the Intel Graphics Command Center—not your standard Windows settings. Navigate to the System tab and then click on Power. You’ll see a toggle for ‘Display Power Saving.’ Switch it to off for both ‘On Battery’ and ‘Plugged In.’ 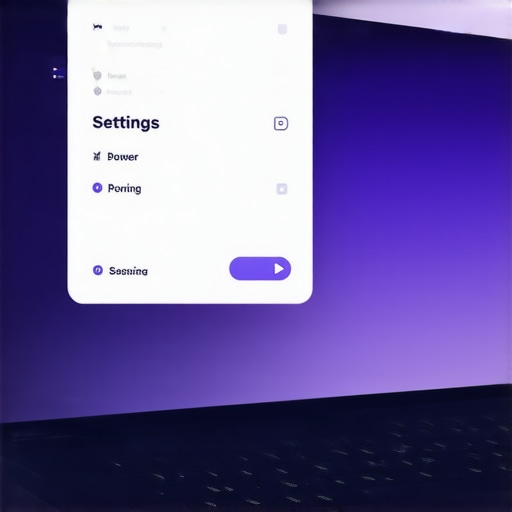
Disable Panel Self-Refresh to Stop the Strobe
While you are in those graphics settings, look for an option called ‘Panel Self-Refresh.’ This technology is supposed to save power by not updating the screen if the image is static, but it often trips over itself when you move your mouse. I remember a lawyer friend whose ThinkPad would flicker specifically during high-stakes depositions. He was ready to buy a new machine, but we fixed it in thirty seconds by disabling this setting. Learning these laptop screen repair basics saves more than just money; it saves your sanity during a deadline. If your screen is still acting up, it’s time to look at the refresh rate discrepancy.
Why Refresh Rates Need to Match on Battery
Laptops often try to be clever by dropping your refresh rate from 60Hz to 48Hz or 40Hz the moment you unplug. This jump creates a visible ‘blink’ or persistent flickering as the hardware struggles to maintain the lower frequency with fluctuating voltage. To fix this, right-click your desktop, go to Display Settings, then Advanced Display. Ensure the ‘Choose a refresh rate’ dropdown is set to the same value for both plugged-in and battery modes. Consistency is king here. You want to troubleshoot laptop screen problems by removing variables, not adding them. When I worked in managed IT, we would standardize these settings across entire fleets to prevent help-desk tickets from blowing up every time a user moved to a conference room.
The Power Plan Tweak Most People Miss
If the graphics control panel didn’t do the trick, the ghost in the machine might be your Windows Power Plan. Deep in the ‘Advanced Power Settings,’ there is a section for PCI Express and ‘Link State Power Management.’ When this is set to ‘Maximum Power Savings’ on battery, it can choke the power going to your GPU just enough to cause signal instability. Set this to ‘Off’ or ‘Moderate Power Savings.’ It is one of those effective troubleshooting techniques that bridges the gap between software glitches and hardware performance. While you are optimizing your machine, remember that sometimes a simple hardware swap like adding more RAM can reduce the overall system strain that makes these power-saving flickers more noticeable. Most flickers are just your laptop crying out for a stable stream of electrons, not a sign that the panel is dying.Let’s dig deeper into why those electrons are behaving so badly in the first place. Most people assume that turning down the brightness is easier on the hardware, but this is a common myth. In reality, many modern displays use a technique called Pulse Width Modulation (PWM) to dim the screen. Instead of lowering the actual voltage, the screen flashes on and off hundreds of times per second. When your battery is low or failing, the frequency of this flashing can drop or become desynced with your GPU’s refresh cycle, leading to that maddening strobe effect. According to detailed display analysis by the experts at NotebookCheck, low-frequency PWM is a primary cause of both eye strain and visible flickering on battery-powered devices. If you try to troubleshoot flicker at low brightness, you will often find that keeping the screen at 80% or higher actually stabilizes the image because the LEDs stay in a constant ‘on’ state. Have you ever fallen into the trap of thinking a dimmer screen was safer for your hardware? Let me know in the comments. 
Stop Chasing the Latest Generic Driver Update
We have been conditioned to think that the newest version is always the best version. In the world of computer repair for beginners, clicking ‘update’ is usually the first step suggested by every forum. However, I have seen countless instances where the generic Intel or AMD driver breaks the delicate voltage handshake that a manufacturer like Dell or Lenovo specifically tuned for their chassis. Your ‘oops’ factor here is letting Windows Update choose your driver for you. Always check the manufacturer’s official support page for a ‘validated’ driver; these often contain specific power-state registry tweaks that generic versions lack, preventing the GPU from under-volting the display panel when the AC cord is pulled.
Could your flickering screen actually be a data recovery warning sign?
While usually a software setting, if the flickering is accompanied by the system freezing or slight mouse lag, you might be looking at a motherboard power rail failure rather than a screen glitch. When the Voltage Regulator Modules (VRMs) start to degrade, they struggle to provide steady current to the screen and the storage drive simultaneously. This is where knowing expert data recovery techniques becomes vital before the machine refuses to boot entirely. For business owners, this is why modern managed IT strategies for 2025 emphasize proactive hardware telemetry. Catching a fluctuating power rail early can save your data from a sudden surge. Don’t wait for a total blackout to realize your hardware is signaling for help; these flickers are often the last warning before a component failure.
I have spent years fixing flickering displays and the one thing I have learned is that software fixes only take you so far if you aren’t monitoring the physical health of your machine. When I’m in the field, I rely on a few specific tools to separate a temporary glitch from a permanent failure. My go-to is HWiNFO64. Unlike the standard Windows Task Manager, it gives me granular data on the voltage rails. If I see the +12V or +5V lines dipping when the screen flickers, I know the battery or the power management chip on the motherboard is the real culprit. I also keep CrystalDiskInfo running in the background because the risk of ignoring that SMART status bad warning is far too high when your screen is already acting erratically.
The Professional Toolkit for Preventing Hardware Burnout
In the world of professional IT support, we don’t just wait for things to break. We use telemetry. If you are running a business, managed IT strategies to keep your business secure in 2025 will involve AI-driven predictive maintenance. These systems can actually detect the minute electrical fluctuations that cause screen flickers weeks before the user even notices them. It is the difference between a five-minute remote setting change and a laptop screen replacement that costs hundreds in parts and labor. I personally use these same principles on my own travel rig by checking my battery wear level every few months. If your battery capacity has dropped below 70%, it might not be able to provide the steady current required for the display’s backlight driver at high brightness levels.
How can I keep my laptop display healthy for the next five years?
Maintenance is about more than just software. Physically, you need to watch your hinges. I’ve seen hundreds of screens flicker simply because the owner didn’t know how to tell if your laptop hinges are about to snap the frame. When hinges tighten up due to dust or age, they put immense pressure on the video cable that runs through them. Every time you open and close the lid, you are essentially ‘sawing’ at the delicate wires that carry the display signal. Keep your vents clear and your hinges moving smoothly to ensure that DIY tips for clearer displays actually last long-term. According to technical specifications from VESA (Video Electronics Standards Association), maintaining a stable operating temperature is critical for display driver longevity, as heat can cause the liquid crystals to degrade or lead to permanent ‘burn-in’ shadows.
Where display technology is headed next
We are moving toward a future where ‘flicker’ might become a thing of the age. With the rise of Tandem OLED panels and advanced VRR (Variable Refresh Rate) controllers, hardware is becoming much better at masking power-state transitions. However, as long as we have legacy devices, the balance of power will always be a factor. My best advice? Don’t let your laptop sit at 0% battery for weeks, and don’t ignore a screen that ‘blinks’ just because it stops when you plug it in. Go into your BIOS today and check your battery health status. If it says anything other than ‘Excellent’ or ‘Good,’ you have found your primary suspect. Take thirty seconds right now to download a hardware monitor and check your system temperatures—it’s the easiest way to troubleshoot common computer repair issues effectively before they become expensive nightmares.
The Hardest Lessons I Learned Fighting the Invisible Screen Glitch
After years of troubleshooting displays, I’ve realized that 90% of screen issues are actually power management conflicts in disguise. One major lightbulb moment for me was discovering that Windows doesn’t always know what’s best for your hardware; sometimes, its default efficiency settings are your display’s worst enemy. I also learned that you should never rush into a laptop screen replacement until you have verified the voltage stability in your BIOS. Lastly, remember that your laptop is an ecosystem—a failing battery often manifests as a flickering panel long before the machine actually fails to hold a charge. Mastering computer repair for beginners starts with looking at these invisible software handshakes rather than just the glass itself.
Tools That Always Stay in My Technician Toolkit
I don’t go anywhere without a few specific pieces of software that cut through the guesswork. First, HWiNFO64 is non-negotiable for monitoring those sneaky voltage drops that happen the moment you pull the plug. I also swear by CrystalDiskInfo because the risk of ignoring that SMART status bad warning is far too high when your system is already showing signs of electrical instability. For specific hardware tweaks, always return to the manufacturer’s official support page for ‘validated’ drivers rather than relying on generic Windows updates. These tools help you troubleshoot common computer repair issues effectively by giving you the data the OS tries to hide.
#IMAGE_PLACEHOLDER_E#
Your Path to a Flicker-Free Mobile Experience
You don’t have to live with a screen that acts like a strobe light every time you leave your desk. By applying these laptop screen repair DIY tips, you’re not just fixing an annoying blink; you’re extending the operational life of your entire mobile workstation. Don’t be afraid to dive into those advanced graphics settings—most of the time, the solution is just a single toggle switch away. Your hardware is likely more resilient than you think, provided you give it the stable power it needs to perform. Have you ever noticed your screen acting up specifically when you hit a certain battery percentage, or does it happen the instant you unplug? Let me know in the comments below!