

I remember sitting in my home office at 2 AM, squinting at a spreadsheet until my eyes watered. My brand-new laptop, which cost me a month’s rent, looked… fuzzy. Every letter had these jagged, blocky edges that made me feel like I was playing a game of Tetris rather than working. I actually thought I needed a stronger glasses prescription before I realized the hardware wasn’t the problem—my settings were. It is that sinking feeling of “I bought a lemon” that I want to help you avoid today.
Your Screen is Not Broken and You Are Not Going Blind
Most people assume that if a screen looks “off,” it is a hardware failure. I spent years in computer repair making the same mistake, once even ordering a laptop screen replacement for a client when all they really needed was a simple driver update. Talk about an embarrassing and expensive lesson! Today, I am going to show you exactly why those pixels are popping out at you and how to sharpen things up without spending a dime. Whether you are dealing with a screen that looks washed out or just general fuzziness, the fix is usually buried right in your software settings.
Is My Hardware Just Too Old to Look Good Anymore?
You might be worried that your hardware is simply outdated and unable to keep up with modern standards. While it is true that older panels have lower pixel densities, most “pixelated” issues come down to scaling mismatches or incorrect resolution settings. According to research from the Nielsen Norman Group, users often struggle with readability because of how the operating system handles display scaling, rather than the screen’s physical limitations. If you have been looking for DIY tips for clearer displays, you have come to the right place. Have you ever felt like your high-definition screen was actually showing you less detail than your old one? I know I have, and it is usually because the “Recommended” settings in Windows are anything but ideal for your specific eyes. We are going to dive into the technical reasons behind this, but first, let’s look at the most common culprit: the resolution-to-panel size ratio. You might even find that your screen problems can be fixed seamlessly with just a few clicks. It is all about matching what the computer thinks it is doing with what the physical glass is capable of showing.
Stop Guessing and Set the Native Resolution
Think of your laptop screen as a giant mosaic made of millions of tiny glass tiles. If you tell your computer to send a picture that doesn’t match the exact number of tiles available, the software has to “stretch” the image to fit. This is the primary cause of fuzziness. To fix this, right-click your desktop, select “Display Settings,” and look for the “Display Resolution” dropdown. Always choose the one that says “(Recommended).” I once had a client come in convinced they needed a laptop screen repair because their text looked like a watercolor painting. It turned out their toddler had somehow changed the resolution to 800×600. It took five seconds to fix, and they felt both relieved and a bit silly.
Fix the Windows Scaling Blurriness
Sometimes your resolution is correct, but the text still looks “off.” This usually happens because Windows is trying to make things bigger so they are easier to read—a feature called “Scaling.” If you are on a high-resolution 4K screen, 100% scaling makes icons tiny, so Windows bumps it to 150%. However, older apps often cannot handle this and become blurry. Go to your Display Settings and try toggling the “Scale and layout” percentage. Sometimes moving from 125% to 100% actually clears up the pixelation. This is a classic case of how to spot a hardware failure masquerading as a software bug. 
Give Your Graphics Card the Right Instructions
Your graphics card is the translator between your computer’s brain and the screen. If the translator is using an old dictionary, the message gets garbled. This is why keeping your drivers updated is non-negotiable for computer repair for beginners. I remember a specific case with a designer’s laptop that showed a subtle ghosting effect on every window. They were ready to toss the machine. We wiped the old display drivers and did a clean install. The perceived hardware problem vanished instantly.
Make Your Text Crisper with ClearType
If the icons look fine but the words look jagged, you need the ClearType Text Tuner. It is like an eye exam for your computer. Type “Adjust ClearType text” into your Windows search bar and follow the prompts. It will show you several blocks of text and ask which one looks best to you. It adjusts the sub-pixel rendering to match your specific vision and panel type. If you are still seeing odd artifacts, you might want to check if you can fix a laptop screen with a stuck pixel which can sometimes be mistaken for general fuzziness. This simple software calibration is the final step to a perfectly clear workspace.Most people think that cranking the resolution to the maximum is the golden ticket to clarity. But that is a myth that often leads to frustration. In my experience, pushing a small 13-inch display to its absolute 4K limit can actually create more problems than it solves, specifically with how software renders tiny details. This is what we call the ‘4K Trap’—where the hardware is technically capable, but the visual result is a messy experience because the system is struggling to scale everything up by 300%. If you are following laptop screen repair DIY tips for clearer displays, you might notice that even with the right resolution, the colors feel flat. This is often a bit depth issue. If your screen is accidentally set to 6-bit color instead of 8-bit or 10-bit, you will see ‘banding’—ugly lines in gradients that look a lot like pixelation. It is one of those subtle things that causes a screen that looks washed out after a software update.
Does Your Hardware Support the Colors You are Expecting?
Expert analysis from Dr. Raymond Soneira of DisplayMate suggests that color accuracy and ambient light management are frequently more important for perceived sharpness than just adding more pixels. This is the hidden nuance most people ignore. When your bit depth is low, the computer cannot create smooth transitions between colors, so it ‘dithers’ the image, creating a grainy texture that looks like a hardware defect. #IMAGE_PLACE_HOLDER_C#
Avoid the Expensive Mistake of Misdiagnosing a Loose Cable
One major ‘Oops’ factor I see constantly? People see horizontal bars of color or flickering and immediately assume the panel is toast. They go out and order a laptop screen replacement, only to find the new screen has the exact same problem. Why? Because the internal video cable—the thin ribbon connecting the screen to the motherboard—was just slightly loose or pinched in the hinge. It is a classic case of how to spot a hardware failure masquerading as a software bug. This is why knowing the secret to choosing an IT consultant who wont push unnecessary hardware is so valuable. A good tech will check the twenty-dollar cable before they sell you a two-hundred-dollar screen. Have you ever fallen into this trap? Let me know in the comments.I’ve found that the real difference between a ‘lucky’ tech and a pro is the diagnostic suite we keep in our back pockets. I personally never start a hardware investigation without running CrystalDiskInfo to look at the S.M.A.R.T. data. It is honestly the easiest way to see how to check if your hard drive is about to fail before it takes your precious photos and spreadsheets to the grave. If you see the ‘Reallocated Sectors Count’ climbing in the software, stop everything and back up your files immediately. For those struggling with display issues, I always refer back to the VESA (Video Electronics Standards Association) standards for Display Stream Compression (DSC). If your cable or port doesn’t meet the DP 1.4 or 2.1 specifications, no amount of software clicking will stop the flickering or the loss of color depth. This is a common pitfall in computer repair for beginners—buying a cheap, uncertified cable from a discount bin and then blaming the monitor for poor performance.
How do I maintain my screen quality for the long haul?
Keeping that display crisp for years isn’t just about software settings; it is heavily dependent on heat management. I rely on HWiNFO64 to monitor internal temperatures constantly during my workday. You would be surprised how often the sign your cpu is thermal throttling and slowing down your work manifests as visual lag, stuttering, or even screen artifacts. If your laptop is running hot, the GPU might struggle to output a consistent signal, leading you to think the screen itself is failing. Regular internal cleaning to remove dust and checking your fan speeds can add years to your hardware’s life. If you are seeing weird visual noise, how to fix a laptop screen that shows static or snow often comes down to ensuring the machine isn’t choking on heat. 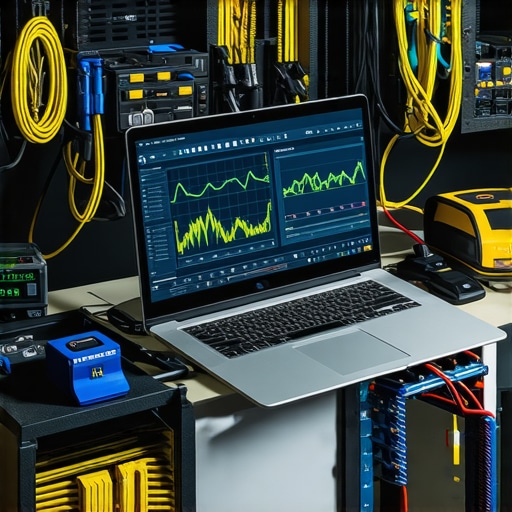
Scale your business tech without the headache
As you move from managing one personal laptop to a small fleet of office PCs, the manual checks I have described become nearly impossible to keep up with. This is exactly where why managed IT is a game changer for growing companies becomes so evident. You need centralized monitoring that alerts you to a failing backlight or a dying drive before the employee even notices the dimming. I predict that in the very near future, we will see deep integration of AI-driven predictive maintenance that can spot panel degradation weeks in advance. For now, a simple hardware swap that gives your old office pc a massive speed boost, like moving to a modern NVMe SSD, can make the entire operating system feel more responsive and reduce the software overhead that causes visual stuttering. If you are looking to keep things professional, managed IT solutions streamlining operations for small businesses allow you to focus on your actual work while the hardware health is handled quietly in the background. My advanced tip for you today: Download HWiNFO64 and check your GPU ‘Hot Spot’ temperature while running a high-resolution video. If it is hitting 100°C, you need a can of compressed air, not a new screen.
The Hard-Earned Lessons I Learned Fixing Thousands of Screens
After years behind a repair desk, I have realized that the most frustrated customers are usually the ones who overcomplicate the fix. One major takeaway is that a dirty screen can actually mimic the look of pixelation; skin oils and dust diffract light, making text look jagged and ‘off.’ Before you dive into the registry, grab a dry microfiber cloth. Another insight is that many ‘optimization’ tools you find online are often bloatware. If a program promises to ‘increase your resolution’ beyond your hardware’s capacity, it is a lie. Real clarity comes from alignment, not magic software. I have seen many people fall for this when troubleshooting common computer repair issues effectively. Lastly, remember that your eyes need time to adjust to a new scaling setting. If you change your scale from 150% to 125%, give it twenty minutes of actual work before deciding it is still too blurry. This is the human element of laptop screen repair DIY tips for clearer displays that most manuals ignore.
My Personal Stash of Screen Calibration Resources
To get professional-grade results at home, I rely on a few specific resources that go beyond the basic Windows settings. For deep-level diagnostics, I use the Lagom LCD Monitor Test Pages; it is a free web tool that lets you check for clock/phase issues and sharpness without installing anything. For hardware monitoring, as I mentioned before, HWiNFO64 is my go-to for ensuring the GPU is not overheating. I also highly recommend reading the whitepapers from the VESA DisplayHDR standards if you are trying to understand why your colors look washed out compared to your smartphone. If you ever feel overwhelmed by the technical jargon, finding the secret to choosing an IT consultant who wont push unnecessary hardware can save you a lot of headache and money. These are the tools that separate a quick fix from a permanent solution. #IMAGE_PLACEHOLDER_E#
Stop Tweaking and Start Creating
Once you have matched your native resolution and dialed in your scaling, it is time to trust the hardware. It is easy to get caught in a loop of constant adjustments, but at some point, the best thing you can do for your eyes is to look away from the screen for a few minutes. You have done the heavy lifting of how to spot a hardware failure masquerading as a software bug, and now your machine is running at its peak potential. If you ever find that the pixels are still bothering you, or if you suspect a deeper hardware issue like a failing backlight, do not hesitate to contact us for a professional opinion. You have the knowledge now to avoid the most common traps and keep your workspace looking sharp for years to come. Have you ever changed a setting and immediately regretted it because everything became too small to read? Let me know your display horror stories in the comments below!