

I’ll never forget the sound—that sudden, sickening shloop followed by a terrifying silence from my PC. I was halfway through a massive project when my favorite mug tipped, sending a wave of dark roast directly into my Cherry MX switches. My first instinct? I tried to keep typing to finish the email I was working on. Don’t be like me. That single mistake turned a simple cleanup into a lesson in hardware failure. If you’re reading this while staring at a dripping desk and wondering if your RGB lights are flickering their final goodbye, take a deep breath. We are going to save your gear today. We will walk through the immediate triage steps to prevent a short circuit and eventually move onto the secret to cleaning a mechanical keyboard without breaking it properly. [image]
The Morning My Morning Brew Tried to Kill My Setup
I can still smell that mixture of hazelnut creamer and ozone. It’s a scent that haunts my home office even now. When those first few drops hit the ‘Enter’ key, my brain didn’t register ‘danger’—it registered ‘annoyance.’ I reached for a napkin while my other hand kept clicking away. That was the exact moment the screen flickered, and my PC started emitting a continuous, low-pitched beep. By the time I realized I should have killed the power, the damage was done. This isn’t just about a sticky spacebar; it’s about preventing a total hardware short that could potentially travel through your port. In this guide, we aren’t just talking about surface-level wiping; we are performing emergency surgery to keep your productivity from grinding to a halt.
Is my expensive hardware actually toast?
It’s a fair question to ask yourself while you watch coffee drip from the bottom of the casing. You’re likely worried that the sugar and cream have already sealed your keyboard’s fate. While it’s true that moisture-induced corrosion can begin within minutes—a fact supported by iFixit experts who note that minerals in liquids cause rapid oxidation on exposed PCB traces—it isn’t a death sentence if you act fast. Most mechanical boards are surprisingly resilient if they aren’t powered on while wet. Have you ever had that heart-stopping moment where a drink lands right on your expensive tech?
Stop Everything and Pull the Plug Right Now
The absolute ‘Golden Minute’ determines whether your keyboard lives or dies. The very first thing you must do—and I mean right now—is unplug it. Don’t bother shutting down your PC through the Windows menu; just yank that USB cable. If it’s wireless, flip the power switch and pull the batteries immediately. Electricity and liquid are a lethal combination for the tiny traces on your logic board. When I made my first big mistake, I thought I could avoid costly mistakes by just wiping the surface, but the liquid had already seeped into the switch housings. If you’re feeling overwhelmed or the spill was massive, it might be time to get in touch with our team for an expert look. But for most of us, gravity is your best friend right now. Flip that board over immediately and let’s get to work.
Flip It Over Immediately to Save the Logic Board
Once the power is killed, gravity is your only defense against a total short circuit. Think of your keyboard’s PCB as a complex city grid; every drop of liquid is a potential flood that can cause a massive blackout across the traces. By flipping the keyboard face down onto a towel, you are literally forcing the liquid to backtrack out of the switch housings rather than seeping deeper toward the sensitive electronics. In my early days of tinkering, I once made the mistake of shaking the board while it was right-side up—it was like trying to fix a leak by splashing water everywhere. All I did was drive the moisture into the microscopic gaps between the controller chips. Don’t shake it. Just let it rest. If you’re managing a fleet of devices for work, this kind of immediate triage is as vital as knowing troubleshooting common computer repair issues effectively. 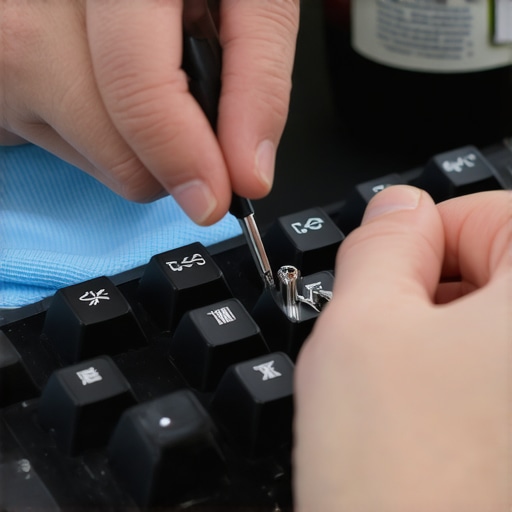
Strip the Keycaps and Assess the Damage
Now that the bleeding has stopped, you need to see what you’re actually dealing with. Use a wire keycap puller—not the plastic ring ones that can scratch your caps—and start removing every single keycap in the splash zone. If the spill was sugary, you’ll notice the stems starting to feel ‘crunchy’ as the liquid evaporates. This is the same logic we apply when we look at laptop screen repair diy tips for clearer displays; you have to remove the outer layers to reach the core problem. I remember a specific incident where I thought I only spilled on the ‘ASDF’ row, but when I pulled the caps, I found a pool of latte sitting under the spacebar, just waiting to corrode the stabilizer. Take a photo of your layout before you start pulling caps so you aren’t guessing where the ‘Scroll Lock’ goes later.
The Isopropyl Alcohol Method That Actually Works
Reach for 90% or higher Isopropyl Alcohol. This is non-negotiable. Avoid the 70% ‘rubbing alcohol’ from the grocery store because the remaining 30% is mostly water and impurities that can leave a conductive film behind. You need a solvent that evaporates completely without leaving a trace. For mechanical switches, use a Q-tip or a small brush to dab the alcohol directly into the switch stem while pressing it down. This allows the alcohol to penetrate the internal leaf and spring, breaking down the sugars and oils from your drink. It’s a precision job, much like when specialists use the power of data recovery tools to bypass damaged sectors on a drive—you are bypassing the gunk to restore the connection.
Why Heat is Your Keyboard’s Worst Enemy
Your instinct will be to grab a hairdryer to speed things up. Resist that urge. Most modern keycaps are made of ABS plastic, which has a surprisingly low melting point. I once tried to ‘fast-track’ a drying process and ended up with a spacebar that looked like a piece of wilted lettuce. Even worse, excessive heat can cause the solder joints on the PCB to expand and crack. Instead, find a spot with good airflow. If you have a desk fan, point it at the inverted board. This process requires patience—usually 48 hours. If you try to plug it back in while even a molecule of water remains, you risk the same failure as how to tell if your laptops overheating is caused by dust or a dead fan where the internal components just give up under stress. Let it dry until you are absolutely certain it’s bone dry.
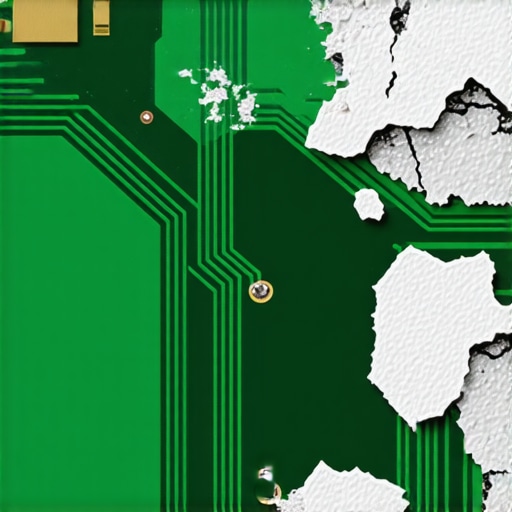
Let’s talk about the elephant in the room: the rice bowl. Everyone tells you to stick your wet electronics in a bag of rice, but in my years of doing this, I’ve seen more hardware killed by the “rice method” than the actual water. Rice doesn’t pull moisture out of the air; it just adds starch and dust into your switches and ports, creating a sticky, conductive paste. It’s a classic mistake for beginners. If you’re managing professional hardware, you need to understand that surface-level fixes are often just a band-aid. This is especially true for businesses where managed IT strategies to keep your business secure in 2025 rely on more than just fixing what is broken.
The Rice Myth is a Hardware Death Sentence
I’ve seen boards that might have survived with a simple isopropyl alcohol bath become completely unrepairable because of rice dust settling into the gaps. Instead of acting as a desiccant, rice acts as a trap for moisture. Expert analysis from hardware repair communities like iFixit confirms that the absorption rate of rice is negligible compared to simple open-air evaporation with a fan. If you really want to save your gear and your information, you should be looking at data recovery secrets and expert techniques to save your files fast rather than trusting a pantry staple. The “Oops” factor here is thinking that because the device turns on after two days in rice, it is cured. In reality, internal corrosion is often a slow burn that kills the board weeks later.
Why Your Firewall Needs a Physical Home
Another common trap is thinking that a basic software-level firewall is enough for a growing office. I’ve seen dozens of companies get hit by “low and slow” cyber attacks because they relied on Windows Defender alone. In reality, understanding why your office network needs a dedicated firewall appliance becomes clear when you realize software firewalls can be bypassed by local system vulnerabilities. It’s about building a perimeter at the hardware level, not just installing an app. Relying on software for network security is like locking your bedroom door but leaving the front door of the house wide open.
Can You Still Recover Files After a Major Short Circuit?
This is the advanced question I get most often when a spill occurs. The short answer is usually yes, but only if the flash memory chips themselves haven’t been surged with high voltage. When a short circuit occurs from liquid, it typically hits the controller or the power management circuit first. By using the power of data recovery tools, a specialist can often bypass the blown components and read the raw data directly from the NAND. According to Kroll Ontrack, a leader in the field, over 75% of liquid-damaged drives are recoverable if they haven’t been subjected to “home remedies” like heat or rice. Have you ever fallen into the rice trap or tried a DIY fix that backfired? Let me know in the comments.
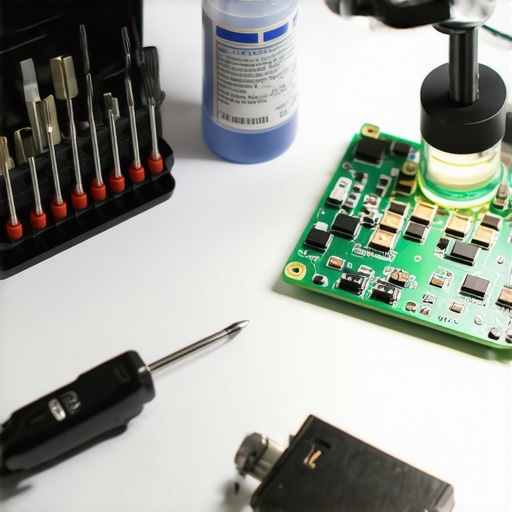
Saving your keyboard from a coffee spill is just the first step in a much larger journey of tech ownership. If you want your gear to last a decade instead of a few years, you need to transition from reactive repairs to a proactive maintenance mindset. My workbench isn’t full of fancy gadgets; it’s stocked with specific, high-quality essentials that I’ve trusted for years. For instance, I never touch a laptop without my Wera Kraftform micro screwdriver set. The precision of German engineering ensures I never strip a tiny screw, which is one of the most common computer repair mistakes beginners make. When you have the right tools, you stop fearing your hardware and start respecting its complexity.
My Favorite Tools for Zero-Failure Maintenance
Beyond the screwdrivers, I swear by 99% anhydrous isopropyl alcohol and a high-quality electronic contact cleaner. These are essential for more than just cleaning keys; they are vital for reviving a dead USB port on your motherboard. I also use a specialized data-blocking USB adapter when testing unknown devices to ensure no malicious code can jump to my main rig. If you are serious about your setup, invest in a good air duster—not the canned stuff that can spray liquid propellant, but a dedicated electric blower. This prevents the kind of buildup that leads to overheating caused by dust or a dead fan. It’s about having a surgical approach to cleanliness.
Keep Your Office Machines Fast With Preventative Care
For those running a business, maintenance isn’t just about cleaning dust; it’s about system-wide health. I’ve seen small offices grind to a halt because they ignored simple server care. Utilizing managed IT solutions for streamlining operations means you aren’t just fixing what breaks; you are preventing the break from happening in the first place. For example, a common issue in server rooms is thermal management. Knowing how to stop your server from thermal throttling during peak hours can save your company thousands in lost productivity and hardware replacement costs. When you scale, these small maintenance habits become your competitive advantage.
How do I maintain my hardware performance over time?
The secret to long-term performance is a combination of physical cleaning and software auditing. Every six months, I perform a ‘deep audit’ where I check for thermal paste degradation and monitor drive health using SMART data. According to the Backblaze Hard Drive Stats report, a cornerstone for anyone tracking drive reliability, the failure rate for older HDDs significantly spikes after the four-year mark, emphasizing why constant monitoring is essential. If you start seeing ‘Correctable Errors’ in your logs, it’s time to use expert data recovery techniques to migrate your files before the drive becomes a paperweight. Don’t wait for the clicking sound to act.
Self-Healing Hardware is Coming for Your Desktop
Looking ahead, I predict we are moving toward an era of ‘self-diagnosing’ and modular hardware. Companies are starting to realize that the ‘disposable tech’ model is failing consumers. In the next few years, I expect to see more motherboards with built-in isolation circuits that can automatically shut down a specific port if liquid is detected, preventing the surge from reaching the CPU. Until then, you are the primary line of defense. I encourage you to try one advanced tip this weekend: download a hardware monitor and check your CPU temperatures under load. If you’re hitting 90°C, it’s time to crack that case open. If that feels too daunting, you can always get in touch with our team for a professional tune-up.
Why I No Longer Trust a ‘Working’ Device After a Spill
Looking back at my coffee-soaked keyboard disaster, I realized that the real damage isn’t always the liquid itself—it’s the ‘ghost in the machine’ that appears months later. After years of repairing gear, here are the hard truths I’ve gathered:
- Sugar is the silent killer. Even if a switch feels fine now, sugar will eventually attract moisture from the air, causing slow-motion corrosion on the PCB traces.
- Testing too early is a gambler’s game. Every time I plugged a board in after just 12 hours, I risked a permanent short circuit that could have been avoided with another day of patience.
- Documentation is your best friend. Never assume you’ll remember where those thirty tiny screws went or how the stabilizer bars were oriented. Take photos at every stage.
If you’re just starting out, learning how to avoid costly computer repair mistakes is the best investment you can make for your setup’s longevity.
[image]
Gear I Actually Use When Things Go South
To do this right, you need a specialized kit. I don’t go anywhere without my Wera precision drivers and a bottle of 99.9% Isopropyl Alcohol. These aren’t just for cleaning; they are the baseline for expert data recovery techniques when a spill gets out of hand and hits your storage drives. I also highly recommend the iFixit Pro Tech Toolkit; it has every bit you could ever need for modern electronics. These tools allow me to handle complex tasks like streamlining office operations without worrying about stripping screws or damaging sensitive internal hardware components.
Stop Reacting and Start Owning Your Setup
You have the power to save your gear. It takes patience, the right chemicals, and a refusal to cut corners. By following the secret to cleaning a mechanical keyboard without breaking it, you aren’t just fixing a peripheral; you’re building the skills to maintain all your technology for years to come. If the damage feels too deep or the data is too precious to risk, don’t hesitate to contact our team for specialized help. What’s the one piece of tech you’re most afraid of losing to a spill?