

I’ll never forget the morning I sat down at my kitchen table, coffee in hand, ready to tackle a mountain of emails. I reached out to open my laptop, and instead of the usual smooth motion, I heard a sickening crunch. It wasn’t loud, but it felt… wrong. Like sand in a gear. Being a bit of a fixer, I figured it was just dust. I pushed it a little harder. Big mistake. Within three days, that tiny creak turned into a full-blown fracture, and I was suddenly staring at the internal wiring of my display. It’s a classic case of mechanical neglect, and if you’re hearing that same sound, you’re standing exactly where I was: on the edge of a very expensive repair bill. If you’ve noticed your lid getting stiffer or heard that tell-tale clicking, you’re in the right place. We are going to stop the damage before you need a full laptop screen repair. I’m going to walk you through how to safely lubricate those metal-on-metal joints so your laptop feels brand new again.
That Cringe-Worthy Sound When You Open Your Lid
The hinge on your laptop is a marvel of engineering that we completely take for granted until it fails. It has to be stiff enough to hold the screen at any angle but loose enough to open with one hand. When that balance shifts, you aren’t just dealing with a noise; you’re dealing with structural stress. I once made the rookie error of trying to “break in” a stiff hinge by forcing it, which only led to a costly repair mistake that involved replacing the entire bottom chassis.
Will I Accidentally Fry My Motherboard If I Use the Wrong Oil?
That skepticism is healthy! You might be worried that you’ll drip oil onto your motherboard or somehow make the screen floppy. In fact, when I first started, I used standard WD-40—which is actually a solvent, not a long-term lubricant—and it made the situation ten times worse by attracting dust. But when done with the right materials, like high-quality synthetic grease or PTFE-based lubricants, it’s a standard maintenance task that can extend the life of your device by years.
Don’t Wait Until the Plastic Starts Cracking
The reason this is so urgent is that your laptop hinges aren’t just there for movement; they are the primary structural support for your screen. According to mechanical engineering principles from ScienceDirect, constant resistance on a friction hinge transfers that torque directly into the plastic casing or the magnesium frame. If the hinge doesn’t move, the plastic around it must give. That’s why you need to know how to tell if your laptop hinges are about to snap the frame. Have you noticed your laptop screen wobbling or making a sharp clicking sound lately? Let me know, because catching it now is the difference between a five-minute fix and a massive headache. We aren’t just talking about a noise; we’re talking about preventing a mechanical catastrophe. Let’s look at what actually goes on inside those metal joints before we start the teardown.
Strip Away the Shell First
Before you even touch a screwdriver, grab a magnetic mat or a simple ice cube tray. I can’t tell you how many times I’ve seen people perform a perfect repair only to realize they are missing two specialized screws that hold the display assembly to the base. To get to the hinges, you usually need to remove the bottom casing of your laptop. Most modern ultrabooks use Torx or Phillips head screws hidden under rubber feet. Once you’re inside, you’ll see the metal brackets that anchor the screen to the chassis. If the plastic around these anchors looks white or stressed, stop immediately; you aren’t just lubricating, you’re reinforcing. While you have the back off, it’s the perfect time to learn how to clean a laptop fan without pushing dust deeper inside because dust is the silent killer of both hinges and processors. 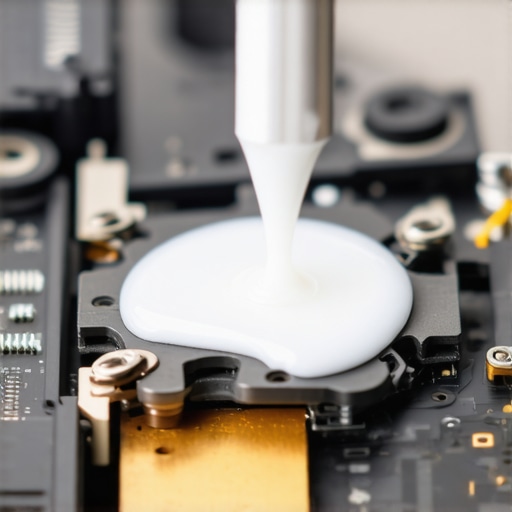
The One Grease That Won’t Kill Your Electronics
I learned the hard way that not all lubricants are created equal. Back when I was first starting out, I worked on an old Dell XPS 13 that was screaming every time the owner opened it. I grabbed a generic household oil, thinking it would do the trick. Three weeks later, the oil had seeped into the display ribbon cable, causing the screen to flicker like a 1920s silent film. Avoid petroleum-based oils at all costs. You want a high-viscosity synthetic grease or a PTFE-based lubricant (like Super Lube). These stay where you put them and don’t evaporate or attract grit. If you find the hinge is physically seized, you might be past the point of a simple lube job and should look into laptop screen repair diy tips to see if the internal bracket is salvageable.
Find the Sweet Spot Between Loose and Stiff
Most laptop hinges have a small locknut on the end of the pivot pin. This nut determines the friction. If your hinge is so tight that it’s pulling the plastic apart, you need to slightly loosen this nut—we’re talking a sixteenth of a turn. It’s a delicate dance. I remember a client who tried to do this himself and loosened it so much the screen would flop down whenever he typed. He ended up needing a full laptop screen replacement step-by-step repair guide because the loose hinge eventually snapped the Wi-Fi antenna cables. Use a small socket wrench or needle-nose pliers and test the tension after every tiny adjustment. You want enough resistance to hold the screen steady at a 45-degree angle, but smooth enough that the base doesn’t lift off the desk when you open it.
Cleaning the Grit Before Applying the Fix
Applying new grease over old, dried-up factory lubricant is like putting clean clothes over a sweaty gym outfit—it just doesn’t work. Use a Q-tip dipped in 90% isopropyl alcohol to scrub the hinge area first. You’ll likely see black or grey residue; that’s metal-on-metal wear. Once the area is clean and dry, apply a tiny, bead-sized amount of your synthetic grease directly to the friction discs. Open and close the lid ten to fifteen times to work the lubricant into the internal mechanism. This is basic computer repair for beginners, but it’s the step most people skip because they’re in a hurry. If you notice any metal shavings during this cleaning process, your hinges are already failing structurally, and you should prioritize backing up your data using the power of data recovery tools before the next time you open the lid is the last.I’ve seen it a thousand times: a DIYer buys a tube of grease and thinks they’re a hero. But here’s the contrarian truth—the grease isn’t always the solution; it’s often the forensic evidence of a deeper problem. Most people think a stiff hinge is just ‘dry.’ In reality, the friction washers inside the hinge assembly are often suffering from galling—a form of wear caused by adhesion between sliding surfaces. According to research from ASM International on material wear, once metal transfer starts at a microscopic level, no amount of lubricant will truly ‘fix’ the surface damage; you are merely masking a mechanical failure. If you’re managing a fleet of devices for a business, this is where many people fall into the ‘hardware trap.’ They focus on software uptime but ignore the physical integrity of the machines. This is exactly why managed IT is a game-changer for growing companies; a proactive partner spots these mechanical red flags during routine checkups before a $50 hinge turns into a $500 screen replacement.
Can a Loosened Hinge Nut Actually Short My Motherboard?
It sounds like an old wives’ tale, but it’s a very real ‘oops’ factor. When you loosen that locknut to make the screen easier to open, you’re changing the vibration profile of the display. If you loosen it too much, the hinge can shift laterally, pinching the LVDS (Low-Voltage Differential Signaling) cable against the metal chassis. I once saw a laptop literally spark because a DIY adjustment caused the hinge to bite into the power rail of the screen cable. If your screen starts acting up after an adjustment, check out these tips for troubleshooting laptop screen problems seamlessly before you try to power it on again. 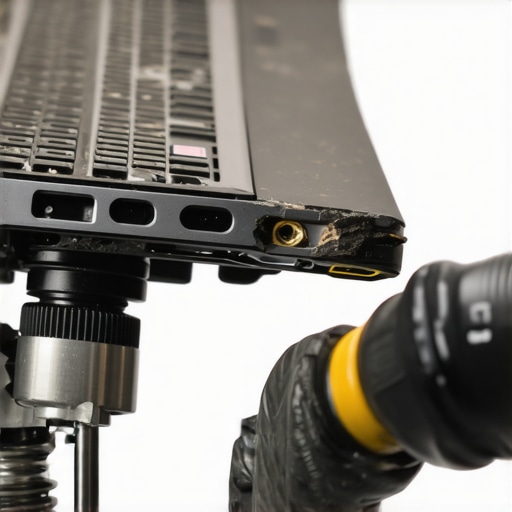 One of the biggest mistakes is assuming that all laptop frames are created equal. High-end workstations use magnesium alloys, while consumer laptops use ABS plastic with brass inserts. If you apply too much torque to a hinge anchored in plastic, you’ll rip those inserts right out of the mold. If you’ve already heard a ‘pop’ and the screen is wobbly, you might be looking at a structural failure. At that point, you need to know how to tell if your laptop hinges are about to snap the frame to prevent further damage to the internal components. Don’t forget that physical damage often leads to digital crises. If a snapped hinge severs a connection and causes a short, your SSD could be the next victim. Knowing a few data recovery secrets and expert techniques to save your files fast can be a literal lifesaver when a mechanical failure turns into a data loss event. Have you ever tried to fix a ‘simple’ hardware issue only to have it spiral into something much bigger? Let me know in the comments—I’ve definitely been there!I’ve learned that the difference between a successful repair and a pile of scrap metal usually comes down to the three inches of steel in your hand. When I started, I used a bargain-bin precision set that came in a plastic bag. I stripped more Torx screws on MacBooks than I care to admit. Now, I won’t touch a device unless I have my Wiha or iFixit drivers. The reason is simple: metallurgy. High-quality bits are hardened to exact tolerances, meaning they grip the screw head instead of rounding it out. If you’re just starting, please avoid costly mistakes by investing $50 in a real toolkit. It’s significantly cheaper than drilling out a stripped screw from a $2,000 logic board.
The Kit That Actually Works for Real World Repairs
My daily carry isn’t just about screwdrivers. I rely heavily on nylon spudgers and ultra-thin metal opening tools like the iSesamo. Why? Because modern laptops are held together by plastic clips that are designed to be permanent. Using a flathead screwdriver is a one-way ticket to a gouged chassis. Beyond the physical tools, I’ve found that the power of data recovery tools like DeepSpar or even specialized software for disk imaging is essential for any hardware technician. You never open a case without knowing the data is safe first.
How Can I Maintain My Hardware Integrity Over the Long Haul?
Maintenance isn’t a one-and-done event; it’s a quarterly ritual. For my business clients, this is where managed IT strategies to keep your business secure in 2025 really shine. We don’t just look at software patches; we physically inspect the hardware. Every three months, you should be checking for the early signs of failure, such as strange horizontal black bars on the display or a fan that sounds like a jet engine. According to the IPC-7711/7721 Rework and Repair standards, keeping the thermal environment stable is the single most effective way to prevent component fatigue. This means blowing out dust and ensuring the hinge tension hasn’t drifted. 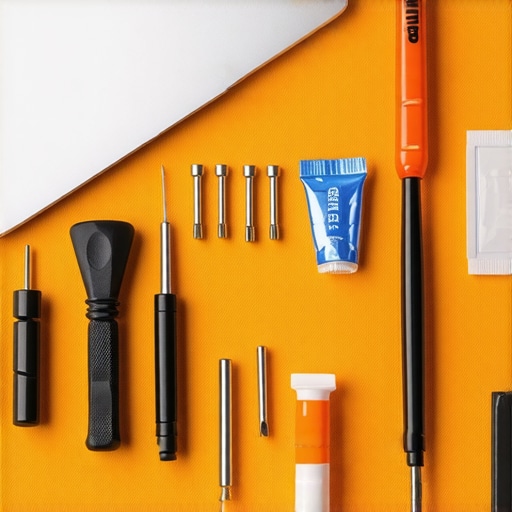
Stop Reacting and Start Preserving Your Tech
If you’re managing a larger setup, you need to think about infrastructure. I often guide clients through the checklist for moving your office server to a secure data center because environmental control is the ultimate maintenance tool. Dust, humidity, and heat are the primary enemies of longevity. I predict that in the next five years, we will see ‘smart hinges’ and ‘self-healing’ thermal pads become standard. We are moving toward a future where hardware will use AI-driven sensors to alert you to mechanical stress before you ever hear that sickening crunch. For now, we rely on our eyes and the right tools. I challenge you to open your laptop today—carefully—and just blow out the dust from the heatsink. It’s a five-minute task that could save you five years of hardware life. Give it a shot and see if your fan noise drops!
Hard-Won Truths from a Decade of Creaky Hinges
After years of repairing devices, I’ve realized that a stiff hinge is often a symptom of environmental stress rather than just age. If you ignore that crunch, you aren’t just risking a noisy lid; you’re risking a screen failure. I’ve seen cases where a tight hinge caused enough pressure to create a weird shadow in the corner of the display, which is actually the liquid crystals being physically compressed. Another lesson? Never trust a hinge that has already ‘popped’ out of its housing. Once the brass inserts pull out of the plastic, you need epoxy, not oil. I’ve also found that many people mistake a hinge issue for a software glitch when, in reality, the mechanical strain is causing the laptop screen resolution to look blurry because the display cable is being pinched. The most important takeaway is that patience saves money. Forcing a hinge even once can double your repair bill instantly.
The Gear That Separates Pro Fixers from Amateurs
You don’t need a lab, but you do need the right toolkit. I personally swear by the iFixit Pro Tech Toolkit; it’s the only set I’ve found that doesn’t strip those tiny M2 screws. For lubrication, Super Lube with PTFE is my go-to because it doesn’t run, even when the laptop gets hot. Before you even open the case, though, I always recommend securing your environment. I’ve learned that why your business needs a disaster recovery plan starts with physical hardware safety—if you break a hinge and short the board, that data needs to be somewhere else. #IMAGE_PLACEHOLDER_E# For those looking to boost performance while they have the case open, consider the hardware upgrade that actually speeds up your daily workflow like an NVMe SSD or a RAM boost. These tools and strategies turn a stressful repair into a professional maintenance session.
Take Control of Your Device’s Lifespan Today
It can be intimidating to open up a device that costs a month’s rent, but remember that most laptop screen repair tasks are just series of logical steps. By catching that hinge resistance early, you are being the proactive owner your tech deserves. You don’t have to wait for a total failure to start learning how your machine works. If you ever feel like you’re in over your head, don’t hesitate to reach out and contact us for professional guidance. Your laptop is an investment—treat its mechanical parts with as much care as its software, and it will serve you for years to come.
Have you ever noticed your screen making a clicking sound when you first open it in the morning? Let me know in the comments below!