

I was leaning back on my recliner last Tuesday, trying to finish a report, when I shifted the laptop slightly to my left. Suddenly, my quiet workspace was invaded by a sound like a tiny chainsaw hitting a gravel pit. Grind. Whir. Crunch. I froze. If I kept it perfectly level, the noise vanished. The moment I tilted it even ten degrees? The beast returned. It’s one of those heart-stopping moments where you wonder if your data is about to go up in smoke. I’ve been there, and I know exactly how much it makes your stomach drop.
That Awful Noise Only Happens When You Tilt Your Tech
I’ll be honest: years ago, when I first heard this in my old workhorse laptop, I did the dumbest thing possible. I gave the chassis a firm “technical tap”—okay, I whacked it. I thought maybe the fan was just “caught” and needed a nudge. Instead of fixing it, I nearly bent the heat pipe and made the vibration even worse. Don’t be like younger me. We’re going to figure out why your fan is acting like a gyroscope gone rogue and, more importantly, how to silence it for good. Have you ever felt that weird vibration through the palm rest when the grinding starts? It’s unnerving, isn’t it?
Is This Sound Actually Going to Kill My Laptop?
It’s a fair question. You’re likely worried that the grinding means a total hardware failure is imminent. While it’s rarely “explosive,” a grinding fan is a mechanical failure that can lead to severe overheating issues. According to a study by the University of Maryland’s CALCE center, mechanical fan failure is one of the leading causes of thermal-related hardware degradation in portable electronics. When that fan stops, the heat stays.
The Real Reason Movement Changes the Pitch
Most laptop fans use something called a sleeve bearing. It’s basically a lubricated shaft inside a tube. Over time, that lubricant dries out or gets clogged with microscopic grit. When you hold your laptop flat, gravity keeps the fan blade centered. But the moment you move or tilt it, the “play” in that worn-out bearing allows the blades to wobble. That grinding you hear is actually the edge of the fan blade physically striking the plastic housing or the heat sink. It’s a physics problem, not a ghost in the machine. If you’ve been putting off maintenance, you might want to learn how to clean a laptop fan properly before the bearing gives up entirely. We aren’t just looking at a “dusty” fan here; we’re looking at a component that’s losing its center of gravity. This is also why the way you position your laptop on your lap matters so much for its long-term health.
Let’s Open the Case Without Making Things Worse
If you’re ready to stop the grinding, you need to be surgical. Most people just spray compressed air into the side vents and hope for the best. That is a mistake. You’re often just jamming the debris further into the bearing or against the fins. To do this right, you need a set of precision screwdrivers and a bit of patience. I highly recommend checking out some computer repair for beginners tips before you start prying at the plastic. When prying the bottom panel, always start from the hinges. These are the strongest points. I remember working on an old XPS 15 that sounded like a coffee grinder whenever I moved it from my desk to my lap. I was convinced the motor was shot. When I finally cracked it open, I realized the fan wasn’t dead; a tiny piece of plastic from a broken internal clip had lodged itself in the shroud. Every time I tilted the laptop, gravity slid that piece right into the blades. No amount of air would have fixed that without opening the chassis.
Hold the Blades Still Before You Spray
When you finally see the fan, don’t just blast it. If you let compressed air spin a fan at high speeds, it acts like a tiny generator, sending electricity back into the motherboard through the header. This can actually fry components. Use a finger or a non-conductive plastic pick to hold the blades still while you work. Now, give it a series of short, sharp bursts. This is the most effective way to clean a laptop fan properly without causing accidental damage. Think of it like cleaning a delicate instrument rather than dusting a bookshelf. 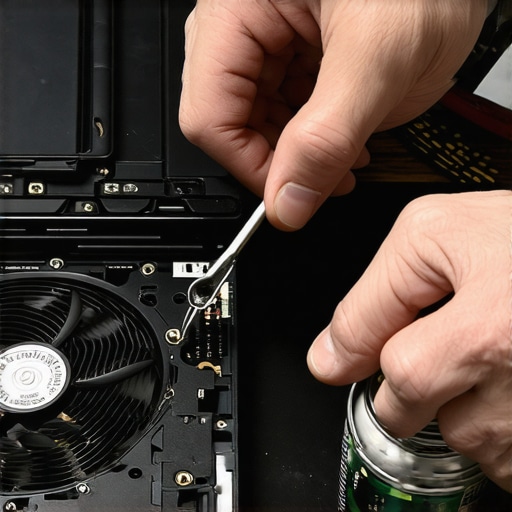
The Finger Spin Test
Once the visible dust is gone, give the fan a gentle flick with your finger. It should spin freely and silently. If you feel any resistance or hear a faint ‘click-click-click,’ the bearing itself is likely deformed. This is common when a laptop has been dropped or if it has been running in a high-heat environment for years, causing the lubricant to solidify into a sticky paste. If the manual spin feels gritty, no amount of air will save it. At this point, you’re looking at a replacement, which is usually a twenty-dollar part and much better than risking a total system meltdown. You can learn more about troubleshooting common computer repair issues effectively if the noise persists after a thorough cleaning.
Why the Technical Tap is a Death Sentence
Many people think they can just knock the fan back into place with a firm smack to the keyboard. Think of your fan like a high-speed record player. If you bump the needle while it’s spinning, you’re going to gouge the disc. In a laptop, that impact forces the metal shaft into the soft sleeve of the bearing, creating a permanent flat spot. Once that flat spot exists, the fan will vibrate forever, regardless of orientation. This vibration doesn’t just make noise; it can loosen internal ribbon cables and even impact your laptop’s thermal performance by breaking the seal between the fan and the heatsink. If your fan is already screaming, even when it’s sitting perfectly flat on the desk, you might be dealing with a runaway background process causing max RPMs, but that distinct tilt-grind is almost always a mechanical cry for help.Most people assume that if their computer is making noise, it’s just a minor nuisance that can be ignored until the machine actually shuts down. That is a dangerous gamble. In professional environments, ignoring these mechanical groans is how you end up needing the power of data recovery tools when a vibrating fan finally shakes a loose connection or, worse, causes a head crash on a traditional hard drive. Everyone says you should just wait for a total failure before replacing a part, but in my experience, proactive replacement is the only way to avoid a four-figure emergency bill. Have you ever fallen into the trap of thinking a quick ‘whack’ would fix your hardware? Let me know in the comments.
The Hidden Vibration That Kills Other Parts
When a fan bearing goes, it doesn’t just make noise; it creates high-frequency harmonic vibrations. If you have an older laptop with a mechanical drive, this is a death sentence. Even with modern SSDs, these vibrations can eventually impact the delicate ribbon cables connecting your display. This is a common nuance many DIYers miss: that ‘fan noise’ might actually be the precursor to needing a laptop screen repair because the vibration caused the LVDS cable to chafe against the chassis. 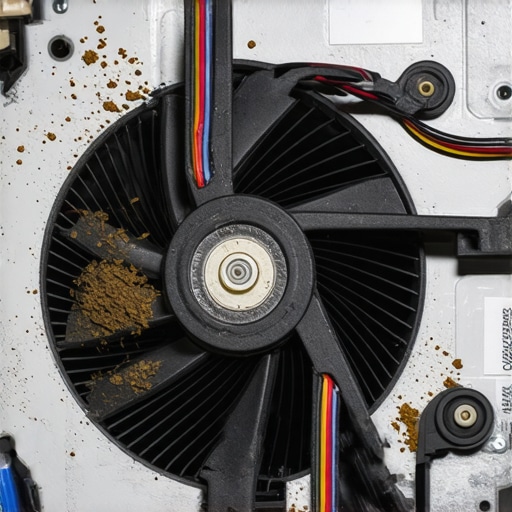
Could My Power Settings Be Masking a Physical Bearing Failure?
It sounds counterintuitive, but your OS power profile can hide a failing fan for months. If you are running in ‘Power Saver’ mode, the fan may never reach the RPM threshold where the bearing wobble becomes audible. The moment you plug in your charger and the system boosts, the grinding starts. This ‘ghost noise’ often leads people to think it’s a software bug or a Windows Update issue. However, a study by the Ponemon Institute suggests that hardware failure still accounts for nearly 25% of all data loss events, often preceded by ignored physical symptoms like these. For businesses, this is why managed IT strategies to keep your business secure in 2025 must include physical hardware audits, not just antivirus scans.
Stop Overestimating Your Compressed Air
The biggest ‘oops’ factor I see involves the misplaced faith in canned air. Many users believe that if they can’t see dust, the fan must be clean. In reality, the most damaging debris often hides on the *inside* of the fan blades, creating an unbalanced load that wears out the bearing prematurely. If you’re a business owner, this lack of deep maintenance is why your IT budget is leaking money on hardware replacements that could have been avoided. Instead of a surface-level spray, you need to ensure the fan is actually balanced. If the grinding persists after a cleaning, stop. You are likely dealing with a deformed spindle. At this stage, trying to ‘lube’ a sealed bearing is a fool’s errand; you’re better off checking out computer repair for beginners tips to learn how to source a proper OEM replacement without overpaying. Don’t let a twenty-dollar fan turn into a three-hundred-dollar logic board repair because you ignored the tilt-test warning signs.
The Toolkit I Actually Carry Every Day
I’ve learned the hard way that a butter knife or a cheap dollar-store screwdriver is the fastest way to strip a screw and ruin a chassis. If you’re serious about keeping your machine alive, you need a precision bit set. I personally swear by the iFixit Mako driver kit. It’s not just about having the bits; it’s about the reach and the magnetism. When you’re trying to reach a recessed screw near the hinge to perform a laptop screen replacement, the right tool is the difference between a ten-minute job and a broken plastic assembly. According to the official repair manuals from iFixit, using nylon spudgers instead of metal pry tools is non-negotiable because it prevents shorting out surface-mounted components on the motherboard. I’ve seen people fry their entire board just by trying to pop a ribbon cable with a flathead screwdriver. Don’t be that person. 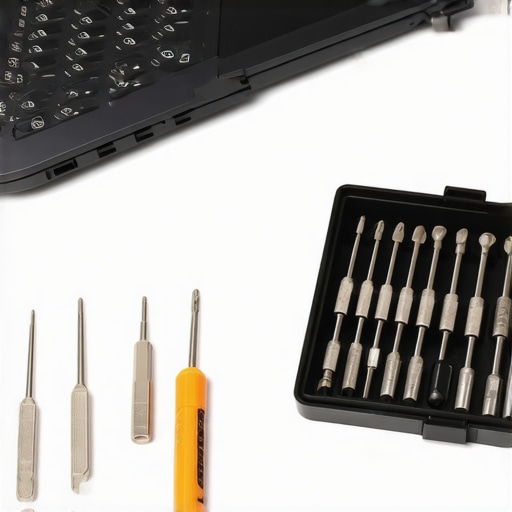
How do I keep my laptop running like new for years?
Maintenance isn’t a one-time event; it’s a quarterly habit. Every three months, I run a software diagnostic called HWInfo64. I don’t just look at the temperatures; I look at the ‘Thermal Throttling’ flags. If I see that my CPU is hitting its limit even during basic tasks, I know it’s time to go deeper than just blowing out dust. This is especially true if you notice the screen turns off on battery or other weird power fluctuations. For businesses, this level of proactive checking is exactly why managed IT strategies to keep your business secure in 2025 are shifting toward automated hardware health monitoring. We are moving away from ‘break-fix’ and toward ‘predict and prevent.’
Thermal Paste is Not Forever
Many people think that once a laptop is built, the internal cooling assembly is a sealed, eternal unit. In reality, the thermal interface material (TIM) between your chip and the copper heat sink dries out. After about three years, it often turns into a brittle, insulating crust. If you’ve cleaned your fan and the grinding has stopped, but your palm rest still feels like a pizza oven, you likely need to repaste. I always use Thermal Grizzly Kryonaut because of its high thermal conductivity. It’s a bit of an advanced move, but learning computer repair for beginners can save you from the common pitfall of applying too much paste and creating a mess.
What the Future of Repair Looks Like
Looking ahead, I predict we are going to see a massive shift toward modularity, led by companies like Framework. The days of ‘soldered everything’ are meeting fierce resistance from right-to-repair advocates. In the next few years, I expect even mainstream manufacturers to make fans and batteries more accessible to the end-user. This is great news for those who want to avoid the power of data recovery tools by simply keeping their hardware from burning out in the first place. For now, my best advice is this: the next time you hear a tiny rattle, don’t wait. Open your laptop, hold the fan still, and give it a proper cleaning. You might just save yourself from a total system failure tonight.
Lessons from a Decade of Silent Fans and Scratched Cases
Over the years, I’ve realized that a grinding fan is rarely a solo act of failure; it’s usually the lead singer in a band of hardware problems. One major takeaway is that gravity is the most honest diagnostic tool you have. If you tilt your machine and the sound changes, you aren’t looking at a software glitch, you’re looking at physical wear. I’ve also learned that “good enough” cleaning often leads to more troubleshooting common computer repair issues effectively later on because you left the heaviest dust clumps behind. Another hard-won insight: silence isn’t always safety. A fan that has stopped making noise might have simply seized entirely. Always verify airflow with your hand, not just your ears. Finally, remember that your laptop is a cohesive system. Ignoring a vibrating fan can lead to needing laptop screen repair if those high-frequency harmonics shake internal display connectors loose. Being proactive is the difference between a five-minute fix and a week-long headache.
The Only Maintenance Toolkit You Actually Need
If you want to move past the amateur level of blowing air into vents, you need the right gear. I personally rely on the iFixit Mako Driver Kit because it covers almost every screw you’ll encounter in modern electronics. For monitoring, HWInfo64 is my go-to software; it provides real-time data on whether your overheating is caused by dust or a dead fan. For the hardware side, I never open a case without a set of nylon spudgers to prevent short circuits, and I always keep a tube of Thermal Grizzly Kryonaut on hand for when I need to refresh the cooling system. These aren’t just gadgets; they are the essentials for any serious computer repair for beginners journey. #IMAGE_PLACEHOLDER_E#
Take the Screwdriver and Save Your PC
It’s easy to feel intimidated when your expensive laptop starts making sounds like a construction site. But remember, most of these machines are designed to be serviced. By taking the time to open the case and address the bearing wobble or dust buildup now, you are extending the life of your investment by years. Don’t wait for the day your screen goes dark or your data becomes inaccessible. You have the knowledge and the steps to perform a successful computer repair and keep your workspace peaceful. You’ve got this—just take it one screw at a time. Have you ever tried to open your laptop only to find a “secret” screw hiding under a rubber foot? Let me know your repair horror stories in the comments!