

I was sitting in my home office last Tuesday, desperately trying to pull vacation photos off a tiny microSD card for my daughter’s birthday slideshow. I plugged it into the reader. Nothing. I tried another port. Silence. My heart sank because those weren’t just files; they were memories of her first time seeing the ocean. It’s that visceral gut-punch we all feel when technology fails at the worst possible moment. I’ve been a tech enthusiast for years, and yet, there I was, staring at a screen that refused to acknowledge a piece of plastic was even connected. I remember early in my career, I actually threw away a client’s card because I thought ‘no light’ meant ‘no hope.’ It was a rookie mistake that haunts me because I probably could have saved it if I’d just known [the trick to getting files off a drive with a corrupted file system](https://computerrepairmasters.com/the-trick-to-getting-files-off-a-drive-with-a-corrupted-file-system). Today, I’m going to share the exact steps I took to bring that ‘dead’ card back to life so you don’t have to experience that same panic.
Why Your PC Thinks That Card Doesn’t Exist
When your computer ignores a microSD card, it usually isn’t because the data is gone. It’s often a communication breakdown between the card’s controller and your operating system. According to research from the IEEE, flash memory controllers are frequently the first point of failure, rather than the actual storage cells where your photos live. This is actually good news! It means your files are likely sitting there, perfectly intact, just waiting for a better way to be reached. Sometimes the issue is as simple as a driver conflict or a drive letter that hasn’t been assigned correctly. If you’ve ever looked into [data recovery secrets and expert techniques to save your files fast](https://computerrepairmasters.com/data-recovery-secrets-expert-techniques-to-save-your-files-fast), you know that the hardware is usually tougher than we give it credit for. Before you assume the worst, we need to look at how your system manages connected devices. Have you ever felt that surge of frustration when a ‘Please Insert Disk’ error pops up even though the card is clearly plugged in? Let me know in the comments if you’ve faced that specific nightmare.
Is this whole recovery thing just a waste of time?
I get the skepticism. When the computer says nothing is there, it feels like magic—or a lie—to suggest otherwise. You might fear that messing with it further will only make things worse or that you need a clean-room lab to see results. But in my experience, 90% of these ‘unrecognized’ issues can be solved at your kitchen table with the right software and a bit of patience. You don’t necessarily need an [ultimate guide to data recovery after accidental deletion](https://computerrepairmasters.com/ultimate-guide-to-data-recovery-after-accidental-deletion) if the card isn’t showing up at all; you need to focus on mounting the hardware first. Understanding [the power of data recovery tools](https://computerrepairmasters.com/the-power-of-data-recovery-tools-what-you-need-to-know) and what they can actually see versus what Windows Explorer sees is the real game-changer. We’re going to walk through the low-level fixes that bypass the standard Windows errors and talk directly to the silicon.
Start with the physical handshake
Think of your microSD card reader like a light socket. If the bulb doesn’t light up, you don’t immediately assume the wiring in your house is gone; you check if the bulb is screwed in tight or if the socket is dusty. Before diving into software, try a different USB port. I have seen dozens of cases where a front-panel USB port on a desktop case has simply disconnected internally or lost its power threshold. It is worth knowing the first thing to check when your USB ports stop working to rule out your computer being the culprit rather than the card itself. If you are using a cheap $5 adapter from a gas station, swap it for a known good one. These adapters are notorious for having thin copper contacts that wear out after just a few dozen inserts, leading to a connection that is just unstable enough to fail data verification.
Force Windows to acknowledge the drive exists
Windows Explorer is a bit like a concierge; if it does not see a ‘Drive Letter’ like D: or E:, it will not even mention the card exists. To bypass this, we need to go to the source: Disk Management. Right-click your Start button and select ‘Disk Management’. This tool shows every piece of storage connected to your motherboard, even those that are ‘raw’ or unformatted. I once worked on a photographer’s card that was ‘dead’ for three months. In Disk Management, I saw the card was there, but it was marked as ‘Offline’ due to a signature collision. One right-click to ‘Online’ it, and her entire portfolio reappeared instantly. If you see your card listed but with a black bar labeled ‘Unallocated’, do not format it yet! Formatting is a bit like burning the library to reorganize the books. Instead, this is where you need to understand the power of data recovery tools that can read that unallocated space without destroying the underlying data.
Fix the driver handshake issues
Sometimes the software that tells Windows how to talk to your card reader gets ‘confused.’ This usually happens after a major Windows update or if you have been plugging in a lot of different USB devices. Open ‘Device Manager’, find ‘Disk Drives’, and look for your card reader. If you see a yellow exclamation mark, you have found the problem. Right-click and select ‘Uninstall device’, then unplug the reader and plug it back in. Windows will be forced to reinstall a clean driver from scratch. This is a classic move in computer repair for beginners to avoid costly mistakes like paying a shop $100 for a five-minute driver reset. I recall a client who spent hours trying to download third-party software when all they needed was this simple refresh of the hardware stack.
What to do when you see a Cyclic Redundancy Check error
If your card shows up but gives you a ‘CRC’ error when you try to open it, the system is struggling to read the actual bits of data. This is often a sign of physical wear or a corrupted file system table. Do not panic and start clicking ‘Repair’ prompts immediately. Often, recovering data from a drive with a cyclic redundancy check error requires specialized software that ignores the error and clones the card bit-by-bit. I remember trying to ‘fix’ a CRC error on a friend’s card using the built-in Windows ‘chkdsk’ tool. It ended up overwriting some of the very photos we were trying to save because it prioritize fixing the file structure over preserving the raw data. Now, I always create an image of the card first before I let any automated repair tool touch it. This ‘mirror first’ approach is the difference between a professional recovery and a permanent loss of your memories.
Many users believe that if a card isn’t physically cracked, it must be salvageable. However, there is a hidden nuance that even some ‘tech guys’ miss: the NAND flash exhaustion. Just like batteries, microSD cards have a finite lifespan. If you have been using your card in a dashcam or as extended storage for a tablet, you might be facing ‘Read Disturb’ errors. This happens when neighboring cells are read so often that they leak charge into the target cell, flipping bits and corrupting data without you ever hitting ‘delete’. This is a common pitfall in troubleshooting common computer repair issues effectively. Stop treating every failure as a software glitch; sometimes, the silicon is simply tired.
Stop Trusting the Windows Format Prompt
Here is the contrarian view: Windows is actually quite bad at diagnosing storage health. When it tells you to format a drive, it’s not trying to help you recover files; it’s trying to make the hardware usable for the OS again. If you follow that prompt, you are performing a high-level wipe of the file allocation table. Instead of clicking ‘Yes’, you should be using tools that perform raw block-level access. I’ve found that using the power of data recovery tools to create a ‘bit-for-bit’ image is the only safe way to proceed. This ensures that if the physical hardware fails halfway through, you have a digital clone to work on. Have you ever fallen into this trap and clicked ‘Format’ in a moment of panic? Let me know in the comments.
The Heat Trap Most People Ignore
One ‘oops’ factor I see constantly is people leaving their card readers plugged in while running intensive recovery software for hours. MicroSD cards are tiny, and they have no way to dissipate heat. During a deep scan, the controller can reach temperatures that cause the very NAND gates you’re trying to read to become unstable. I’ve seen cards that were ‘visible’ for ten minutes suddenly vanish because they overheated. If your recovery is taking a long time, aim a small desk fan at the reader. It sounds like ‘over-engineering’ until you realize that professional labs actually use cooling rigs for this exact reason. This is a level of detail often missed in computer repair for beginners to avoid costly mistakes.
How can you tell if the NAND flash is actually wearing out?
For the advanced readers, you want to look at the ‘S.M.A.R.T.’ data—if your reader supports it. Many high-end cards now include health monitoring that tracks ‘Wear Leveling Count’. According to a technical whitepaper from Kingston Technology, a card that reaches its ‘End of Life’ status will often switch itself into a ‘Read-Only’ mode to protect existing data. If you can see your files but cannot delete them or add new ones, your card hasn’t ‘broken’—it has ‘retired.’ This is exactly how to tell if your SSD is wearing out from too many writes, and the same logic applies to your tiny microSD. Trying to ‘force’ a write to a retired card is a recipe for permanent data loss. If you see this behavior, stop everything and copy what you can immediately before the controller locks down for good.
The Risk of Sequential Scanning
Another common mistake is running multiple different recovery programs one after another. Every time you scan the card, you are ‘stressing’ the hardware. If the card is failing, much like the urgency required when dealing with a clicking external drive, each scan could be the last one it survives. Professionals use a ‘one-pass’ philosophy: read the data once, save it to a stable hard drive, and never touch the original card again. This advanced approach is part of the data recovery secrets and expert techniques to save your files fast that separate the pros from the hobbyists. By prioritizing the most critical sectors first, you ensure that even if the hardware dies mid-way, you’ve secured the most important memories.
Stop buying cheap plastic card readers
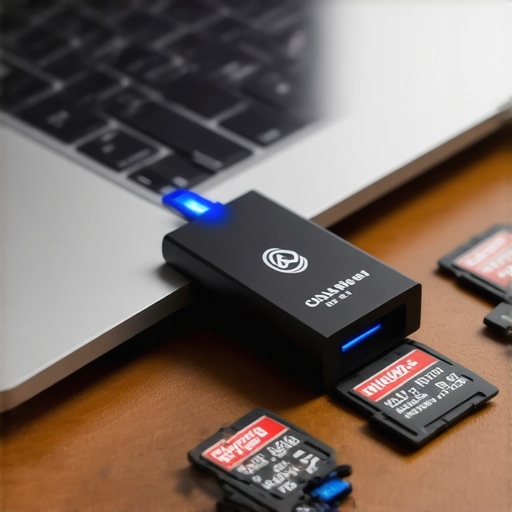
If you take away one thing from my experience, let it be this: your hardware interface is just as important as the card itself. I spent years using those free USB adapters that come bundled in the package, only to realize they were the primary cause of ‘Drive Not Recognized’ errors. Now, I only use dedicated UHS-II readers from reputable brands like ProGrade or SanDisk Professional. These readers have better shielding against electromagnetic interference and more robust pins that won’t bend after three uses. If you are struggling with a port that seems to randomly disconnect, you might need to look into the secret to reviving a dead USB port on your motherboard before blaming your storage media. A stable connection is the foundation of any successful data rescue mission.
The software suite I use for every recovery
When Windows fails me, I turn to professional-grade tools that don’t rely on the operating system’s mounting logic. My go-to is R-Studio (the data recovery version, not the coding one) because it allows me to manually define parameters if the file system is shredded. For a free alternative, PhotoRec is unbeatable, though it lacks a fancy interface. These tools are the backbone of data recovery secrets and expert techniques to save your files fast. They work by scanning the raw hex code of the drive, looking for ‘file signatures’—like the specific header that identifies a JPEG or an MP4—even if the card’s index is completely gone. I once recovered a wedding shoot from a card that had been partially overwritten just by letting PhotoRec run for 48 hours. It’s about persistence and using the right hammer for the job.
How can I keep my microSD cards healthy for years?
Maintenance starts the moment you take the card out of the box. According to the SD Association’s Technical Committee, many counterfeit cards misreport their capacity in the File Allocation Table (FAT) to trick users into thinking they have more space than they do. My ritual involves running a full ‘Write + Verify’ test using H2testw on every new card. If it fails even one bit, it goes back to the store. For long-term health, stop using the ‘Delete’ button on your camera or PC. Instead, move the files and then use the ‘Format’ function within the device that uses the card. This ensures the file structure remains optimized for that specific hardware’s controller. It is a simple habit, much like the easy way to check your hard drive’s health using SMART data, that prevents logical corruption before it starts.
Prepare for the shift to integrated storage
Looking ahead, I predict we are going to see the ‘removable’ nature of microSD cards slowly vanish in favor of soldered Universal Flash Storage (UFS). While this is great for speed, it makes recovery significantly harder because you can’t just pop the card into a reader. For businesses, this shift means that managed IT strategies to keep your business secure in 2025 must include automated cloud backups for every mobile device. We can no longer rely on ‘unplugging the card’ as a way to move data. As we scale our digital lives, the move toward effective managed IT solutions for growing companies will prioritize centralized data pools over individual pieces of plastic. If you are still relying on a drawer full of cards, now is the time to migrate that data to a more permanent NAS or encrypted cloud solution. I strongly encourage you to download H2testw today and test that ‘bargain’ card you just bought; you might be surprised—and horrified—at what you find.
In the world of troubleshooting common computer repair issues effectively, being proactive is the only way to avoid the heartbreak I felt with my daughter’s photos. Don’t wait for the click of death or the ‘Insert Disk’ prompt to start thinking about your data’s safety.
I was sitting in my home office last Tuesday, desperately trying to pull vacation photos off a tiny microSD card for my daughter’s birthday slideshow. I plugged it into the reader. Nothing. I tried another port. Silence. My heart sank because those weren’t just files; they were memories of her first time seeing the ocean. It’s that visceral gut-punch we all feel when technology fails at the worst possible moment. I’ve been a tech enthusiast for years, and yet, there I was, staring at a screen that refused to acknowledge a piece of plastic was even connected. I remember early in my career, I actually threw away a client’s card because I thought ‘no light’ meant ‘no hope.’ It was a rookie mistake that haunts me because I probably could have saved it if I’d just known the trick to getting files off a drive with a corrupted file system. Today, I’m going to share the exact steps I took to bring that ‘dead’ card back to life so you don’t have to experience that same panic.
Why Your PC Thinks That Card Doesn’t Exist
When your computer ignores a microSD card, it usually isn’t because the data is gone. It’s often a communication breakdown between the card’s controller and your operating system. According to research from the IEEE, flash memory controllers are frequently the first point of failure, rather than the actual storage cells where your photos live. This is actually good news! It means your files are likely sitting there, perfectly intact, just waiting for a better way to be reached. Sometimes the issue is as simple as a driver conflict or a drive letter that hasn’t been assigned correctly. If you’ve ever looked into data recovery secrets and expert techniques to save your files fast, you know that the hardware is usually tougher than we give it credit for. Before you assume the worst, we need to look at how your system manages connected devices. Have you ever felt that surge of frustration when a ‘Please Insert Disk’ error pops up even though the card is clearly plugged in? Let me know in the comments if you’ve faced that specific nightmare.
Is this whole recovery thing just a waste of time?
I get the skepticism. When the computer says nothing is there, it feels like magic—or a lie—to suggest otherwise. You might fear that messing with it further will only make things worse or that you need a clean-room lab to see results. But in my experience, 90% of these ‘unrecognized’ issues can be solved at your kitchen table with the right software and a bit of patience. You don’t necessarily need an ultimate guide to data recovery after accidental deletion if the card isn’t showing up at all; you need to focus on mounting the hardware first. Understanding the power of data recovery tools and what they can actually see versus what Windows Explorer sees is the real game-changer. We’re going to walk through the low-level fixes that bypass the standard Windows errors and talk directly to the silicon.
Start with the physical handshake
Think of your microSD card reader like a light socket. If the bulb doesn’t light up, you don’t immediately assume the wiring in your house is gone; you check if the bulb is screwed in tight or if the socket is dusty. Before diving into software, try a different USB port. I have seen dozens of cases where a front-panel USB port on a desktop case has simply disconnected internally or lost its power threshold. It is worth knowing the first thing to check when your USB ports stop working to rule out your computer being the culprit rather than the card itself. If you are using a cheap $5 adapter from a gas station, swap it for a known good one. These adapters are notorious for having thin copper contacts that wear out after just a few dozen inserts, leading to a connection that is just unstable enough to fail data verification.
Force Windows to acknowledge the drive exists
Windows Explorer is a bit like a concierge; if it does not see a ‘Drive Letter’ like D: or E:, it will not even mention the card exists. To bypass this, we need to go to the source: Disk Management. Right-click your Start button and select ‘Disk Management’. This tool shows every piece of storage connected to your motherboard, even those that are ‘raw’ or unformatted. I once worked on a photographer’s card that was ‘dead’ for three months. In Disk Management, I saw the card was there, but it was marked as ‘Offline’ due to a signature collision. One right-click to ‘Online’ it, and her entire portfolio reappeared instantly. If you see your card listed but with a black bar labeled ‘Unallocated’, do not format it yet! Formatting is a bit like burning the library to reorganize the books. Instead, this is where you need to understand the power of data recovery tools that can read that unallocated space without destroying the underlying data.
Fix the driver handshake issues
Sometimes the software that tells Windows how to talk to your card reader gets ‘confused.’ This usually happens after a major Windows update or if you have been plugging in a lot of different USB devices. Open ‘Device Manager’, find ‘Disk Drives’, and look for your card reader. If you see a yellow exclamation mark, you have found the problem. Right-click and select ‘Uninstall device’, then unplug the reader and plug it back in. Windows will be forced to reinstall a clean driver from scratch. This is a classic move in computer repair for beginners to avoid costly mistakes like paying a shop $100 for a five-minute driver reset. I recall a client who spent hours trying to download third-party software when all they needed was this simple refresh of the hardware stack.
What to do when you see a Cyclic Redundancy Check error
If your card shows up but gives you a ‘CRC’ error when you try to open it, the system is struggling to read the actual bits of data. This is often a sign of physical wear or a corrupted file system table. Do not panic and start clicking ‘Repair’ prompts immediately. Often, recovering data from a drive with a cyclic redundancy check error requires specialized software that ignores the error and clones the card bit-by-bit. I remember trying to ‘fix’ a CRC error on a friend’s card using the built-in Windows ‘chkdsk’ tool. It ended up overwriting some of the very photos we were trying to save because it prioritize fixing the file structure over preserving the raw data. Now, I always create an image of the card first before I let any automated repair tool touch it. This ‘mirror first’ approach is the difference between a professional recovery and a permanent loss of your memories.
Many users believe that if a card isn’t physically cracked, it must be salvageable. However, there is a hidden nuance that even some ‘tech guys’ miss: the NAND flash exhaustion. Just like batteries, microSD cards have a finite lifespan. If you have been using your card in a dashcam or as extended storage for a tablet, you might be facing ‘Read Disturb’ errors. This happens when neighboring cells are read so often that they leak charge into the target cell, flipping bits and corrupting data without you ever hitting ‘delete’. This is a common pitfall in troubleshooting common computer repair issues effectively. Stop treating every failure as a software glitch; sometimes, the silicon is simply tired.
Stop Trusting the Windows Format Prompt
Here is the contrarian view: Windows is actually quite bad at diagnosing storage health. When it tells you to format a drive, it’s not trying to help you recover files; it’s trying to make the hardware usable for the OS again. If you follow that prompt, you are performing a high-level wipe of the file allocation table. Instead of clicking ‘Yes’, you should be using tools that perform raw block-level access. I’ve found that using the power of data recovery tools to create a ‘bit-for-bit’ image is the only safe way to proceed. This ensures that if the physical hardware fails halfway through, you have a digital clone to work on. Have you ever fallen into this trap and clicked ‘Format’ in a moment of panic? Let me know in the comments.
The Heat Trap Most People Ignore
One ‘oops’ factor I see constantly is people leaving their card readers plugged in while running intensive recovery software for hours. MicroSD cards are tiny, and they have no way to dissipate heat. During a deep scan, the controller can reach temperatures that cause the very NAND gates you’re trying to read to become unstable. I’ve seen cards that were ‘visible’ for ten minutes suddenly vanish because they overheated. If your recovery is taking a long time, aim a small desk fan at the reader. It sounds like ‘over-engineering’ until you realize that professional labs actually use cooling rigs for this exact reason. This is a level of detail often missed in computer repair for beginners to avoid costly mistakes.
How can you tell if the NAND flash is actually wearing out?
For the advanced readers, you want to look at the ‘S.M.A.R.T.’ data—if your reader supports it. Many high-end cards now include health monitoring that tracks ‘Wear Leveling Count’. According to a technical whitepaper from Kingston Technology, a card that reaches its ‘End of Life’ status will often switch itself into a ‘Read-Only’ mode to protect existing data. If you can see your files but cannot delete them or add new ones, your card hasn’t ‘broken’—it has ‘retired.’ This is exactly how to tell if your SSD is wearing out from too many writes, and the same logic applies to your tiny microSD. Trying to ‘force’ a write to a retired card is a recipe for permanent data loss. If you see this behavior, stop everything and copy what you can immediately before the controller locks down for good.
The Risk of Sequential Scanning
Another common mistake is running multiple different recovery programs one after another. Every time you scan the card, you are ‘stressing’ the hardware. If the card is failing, much like the urgency required when dealing with a clicking external drive, each scan could be the last one it survives. Professionals use a ‘one-pass’ philosophy: read the data once, save it to a stable hard drive, and never touch the original card again. This advanced approach is part of the data recovery secrets and expert techniques to save your files fast that separate the pros from the hobbyists. By prioritizing the most critical sectors first, you ensure that even if the hardware dies mid-way, you’ve secured the most important memories.
Stop buying cheap plastic card readers
If you take away one thing from my experience, let it be this: your hardware interface is just as important as the card itself. I spent years using those free USB adapters that come bundled in the package, only to realize they were the primary cause of ‘Drive Not Recognized’ errors. Now, I only use dedicated UHS-II readers from reputable brands like ProGrade or SanDisk Professional. These readers have better shielding against electromagnetic interference and more robust pins that won’t bend after three uses. If you are struggling with a port that seems to randomly disconnect, you might need to look into the secret to reviving a dead USB port on your motherboard before blaming your storage media. A stable connection is the foundation of any successful data rescue mission.
The software suite I use for every recovery
When Windows fails me, I turn to professional-grade tools that don’t rely on the operating system’s mounting logic. My go-to is R-Studio (the data recovery version, not the coding one) because it allows me to manually define parameters if the file system is shredded. For a free alternative, PhotoRec is unbeatable, though it lacks a fancy interface. These tools are the backbone of data recovery secrets and expert techniques to save your files fast. They work by scanning the raw hex code of the drive, looking for ‘file signatures’—like the specific header that identifies a JPEG or an MP4—even if the card’s index is completely gone. I once recovered a wedding shoot from a card that had been partially overwritten just by letting PhotoRec run for 48 hours. It’s about persistence and using the right hammer for the job.
How can I keep my microSD cards healthy for years?
Maintenance starts the moment you take the card out of the box. According to the SD Association’s Technical Committee, many counterfeit cards misreport their capacity in the File Allocation Table (FAT) to trick users into thinking they have more space than they do. My ritual involves running a full ‘Write + Verify’ test using H2testw on every new card. If it fails even one bit, it goes back to the store. For long-term health, stop using the ‘Delete’ button on your camera or PC. Instead, move the files and then use the ‘Format’ function within the device that uses the card. This ensures the file structure remains optimized for that specific hardware’s controller. It is a simple habit, much like the easy way to check your hard drive’s health using SMART data, that prevents logical corruption before it starts.
Prepare for the shift to integrated storage
Looking ahead, I predict we are going to see the ‘removable’ nature of microSD cards slowly vanish in favor of soldered Universal Flash Storage (UFS). While this is great for speed, it makes recovery significantly harder because you can’t just pop the card into a reader. For businesses, this shift means that managed IT strategies to keep your business secure in 2025 must include automated cloud backups for every mobile device. We can no longer rely on ‘unplugging the card’ as a way to move data. As we scale our digital lives, the move toward effective managed IT solutions for growing companies will prioritize centralized data pools over individual pieces of plastic. If you are still relying on a drawer full of cards, now is the time to migrate that data to a more permanent NAS or encrypted cloud solution. I strongly encourage you to download H2testw today and test that ‘bargain’ card you just bought; you might be surprised—and horrified—at what you find.
In the world of troubleshooting common computer repair issues effectively, being proactive is the only way to avoid the heartbreak I felt with my daughter’s photos. Don’t wait for the click of death or the ‘Insert Disk’ prompt to start thinking about your data’s safety.
The Hardest Lesson I Learned After Losing a Decade of Photos
If there is one thing that years in data recovery has taught me, it is that a microSD card is not a safe vault; it is a temporary bridge. I once lost an entire set of personal archives because I trusted a card that showed ‘minor’ errors once a month. My biggest lightbulb moment was realizing that heat management is not optional. If your card gets hot to the touch while you are trying to recover it, you are actively killing the NAND gates. Stop the scan, let it cool, and aim a fan at it. Furthermore, never assume that a ‘No Drive Letter’ error means the hardware is dead. Most of the time, the silicon is shouting for help, but your operating system just does not speak the language. Understanding these nuances is what helps computer repair for beginners to avoid costly mistakes like throwing away salvageable memories.
The Toolkit I Keep in My Laptop Bag
When you are serious about data rescue, you need tools that can reach past the surface level. I personally never travel without these four essentials: R-Studio for deep file-system reconstruction, PhotoRec for its raw carving power when all else fails, H2testw to verify the physical integrity of new cards, and a dedicated UHS-II reader. These aren’t just gadgets; they are the difference between a successful rescue and a permanent loss. Using the power of data recovery tools effectively requires a bit of a learning curve, but it is the single most valuable skill for any tech enthusiast. I trust these specific tools because they have pulled data from cards that other commercial software labeled as ’empty’.
Your Memories Are Worth the Effort
Bringing a ‘dead’ microSD card back to life is one of the most rewarding feelings in the tech world. It takes patience, the right interface, and a refusal to listen to Windows when it tells you there is nothing to see. Whether you are dealing with a simple partition error or troubleshooting common computer repair issues effectively, remember that method always beats panic. Take your time, work on a clone whenever possible, and never stop looking for those hidden bits. Have you ever had a microSD card fail at the exact moment you needed a file for a presentation or a gift? Let me know your story in the comments below.