

I was staring at my laptop last Tuesday, trying to ignore those three annoying, bright white spots staring back at me like tiny, glowing ghosts. At first, I thought maybe I had just pressed the lid too hard while packing my bag, or worse, that the LCD was liquid-leaking. It is a visceral feeling of dread when your main workstation starts showing its age in such a distracting way. I remember leaning in so close my nose touched the glass, desperately hoping it was just a smudge. It wasn’t. If you are seeing these bright dots, you aren’t losing your mind, and your screen isn’t necessarily destined for the landfill. Today, I am going to walk you through exactly what those spots are and how we can get your display looking crisp again based on my own trial and error in the workshop.
Why Your Screen Looks Like It Is Growing Glowing Polka Dots
Most people assume these spots are a software glitch or the dreaded dead pixel, but it is actually a physical, mechanical failure deep inside the panel. Inside your screen, there are LED strips with tiny plastic lenses—called diffusers—glued over each bulb. These lenses are supposed to spread the light evenly. When one of those lenses pops off due to heat or a bump, the light hits the back of your screen like a concentrated spotlight. I will be the first to admit that my biggest mistake early on was trying to massage the screen with a microfiber cloth, thinking I could move the ‘pixel’ back into place. Pro tip: do not do that. You will likely just end up cracking the delicate glass layers. Instead, you need to understand the basics of laptop screen repair DIY tips for clearer displays before you start poking around. A surprising fact found in research by the International Journal of Optomechatronics suggests that thermal stress in slim LED-backlit displays is the leading cause of adhesive degradation, which is why those lenses fall off in the first place. If you are new to this, it is worth looking into computer repair for beginners to avoid costly mistakes before you start unscrewing your bezel. We want to fix the light, not create a flickering screen by adjusting the display ribbon incorrectly during the process.
Is This Repair Actually Worth the Effort?
You might be sitting there wondering if you should just throw in the towel and buy a new machine. That is a fair concern! If your laptop is a decade old, maybe it is time. But for most of us, this is a relatively straightforward fix that involves some patience and a tiny bit of specialized adhesive. It is much cheaper than a full replacement. Have you noticed these spots appearing right after your laptop got a bit too hot during a long gaming session or a heavy video render? It is a common sign that the internal glue has simply given up the ghost. Before you give up, let’s look at some tips for troubleshooting laptop screen problems seamlessly so we can confirm it is a diffuser issue and not a failing backlight array. For those who are feeling brave, my guide on laptop screen repair and how to fix common issues at home will give you the confidence to dive in.Fixing those glowing polka dots is like performing microsurgery on a lightbulb. You need a space that is as clean as a lab because even a single speck of dust trapped between the layers will look like a mountain once you turn the power back on. I usually lay out a lint-free microfiber towel to keep the delicate screen from scratching against my desk. If you have never opened a case before, I highly recommend checking out a laptop screen replacement step-by-step repair guide just to get a feel for how the plastic clips and tiny screws behave. You are going to need a set of precision screwdrivers and, most importantly, a plastic prying tool. Using a metal flathead screwdriver is the quickest way to turn a small fix into a total disaster.
Strip Down the Panel to Find the Culprit
Once you get the bezel off, you are basically peeling an onion. You have the outer glass, then several layers of polarizing films and light-diffusing sheets. I once did this on an old Dell Latitude where four lenses had popped off. I was so excited to fix it that I didn’t keep the sheets in order. When I put it back together, the screen had a weird wavy pattern because the filters were misaligned. Take a photo of every layer as you lift it. You are looking for those tiny clear plastic ‘buttons’ that have fallen to the bottom of the frame. If you notice other dark areas, you might be dealing with why your laptop screen has a weird shadow in one corner, which can sometimes be a loose sheet rather than a lens.
The Tiny Drop of Glue That Saves Your Display
The actual fix is surprisingly low-tech but requires the precision of a clockmaker. You need a toothpick and a tiny bit of clear, heat-resistant epoxy. Avoid standard superglue; the fumes can outgas and fog up the inside of your lens, making the spot look blurry instead of bright. I use the toothpick to apply three microscopic dots of glue to the original mounting points on the LED strip. When I was fixing that Dell, I learned that a ‘blob’ is your enemy. Too much glue and the lens won’t sit flat, which results in the light refracting at a weird angle. This is where troubleshooting common computer repair issues effectively becomes about patience rather than power.
Test the Backlight Before Clicking the Case Shut
Before you snap the bezel back on, plug the display cable back in and power it up carefully. This is the moment of truth. You want to see a perfectly uniform field of light. If you still see a slight halo, the lens might be slightly off-center. If you’ve botched the ribbon connection during this dance, you might end up needing to know how to fix a flickering screen by adjusting the display ribbon. It’s much easier to nudge a lens into place while the glue is still tacky than it is to tear the whole thing apart tomorrow because you were too impatient to do a five-minute test run.
Everyone says that if you buy a premium workstation or a high-end IPS panel, you’re safe from these ‘white spots.’ In my experience, that’s a dangerous oversimplification. While it’s true that cheaper builds use lower-grade adhesives, research published by the IEEE Transactions on Device and Materials Reliability shows that even high-quality LED arrays can suffer from localized delamination if the internal chassis temperature consistently exceeds 50°C during heavy workloads. High-end machines often run hotter because they pack more power into smaller frames, making them more prone to lens failure over time. If you’ve been ignoring your thermals, you might soon be looking for laptop screen repair DIY tips for clearer displays regardless of your laptop’s price tag.
Keep Your Bare Hands Off the Reflective Sheets
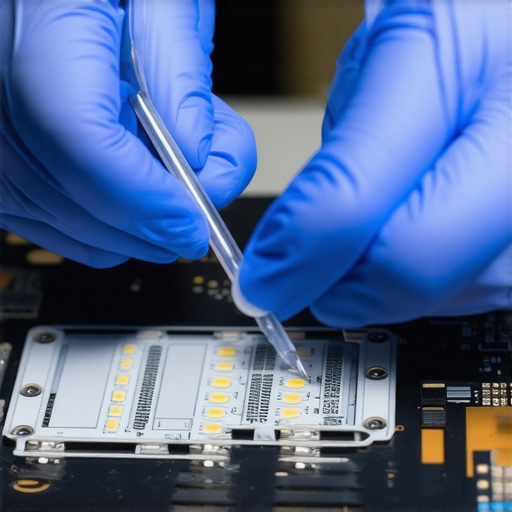
Here is the biggest ‘trap’ that ruins a successful repair: skin oils. When you are deep inside the panel, those white and silver sheets behind the LCD are incredibly sensitive. I’ve seen people handle them with bare hands, only to find that the oil from their fingertips creates permanent shadows or weird ‘clouding’ once the screen is back together. It’s the same logic used in troubleshooting common computer repair issues effectively—cleanliness is everything. Always wear powder-free nitrile gloves. If you accidentally touch a sheet, don’t use Windex or alcohol; you’ll likely strip the coating and end up with a blurry screen on a high-end laptop that looks worse than when you started.
Why Does the Color Look Off After the Repair?
A sophisticated question I often get is why the repaired spot looks slightly cooler or warmer than the rest of the screen. This usually happens because of “glue outgassing.” If you used a cheap hardware-store adhesive, the fumes can settle on the underside of the diffuser lens as it cures. This creates a microscopic film that shifts the light spectrum. You might notice your laptop screen has a persistent yellow tint in that specific area. This is why I stress using optical-grade, heat-resistant epoxy. It prevents the light from refracting incorrectly. If you didn’t get the alignment perfectly centered, you might even see a strange pressure mark in the center where the lens is actually touching the LCD layer. Managing these nuances is what separates a hack job from a professional restoration. Have you ever fallen into this trap or accidentally made a screen issue worse while trying to fix it? Let me know in the comments. If you’re feeling overwhelmed, checking out a laptop screen repair guide for home fixes can help you slow down and get it right the first time. We want to avoid a situation where you have a laptop screen that is too dim even at max brightness because the light is being trapped by misaligned layers.
I’ve learned the hard way that a repair is only as good as the tools you use to perform it. For me, that means a dedicated set of nylon spudgers and a suction cup that doesn’t leave a residue. I never touch the internal components with metal if I can help it. Metal gouges plastic and creates pathways for dust to enter later. I’ve seen so many people try to save a few bucks by using a kitchen knife, only to end up needing a laptop screen replacement step-by-step repair guide because they sliced through the actual LCD panel. If you are serious about keeping your hardware alive, you need a precision driver set with bits small enough to handle the 1.2mm screws found in modern ultrabooks. Using a bit that is just a fraction too large will strip the head, and then you’re looking at a much more expensive problem than a few white spots.
How can I keep my screen crisp for years to come?
The secret to screen longevity isn’t just about how you clean it; it’s about how you vent it. According to technical bulletins from LG Display regarding direct-lit LED backlight assemblies, the adhesive holding your diffusers in place is rated for a specific thermal cycle. If your laptop is constantly running at 90°C because your vents are clogged, you are effectively baking the glue until it becomes brittle and snaps. This is why I always tell my clients to find out how to tell if your laptops overheating is caused by dust or a dead fan as part of their monthly maintenance. I personally use a compressed air canister every two weeks to blow out the side vents. It sounds like overkill until you realize that a five-second blast can save you a five-hour teardown.
The Toolkit I Trust for Delicate Screen Surgery
In my workshop, the MVP is the B-7000 adhesive. Unlike standard superglue, which dries into a glass-like state and can crack during the normal flex of a laptop lid, B-7000 remains slightly rubberized. This flexibility is crucial because it absorbs the vibrations when you snap your laptop shut or carry it in a backpack. While you’re under the hood, it’s also the perfect time to do a broader health check. I always take a moment to look at the easy way to check your hard drives health using smart data while the machine is open, just to ensure I’m not fixing a screen on a device that has a failing SSD. It’s about being efficient with your downtime. If you’re going to go through the trouble of laptop screen repair for common issues at home, make sure the rest of the internals are worth the effort.
Looking Toward a Future Without Diffuser Failures
The industry is moving toward Mini-LED and Micro-LED technology, which effectively eliminates these large, separate plastic lenses in favor of thousands of microscopic light sources. While this means ‘white spots’ will eventually become a relic of the past, it also means repairs will become significantly more complex, likely requiring specialized soldering stations rather than a drop of glue. Dr. Raymond Soneira of DisplayMate Technologies has noted that as pixel density and backlight precision increase, the tolerance for manual DIY repair decreases. We are in a ‘sweet spot’ right now where we can still fix our own gear. Don’t waste that opportunity by being sloppy. I challenge you to download a thermal monitoring tool today and check your idle temperatures; if you’re idling above 50°C, it’s time to clean those fans before your screen starts growing those glowing polka dots again.
What My Workbench Taught Me About Glowing Polka Dots
Over the years, I have learned that the biggest hurdle in fixing a display isn’t the adhesive; it’s the environment. One microscopic spec of dust or a single fingerprint on the inner diffusers can ruin hours of delicate work. If you accidentally touch the reflective sheets with bare skin, you might notice your laptop screen has a persistent yellow tint or oily clouding that simply won’t go away once the backlight hits it. Another hard-earned lesson: these lenses are often directional. Placing them even slightly upside down or tilted creates a weird spotlight effect rather than a smooth glow. Lastly, never rush the drying process. I once snapped a bezel back on too early, and the pressure shifted a lens, leading to ghosting issues that forced me to restart the entire teardown from scratch.
The Gear That Actually Lives in My Toolbag
I don’t believe in overcomplicating things, but these three items are non-negotiable for a successful screen surgery. First is the B-7000 adhesive; its rubberized curing property is the only way to ensure the lens doesn’t snap off again during transport. Second, I always use a small rubber suction cup to lift the LCD panel safely. Without even pressure, you risk putting stress on the thin glass, which can lead to a laptop screen with a vertical yellow line caused by microscopic cracks in the gate drivers. Finally, I rely on powder-free nitrile gloves. They are your only defense against skin oils that can permanently smudge the internal light-shaping layers. If you are just starting, checking out a guide for beginners to avoid costly mistakes will help you organize these tools before you crack the case open.
Take the Leap and Restore Your View
Your laptop is your window to the digital world, and staring at glowing artifacts every day is a recipe for eye strain and frustration. Don’t let a few loose lenses force you into buying a brand-new machine when a bit of patience and a toothpick can solve the problem. Armed with these laptop screen repair DIY tips for clearer displays, you have the power to extend the life of your hardware significantly. It might feel intimidating to peel back those layers for the first time, but the moment you power it on and see a perfectly uniform image, the effort pays for itself. Have you ever tried to open your display and run into a screw that just wouldn’t budge? Let me know in the comments below!