

I heard the crack before I felt the resistance. My laptop was on my lap, a cheap plastic USB drive sticking out the side, and as I shifted to reach for my coffee, my knee caught it just right. *Snap.* The metal connector stayed in the laptop port, while the plastic body—containing every single one of my tax documents—fell onto the rug. I’ve spent years troubleshooting common computer repair issues effectively, but in that moment, I felt like a total amateur. It was a visceral, sinking feeling that I wouldn’t wish on my worst enemy. I’m here to tell you that while your drive looks like a casualty of war, the data inside is often just waiting for a bridge to get out. Today, we are going to walk through the exact move that can bridge that gap and save your digital life.
Don’t Throw the Pieces in the Trash Just Yet
When I first started messing with hardware, I made a massive mistake: I tried to “force” a connection by holding the broken pieces together with scotch tape while plugging it back in. Spoiler alert—it didn’t work, and I actually risked shorting out my motherboard. If you’re currently staring at a broken drive, stop. Take a breath. We need to focus on how to rescue data from a usb flash drive with a broken tip without causing more damage. The move I am talking about involves recognizing that the connector is just a gateway; the actual memory chip is likely still perfect. According to industry statistics from data recovery firms like Ontrack, nearly 90% of physically snapped USB drives are recoverable as long as the NAND flash chip itself hasn’t been cracked or crushed.
Is a snapped drive actually worth the effort to fix?
You might be thinking that it’s easier to just start over or hire an expensive lab. But before you shell out $500 to a clean-room service, you should know some data recovery secrets that the pros use to get files off in minutes. I’ve seen people give up on drives that only needed a five-minute solder job or a simple bypass. Whether you are dealing with a personal catastrophe or looking for computer repair for beginners tips, knowing how to handle physical hardware failure is a superpower. Have you ever experienced that heart-stopping moment when you realize you’ve physically broken your only copy of a file? Drop a comment and tell me how it happened—I promise your story isn’t as embarrassing as my laptop-on-the-lap incident. Now, let’s get into the nitty-gritty of how we’re going to get those files back safely.
Identify the Four Golden Lanes
Think of the broken end of your USB drive as a bridge that’s been demolished. To get the traffic—your data—moving again, you don’t need to rebuild the whole bridge; you just need four narrow paths. Every standard USB 2.0 drive has four pads: Power (VCC), Data -, Data +, and Ground. I remember a frantic Tuesday when a local business owner brought in a drive that looked like it had been through a blender. By cleaning the PCB with a bit of isopropyl alcohol, I could see the copper traces leading away from where the connector used to be. This is where computer repair for beginners starts—with observation. If those pads are lifted or torn off the green board, you’re looking at a much harder job, but if the silver solder points are still there, you’re in business. Without these lanes, the NAND flash chip is an island with no way to offload its passengers.
Build a Temporary Bridge with a USB Cable
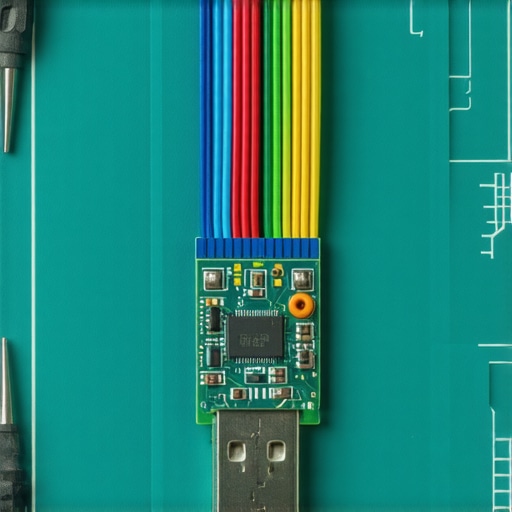
Instead of trying to solder the old, mangled connector back on—which is like trying to glue a broken vase back together while it’s holding water—it is much easier to use a “donor” USB cable. Cut the female end off a spare USB extension cord and strip the four wires inside: red, white, green, and black. This allows you to bypass the physical break entirely. I once spent three hours trying to hold a broken tip in place with a rubber band before I realized that the secret to reviving a dead usb port or a broken drive often lies in the quality of the connection, not the force applied. You are essentially creating a custom-fit umbilical cord for your data. Red goes to VCC, black to Ground, and the green/white pair handle the communication. Getting these reversed won’t just fail to work; it could send five volts into a data line and fry the memory controller instantly.
Master the Steady Hand Solder
This is the part that scares people, but it shouldn’t. You are essentially just “painting” with molten metal. You’ll want to tin the tips of your donor wires and the pads on the drive first with a bit of flux. Flux is the secret sauce that makes the solder flow onto the pads instead of sticking to your iron like a stubborn bead of water. In my early days, I once bridged the Data+ and Ground pads with a big glob of solder, which caused the computer to instantly shut down to protect itself. Always use a magnifying glass or a phone camera on zoom to check your work. Once those four wires are attached to their respective pads, you’ve created a bypass. This is one of those data recovery secrets that turns a paperweight back into a storage device. It’s a delicate dance, but the reward is seeing that drive letter pop up on your screen.
Stop if Windows Asks to Format
If you plug your franken-drive in and the computer recognizes it but shouts “You need to format the disk in drive X: before you can use it,” do not click yes. This usually means the hardware connection is working, but the file system is shivering from the trauma of the physical break. This is the moment you switch from hardware fixes to software logic. You should use the power of data recovery tools to scan the drive rather than letting the OS touch it. Knowing how to recover files from a usb drive that asks to be formatted is the final hurdle in the race. In my experience, once you get the raw data flowing, a tool like Recuva or R-Studio can pull the files off even if the partition table is a mess. I’ve seen drives that looked absolutely charred inside still give up their files once the controller was bypassed and the software took over the heavy lifting.
Stop trusting the ‘miracle’ freezer trick
Everyone has heard the urban legend: if your drive stops working, stick it in the freezer for twenty minutes. While this might have occasionally helped ancient mechanical hard drives with ‘stiction’ issues, it is a death sentence for a snapped USB drive. In my experience, the moisture and condensation created by temperature shifts can actually cause microscopic shorts across the NAND flash pins. If you’re trying to rescue data from a usb flash drive with a broken tip, the last thing you want is ice crystals forming on the circuitry. A study by the IEEE Reliability Society on non-volatile memory components confirms that thermal shock is one of the leading causes of premature chip failure during recovery attempts. Stick to dry, room-temperature environments when you’re working on a fix.
The heat trap that kills memory chips
One of the biggest mistakes I see—and I’ve definitely fallen into this trap early in my career—is over-soldering. When you’re trying to bridge those ‘four golden lanes’ I mentioned earlier, it is tempting to keep the iron on the pad until you’re sure the connection is ‘solid.’ But here is the nuance: the copper traces on a USB PCB are often thinner than a human hair. If you apply heat for more than three seconds, the adhesive holding the copper to the fiberglass board can fail. This is called ‘lifting a pad,’ and once that copper is gone, you no longer have a bridge to solder to. I’ve seen countless computer repair for beginners projects turn into disasters because of a $15 hobbyist iron with no temperature control. You need enough heat to melt the solder, but not enough to cook the motherboard.
What happens when the NAND chip itself is the problem?
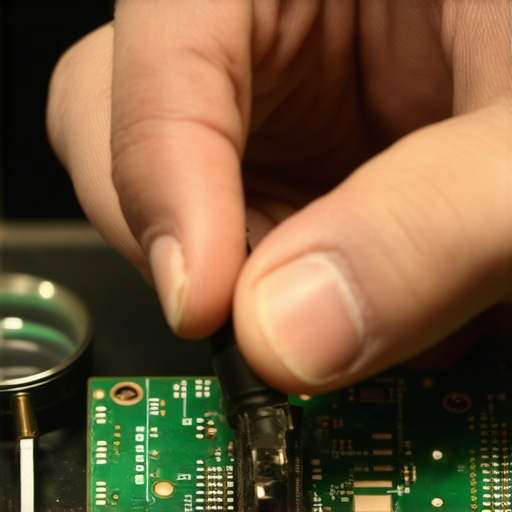
If you have successfully bridged the connections and the drive still isn’t showing up, you might be dealing with a controller failure rather than just a broken physical path. This is where you need to look into more data recovery secrets like ‘chip-off’ recovery. In this advanced scenario, the memory chip is actually desoldered from the broken board and placed into a specialized reader that bypasses the USB controller entirely. This is why you should never throw away the ‘body’ of the drive even if the connector is long gone. Sometimes the secret to reviving a dead usb port or access isn’t in fixing the port at all, but in speaking directly to the storage chips. However, if you see a physical crack in the black epoxy of the NAND chip itself, that is the one time I’ll tell you the data is truly gone. Have you ever fallen into this trap of trying a ‘miracle’ internet fix that made it worse? Let me know in the comments—I’ve seen it all, from oven-baked laptops to drives soaked in rice.
The hidden danger of generic donor cables
When you are building your bridge, don’t just grab the first cable you find in your junk drawer. Cheap, unshielded cables can introduce ‘noise’ into the data lines. For a stable recovery, especially when the signal is already weak due to a manual solder job, you want a high-quality, shielded donor. If the connection flickers for even a millisecond while you are transferring files, you could end up with a ‘RAW’ file system error. Knowing how to recover files from a usb drive that asks to be formatted is a great safety net, but preventing the corruption in the first place by using a stable, high-gauge copper wire is always the better move. Precision and patience are your best tools here.
I’ve learned the hard way that a $10 soldering iron from the local hardware store is actually a liability. When I’m performing a delicate bypass on a snapped USB, I reach for my Pinecil or a TS100 portable iron. These tools use a DC input that allows for incredibly precise temperature control, which is vital because the IPC-A-610 standard for electronics assembly specifies very tight tolerances for heat application to avoid damaging delicate components. If you aren’t using high-quality tacky flux—specifically Amtech NC-559—you are fighting a losing battle. The flux ensures that the solder only sticks to the pads and doesn’t bridge those tiny data lanes. This level of precision is exactly why troubleshooting common computer repair issues effectively requires the right gear before you even touch the hardware.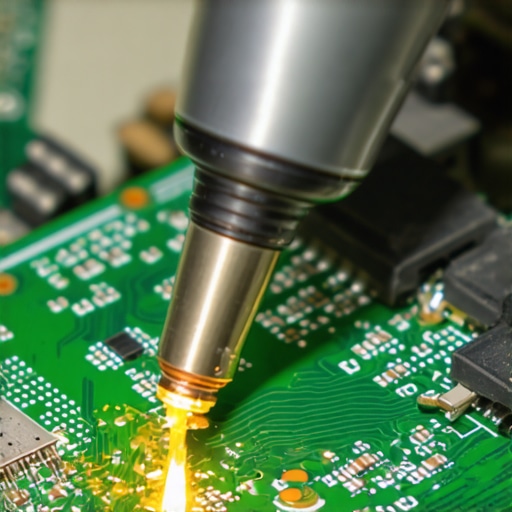 Beyond the physical tools, the software you use determines if you get a corrupted mess or your actual tax returns back. While many people start with free tools, I personally rely on R-Studio for complex recoveries. It handles “raw” file signatures and damaged partition tables far better than basic consumer apps. You need to understand the power of data recovery tools to realize that most ‘deleted’ data is just hidden, not gone. For businesses, this manual effort is a nightmare, which is why why managed IT is a game changer for growing companies. Instead of soldering at midnight, you have automated backups that make the physical state of a USB drive irrelevant.
How do I keep my data safe without becoming a soldering pro?
The most effective maintenance is redundancy. If you are relying on a single physical drive for important documents, you are already in the “danger zone.” I recommend moving toward a 3-2-1 backup strategy: three copies of your data, on two different media types, with one offsite. This is a core part of managed IT strategies to keep your business secure in 2025. By the time you need to use data recovery secrets to save a file, something in your workflow has already failed. Looking ahead, I predict that DIY hardware recovery will become significantly harder. We are seeing a massive shift toward “monolithic” USB drives where the controller and the NAND flash are all one single piece of plastic and silicon. You can’t just solder wires to pads that don’t exist. This makes having a why your business needs a disaster recovery plan before you need it more critical than ever. In the next few years, cloud-first storage with local hardware acting only as a temporary cache will be the standard for both pros and amateurs alike. If you want to level up your skills today, grab a broken, non-critical drive and practice “tinning” the wires with a high-quality flux. It’s a meditative process that builds the muscle memory you’ll need when the stakes are actually high.
Hard Lessons From the Trenches of Hardware Salvage
I’ve realized that the “wiggle test”—plugging the drive in and moving it until the light blinks—is the fastest way to kill a drive forever. Each wiggle scrapes the delicate copper pads off the board. If you have a broken tip, treat it like a spinal injury: stabilize it and don’t move it until the surgery begins. I’ve seen troubleshooting common computer repair issues effectively turn into a total loss just because of one last “let me see if it works” wiggle. Another truth: your eyes will lie to you. Always use a digital microscope or a high-zoom smartphone camera to inspect your solder joints; bridges that look invisible to the naked eye can still fry your NAND chip.
My Pro Bench Toolkit for Critical Recoveries
You need a donor cable that isn’t from a bargain bin. I personally use shielded USB 3.0 cables even for 2.0 drives because the internal wiring is more robust and offers better signal integrity. Combine this with professional techniques to recover files from a usb drive that asks to be formatted, and your success rate will skyrocket. For the software side, the power of data recovery tools like R-Studio or DMDE cannot be overstated. On the bench, I recommend the TS100 soldering iron for its precision. I also swear by Amtech NC-559 flux; it’s the difference between a clean joint and a charred mess. These are the data recovery secrets that professionals use daily.
#IMAGE_PLACEHOLDER_E#
From Emergency Soldering to Professional Redundancy
While learning how to rescue data from a usb flash drive with a broken tip is an incredible skill, the ultimate goal should be to never need it again. For business owners, this means implementing managed IT strategies to keep your business secure in 2025. A physical break shouldn’t be a catastrophe; it should be a minor inconvenience because your disaster recovery plan kicked in hours ago. Don’t be afraid to pick up the iron and try—every expert started with a pile of broken parts and a dream. Have you ever managed to solder a broken connection back to life, or did the magic smoke escape? Let me know in the comments below!