

I’ll never forget the sinking feeling in my stomach when I tilted my laptop toward the sunlight and saw them: faint, permanent oily rectangles etched right into the center of my display. At first, I thought I’d just been eating too many potato chips near my workstation, but no amount of microfiber-buffing would make those marks budge. It’s a heartbreaking moment for any tech lover. You spend a small fortune on a sleek machine, only to have it effectively ‘branded’ by its own hardware. This isn’t just about aesthetics; it’s a sign of how we treat our portable offices and a warning of potential [troubleshooting laptop screen problems](https://computerrepairmasters.com/tips-for-troubleshooting-laptop-screen-problems-seamlessly) down the road.
Those Annoying Ghostly Outlines Aren’t Just Your Imagination
I used to think that maybe I was just closing the lid too hard. I even bought a fancy hard-shell case, thinking protection was the answer. But here’s the kicker: the thinner our laptops get, the less ‘breathing room’ there is between the glass and the keys. When you toss that laptop into a backpack or even just carry it under your arm, the slight flex in the chassis is enough to press the keycaps directly against the delicate screen coating. If you’ve ever dealt with a [laptop screen that shows static or snow](https://computerrepairmasters.com/how-to-fix-a-laptop-screen-that-shows-static-or-snow), you know how fragile these components really are. I actually made the rookie mistake of using a generic window cleaner to try and ‘scrub’ the marks off, which only stripped the protective layers and made the marks even more visible. It’s one of those [computer repair for beginners mistakes](https://computerrepairmasters.com/computer-repair-for-beginners-avoid-costly-mistakes) I wish I could take back.
Is this just a sign of a cheap laptop?
You might be tempted to think this only happens to budget-tier plastic machines, but the truth is quite the opposite. High-end Ultrabooks and MacBooks are often the biggest victims because their tolerances are so tight. According to research from the Journal of Failure Analysis and Prevention, modern display coatings are incredibly susceptible to ‘micro-abrasion’ from repetitive contact with plastic polymers—the stuff your keys are made of. Today, I’m going to show you exactly why this friction happens, why your skin oils are making it ten times worse, and the simple $5 fix that keeps your screen looking brand new. Have you started seeing the ‘ghost of keyboards past’ on your screen yet, or are you still in the clear? If the damage is already done, you might even be looking at a [step-by-step screen replacement](https://computerrepairmasters.com/laptop-screen-replacement-step-by-step-repair-guide) if the coating is completely gone.
Stop the Compression That Ruins Your Display
Think of your laptop like a high-tech sandwich. When you shove it into a crowded backpack, you are essentially putting that sandwich in a vice. The ‘bread’ (the chassis) flexes, and the ‘fillings’ (your keyboard and screen) get crushed together. To fix this, you have to address the physical pressure first. I remember trying to solve this on my old workstation by adding a thick silicone keyboard cover. I thought it would act as a cushion. Instead, it increased the thickness of the keyboard area so much that the lid wouldn’t even close flush. After a week, I had a permanent circular pressure mark right in the center of the panel. It was a classic computer repair for beginners mistake—I tried to fix a small problem and created a massive one.
Give Your Laptop Some Breathing Room in Your Bag
The most common culprit isn’t the laptop itself, but how we carry it. If you’re jamming a laptop into a sleeve and then stuffing that sleeve into a bag filled with textbooks or a heavy water bottle, the screen is going to lose that battle every time. Try to ensure your laptop compartment has its own dedicated space where no external objects are pressing against the lid. If you see white pressure spots forming, that is a sign the internal layers of the LCD are already starting to separate. You want to avoid any situation where the middle of the laptop lid can ‘dip’ inward.
Use a Microfiber Sheet as a Protective Barrier
This is the $5 fix I mentioned earlier. You can buy ultra-thin microfiber ‘screen protectors’ that are designed to sit on top of the keys when the lid is closed. Unlike those thick silicone covers that caused me so much grief, these are paper-thin and specifically designed to absorb skin oils and provide a soft buffer. By placing a cloth between the keys and the glass, you ensure that if any contact occurs, it’s with a soft fabric rather than hard plastic keycaps. This is one of the most effective laptop screen repair diy tips for long-term maintenance.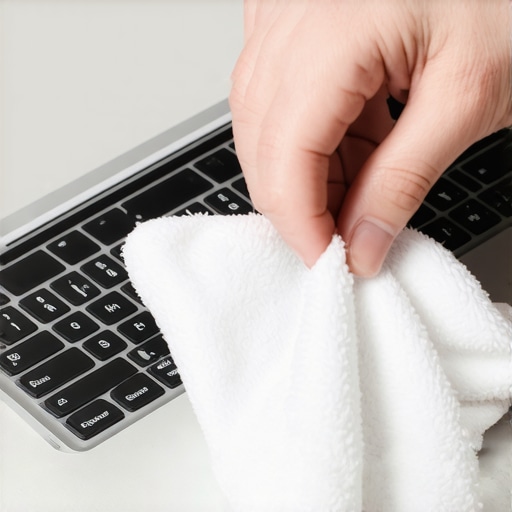
Clean Your Screen Without Killing the Finish
If you already have oily rectangles, you need to clean them before they become permanent abrasions. Avoid anything with ammonia or alcohol. Instead, use a 50/50 mix of distilled water and white vinegar, but only dampen the cloth—never spray the screen directly. If you spray the screen, liquid can seep into the bezel and cause a laptop screen that shows static. Wipe in gentle, circular motions. If the marks remain, it means the keyboard has actually scratched the anti-reflective coating. At that point, you’re looking at more advanced laptop screen repair techniques, or even considering a glossy or matte laptop screen replacement to get back to a pristine view.Everyone tells you to just wipe it down, but here is the contrarian truth: most of the damage I see isn’t just dirt—it’s a chemical reaction. Your skin oils contain acids that, when pressed against the screen for hours in a bag, actually eat into the anti-reflective coating. It’s less like a smudge and more like a slow-motion acid etch. The biggest oops factor I see? People using the same microfiber cloth for months without washing it. If that cloth picks up a single grain of silica or dust from your desk, you aren’t cleaning; you’re essentially using ultra-fine sandpaper on your high-end display. This is exactly why laptop screen repair how to fix common issues at home requires more than just a spray bottle and a prayer. For my business readers, this isn’t just a cleanliness issue. It’s a sign of poor hardware lifecycle management. When a whole fleet of company laptops starts showing these marks, it’s usually because the bags provided don’t have enough rigid support. This is where why managed IT is a game changer for growing companies—it’s not just about fixing broken Wi-Fi; it’s about spotting these physical trends before you’re hit with a massive bill for screen replacements. 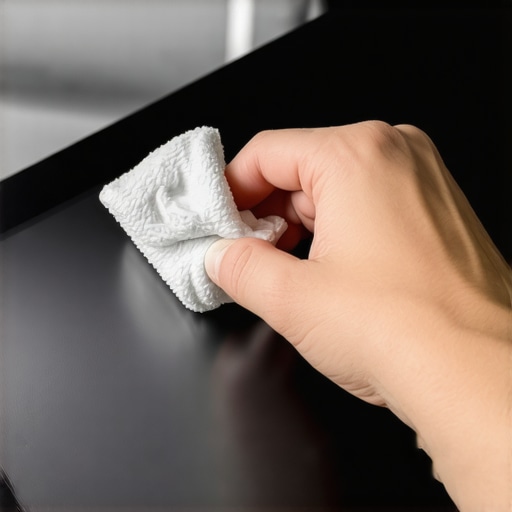
Can software really rescue a screen with physical defects?
It sounds like a tech myth, right? How can pixels heal via software? While you can’t code away a physical scratch, many users mistake a stuck pixel for a permanent physical blemish. Advanced repair techniques often involve high-speed color cycling to unstick a sub-pixel. According to research from the Liquid Crystal Institute, targeted voltage fluctuations can sometimes realign liquid crystals that have become sluggish due to physical pressure or environmental factors. If you’re lucky, you can fix a laptop screen with a stuck pixel using software tools without ever opening the chassis. But don’t get your hopes too high—if the spacer beads inside the panel are crushed from too much backpack pressure, no amount of software will save you. The ultimate trap is trying to save money on the wrong parts. I’ve seen businesses try to cut corners by purchasing used replacement components, but the hardware part you should never buy used for your business is almost always the display. You’re just inheriting someone else’s keyboard ghosts. Have you ever fallen into this trap of trying to clean away a mark that turned out to be a permanent scratch? Let me know in the comments below!
Ditch the Generic Cleaners for Professional Precision
I’ve learned the hard way that a soft touch isn’t enough when you are managing a dozen machines. I personally use the Eizo Monitor Test—a free but powerful web tool—to check for uniformity and color accuracy the moment I suspect a problem. If I see a persistent blur, I check if it’s the fix for a laptop screen that has a ghosting effect rather than just a smudge. For my personal setup, I’ve moved away from standard microfiber cloths to high-density polyester wipers used in cleanrooms. They don’t just move oil around; they lift it off. If you are troubleshooting common computer repair issues effectively, you quickly realize that the environment you work in is just as important as the tools you use. I always keep a rocket air blower in my bag to blast away grit before a cloth ever touches the glass.
How do I maintain my laptop display over the long haul?
The secret is consistency and the ‘daily swipe’ rule. Every evening, before I close the lid, I do a five-second inspection. If there is visible dust on the keyboard, I blow it off. This prevents the abrasive particles from being pressed into the display overnight. According to technical documentation from DisplayMate Technologies, the accumulation of microscopic debris on keyboards creates a ‘sandwich effect’ that accelerates coating degradation during thermal expansion cycles. This means the heat your laptop generates while it’s sleeping can actually bake the oils and dust into the screen. Beyond the physical, I regularly check if your hard drive is about to fail using S.M.A.R.T. data because a screen failure is annoying, but a drive failure is a catastrophe.
Scaling Your Tech Without the Physical Wear
For those running a business, you aren’t just looking after one screen; you are looking after dozens. This is why managed IT is a game changer for growing companies. It allows you to shift from reactive repairs to proactive hardware lifecycle management. When we talk about the power of data recovery tools, we are usually talking about software, but true recovery starts with physical protection. I’ve seen entire fleets of laptops destroyed because of poor transport habits. Implementing a policy where every employee uses a rigid laptop sleeve can save thousands in screen replacements. It’s the same logic behind why your business needs a disaster recovery plan before the storm hits—you prepare for the physical reality of tech usage, not just the digital side.
The Future of Screen Resilience
Looking ahead, I predict we will see the rise of ‘nanostructured self-healing coatings’ that use ambient heat to fill in micro-abrasions caused by keyboard contact within the next five years. Until then, we are the first line of defense. If you want to keep your machine in top shape, take one action today: check your keyboard for any grit or dust before you close your lid tonight. If it’s there, it’s already touching your screen. If the damage is deeper than a surface scratch, you might need to look at laptop screen replacement step-by-step repair guide resources to restore your workstation to its former glory.
Why My First $500 Mistake Changed Everything I Knew About Screens
After years of fixing displays, I’ve realized that the most expensive repairs usually start with the smallest habits. Here are the lightbulb moments that saved my gear:
- The ‘Cleanroom’ Mentality: One tiny grain of sand on your keyboard acts like a diamond drill bit when the lid is closed. I learned to never close my machine without a quick visual scan to ensure the path is clear.
- Avoid the Alcohol Trap: Many people reach for 70% isopropyl alcohol, but on many modern anti-reflective coatings, this is a death sentence. It can cause a negative color effect that is impossible to reverse.
- Structural Integrity Matters: Carrying a laptop in a soft sleeve inside a stuffed bag is a recipe for disaster. If you see white pressure spots forming on the panel, the damage is already internal.
The Professional Gear That Actually Saves Your Glass
I’ve tested dozens of products, and these are the only ones I trust for my clients’ high-end machines:
- Rocket Air Blowers: Before you ever touch the screen with a cloth, you must remove the loose grit. This is the first step in laptop screen repair diy tips that most people skip, leading to micro-scratches.
- Cleanroom-Grade Polyester Wipes: Standard microfibers from the grocery store often trap old oils and dust. These specialized wipes ensure you aren’t just redepositing skin acids back onto the glass.
- Rigid Laptop Shells: For businesses, I always recommend hard-shell cases over soft sleeves. This proactive approach is a core part of why managed IT is a game changer for growing companies because it prevents physical hardware fatigue.
Step Up Your Maintenance Game Before the Marks Turn Permanent
Taking care of your tech isn’t just about vanity; it’s about ensuring your tools are ready for work when you are. A clear, crisp display reduces eye strain and keeps your productivity high during long work sessions. While a laptop screen replacement step-by-step repair guide is great to have in your back pocket for emergencies, preventing the damage is always the smarter play. Treat your laptop screen with the respect it deserves, and it will serve you for years to come. Have you noticed any faint keyboard outlines on your screen yet, or have you found a cleaning trick that works wonders? Let me know in the comments below!