

I still remember the sinking feeling in my gut last Tuesday night. I was about to finish a project when my desktop decided to play a game of blind and noisy. I hit the power button, and instead of the familiar Windows logo, I was greeted by a series of rhythmic, frantic beeps and a monitor that stayed as dark as a midnight sky. It is a visceral kind of frustration, isn’t it? You can hear the fans spinning, the lights are on, but nobody is home. It feels like your PC is trying to tell you a secret in a language you never learned. I spent three hours sweating over it, and honestly, I do not want you to go through that same stress.
The Code Your Motherboard is Desperately Trying to Break
When your computer beeps but refuses to show a picture, it is actually performing a Power-On Self-Test (POST). If something is wrong, it uses those beeps—code for help—to tell you exactly what is broken. Early in my tech journey, I made the amateur mistake of assuming a black screen meant the whole system was fried. I actually went out and bought a new motherboard, only to realize later that a single stick of RAM had not been seated properly. Talk about an expensive lesson in avoiding costly repair mistakes. Today, I am going to show you how to decode those sounds and get your display back without spending a dime on parts you do not need.
Is it really possible to fix this without a pro?
Believe it or not, about 80% of the time, this issue is something you can solve with a screwdriver and a little bit of patience. We often jump to the worst-case scenario, like a dead GPU, but often it is just dust or a loose connection. Before you start looking at laptop screen replacement guides or thinking your desktop is e-waste, we need to look at the basics. According to memory experts at Crucial, nearly 30% of system boot failures are related to memory issues or improper seating. It is a common hurdle, but one that is incredibly satisfying to jump over once you know the trick. We are going to dive into the exact steps to isolate the hardware that is acting up. Whether it is your memory, your graphics card, or a CMOS battery that has finally given up the ghost, we will find it. Have you ever been startled by your computer suddenly screaming at you like this? Drop a comment below if those beep codes have ever sent you into a panic! We are starting with the most likely culprit first, so let’s get those side panels off and see how troubleshooting common computer repair issues can save your afternoon.
Stop Guessing and Start Reseating Your Hardware
The very first thing you need to do is provide what I call a hardware handshake. Over time, heat cycles cause components to expand and contract, which can literally wiggle a stick of RAM out of its socket. Think of your RAM like a library book; if it is not perfectly on the shelf, the librarian—your CPU—cannot find the data it needs to start the system. I once spent an entire Saturday morning thinking my gaming rig had finally kicked the bucket after a move. I was terrified I would have to learn how to safely upgrade your RAM without voiding the warranty much sooner than planned. It turned out that the vibration from the car ride had just loosened the second memory module. I clicked it back in, and it fired right up instantly.
Reseat Your RAM Sticks First
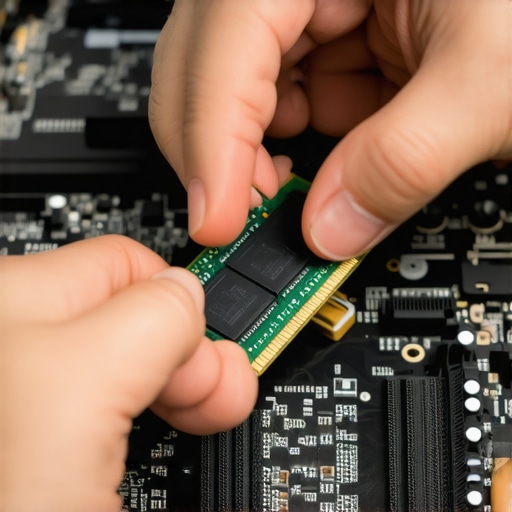
Power down the PC, unplug the power cord from the wall, and hold the power button for five seconds to drain any residual electricity. Open the side panel and find those long, thin sticks. Press the tabs on either side to pop them out, then push them back in until you hear a definitive, satisfying click. If you have multiple sticks, try booting with just one at a time. This helps you identify if a specific module is the culprit behind those frantic beeps or if a specific slot on your motherboard has failed.
Give the Graphics Card a Firm Handshake
If the RAM is fine, your GPU is the next suspect. This is the hardware component responsible for actually talking to your monitor. If it is loose, even by a millimeter, your screen stays black while the rest of the machine screams for help. Much like the RAM, you should unscrew the bracket, pull the card out of its PCIe slot, and firmly reseat it. While you are in there, check the power cables leading into the card. A loose 6-pin or 8-pin connector is a classic reason for a system to fail the POST. If you have been seeing weird glitches before this total blackout, you might want to check why your computer monitor is displaying the wrong colors after an update to see if your hardware was already giving you warning signs of a physical connection issue.
Reset the System Memory with a CMOS Clear
Sometimes the motherboard gets confused by its own saved settings. This is where clearing the CMOS comes in. It is like giving your computer a quick nap to clear its head and forget the errors that are blocking the boot process. Find the small, silver coin-shaped battery on the motherboard. Pop it out with a flathead screwdriver, wait thirty seconds, and put it back in. This resets the BIOS to factory defaults. It is a powerful move when troubleshooting common computer repair issues effectively because it eliminates any software-level BIOS bugs. I have seen this fix systems that appeared completely bricked after a failed overclocking attempt or a sudden power surge.
Listen for Changes in the Beep Pattern
Every time you reseat a component or change a variable, try to boot the system again. You are looking for the sound to change. If the beeps stop or change frequency, you are getting closer to the source of the problem. If you get no beeps at all after a change, you might be dealing with a different set of issues, such as those discussed in a guide on how to fix a desktop PC that turns on but gives no beep codes. Keep a mental log of what you have touched; it is the only way to stay organized when your machine is refusing to cooperate.
While reseating RAM often feels like a magic wand, I have seen too many people stop there and assume their motherboard is a lost cause if the screen stays dark. There is a deeper level of nuance here that separates a weekend tinkerer from a true pro. Everyone says the GPU is the final boss of display issues, but in my experience, the handshake between your monitor and your graphics card is often the real culprit. We live in an era of complex digital protocols, and sometimes your hardware is perfectly healthy—it is just speaking a different dialect than your screen expects.
The Cable Trap That Fools Even the Pros
Here is a contrarian take: your high-end DisplayPort cable might be the very reason your computer refuses to boot. I have encountered dozens of cases where a ‘dead’ PC was actually just a victim of Pin 20. Some low-quality DisplayPort cables carry power back into the graphics card through the 20th pin, which can prevent the motherboard from completing its Power-On Self-Test (POST). You might hear a beep code for a general video error, go out and buy a new card, and still face the same black screen. This is a classic example of why avoiding costly repair mistakes starts with the smallest components first. Before you declare a hardware death, try switching to a basic HDMI cable just to see if you can reach the BIOS.
Can a Failing Power Supply Mimic a Dead Graphics Card?
This is the ultimate ‘Oops’ factor in PC repair. Your motherboard might give you a one long, two short beep code—the universal cry for ‘video error’—and you immediately blame the GPU. However, if your power supply (PSU) is failing to provide enough juice to the PCIe rails, the GPU won’t initialize. I once saw a client spend $600 on a new RTX card only to find the same black screen because their five-year-old PSU had a leaking capacitor. According to the IEEE Standards Association, signal integrity in high-speed digital interfaces is highly sensitive to voltage fluctuations; even a 5% drop in the 12V rail can cause a boot failure that looks like a component death. If you suspect this, you need to know how to spot a failing power supply before it fries your motherboard to save your components.
Another nuance people overlook is the ‘Legacy vs. UEFI’ conflict. If you recently changed a setting in your BIOS or updated your firmware, your motherboard might be trying to send a video signal in a format your older monitor cannot display. This often happens after a CMOS reset. You might be staring at a black screen while the computer is actually sitting at the ‘Press F1 to Continue’ prompt, completely invisible to you. This is where troubleshooting common computer repair issues effectively requires a ‘test’ monitor—something old and reliable—to see if the resolution is just out of range. Have you ever replaced a part only to realize a $10 cable or a single BIOS setting was the real problem? Let me know in the comments, because I have certainly been there!
Lastly, do not ignore the physical health of your ports. If you have been seeing why your computer monitor is displaying the wrong colors after an update, it might not be the software at all. Dust buildup inside the GPU port can cause a partial short that triggers a beep code. A quick blast of compressed air is a much cheaper ‘fix’ than a whole new system. We are focusing on getting you back to work without the anxiety of a massive repair bill, so take these extra steps before you call in the heavy hitters.
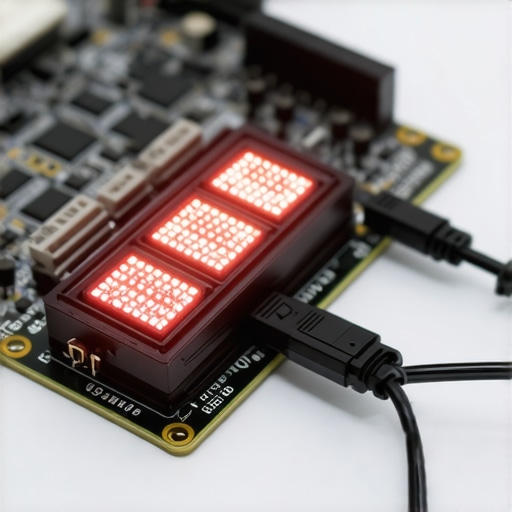
I don’t just rely on my ears to fix a computer; I rely on a small, $15 piece of kit called a POST diagnostic card. While beep codes are great, these cards plug into a PCIe slot and give you a two-digit hex code that tells you exactly where the motherboard is getting hung up. I keep one in my bag because it turns a twenty-minute guessing game into a ten-second diagnosis. If you are serious about DIY, this is the first thing you should buy after a good screwdriver set. It is essentially the same logic used when you want to understand the power of data recovery tools—it is about having the right lens to see the problem. I have seen people replace perfectly good CPUs because they miscounted a series of beeps, a mistake that is easily avoided with a digital readout.
How do I maintain my hardware health over time?
Consistency is the secret sauce for a long-lasting machine. Every six months, I perform what I call a thermal audit. I check my idle temperatures using HWiNFO64 to see if they have crept up. If they have, it is time to learn how to clean a laptop fan without pushing dust deeper inside. This is not just about noise; it is about longevity. According to the 2023 Backblaze Drive Stats report, there is a clear correlation between sustained high operating temperatures and an increased annualized failure rate in mechanical drives. Heat is the silent killer of silicon. I also suggest a physical reseat of your main power cables once a year—just unplug and replug them to scrape off any microscopic oxidation that might be building up on the pins.
If you are running a business, you cannot spend your Tuesday nights doing this manually. This is where scaling your tech strategy becomes vital. Moving from reactive fixing to proactive monitoring is exactly how managed IT can elevate your business security in 2025. Instead of waiting for a beep code, you use software that alerts you when a sector on an SSD is starting to reallocate. For instance, the move that stops an SSD from failing during a power surge often involves just having a high-quality UPS (Uninterruptible Power Supply) and proper firmware management. Scaling does not mean buying more computers; it means buying better visibility into the ones you already have.
The Shift Toward Predictive Hardware Diagnostics
Looking ahead, I predict we are about to enter an era where motherboards will feature integrated AI diagnostic chips. We are already seeing the beginnings of this with debug LEDs, but soon, your PC will likely send an encrypted diagnostic report to your phone via Bluetooth before it even tries to boot. It will tell you Voltage on Rail 3 is 4% low—check PSU before you ever hear a single beep. This will make troubleshooting common computer repair issues effectively accessible to everyone, not just those of us who grew up memorizing BIOS manuals. Before you give up on your current machine, I want you to try one advanced trick: the Power Cycle Reset. Unplug everything—USB, power, monitor—and hold the power button for a full 60 seconds. This drains the capacitors more deeply than a standard restart and can often clear a stuck logic gate on the motherboard. Try it right now if your screen is still black; you would be surprised how often this simple move brings a dead PC back to life!
What Years of Silent Screens Taught Me
I used to think every rhythmic beep was a death knell for my wallet, but I have since realized that hardware is far more resilient than we give it credit for. One major lightbulb moment was discovering that a ‘dead’ PC was actually just suffering from a build-up of static electricity on the case—a simple 60-second power discharge fixed it instantly. I also learned the hard way to never force a component; if it does not click into place easily, something is misaligned. Lastly, always take a high-resolution photo of your cable configuration before you unplug anything, as it saves hours of second-guessing during the reassembly phase. If you ever find yourself with a machine that is totally silent, you might need to pivot your strategy to how to fix a desktop PC that turns on but gives no beep codes for a different diagnostic path.
The Kit I Never Leave Home Without
I swear by Arctic MX-4 thermal paste because it remains stable for years without drying out or becoming brittle. For diagnostics, I always keep a bootable USB drive loaded with HWiNFO64 to check sensor data and voltage stability the moment I finally get back into the operating system. I also strongly recommend investing in a high-quality Uninterruptible Power Supply (UPS) like those from CyberPower; it is the single best move that prevents an SSD from failing during a power surge. Finally, a magnetic screw mat is a lifesaver for keeping track of those tiny motherboard screws that always seem to want to vanish into the carpet during a repair. These tools turn a chaotic repair attempt into a structured, professional process.
You Are More Capable Than the Beep Codes Suggest
Troubleshooting these hardware hiccups is a rite of passage for every PC owner. It is about moving from being a passive user to becoming an active guardian of your own technology. By mastering troubleshooting common computer repair issues, you are not just fixing a black screen; you are building the technical confidence to handle almost any digital curveball thrown your way. Whether you are learning how to safely upgrade your RAM without voiding the warranty or just reseating a graphics card, the experience you gain today will save you thousands of dollars in the long run. Don’t be afraid to get your hands a little dusty—the reward of that first successful ‘all-clear’ beep is worth every second of the effort. Have you ever managed to fix a ‘dead’ computer with a simple trick that surprised you? Let me know in the comments below!