

I remember sitting at my kitchen table three years ago, staring at a spinning blue circle on my screen while trying to render a simple family video. My laptop was struggling, gasping for memory, and I was losing my mind. I knew a stick of RAM would fix the lag, but I was paralyzed by a very specific fear. I kept thinking, ‘If I turn one screw, does my $1,200 investment become a paperweight?’ My palms were sweaty, and I felt like a secret agent trying to defuse a bomb. Eventually, I took the plunge, but not without making a classic rookie mistake: I used a magnetized screwdriver that was way too large and nearly stripped the delicate screw heads. It was a messy, high-stress afternoon that taught me a valuable lesson: most of the anxiety we feel about ‘voiding the warranty’ is actually built on myths and clever marketing designed to keep us paying for expensive professional services.
Stop Letting Manufacturers Scare You Into Staying Slow
The honest truth is that you don’t have to settle for a sluggish machine just to keep your manufacturer happy. Many people believe that the mere act of opening a laptop case sends a signal to a central database that cancels their protection. That simply isn’t how it works. In fact, according to the Federal Trade Commission (FTC), those ‘Warranty Void if Removed’ stickers are generally illegal under the Magnuson-Moss Warranty Act, which protects your right to use third-party parts and perform your own repairs. This is exactly the hardware upgrade that actually speeds up your daily workflow more than any software cleanup or registry fix ever could. It’s a vital part of computer repair for beginners to avoid costly mistakes, as long as you know which tabs to pull and which cables to avoid. I’ve seen so many people give up on a perfectly good machine when they really just needed an extra 8GB of memory. Before you start wondering how to choose between repairing an old workstation and buying a new one, you owe it to your wallet to see if a simple RAM swap can breathe new life into your current setup.
[image_placeholder_1]
Will Opening the Case Instantly Kill My Warranty?
This is the big question that keeps everyone up at night, and I get it. Nobody wants to be left out in the cold if a motherboard fails six months down the line. However, most major manufacturers like Dell, HP, and Lenovo actually provide service manuals specifically because they expect some level of user-serviceability. The key is knowing the difference between ‘upgrading’ and ‘damaging.’ If you snap a plastic hinge or drop a screw onto a live circuit, that’s on you. But simply swapping out a component that is designed to be modular? That is usually fair game. I once had a client who was terrified to touch their RAM because they thought they would cause a system crash, but ironically, a failing factory-installed module is often the hardware component that causes the most blue screens of death anyway. By learning to do this yourself, you aren’t just saving money—you’re taking control of your hardware. Have you ever stared at those tiny screws on the bottom of your laptop and wondered if you were about to make a huge financial mistake? You aren’t alone, and today we’re going to walk through the exact steps to do this safely and legally.
Turn Your Kitchen Table into a Static-Free Zone
Before you even pick up a screwdriver, you need to prep your workspace like a surgical theater. If you’ve ever lost a tiny screw in a shag carpet, you know that the repair part of computer repair for beginners to avoid costly mistakes often starts with organization. I use an old ice cube tray to keep screws sorted by length and location. You’d be surprised how often a 2mm difference in screw length can punch right through a palm rest if you put it back in the wrong hole. Most importantly, you need to ground yourself. Think of static electricity as a tiny lightning bolt that hates microchips. You don’t necessarily need a fancy wrist strap—just touching a metal radiator or the grounded chassis of a plugged-in (but turned off) desktop can discharge that hidden energy. I once fried a perfectly good stick of RAM just by walking across my living room in wool socks, and trust me, that’s a mistake you only make once.
Finding the Screws Hiding Under Rubber Feet
Manufacturers love to hide the entrance to their machines. If you don’t see screws, they are likely tucked away under the long rubber strips that act as the laptop’s feet. Use a plastic pry tool—never a metal knife—to gently lift these. While you’re at it, this is the perfect time to check if your case is bulging. If the bottom panel seems to be pushing outward, you might need to learn how to tell if your laptop battery is swelling under the trackpad before you worry about the RAM. A swollen battery is a fire hazard that requires immediate attention, and trying to force a cover back over one is a recipe for disaster. Once the screws are out, use a guitar pick or a specialized spudger to trace the seam of the laptop. You’ll hear little plastic pops—don’t panic; that’s just the internal clips releasing their grip.
The 45-Degree Angle That Saves Your Logic Board
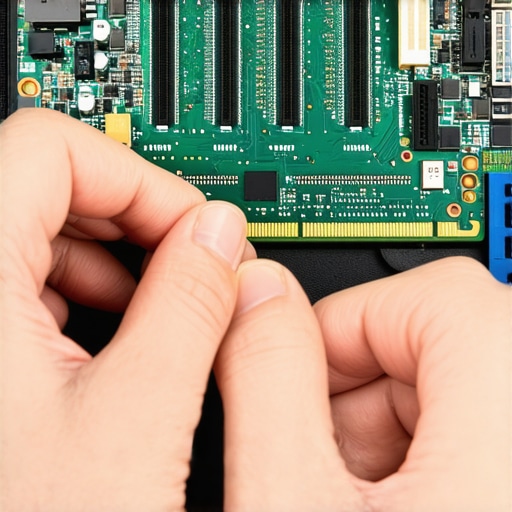
When you finally see the green or black rectangles of the RAM modules, treat them like delicate glass. Most laptops use two small metal arms to hold the stick in place. When you pull these arms outward simultaneously, the RAM will pop up at an angle. This is the eject mechanism. If it doesn’t pop up, don’t force it. I remember helping a friend who tried to yank the RAM straight up without releasing the clips; he nearly ripped the entire socket off the motherboard. When installing the new stick, the secret is the 45-degree angle. Slide the gold contacts into the slot first, then press down until you hear a satisfying click. This click is the seatbelt for your data. If the RAM isn’t seated perfectly, you’re going to end up searching for how to fix a desktop pc that turns on but gives no beep codes because the system won’t even realize the memory exists.
Test the Boot Before You Seal the Deal
The biggest rookie mistake is putting all fifteen screws back in and replacing the rubber feet before hitting the power button. Instead, flip the laptop over gingerly and try to boot it into the BIOS or operating system. If the system recognizes the new capacity, you’re golden. If it doesn’t, you probably just need to reseat the module. Dealing with troubleshooting common computer repair issues effectively means verifying your work at every stage. I once spent forty minutes re-assembling a high-end workstation only to realize the RAM wasn’t pushed in that final millimeter. It was a humbling lesson in patience. Once the screen lights up and shows that beautiful, higher number in the System Memory field, then—and only then—do you screw everything back together. It’s the ultimate measure twice, cut once rule for the digital age.
I’ve spent a decade under the hood of these machines, and if there’s one thing I’ve learned, it’s that the ‘official’ way isn’t always the smart way. Everyone tells you that a cracked display is a simple 1:1 swap, but in my experience, the generic replacement market is a minefield of ‘B-grade’ panels. Most people think that as long as the screen size matches, they are good to go. That’s a massive mistake. I once saw a client spend $150 on a ‘compatible’ screen that ended up having a lower color gamut, making their professional photo work look like a washed-out newspaper. While many people assume a blinking display is a hardware failure, I’ve found that you can often fix a laptop screen that flickers only when the brightness is low by adjusting software Pulse Width Modulation (PWM) settings rather than spending a dime on parts. It’s these small, hidden nuances that separate a hobbyist from a pro.
The Screen Replacement Trap Most Pros Won’t Admit
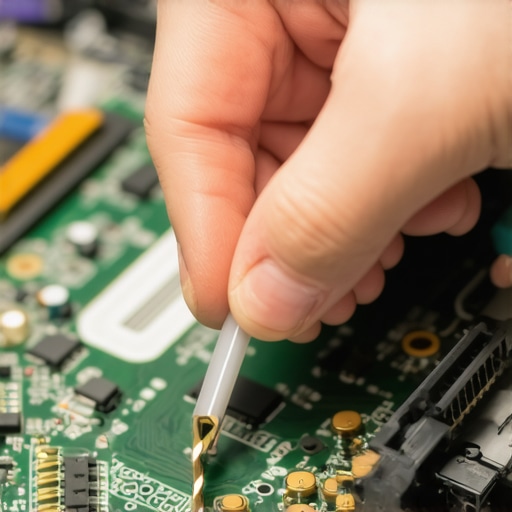
The industry secret that most big-box stores hide is the ‘Panel Whitelist.’ Even if you follow a laptop screen replacement step-by-step repair guide perfectly, your laptop might reject a high-quality third-party screen because the firmware doesn’t recognize the EDID chip. It’s a move designed to force you back into the manufacturer’s expensive ecosystem. If you aren’t careful, you might also ignore how to fix a laptop screen that shows a weird shadow in the corner, which is frequently caused by uneven bezel pressure rather than a failing backlight. I’ve seen enthusiasts throw away perfectly good panels because they didn’t realize they had simply overtightened a single screw by a quarter-turn. According to a 2023 study by the Right to Repair Association, over 30% of user-reported hardware ‘failures’ are actually misdiagnosed software-firmware conflicts or minor assembly errors.
Why Does My New Screen Look Blurry Compared to the Old One?
This is the question that drives people crazy. You’ve done the work, you’ve seated the cables, but the text just doesn’t look ‘crisp’ anymore. Most likely, you’ve fallen victim to a sub-pixel layout difference. Not all 1080p screens are created equal; some use a Pentile arrangement that makes fine lines look jagged. If you don’t understand why your laptop screen resolution looks blurry on a high-end display, you might think you received a defective unit when it’s actually just a mismatch in panel technology. This is also where people panic about their files. If the screen remains dark after a botched DIY attempt, don’t assume the motherboard is dead. You should look into data recovery secrets and expert techniques to save your files fast before you decide the entire machine is e-waste. I’ve rescued thousands of documents from ‘dead’ laptops that just had a blown backlight fuse on the logic board—a $2 part that most shops would use as an excuse to sell you a whole new motherboard.
Avoid the Deadly LVDS Cable Pinch
Here is the ‘oops’ factor that kills more laptops than spills ever will: cable routing. The ribbon cable that connects your screen to the motherboard is thinner than a strand of hair in some places. If you don’t thread it exactly through the hinge channels, the first time you close your laptop, you’ll hear a sickening pop. That sound is your video signal dying. I’ve had to tell countless people that their $800 machine was now a paperweight because they pinched a non-replaceable cable during a simple cleaning. Before you dive in, remember that laptop screen repair DIY tips for clearer displays always emphasize patience over power. Have you ever fallen into this trap or felt that gut-wrenching ‘snap’ while trying to fix something yourself? Let me know in the comments—I want to hear your horror stories (and your wins!).
Don’t Let Cheap Screwdrivers Ruin Your Day
I can’t stress this enough: the quality of your tools determines the life of your hardware. I spent years using those silver, generic precision drivers that come in a plastic tube until I realized they were actually grinding down my screw heads. Investing in a high-quality kit with hardened steel bits is a foundational step in computer repair for beginners to avoid costly mistakes. When you have a bit that fits perfectly into a Torx or Phillips #00 head, the chance of a slip that scratches the motherboard drops to almost zero. It’s about having the right leverage so you don’t have to apply excessive downward pressure, which is often how components get cracked in the first place.
Keep the Air Flowing to Save Your Processor
Once you’ve mastered the physical entry into your machine, the best thing you can do for its long-term health is a deep clean. Dust is a silent killer that acts like an insulating blanket, trapping heat and forcing your fans to work overtime. I make it a habit every six months to learn how to clean a laptop fan without pushing dust deeper inside. If you just blast compressed air into the vents, you’re often just compacting the debris into a felt-like mat against the heatsink. You have to open it up and hold the fan blades still so they don’t over-spin and generate back-voltage. This simple maintenance is the move that keeps your laptop from overheating on your lap and extends the life of your expensive silicon by years.

How do I maintain my hardware performance over the long haul?
The secret isn’t just about the physical parts; it’s about the data environment. As your machine ages, your storage drives become the most likely point of failure. According to the 2023 Backblaze Drive Stats report, the annualized failure rate for older drives can climb significantly after just 48 months of service. This is why I always keep a suite of the power of data recovery tools and what you need to know ready before a crash happens. If you’re seeing slow boot times, it might not be a virus; it might be your drive struggling to read sectors. Learning data recovery secrets and expert techniques to save your files fast is great, but a proactive replacement of a three-year-old SSD is even better. For those managing more than one machine, this is where why managed IT is a game changer for growing companies because it automates these hardware health checks across an entire fleet.
Software is the Shield You Didn’t Know You Needed
We are moving toward a future where AI-driven diagnostics will predict a hardware failure weeks before it happens, but until then, you are the first line of defense. For businesses, this means moving beyond simple antivirus and implementing managed IT strategies to keep your business secure in 2025. You need a system that monitors for the unusual, like the move that prevents a ransomware attack from encrypting your server by detecting massive file-change spikes. Whether you’re a solo creator or a growing team, the goal is to shift from reactive fixing to proactive scaling. I challenge you to download a SMART monitoring tool today—like CrystalDiskInfo—and check your drive’s health percentage. If it’s below 90%, it’s time to start planning your next move before the blue screen finds you first.
The Hard Truths I Learned Under a Magnifier Lamp
After years of opening up laptops, the most consistent lesson I’ve learned is that patience is more important than technical genius. I used to think I needed a degree to fix a flickering display, but often it was just a loose connection. You can actually learn about laptop screen repair how to fix common issues at home by simply reseating the video cable—no new parts required. Another lightbulb moment for me was realizing that most manufacturers don’t want you to know how modular their machines are; they benefit from the mystery. Finally, always document your teardown. Taking photos of every step isn’t just for beginners; even pros use them to ensure every tiny component goes back exactly where it belongs.
The Gear That Actually Belongs on Your Workbench
If you’re serious about maintaining your own machines, you need a few non-negotiable tools. First, I never start a job without a high-quality toolkit like the iFixit Pro Tech set; the bits are precision-engineered to prevent stripping screws, which is the number one way to ruin a weekend. Second, for software health, I swear by CrystalDiskInfo to monitor drive longevity before a crash occurs. If you do face a data loss nightmare, having the ultimate guide to data recovery after accidental deletion bookmarked can save you hours of panic. Lastly, a simple USB-to-NVMe adapter is a lifesaver for pulling files off a machine that refuses to boot.
Own Your Hardware Instead of Fearing It
Taking the back cover off your laptop for the first time is a rite of passage. It transforms the machine from a black box of mystery into a tool that you control. Whether you are performing a simple upgrade or looking into managed IT solutions streamlining operations for small businesses, the core principle is the same: proactive care prevents catastrophic failure. You have the right to repair, the right to upgrade, and the power to keep your tech running longer than the manufacturer ever intended. Don’t be afraid to get your hands dirty; the satisfaction of hearing that boot-up chime after a successful repair is worth every bit of initial nerves. What was the first computer repair you ever attempted, and did it actually go as planned? Let me know in the comments below!