

I remember the smell of ozone clearly. It was 2014, and I was trying to save a client’s wedding photos—a high-stakes data recovery project—when my laptop gave me the ‘low battery’ chirp. I looked down, and the charging light was flickering like a dying firefly. I did what we all do: I grabbed the cord and gave it a firm, desperate yank. It worked for three seconds, then died again. Eventually, I was sitting on the floor, holding the cable at a precise 15-degree angle with my left pinky while typing with my right hand. It was pathetic. I was a professional, yet here I was, defeated by a tiny piece of plastic and metal. That day, I made a massive mistake: I tried to ‘bridge’ the connection with a piece of aluminum foil. Spoiler alert: don’t do that. It sparked, the screen went black, and I learned a very expensive lesson about why you shouldn’t mess with power pins without a plan. If you’re currently using a rubber band to hold your charger in place, stop. We’re going to learn how to fix a laptop that only charges at a certain angle the right way today. Have you ever had to tape your charger to the desk just to get an hour of work done?
Stop Wiggling Your Charger Before You Fry the Motherboard
It feels harmless to just ‘find the angle,’ but you’re playing a dangerous game with your hardware. Every time you tilt that plug, you’re acting like a crowbar on the internal solder joints. A report from IEEE highlights that mechanical fatigue is one of the leading causes of interconnect failure in portable electronics. When those joints crack, they create heat. I’ve seen DC jacks melt right out of the plastic casing because the owner kept wiggling it for ‘just one more week.’ You might think it’s just a bad cable, and maybe you’ve even looked into the truth about using generic chargers as a cheap fix. But if the cord is fine and the port is loose, no new cable will save you.
Is This DIY Fix Actually Safe for My Laptop?
I know the fear. You see all those tiny screws and think you’ll never get it back together. I felt the same way before I mastered computer repair for beginners. The truth is, most modern laptops are designed to be somewhat modular. Whether you have a laptop screen issue or a power problem, the key is patience and the right tools. We aren’t going to do anything that risks your motherboard today. We’re going to diagnose whether it’s a debris issue, a bent pin, or a loose internal jack so you can stop the balancing act and get back to work.
Start with the Non-Invasive Stuff First
I once spent three hours dissecting a client’s MacBook because it wouldn’t take a charge, only to find a compressed ball of Golden Retriever fur wedged deep in the MagSafe port. It was a humbling moment. Before you grab the screwdriver, you need to rule out debris. Think of your charging port like a narrow hallway; if there is a piece of furniture (dust) blocking the door, the person (the plug) can’t get all the way inside to turn on the lights. Use a wooden toothpick or a plastic dental pick—never metal—and gently sweep the inside of the port. You might be surprised by the amount of pocket lint that has been compressed into a hard ‘felt’ puck by months of you shoving the charger in. 
Verify Your Power Brick Is Not the Failure Point
Sometimes the ‘angle’ issue isn’t the port at all, but a fracture inside the cable itself, usually right where the wire meets the plastic plug. This is where the truth about using generic chargers on expensive business laptops becomes critical. Cheap third-party chargers often use thinner copper and poorer strain relief, making them prone to internal snapping. To test this, borrow a known-working original charger. If the laptop charges perfectly with the new cord regardless of the angle, your port is fine and your wallet is saved. If the ‘angle dance’ persists even with a fresh charger, we have to look deeper at how to how to spot a failing power supply before it fries your motherboard and move toward the internal hardware.
Open the Case to Inspect the Physical Connection
If cleaning didn’t work, it is time to see if the DC jack has physically broken away from the motherboard. In many modern laptops, the charging port is a separate ‘harness’—a small part connected by a wire. In others, it is soldered directly to the main board. When you are learning computer repair for beginners, the first thing to check is the ‘wiggle.’ With the laptop bottom cover removed, gently plug the charger in and see if the jack moves independently of the motherboard. If it moves, the mounting bracket is likely broken or the screws have backed out. I remember a ruggedized laptop coming in that had been dropped while plugged in; the port was rattling around like a loose tooth. A single 2mm screw was all that stood between that machine and the scrap heap.
Look for the Tell-Tale Signs of a Loose DC Jack
If your port is soldered directly to the board, look for tiny rings of cracked metal around the pins—these are called ‘cold solder joints.’ They occur because the heat from the current combined with the physical stress of you wiggling the cord eventually snaps the bond. If you see charred plastic or a vinegar smell, stop immediately. You are looking at a potential fire hazard similar to what you might find when reviving a dead usb port on your motherboard. For modular jacks, the fix is usually as simple as ordering a $15 replacement part and swapping the plug. For soldered jacks, you will need a steady hand and a soldering iron, or it might be time to call in a pro to ensure you don’t turn a simple power issue into a permanent data recovery project.
Let’s dig deeper into why we often fail to see the invisible damage until it’s too late. The most dangerous myth in the tech world is that a ‘loose’ port is just a mechanical nuisance. In reality, it is a ticking thermal bomb. When you wiggle that cord to find the ‘sweet spot,’ you aren’t just making a physical connection; you are creating a high-resistance bridge. High resistance generates heat. According to a study published by the IEEE on electronic components, intermittent contact in high-current paths leads to ‘arcing’—microscopic sparks that carbonize the surrounding plastic and create a permanent path for short circuits. If you’ve ever noticed the area around your port feels hot to the touch, you’ve already passed the point of simple repair. You aren’t just fighting a loose wire; you’re fighting the degradation of the motherboard’s substrate. 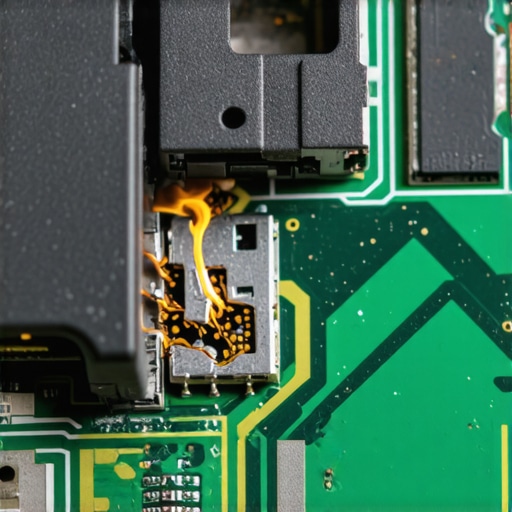
Stop Thinking a Loose Port is Only a Physical Problem
Everyone says the fix is just to ‘tighten the pins,’ but in my experience, the problem is often deeper in the power management IC (Integrated Circuit). While you are learning troubleshooting common computer repair issues effectively, you might notice that even after securing the port, the laptop still refuses to draw current. This is because modern laptops use a ‘handshake’ protocol between the charger and the board. If the ‘ID pin’—that tiny needle in the center of many Dell or HP plugs—is even slightly bent or oxidized, the laptop will detect the charger but won’t actually charge the battery. It’s a protection mechanism that prevents the machine from drawing too much power from an unverified source. Don’t fall into the trap of thinking a simple connection equals a functional one.
Why Does the Laptop Recognize the Charger but Refuse to Charge?
This is the question that separates the pros from the amateurs. Most people see the ‘Plugged in, not charging’ notification and immediately assume the battery is dead. They rush out and buy a replacement, which is a classic pitfall in computer repair for beginners. If your port has been failing at an angle for weeks, the resulting power surges may have blown a tiny fuse or a MOSFET on the motherboard. This is why the truth about using generic chargers on expensive business laptops is so vital; those cheap chargers lack the surge protection needed to handle the erratic connections of a loose port. If you are managing a fleet of devices, this is where managed IT strategies to keep your business secure in 2025 become a lifesaver, as they often include hardware health monitoring that catches these power fluctuations before they kill the device entirely.
The Expensive Mistake of Misdiagnosing the Battery
Here is the ‘oops’ factor I see every single week: a user spends $100 on a new battery and $50 on a new charger, only to find the problem persists because the internal DC jack harness is the actual failure point. Before you spend a dime, use a multimeter to check for continuity from the plug to the pins on the other side of the harness. If you’re nervous about opening the case, remember that even laptop screen repair diy tips for clearer displays usually require less precision than a motherboard-level solder job. If the jack is part of a modular cable, just replace the cable. If it’s soldered, and you’ve never held a soldering iron, this is the time to go to a professional before you turn a $20 part into a $500 data recovery project. Have you ever fallen into this trap of replacing the wrong part? Let me know in the comments.
Protect Your Port From Mechanical Fatigue
I’ve learned that the best repair is the one you never have to do. To keep your laptop from needing a computer repair for beginners, you have to address the way you handle the machine while it is plugged in. We often treat our laptops like tablets, moving them from the desk to the couch without considering the tension on the charging cable. This constant pulling is what kills those internal solder joints. I recommend using a 90-degree adapter if your charger sticks straight out; it significantly reduces the leverage applied to the port. If you are managing a business, implementing these small hardware standards is a key part of managed IT strategies to keep your business secure in 2025 because it prevents the sudden downtime of a dead machine.
The Expert Tools That Save My Motherboards
When the ‘angle dance’ becomes a permanent reality, I reach for my TS101 portable soldering iron and a high-quality ammeter. You shouldn’t just guess if the power is flowing; you need to measure it. I use a USB-C tester to verify the voltage negotiation. As noted in the USB-IF Power Delivery Specification 3.1, the move to Extended Power Range (EPR) means we are now pushing up to 48V through these tiny connectors, which makes the risk of arcing from a loose connection even more catastrophic. If you find yourself needing to how to replace a soldered in battery in a modern ultrabook or repair a port, don’t use a cheap $10 iron from the hardware store. Those lack the thermal mass to heat the ground planes of a modern motherboard, often leading to ripped pads and a total data recovery project. 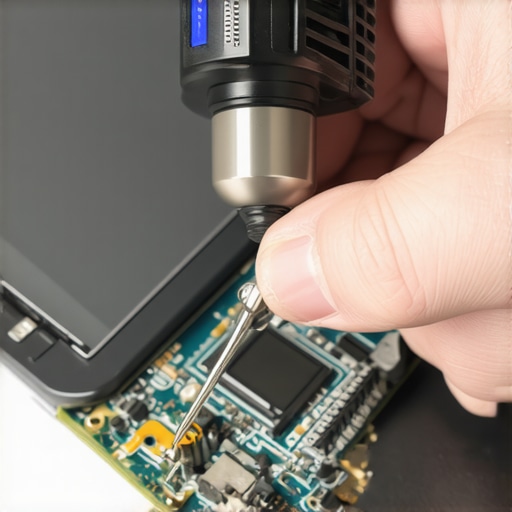
How do I maintain my laptop power system over time?
Maintenance isn’t a one-time event; it’s a habit. Every six months, I use compressed air to blow out my ports and inspect the cable for any fraying. I also check for ‘battery bloat’ which can sometimes push against the DC jack from the inside. If you notice your trackpad is getting harder to click, you should immediately learn how to tell if your laptop battery is swelling before it breaks the case. In the future, I expect we will see more magnetic ‘breakaway’ connectors becoming standard again, similar to the old MagSafe, to prevent this mechanical fatigue entirely. For now, the most advanced tip I can give you is this: Use a toothpick to clean the ‘corners’ of your USB-C port every few months. Even a tiny speck of dust can prevent the pins from seating deeply enough to lock, which is the primary cause of that ‘only charges at an angle’ frustration. My challenge for you: Unplug your charger right now and look inside the port with a bright flashlight. If you see any blackening or fuzz, clean it today—don’t wait for the flicker.
Hard Lessons from a Decade of Fried Power Pins
After years of fixing these issues, I’ve realized that the ‘angle dance’ is rarely just a physical annoyance; it’s a symptom of a deeper electrical failure. One of the biggest mistakes I see is ignoring the warning signs until the laptop simply won’t turn on. If you find yourself needing to learn how to fix a laptop that only charges at a certain angle, remember that every spark you see inside that port is eating away at the copper pads on your motherboard. I’ve also learned that the battery is often the victim, not the culprit. When power fluctuates wildly because of a loose connection, it stresses the internal cells. Always check if you should learn how to tell if your laptop battery is swelling before it breaks the case, as physical pressure from a bad battery can actually push the charging port out of alignment. Lastly, never underestimate the power of a proper handshake; if the center pin is damaged, you’ll see ‘Plugged in, not charging,’ which often points back to the truth about using generic chargers on expensive business laptops.
#IMAGE_PLACEHOLDER_E#
The Small Tool Kit I Use to Save Dying Devices
You don’t need a lab full of equipment, but a few specific items changed how I approach repairs. First, a digital multimeter is non-negotiable for checking continuity; I personally use a Fluke 101 for its portability. Second, I always recommend 90-degree magnetic adapters; they act as a ‘fuse’ for mechanical stress, snapping away safely if you trip on the cord. Third, a can of DeoxIT contact cleaner can sometimes solve ‘angle’ issues that are actually just surface oxidation. For those just starting out, my guide on computer repair for beginners covers the essential safety steps you need to take before opening any chassis.
Take Back Control of Your Power Connection
Repairing your own hardware is incredibly empowering. It turns a $1,000 crisis into a $15 part and a Saturday afternoon of focus. By fixing your charging port correctly, you’re preventing the catastrophic failures that lead to a high-stakes data recovery project. For business owners, ensuring your team isn’t wiggling their chargers is a simple but effective part of managed IT strategies to keep your business secure in 2025. Don’t wait for the final spark—fix it today and get back to work with confidence. Have you ever had to use a weird object like a book or a binder clip to hold your laptop charger in the right spot? Let me know your funniest ‘angle charging’ hack in the comments below!